If you have been paying attention to the protests, aggravated demonstrations and outright riots happening in the United States and around the world, you have likely seen plenty of cops and agitators alike carrying shields.
It does not take much in the way of imagination to see how these medieval defensive implements can have value in our modern era when things heat up.

In the right kind of circumstances or the right kind of fight, a shield is invaluable for keeping your brain inside your skull and the rest of your organs unruptured.
Shields can be large or small, and will typically serve to protect the carrier from physical blows using hands or melee weapons and a variety of thrown missiles, from rocks and bricks to bottles, and even less-lethal munitions fired from launchers and shotguns.
It is not out of the question that a prepper might encounter a situation where a shield could be useful. Considering that you probably don’t have one lying around, it might be a good idea to learn how to make one, or even improvise one quickly in the field from common materials.
Having the right tool for the job is often times half the battle. We will talk about all the factors to consider and show you how in today’s article.
Why Might You Make Your Own Riot Shield?
At first it might seem like a no-brainer why you would want to create your own riot shield.
After all, one look at modern riots sees both agitators and the police using them in abundance in one form or another, police with nice factory-made and completely transparent polycarbonate riot shields, and protesters using a mishmash of cobbled together styles made from everything from wooden planks and metal trash can lids to 55-gallon steel drums cut in half lengthwise.
However high or low the protection factor of these shields, the desired end result is very much the same: protecting the carrier from blows that would otherwise strike flesh directly!
But after additional consideration it seems increasingly unlikely that one would have any use for a shield, purpose-made, improvised or otherwise.
After all, as preppers, we definitely want to be heading away from riots, violent confrontations between large groups and other situations where mayhem is attendant.
These situations are simply too dangerous and though a shield is certainly good protection in any kind of melee it can only protect one facing at a time.
Even in an emergent situation that you might find yourself caught in the additional weight and bulk of a shield is liable to slow you down when you should be making tracks to get out of dodge as quickly as possible in the opposite direction.
What I’m trying to say is that there are very few situations that you will find where a shield is the correct answer to the question and you happen to have it readily available to use.
Even so, part of being prepared is being ready for contingencies of all kinds, and it is not out of the question you might find yourself stranded somewhere that is being overtaken by ongoing violence and major civil unrest.
In such a scenario, having the know-how and skills to fashion a shield from commonly available materials could handily increase your ability to protect yourself.
Big or Small, a Shield Can Block it All
Shields are primitive but entirely capable defensive implements. Shields function by stopping cold attacks that would strike the person carrying it, deflecting them or, at the very least, absorbing some of the force before it impacts the wielder, reducing injury or the likelihood of injury.
Shields are available and can be made in all kinds of styles, sizes and thicknesses from a variety of materials, and a shield’s defensive characteristics are largely dependent upon its construction factors.
Most modern shields you’ll see today are rectangular in shape in rough proportion to a standing human wielder and often seen with rounded or beveled corners. There are still a few modern Plexiglas shields that are round in shape, these most often designed to be used nimbly with one arm.
One interesting design variation on larger Plexiglas shields you will sometimes see is whether the surface is concave or convex in shape.
Many United States designed riot shields (especially those used in situations where prisoners are handled) are concave in shape, allowing the user to barge into an unruly person, and pin them against the wall using the shield.
A typical modern shield is sized to protect the wielder from the crown of their head down to their waist, or sometimes their knees.
Anything larger than this becomes very cumbersome and difficult to maneuver. There are also some smaller shields which are designed to protect only the head and torso or just the torso.
The weight of a shield is proportional with its dimensions, thickness and the material it is made from. Even the lightest of shields can get heavy quickly when you have to hold it in position to protect yourself.
Some larger shields, especially those that are ballistically rated to stop bullets, will feature a sling or similar suspension mechanism to help the user keep it in place without fatiguing.
The size and style of shield you create will be dependent upon your physical strength, anticipated usage parameters, and other factors.
Protection Factor
Broadly speaking, you can only expect a properly constructed shield from any source to block or deflect blunt impacts along with some blades and low-velocity, low mass piercing weapons.
The only shields that will reliably block bullets, even low-velocity small caliber ones, are purpose made ballistic shields.
It is possible to create your own homemade ballistic shield, but commonly available materials used for the purpose will mean the weight skyrockets quickly and what you are really carrying around is a semi-mobile and exhausting piece of cover.
Modern flexible or rigid riot shields are only expected to block physical blows, turn knives, deflect or stop throwing projectiles like rocks, bricks, bottles and so forth.
The latest in semi-flexible, transparent materials like lexan and other polycarbonates colloquially referred to as Plexiglas are capable of easily turning slashes and thrusts from knives, but heavy or high-velocity piercing weapons may penetrate them.
Most gunfire will defeat them effortlessly unless the impact angle is extremely oblique.
Things get even more complicated when you consider all the variables that go into making a homemade shield.
Its overall quality will be determined by many factors in its construction: the quality and condition of the base material, the quality of the fasteners and adhesives, attention to detail put into its assembly by the maker, etc.
In general, you should never expect your shield to stop something that is purpose designed to deliver a powerful chopping blow, like an axe or hatchet.
Also, purpose-made or improvised arms that are designed to pierce armor easily will make short work of a shield or at least tie it up, so you cannot use it effectively.
Consider the sharpened beak or spike typically found opposite the hammer face on medieval war hammers; these implements easily pierced the heaviest plate armor of the day, and will do the same thing to a shield.
Remind yourself that such implements are still found in abundance to this very day opposite the chopping edge of many axes and hatchets. An improvised variation could be nothing more than a sharpened spike of rebar driven into the end of a length of sturdy lumber.
You could depend on a sturdy homemade riot shield to deflect or at least impede such a blow, but you must always keep in mind that one of your arms is going to be in direct contact with the reverse facing of the shield at all times in order to control it.
Any blow that is capable of piercing and penetrating the shield completely could still inflict a grievous wound to the arm holding the shield. If you had the shield held close to your body this may result in a more severe injury to your torso or head.
Building Your Own Riot Shield Step by Step
I have provided the instructions and materials list for my favorite type of general-purpose shield below. Note that it is made of wood and thin metal, not Plexiglas or any other polycarbonate derivative as is commonly encountered with factory-made shields today.
The reason why is that sourcing the correct kind of polycarbonate and then manipulating it to make a shield that is both effective and easy to handle without wiggling and warping all over the place like a pool noodle is significantly more technically challenging than going with “primitive” materials I mentioned above.
You’ll need the following materials for constructing your riot shield:
- Plywood sheets, x2, appx. 2 ½”’ x 4 ½’ (Make sure you cut one panel each with grain parallel and perpendicular to long edge.)
- Thin sheet metal panel, x1, same size as plywood sheets above.
- Dense foam padding or fabric, x 1, same size as plywood sheets above plus one large scrap piece.
- Thick rope or wide webbing.
- Wire mesh sheets, x3, appx. 4” x 8 ½ “
- Nails or tacks suitable for piercing metal
- Construction adhesive/glue
This is a heavier shield and one that will offer you fairly substantial protection from a variety of threats so long as you are not facing somebody armed with a firearm or a powerful piercing weapon.
A couple of the steps are optional depending on what you have at hand and your desired result, so make sure you read all of the steps before you begin construction of your own riot shield.
Step #1: Layout
Generally you will want your shield to protect you from the crown of your head down to your groin. You probably want to go no smaller than one that can protect the entirety of your head and thorax.
Hold up a single panel of the plywood to get a feel for about where your shield will ride and so where you will need to place your handles.
Step #2: Assemble Panels
Taking care to ensure the grain of the wood runs perpendicular to each other, slather one panel on one facing with construction adhesive or glue if you have it and then sandwich the other panel on to it.
Step #3: Attach Strike Face
Now it is time to attach the strike face. The strike face will work to easily deflect edged influence as well as snarl, to a degree, piercing weapons, and will also reduce impact shock from blunt blows.
Start by laying down your foam or cloth on the outer facing of the shield. Next, lay the thin sheet metal face over this before tacking it in place.
The fabric/foam liner is not just for shock absorption; it will help tie up any piercing weapons that make it through the metal facing.
Step #4: Attach Handle and Forearm Straps
The next step is to attach the handle and forearm strap you will use to control the shield. You can use a simple handle with this shield, but you will find it very difficult to control.
Having at least a loop of webbing for your forearm will give you much better control, and greater security.
Since you want your shield to be upright in front of you, you need to angle the attachment of the strap and the handle. Also, shields are typically controlled with your non-dominant hand so place them accordingly.
If you are a right-handed person, the forearm strap will be located in the bottom left corner of the back facing of the shield, at approximately 7:30. You want this strap to ride just ahead of your elbow joint on your forearm for maximum leverage and the minimum fatigue.
Plan this out carefully, and then attach a strap that is snug but not so tight you can’t slip out of it in the desired spot.
Once this is done, hold the shield up with your arm through the strap in front of you as if you were using it, and make note of where your fist is on the backside of the shield. This is where you should place your second, smaller loop to serve as a handle.
(Optional) Step 5: Create Viewport
Some people are just not going to be happy unless they have a viewport to peek through on their shield.
Generally, this is unnecessary as you are probably not going to be charging any hostiles with your shield, instead moving perpendicular to them with your shield covering the facing of your body that is exposed.
Nonetheless, if you desire a viewport on your homemade riot shield you can easily create one with an additional cut into the shield before you attach the strike face.
Take note of where your shield rides when you have it lifted into position. On the reverse facing of the shield that is directly in front of your eyes, make a mark in the center, then cut out a 2 in. tall by 6 in. wide viewport centered on this mark.
Next, you can use mesh of any kind so long as it is fine enough where a pencil could not pass through it and layer it over this viewport on the outside of the shield, tacking it in place carefully.
Note that this viewport is a structural weakness, and will not stand up to high-velocity impact like polycarbonate will.
After this step is completed you can finish the shield normally according to the steps above, taking caution when carefully cutting out the padding and the middle strike face to accommodate the viewport.
Considering the extra effort, time and agitation involved, you can go ahead and omit this step, especially if I might be making the shield in a great hurry.
Also, you should take care to finish the shield if you have time, rounding off corners, sanding down sharp edges, and ensuring that any tax or nails do not protrude through the base wood that could end up harming you.
Conclusion
Against low velocity and melee threats, shields of all kinds are just as viable today as they were thousands and thousands of years ago when they were first created.
If you are potentially dealing with a major civil unrest situation that does not require the indiscriminate use of lethal force to extricate yourself from it, you might consider creating your own riot shield that can keep the bricks, bottles and other hazards attendant with such an event from wounding you.
By following the simple steps above and applying a little bit of DIY spirit you can come up with your own riot shield that is nearly as good as a factory option. And after you finish it, maybe you’ll be up for some similar projects, such as a diy gas mask…


Tom Marlowe practically grew up with a gun in his hand, and has held all kinds of jobs in the gun industry: range safety, sales, instruction and consulting, Tom has the experience to help civilian shooters figure out what will work best for them.
Two points of consideration in shield design and construction – of many that could be made.
The demonstration video above shows the handle and forearm strap mounted parallel to the ground. While functional, this can (and will) lead to muscle fatigue and potential injury.
In order to combat this, hold your arm in to your chest naturally, like its been injured and is in a sling. It should lie at a 30-45 degree angle. THIS is the angle you want your handling system to be mounted at.
Two improvements (one, but a couple options) would be a piece of 90 degree angled metal, ideally, or secondarily a piece of tire or thick rubber, across the face, vertically. This can cause deflection from edged weapons, and will serve to protect the arm and hand from impact.
Good points, an added design feature to include is the boss, embossing the grip area to create a hand guard. Having it spiked can increase Woot’s own thoughts as it can be used to deal with pole and some other weapon types better. Or just a sort of bulb, since the spike can be too overtly offensive for bystanders, allies, or being on the self-defense side over combatant uses.
The inherent designs of arms and armor reflect the purpose and use, as ever. Acting in self defense versus being an antagonist.
Either way the design function includes the deflection angles brought up and ways to increase defense where needed. Everything mentioned goes into it. If you make a shield out of thick plastic, wood, or thin metal you may still want proper gauge steel protecting yourself there. It’s also why more advanced-developed shields ended up including full spine ridges which is also a design feature to bypass the boss-logic.
His mention of angles for some ballistics deflection also plays into that, a square shield with four ridges and caved angles may be worth considering, if you can keep the ridge spines sturdiest rather than weaker function seams. Or round, but unless you wear layers of armoring in a proper sense you’ll want to shield your soft bits the most.
You may also want to pad your arm since improvised like this is going to carry reverb and unless you hard spar train, you don’t want to turn your defense into an exploit. He also didn’t mention how blunt weaponry adds to this.. the pick-end of a fire ax may penetrate and stab your arm, but a sledgehammer will probably fubar it.
The only caveat I can think of is the variety of modern foams available may mitigate those factors. Maybe.
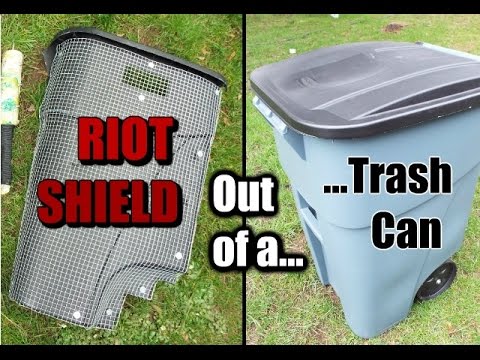
i have made one from a junk 90 gallon city owned trash can, on the front, is a thick plastic bar u can hold on to, the plastic is about 1/4 thick and tough, i cut it out almost 2 ft wide and 3 ft tall, it all i could get out of this one,cheap ,and usefull i used a reciprocating saw to cut it out..
Don’t forget that the shield is also an important weapon. You can smash someone back a few steps and off balance with it. You can slap away heavy cumbersome weapons of your opponent / attacker with it. You can break body parts of your opponent with it. If you use a shield then you need a two foot stabbing weapon, very fast and very hard to defend against. Your shields weight can ruin your balance without supporting footwork. Your shield can be an interference unless very practiced at properly working your own weapon around your own shield effectively. Also, if you expose your arm too often in this, a quick opponent will strike your arm, disabling it or amputating it. Using a shield can be simple but using it effectively demands practice like any other artform.