Your wife and children are in camp and they are hungry. Your food ran out yesterday and you need to feed your family. You have only your bow, your quiver of arrows, and your skill.
But you didn’t practice shooting very much before society went south. You have spent much of the day shooting at possible dinner and missed every shot. Now the light is fading and your arms begin to get tired. Your family doesn’t eat today.
Making your own archery target is the best way to save money and still have a good target to practice on when you need to increase your archery skills, skills you will need one day.
Whether it’s a slow process or a quick collapse, with our world’s growing population and the environmental catastrophe waiting on our doorstep, food will become scarcer.
Table of Contents
Types of Archery Targets
A homemade archery target is easy and fun to make and will save you from having to spend $100 or more for a store-bought target. There are a number of types; some are easier and less involved in their construction, but aren’t necessarily meant to stand up to weather and long-term use.
Others are sturdier, take more time, effort, and material to make, but will last a long time. Here I’ll discuss a few designs that range in difficulty level and you can choose the right archery target for your needs.
#1. Hay Bale Archery Target
What you need:
- Hay bales or compressed cardboard bales
- Builder’s plastic (if using compressed cardboard)
- Shade cloth
- Paint and paint brush (optional)
Hay bales work well, particularly for anyone shooting a bow with low poundage. Simply stack one bale on top of another, and if you want them to be tightly compressed, then use tie down straps. You can then wrap the target in shade cloth.
You can also make this type out of compressed cardboard bales. If you go to a grocery store, you can usually buy a couple of these bales for around $20 each, which is what they get if they sell them to the recycling company. Just don’t sneak around the back of the store and take them.
If you use compressed cardboard bales, then you need to wrap them in black builder’s plastic to protect them from the elements before you wrap them in shade cloth. You’ll also need some muscle to help you get these properly set up.
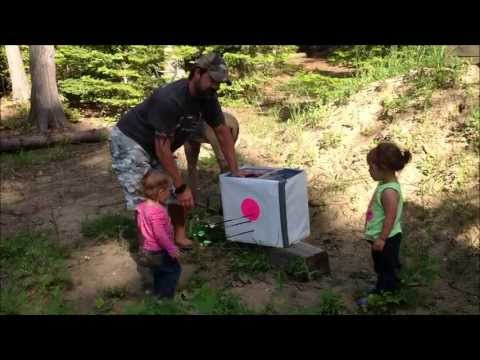
#2. Garden Bag DIY Archery Target
What you need:
- Cube-shaped garden bag or a box
- Any combination of scrap carpet underlay, shrink wrap, shade cloth, and fly wire (not metal or plastic)
- Bale hooks or duct tape
- Shade cloth or white paper
Open up your garden bag or box and fill it with the scrap material you have collected. You can likely get the scrap carpet underlay from any carpet store. Just ask them for the scraps. Scrap shrink wrap can be found in many office environments or stores that bring in big shipments, such as hardware stores.
As you fill the garden bag or box, you’ll need to stomp it down and fill it to the brim, nice and tight. Then close up the bag and secure it with bale hooks, which you can purchase or make out of spare fencing wire.
If you are using a box, then tape it shut. Cover the target with the shade cloth or paper. See how to make it here:
#3. Carpet Archery Target #3
What you need:
- Carpet (standard, medium pile)
- 1 2 x 12 board cut in half
- 4 threaded rods at least 36 inches long (longer if you want a bigger target)
Any scrap carpet will work for this and carpet retailers always have scraps they are throwing away. Just go in and ask them for what they have. You’ll need a lot of it.
You can also use good quality closed-cell foam, like what is used to make yoga mats, or rubber sheets.
Try to get sheets that have an area that is the size you want your target to be. Cut your carpet pieces to the right size. You’ll want a minimum of 11 inches in width and the length will be 33 inches.
Pile up the carpet pieces (or layers of closed-cell foam or rubber) one on top of the other, and place your pieces of board on the top and bottom of the pile.
Then use your threaded rods to compress and clamp together the boards and carpet. Be sure to get threaded rods that are long enough that your target will be the desired height. This one will allow you to loosen it to adjust the foam layers when they get shot up. Here’s how it’s done:

#4. Archery Target Made of Old Clothing
Disclosure: This post has links to 3rd party websites, so I may get a commission if you buy through those links. Survival Sullivan is a participant in the Amazon Services LLC Associates Program. As an Amazon Associate, I earn from qualifying purchases. See my full disclosure for more.
This one will last you years. What you need:
- 2 8-foot-long 2 x 12s (kiln-dried)
- 2 eight-foot-long 1 x 4s
- 5-inch wood screws
- Staples and staple gun
- Chicken wire
- Tarp or burlap
- Lots of old clothing, no longer wearable and with all hard piece, such as zippers, removed
- Stain (optional)
- Jigsaw and radial saw
- Clamps and squaring tool (optional, but preferred)
To begin with, cut your 2 x 12s each into one 5-foot-long piece and one 3-foot-long piece. Stain the pieces if desires (oil-based stain is ideal). Cut into the center of one of the 3-foot boards a rectangular hole big enough to stuff in the old clothing you will use as stuffing.
The 5-foot boards will be the length and the 3-foot boars will be with width. Using the clamps, squaring tool, and 6-inch wood screws, secure one 3-foot board between the ends of the two 5-foot boards and secure the other 3-foot board 3 feet from the first one. This will make a 3 x 3-foot target area.
Once your frame is put together, wrap 36-inch chicken wire around the frame and secure it with staples. Then you can stuff in the clothes, packing them in really tight.
What makes this particular design great is that if you run out of clothing you can substitute any rags and/or old bedraggled towels you might have lying around the house. This means that you have a target that will literally last for years; all you have to do is replace the stuffing.
How often do you have old, unusable clothes, towels, and/or rags lying around the house? Well, now you have an extra use for them.
Be sure to roll some clothes up and stuff scraps in wherever they will fit to ensure it is tight. Cover the front (you can do this to the back, too, if you prefer) of the frame with your tarp or burlap, securing it with tacks and the 1 x 4s. The target is complete!
#5. Cardboard Box Target
Stuffing bits of cardboard into a cardboard box? Yep, this is a very simple design, and it works very well. Cut squares of cardboard and stack them, lengthwise, into the box until there’s no space for any more cardboard. The video below can show you how it’s done:
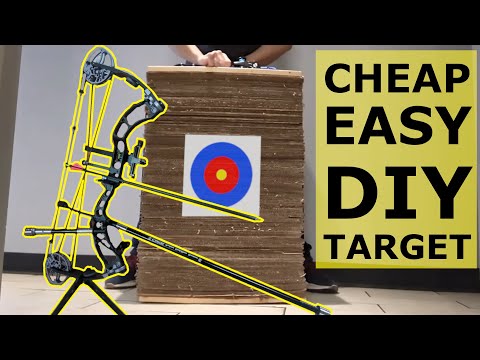
Once your box is stuffed, turn it lengthwise so that the shorter side of the box is in front of you and you’re ready to shoot.
#6. Burlap Bag Target
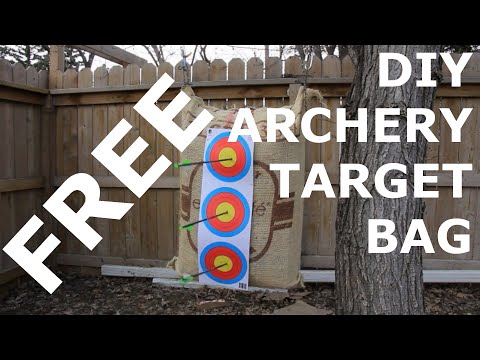
This is just like the target that you made out of old clothes the difference is you’re stuffing a burlap bag and not a frame of wood and chicken wire. Simple, cheap, and effective, you can use old feed bags if you’d like – they work just as well.
#7. Bucket Target
Stuff an old, plastic bucket with as many old clothes, towels, and rags as possible and cover it with a piece of burlap or something similar.

Bucket targets are great because not only are they cheap and durable, but you can use pretty much any size bucket you’d like. That means you can have targets of whatever size you want/need for a very low price – sounds like a pretty good deal to me.
#8. Foam Target
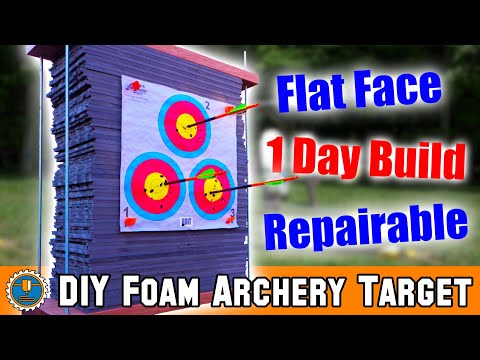
This one is very durable, and the design is ridiculously simple. Pieces of foam tightly compacted between two large wooden boards and held together by threaded steel rods, nuts, and washers.
You can use foam from a variety of sources, but you’ll need a lot of it. Yoga mats, children’s puzzle mats, and large sheets of crafting foam are all good options to use.
Using Your Target
Now that you have your DIY archery target made, you need to use it because you need to learn how to shoot your bow effectively. Aside from the fact that this is fun, it is also necessary. If you don’t get a feel for your bow before society collapses, then you will go hungry. It’s that simple.
You need to hone your skills so that you can be Katniss Everdeen in the flesh, shooting squirrels through the eye with accurate precision, but also able to take down a bear if need be.
How do you get this good? Practice. Here are the fist steps of a 30-day archery training program, steps that are based on how archery coach Terry Wunderle trains his archers. They are simple, but effective:
1. Set your target 10-15 feet away from you and for the first ten days of your practice spend at least 30 minutes a day shooting at the blank bale (a target with no markers on it).
This might seem boring, but what you are doing here is really practicing your form. You are practicing pulling your bow forward and the bow cord backward with a steady pressure that you will learn to repeat, arrow-after-arrow.
It is not about hitting a target at this point, but about getting the feel for shooting. If you feel safe enough doing it, then close your eyes and shoot.
2. For the next ten days you will divvy up your 30 minutes of shooting into 10 minutes of shooting blank bale and 20 minutes of alternating between shooting blank bale and shooting at a small dot or other small mark.
Again, it’s form that matters. Even when shooting the target, you should focus on your form rather than on aiming.
You need to learn to “float the pin,” which means to not try to aim right at the target, but allow the tip to float around the general vicinity of the target. The idea is that it is not possible to fix the pin on the target and keep it there and to try will throw off your form. You can see how it’s done here.
You should be relaxed and focus on where you are shooting, rather than focusing on pointing the arrow. Shooting is about controlling the mind so that the form is perfect.
3. For the final 10 days, you will spend your 30 minutes shooting blank bale for 10 minutes and shooting the target for 20 minutes. If at any time you find yourself aiming, go back and shoot a couple of blank bale shots.
Shooting Tips
- The majority of misses are caused by a weak bow arm.
- The best way to keep your stance consistent between shots is to make sure your feet are lined up perpendicular to the target.
- Make sure your wrist is kept low and your hand is flexed up and backward. The bow grip should make contact with the heel of your palm. Relax your fingers, and at full draw, your knuckles should line up to form a 45 degree angle.
- Test yourself under pressure because how you shoot under pressure will determine whether you are a good bow hunter or a poor one. You can set the target further away. You can shoot at a smaller target. Have the people you are shooting with try to distract you in any way possible, without getting in your line of sight or physically touching you.
- Use a solid weight stabilizer to steady your bow. This will improve your shooting.
- If your target is lower or higher, don’t move your arms to adjust your aim. Instead, move from the waist to get your aim or get down on your knees if the target is really low.
Finally, Terry Wunderle advises his clients imagine seeing and feeling a good shot, rather than focusing on aiming the arrow. “Do not focus on results. When you focus on results, it builds anxiety. And anxiety is the kiss of death.”
This is About Survival
Again, I want to stress that learning to shoot is about survival. Practice now. Learn now. Go hunting now so you get the feel for it before your family’s lives depend on it.
Now’s the time to build this critical skill and turn your archery into a life-saving skill, rather than just a hobby. Remember, your family is depending on you when the SHTF.

An urban prepper and rural wannabe, Karen has been working as a freelance writer for a decade and prepping for about half that time. She has gathered a wealth of knowledge on preparing for SHTF, but there is always more to learn and she has a passion for gathering and sharing that knowledge with other like-minded folk. Karen lives in London, Canada with her two children and plethora of cats.