Whether you’re trying to make a getaway or restricting access to certain areas of your homestead, you’ll find these handmade ladders do the trick quite well. We’ll cover the following:
- Build your own rope ladder without wood
- Build your own rope ladder
- Build your own framed ladder
- How to hide your ladders
- How to make hidden ladders appear out of nowhere
No matter what the case is, you’ll find something useful here. We’ll include a shopping list per section so it’s not all grouped up together. Read this article in its entirety for pro tips before you go running to the nearest home improvement store. Let’s get started.
Table of Contents
Build Your Own Rope Ladder Without Wood
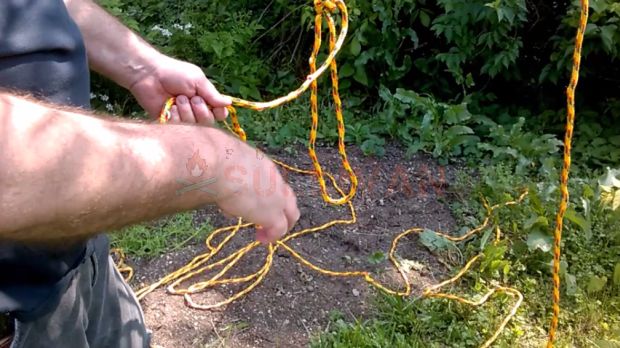
This is by far the most simplistic ladder to make, with arguably the best durability. You’ll feel like a soldier straight out of Black Hawk Down using one of these. Here’s what you’ll need:
- Rope (50ft+ depending on desired ladder length)
- Two metal pegs (optional)
- Designated area to attach top section of ladder
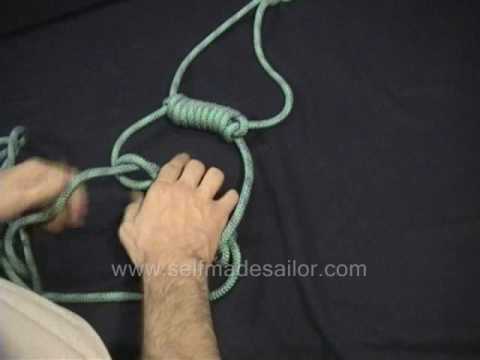
It’s very difficult to explain properly in simple text. Use this video above as a complete guide on how to craft the physical ladder. Now that you have your rope ladder completed, we’re going to discuss mounting it, or leaving it open-ended for our little tricks later on how to hide it.
To mount your rope ladder, you’re going to use the extra rope at the bottom of your newly constructed, rung-based loop ladder. From here, take mounting pegs, such as seen in tent building, and look the rope around them. It’s best to use two for perfect balance.
As you’ll see in the video towards the end, if you don’t tie a top loop correctly, it’ll throw off weight distribution when you’re trying to climb upward. If that isn’t secure, you’ll need to retie it so we can have a strong and balanced climb.
Another Way to Build Your Own Rope Ladder
- Two strands of rope of equal length (scale to desired size)
- Between 10 – 24 wooden dowel rods, about one foot long each
- Hole saw
- Mountain equipment (2-4 mounting pegs, wooden handles to install, etc.)
- Basic tools
We’re going for a compact size here, and it’ll come in handy for two reasons. First, it’ll be lightweight and less awkward when hanging it up. Second, we’ll be using it in a potential escape plan.
Your first step is to power up your circular saw; your dowel rods should be about 1 inch or 1 ¼ inch in diameter. You’ll be putting two holes through each wooden dowel rod. To ensure they are aligned properly, use a leveler and mark each end. They should be one inch from the end so we’re retaining the integrity of the dowel rod.
Step two is a bit tedious; you’re going to make sure the holes are cut in each rod before continuing. When you have these completed, take your rope, and tie a big fat knot on one end.
Do this to each of the two pieces, and slide the dowel rods onto the rope from the other side. You’ll have 10-24 dowels bunched together; can you believe you’re already halfway done?
Next, from the bottom of your ladder (the knots) you’re going to slide each dowel one foot up the rope. You’ll be pushing the whole stack up with it, and this will diminish with each successful step you put in. Use a leveler on the ground beneath the two pieces of rope.
Make sure they’re both spanning the same length; with the leveler, you’ll know if one dowel will be tilted or not, and can properly adjust. Use the rope to tie another knot to go just beneath that dowel, and do this on each side.
The effect should be that you have two sturdy knots beneath your bottom step, and that step will be one foot from the bottom knots of the rope ladder. Repeat this until you reach the top.
Whew, all the guesswork is over and done with. Now it’s time for mounting. You’re going to take the top of your ladder and hoist it up to wherever that section will be mounted.
This is in case there was a miscommunication about the required length. You wouldn’t want to be six inches shy of reaching the top after you’ve already pegged it into the ground.
Pro Tip: Use two wooden handles, or a single wall-mounted towel holder (can be bought from any Home Depot or Wal Mart) and mount it flatly to the surface the ladder will ascend to.
From here, you’ll have between 4-8 screws securing it, and you can tie the two open ends of the rope ladder’s top around the pole. If not, use some large pegs and hammer them into the surface with the rope tied around the pegheads.
Build A Framed Ladder
This refers to a simple, traditional-styled ladder. Nice and sturdy, we all know them well. Building one of these out of simple, unfinished wood will yield a light build, and be rather inexpensive to make.
It also allows you to skip any OSHA guidelines, since you won’t be selling this or using it on commercial property. In this example, the ladder will be eight feet tall.
Take a peek at this instruction video on the same premise:

- Two eight foot tall wooden posts
- Nine 2X4 plank sections, 1 foot long each (buy a long board, cut it up)
- Eighteen corner brackets
- 40 6 inch nails
- 72 1 inch screws
- Recycled Rubber
- Wood glue
- Basic tools
- Jigsaw
Note: For every extra foot of space you plan on adding to this example, add 4 nails and 1 plank section.
This is an extremely simple build, but nevertheless, effective. We’re even going to optimize it for leaning against a building at an angle, that way, depending on the length you choose, you’re garner stability. Let’s get started.
Your posts are fine; so don’t worry about cutting them. If you need, have them cut them to size at the hardware store to the necessary size. They usually don’t charge anything, and it cuts out a step for you. You’re going to lay them down next to each other on a flat, dry surface.
Use a few plank sections to make sure they’re properly spaced. If you put one at the top and one at the bottom, it should align the pieces properly when pushed together.
Designate which end you’ll be starting from and get your hammer ready; we’re working from the ground up, here. From one foot up, make sure that your plank is properly between the posts, leveled and all, and use two nails on either side to drive through the posts and into the steps
After you’re done, you’ve got a sturdy ladder held together with 6 inch nails, built of thick, sturdy wood, and stronger than any aluminum ladder out there.
Take your screwdriver or electric drill, apply the brackets the underside of each step, and screw them in. You should have four screws per bracket. This is going to hold your weight, plus the weight of whatever you’re carrying upwards.
On the bottom, get your saw ready; you’re going to mark one line on the bottom of each post. You want a 70 degree angular cut. This way, you’ll lean the ladder against the structure you’re climbing and it’ll maintain a sturdy balance.
Use those four extra nails you have. Take your recycled rubber and cut slabs to the same size as the bottom of your posts. Using a couple of nails and some wood glue, attach the rubber slabs to the bottom of your 70 degree slants.
Voila; you have an eight-foot ladder capable of properly leaning up against your house with some traction. You can view this video below for another material that’s good for traction.
Quick-Access Ladder Mechanisms
For this to work effectively, you need high-tension nylon wiring. Depending on the size of your creation, its weight may outdo the common capacity of 50lbs of tension.
If that’s the case, you can also try using two strips of nylon wire instead of just one to increase ability. To access your hidden ladders when they’re all set and ready, you’ll just need a sharp blade, like a pocketknife.
No Wood Rope Ladder
For example’s sake, you’ve got your no wood rope ladder for accessing a platform in a large tree on your homestead. You have twelve feet to climb, but there’s no way you’re going to let potential intruders know there’s a platform nestled up there. You’re going to use high-tension nylon wire.
Feed one end of your nylon wire through a split in the rope along the bottom, where your first step will be. Throw your rope ladder up onto the platform so it’s out of sight after you throw the nylon over a nearby branch, and have the other end touching the ground.
Your ladder is invisible, as is the nylon wire. Tighten it to the best of your ability, and affix it to something small, like tying it around a sizable rock and leaving it in a place where you’ll remember where it is, and leave it at the base of the tree.
When an attacker comes, all you have to do is pull on the wire enough to release the rope ladder, and it will begin to fall. Slash the wire and the bottom section should come tumbling down.
Check out Eric’s video on how to make no-rope ladders too (skip to 2′ 15″):
Wooden Step Rope Ladder
Here’s an example of another type of rope ladder with wooden steps in the video below. We cover a different type of ladder below, but this is a good guide as well.
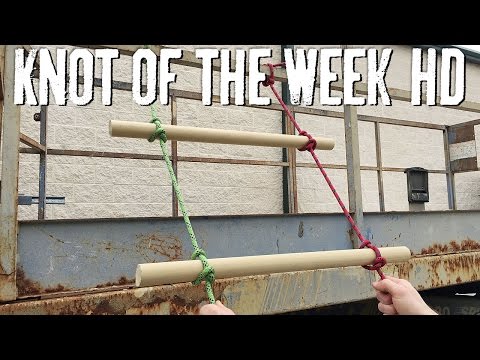
This one is a bit cleaner. The rung style rope ladder is convenient, but lacks the ability to hold a certain form. Head to the top of your structure and tie the nylon around two nails.
Tack those in between the anchors of your rope ladder and the edge of the surface. Let those lines run between the ladder and tree trunk, then back up the ladder on the other side, and over a tree branch. You now have a pulley-styled system.
When you’re on the ground, simply pull on both nylon strings at the same time, and watch your ladder begin to rise from the ground.
Make sure your branch is high enough; when the ladder rises, it won’t be neat, but it’ll be hidden above and resting on two high-tension wires. When you need to access the ladder, simple cut the tightly secured strings and look out—that ladder’s falling down.
How To Hide Your Ladders
You can take your rope ladders no matter which type you went with, and very simply roll them up. The rung ladder may need a big of TLC, but putting it in the bed of your pickup and throwing a tarp over it could be a great method of concealment.
Your eight foot wooden ladder, well, that’s a different story. Concealing that isn’t going to be easy, but it doesn’t have to be locked in an underground bunker. Hiding it in plain sight is your best option.
If you’ve got a lumber pile, hide it among the pieces. If there’s a garage or barn, use to pieces of thin twine to tie it above to a support beam. You can rip it down in a hurry, and it’s out of sight, out of mind.
Conclusion
We’ve built three types of ladders, discussed where to hide them, and how to set them up for quick access in an emergency. None of these types should cost you very much, and all have proven to be very effective.

My name is Teresa Fikes. I am a Homesteader, survivalist, prepper, historian, and writer plus much more all in one package deal. I was raised on a small family farm were I was taught at an early age to survive off the land without the help of modern conveniences. I am a writer by profession and a Homesteader by Blood, Sweat, and Tears.