So much of prepping is just being prepared for tough times. Having the right gear and supplies on hand can make all the difference when things go bad. If you’re just getting started as a prepper, it’s easy to feel overwhelmed: there’s so much to assess, gather, and buy!

When it feels like the walls are closing in, that’s when you need to get back to basics. When it comes to basic preparations, even the largest stockpile should start with a 72-hour emergency food kit.
Having just 3 days of food on hand for each person in your family means that you’ll be better prepared for disasters than 90% of your fellow citizens.
It’s easy to do, achievable, and best of all, you can put it all together with readily available items you can snag the next time you’re at the grocery store. Read on and I’ll tell you everything you need to know.
What Foods Go in Our 72-Hour Emergency Kit?
We’ve got a few key factors for selecting the foods…
For starters, they need to be shelf-stable and ready to eat with no or bare minimum preparation. Our 72-hour emergency kit must be able to sit in storage for a long time and remain fresh, completely safe, and hopefully tasty until we need it.
This minimizes the need to rotate our food. If it spoils quicker, it costs more to maintain in the long run and requires more input from you.
Look over the list of foods in the menu below and you’ll see that much of this stuff is heavily processed and factory-preserved for longevity. All of them are examples, and you can feel free to include similar items that you like better.
Next, these foods should be varied both to help us avoid menu fatigue and to give us a variety of nutrients that hard-working bodies need for optimal function.
Most preppers focused only on short-term food needs like this throw caution to the wind concerning varied nutrition and focus on calories...
This is a mistake, as a lack of critical nutrients like vitamin C, potassium, and more can quickly lead to fatigue and health problems even in the short term.
Last, but just as important, all of these foods should be ready to open and eat, or prepare with very little effort and additional resources.
As a rule, for a stash like this, if it requires anything more than room-temperature water to make it edible, I don’t include it.
And before you ask, yes, lots of things you’ll see on the list below taste a lot better if you can heat them up. But even if you can’t, they’ll still taste pretty good and be palatable, and that’s what matters.
Storing Your Emergency Food
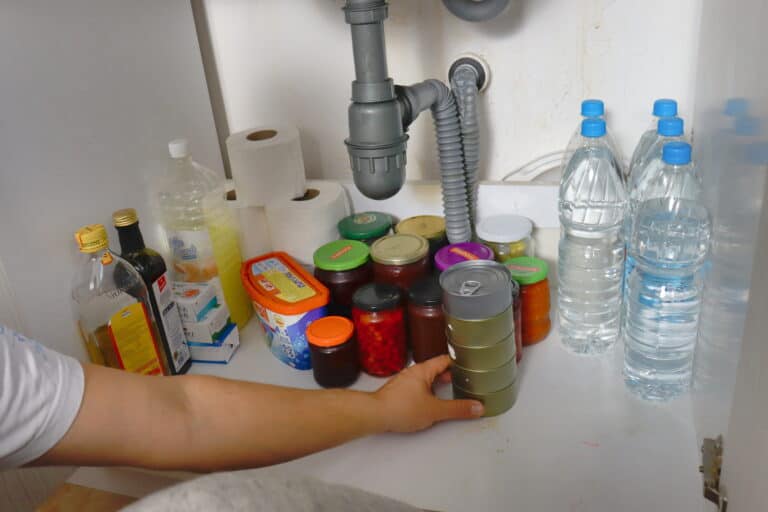
The next thing to consider is how we store our emergency food supply. If you want to, you can simply keep all of this stuff in your pantry or another safe, secure location until you need it and then break it out.
I prefer to keep it a bit more weatherized and, if needed, mobile by placing each meal in a container of some kind.
I like to use heavy-duty gallon-size Ziploc freezer bags, but I know folks who use large plastic food storage jars, buckets with gasketed lids, and lots of other things. As long as it’s food-grade, completely clean, and moisture-tight, you’re good to go.
Packing Your Food for Success
Something else to keep in mind is that you should break down the items you buy at the grocery store from their factory carton into smaller individual servings or packages, if possible.
For instance, if you buy a multi-pack of drink mixes, instant coffee, tea, fruit snacks, or anything else, you can open up the box and the individual servings will have their own airtight packaging. This lets you distribute them without compromising freshness or safety.
The same thing goes for instant oatmeal packs, and you can even get lunch-box-sized individual servings of peanut butter and other nut butters these days.
These multi-packs are a godsend for what we are doing because they are an extra hedge against spoilage and also because they save room in storage.
Cost Analysis
Let’s look at the math here. Where folks go wrong when figuring out how much they are spending for their 72 hour food supply is in looking at the total purchase price; that will be substantially higher.
But remember that many of the things we are eating below we are parsing out from a bulk pack or else they come in a multipack consisting of individually sealed servings or portions. I’ve taken the time to show you the actual per unit cost of the foods below, each of them sourced from my local grocery store, Meijer.
Whenever possible, to save cost I purchased store brand items (which happened to be quite good from this chain!) and it took advantage of sales, clearance, a few coupons and instant rebates on the store app.
- Instant Oatmeal Packet – $0.19 per pack
- Peanut Butter – $2.19 / 16 ounces
- Breakfast Biscuits – $0.99 per pack
- Pop-Tarts – $0.36 per pack of two
- Dried Fruit / Raisins – $2.99 / 12 ounces
- Canned Fruit – $0.99
- Canned Pineapple – $1.19 / 8 ounces
- Crackers / Saltines – $0.62 per sleeve
- Rice Cakes – $2.49
- Trail Mix (homemade)
- Energy Bar – $1.00 each
- Fruit Roll-Up – $0.29 each
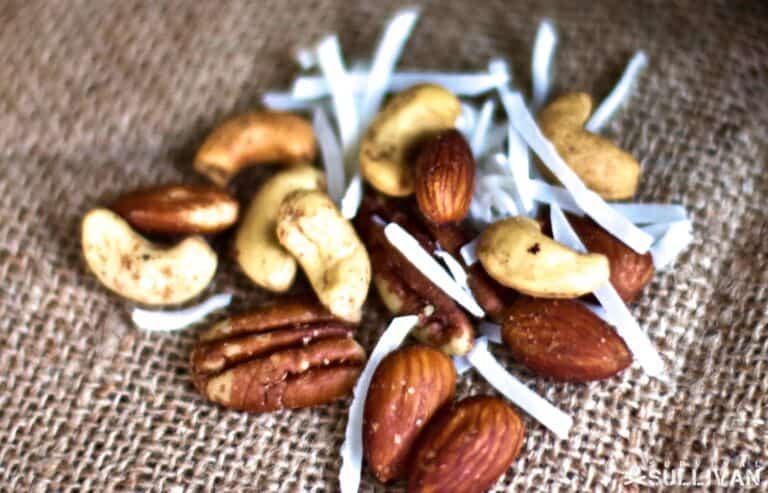
- Mixed Nuts – $3.00 / 10 ounces
- Processed Cheese Stick – $0.99 each (x3)
- Beef Jerky (homemade)
- Hard Candies (Lemonheads) – $1.29
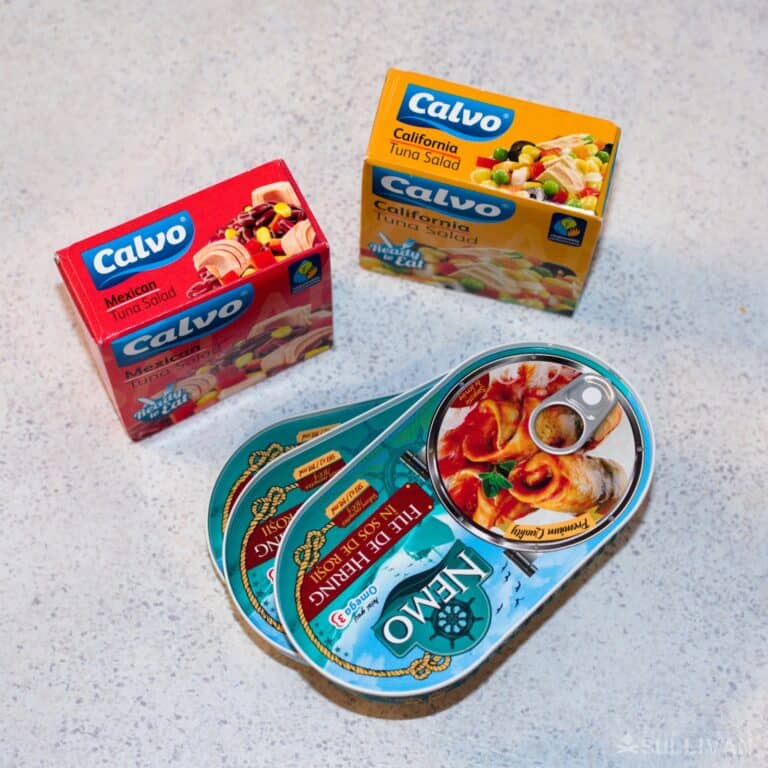
- Hormel Compleat Meals – $2.45 each (x2)
- Beef Stew – $2.99
- Spam – $3.99 / can
- Canned Chili Mac – $2.15 / 15-ounce can
- Canned Tuna – $0.89 / 5 ounces
- Canned Sweet Potatoes – $1.49 / 15 ounces
- Tortilla – $0.20 each
- Canned Carrots – $0.99
- Canned Mixed Veggies – $0.99
- Canned Green Beans – $0.69
- Canned Cranberry Relish – $1.75 / 14 ounces
- Instant Coffee – $0.13 per single-serve packet
- Instant Tea – $0.42 per single-serve packet
- Juice or Punch Drink – $0.43 per single-serve packet
- Sports Drink Mix – $0.26 per single-serve packet
Total: $42.83
If I went out and bought all of these items and just looked at the cost on my receipt, it would be much higher but remember you’ll also have a lot more food than just a 72-hour supply if that’s the measure you use!
Something else to keep in mind is that many of you will already have these items in your pantry right now, ready to part out and put in your meal containers. That’s another factor that can defray upfront expense.
Your 72-Hour Emergency Food Menu
The following menu is assembled from readily available items you can get at any grocery store, or often at larger gas stations. Each is nutritionally well-rounded and provides roughly 2,000 calories per day.
Remember: this menu is for a single person. You’ll need to duplicate this for each person in your family.
Day 1
Breakfast:
- Instant Oatmeal Packet
- Peanut Butter, 2 to 3 Tbsp.
- Canned or Dried Fruit, ½ Cup
- Instant Coffee or Tea with Creamer
Lunch:
- Hormel Compleat Meal – Chicken and Noodles
- Crackers (approx. 10)
- Canned Carrots
- Processed Cheese Stick
- Juice or Punch Drink
Dinner:
- Beef Stew
- Rice Cakes (2)
- Canned Mixed Veggies
- Fruit Roll-Up or Fruit Gummies
- Sports Drink Mix
Snacks/Extras:
- Mixed Nuts
- Energy Bar
Day 2
Breakfast:
- Spam
- Breakfast Biscuits, 1 Pack
- Canned or Dried Fruit
- Instant Coffee or Tea with Creamer
Lunch:
- Canned Tuna
- Crackers (approx. 10 crackers)
- Canned Green Beans
- Processed Cheese Stick
Dinner:
- Canned Chili Mac
- Rice Cakes (2)
- Canned Carrots
- Peanut Butter
- Dried Fruit
Snacks/Extras:
- Trail Mix
- Hard Candies
Day 3
Breakfast:
- Instant Oatmeal (1 packet)
- Peanut Butter, 2 to 3 Tbsp.
- Canned Pineapple
- Instant Coffee or Tea with Creamer
Lunch:
- Spam
- Tortilla
- Canned Sweet Potatoes
- Processed Cheese Stick
- Fruit Punch Mix
Dinner:
- Hormel Compleat Meal – Turkey and Dressing
- Rice Cakes (2 cakes)
- Canned Mixed Vegetables
- Canned Cranberry Relish
- Water
Snacks/Extras:
- Beef Jerky
- Pop-Tarts
What Else You Will Need
There are a few odds and ends you should include with each of these meals or else keep on hand specifically for survival use.
Individually wrapped picnic cutlery consisting of a knife, fork, and spoon for each will be helpful, or as an alternative, a reusable camping spork.
Condiment packs consisting of salt, pepper, and other desired seasonings are beneficial, especially for picky eaters, as are disposable napkins and wet wipes.
You can include a disposable plate or bowl with each if you have room, or else use a camping mug or dishes. Another option is to choose foods that are ready to eat right out of the package.
Speaking of packaging, you’ll notice there are quite a few canned goods in that menu. Even if you’ve chosen brands that have pull tabs, you’d be wise to include a small manual can opener in your kit!
There are ways to pop open a standard can without a can opener, but it is always laborious and a pain in the butt!
A Note on Preparation
One last thing: the above menu presumes you have plenty of water on hand. You do have a 3-day supply of water on hand, don’t you?
Water is critical not only for drinking but also for preparing certain foods; in the example menu above, that would be the instant oatmeal. Typically, you’ll pour water or milk over this instant oatmeal and then microwave it or heat it up in a saucepan.
It turns out soaking this oatmeal for a little while in room-temperature water alone will soften it enough to make it easily edible. And before you ask, yes, I’ve eaten it this way myself plenty of times and it’s still surprisingly good!
Think twice before including any food that requires water and heating to prepare; you never know if you’ll be low on fuel or simply cannot afford to have a fire going.


Tom Marlowe practically grew up with a gun in his hand, and has held all kinds of jobs in the gun industry: range safety, sales, instruction and consulting, Tom has the experience to help civilian shooters figure out what will work best for them.