Smart preppers know that maintaining communications is critical in times of trouble. Whether you need to check in with family, distant neighbors, or other people in your survival group, nothing beats electronic communications for speed, ease, and efficiency.

BaoFeng UV5R Ham radio
the BaoFeng UV5R Ham radio

The problem is that cell phone networks and landlines are disproportionately vulnerable to disruption or destruction by all kinds of things, be it natural disasters, government intervention, or just high traffic.

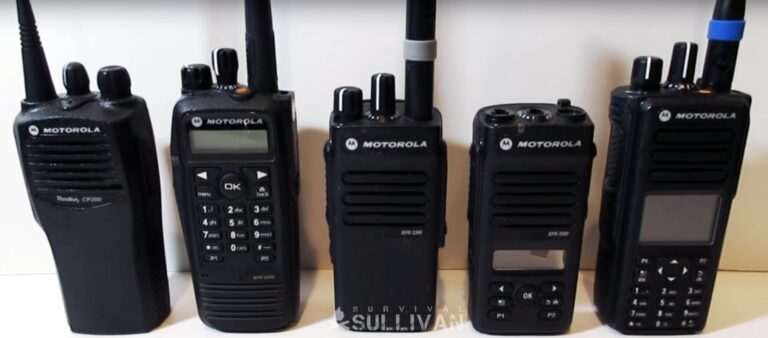
A better bet for preppers is radio. As long as you have a power source to set and an antenna, and the people you’re trying to reach have the same, you can get in touch if you’re in range and know what to do. You’ll hear about two radio services constantly in this context, GMRS and ham.

Both have advantages, both have disadvantages, and everyone has a favorite. But what are the differences, and what do they mean for someone who is just getting into radio communications? I’ll tell you all about those differences and more need-to-know info in this guide…

Ham Radio Licensing Requires Testing and Has Multiple Grades

Let’s get the boring stuff out of the way first. For starters, both ham and GMRS, or general mobile radio service, require licensing for legal operation.

In the case of ham radio, you’ll need to pass a test to demonstrate an understanding of the law and radio theory, along with proper procedures in operation, to legally get on the airways and transmit.

But that’s not all. Ham radio entails different levels of licensure with increasing privileges and transmission power available to those who show they have what it takes.

In order, they are the Technician Class, which is the entry-level license, the General Class, and the Amateur Extra Class. You have to hold the prior grade of license to qualify for testing for the more advanced ones.

A Technician Class license will give you access to VHF and UHF bands and entails a 35-question multiple-choice test. General Class will give you access to more bands, while the Amateur Extra Class will allow you to use the special Amateur Extra-only bands.

Getting into ham radio legally requires study, and a thorough understanding of the principles of radio communication. It isn’t as quick as setting up and signing on with GMRS.

Maximizing it also means you’ll have to test several times in order to get all of the perks and privileges. Remember, you can’t transmit without a license, so make sure you follow the rules!

A GMRS License Requires No Test and Covers Immediate Family

Completely different from Ham radio, GMRS licensing requires only that you pay a fee. There is no testing requirement to demonstrate knowledge of law, use, or radio theory!

What’s more, your GMRS license also covers your immediate family members, meaning you can pay the fee one time and enjoy the benefits of this radio service with your family for all sorts of tasks.

Also, there’s only one grade of license, and everyone gets access to the same bands and the same level of power depending on the type of set.

This makes GMRS much quicker and easier to get on the air with, but it will ultimately be quite limited in terms of capability and scope compared to ham radio.

Ham Radio Can Use Far More Power for Transmitting

A major difference between ham and GMRS radio is the level of power that can be used for transmission. Here, ham radio blows GMRS away. Ham radios can transmit using up to 1500 watts of power for high-frequency communications.

GMRS is limited to a maximum of 50 watts for mobile or fixed base station sets, and a meager 2 watts for handheld radios.

This does not mean that you can’t do what you need with a GMRS radio, but if long-distance communications, especially in less-than-ideal conditions, are on your mind, ham is definitely the way you’ll want to go…

Ham Radio Can Operate Worldwide

The greater power and flexibility of ham radio mean it can operate worldwide. Using ham radio, you can easily contact people across the county, across the state, across the nation, or across the globe once you know what you are doing and assuming conditions are favorable.

Ham operators routinely engage in DXing, a practice of trying to make extreme long-distance contact with other stations that are way off the grid. Or sometimes even in space! It’s true; the International Space Station has its own ham radio!

By comparison, GMRS radio, even in ideal conditions and at its most powerful, has a far more limited range, about 25 miles at most. This is certainly a huge improvement over CB radio and FRS radio, a closely related service, but is only a fraction of what a good ham setup can do.

Ham Radio Can Operate in Multiple Modes; GMRS is FM or Text Data Only

It’s a lot more involved, but ham radio gives users considerably more flexibility in communications. Ham radio can transmit packets of information for text, images, and a lot more, and communicate using simplex, repeaters, and non-FM modes.

With the rise of internet-based radio communications, the sky’s the limit in terms of redundancy and niche application. It really is limited only by your imagination, the law, and your technical skill!

GMRS has a lot less to offer savvy users, being capable of FM operation and text or GPS data only. Again, potentially more than enough for most preppers, especially folks who don’t want to go deeply into the rabbit hole of radio theory.

But there’s no denying that ham radio can open up an entire world of off-grid communications even when cell and internet services are completely down.

Ham Can Access HF and VHF Bands; GMRS Can’t

By type and by law, GMRS radio is restricted to UHF frequencies only, namely 462 and 467 megahertz, spread across 22 channels.

This is more than adequate anywhere there isn’t a ton of traffic, but in suburban or urban areas, you’ll find that the airwaves might be quite clogged indeed. Definitely something to think about if you’re a prepper living close to the city!

Ham radios have access to HF, VHF, and UHF bands spread across 420 to 450 MHz.

Depending on what you are doing and when you’re on there during the week, you’ll run into lots of traffic on certain frequencies, but it’s a rarity you won’t be able to find some clear air for one purpose or another with ham.

GMRS Radios are Limited by Type

For tinkerers and people who want to optimize their setup or just customize it for their specific needs, ham radio is the only way to go because you can build or modify your set to your heart’s content as long as you stay within the bounds of the FCC law.

A capable ham radio setup of any kind typically costs more than a comparable GMRS set, but is far more capable.

Your GMRS radios, on the other hand, are type-approved equipment only, meaning you can’t tune them up, get more capability out of them, or in many cases, modify them in any way except perhaps by adding a better antenna or other accessories.

For folks who might have changing needs or want to adapt their equipment to shortcomings or anticipated problems, ham radio will give you the freedom to do that.

One of the smartest things any prepper can do is invest in a self-contained communications technology. Cell phones are great, and the internet certainly changed the world, but you can’t exactly count on either of these in the aftermath of a major disaster or society-toppling event.

several Motorola walkie-talkies

Accordingly, most preppers are keen to invest in ham, GMRS, or FRS radio sets, but another one is being talked about lately that might be worth investigating: MURS. What exactly is MURS radio, anyway?

MURS stands for multi-use radio service, and it uses channels between 151 and 154 megahertz. Intended for short-range two-way communications with base stations or portable radios, it has long been used in industrial and business settings.

There are some folks who describe MURS as the best-kept secret in radio communication for civilians, and part of that is because it was once set aside for business use by the FCC, but only relatively recently in 2000 has it been opened up for public use.

It’s rarely discussed as a true competitor to GMRS, FRS, or even CB radio, but it has several legitimate aces up its sleeve you should know about. I’ll tell you about them in the rest of this article…

What’s MURS Used for Typically?

As said, MURS is intended for short-range, two-way communications, and for a long time, these frequencies were set aside for business and industrial usage. You might have heard of them referred to as the color dot frequencies before.

Interestingly, major corporations like Wal-Mart and others make constant use of MURS frequencies in their stores, warehouses, and other installations.

MURS Frequencies

MURS radio has five frequencies available for use:

  • 151.820 MHz,
  • 151.880 MHz,
  • 151.940 MHz,
  • 154.570 MHz,
  • and 154.600 MHz.

What’s the Range Like on a MURS Radio?

It depends on a host of factors, but as a rule of thumb, you can get a range of 2 to 8 miles with a handheld MURS radio, certainly comparable and often superior to CB! Terrain, atmospherics, and other conditions as always will make a difference.

You can also get up to an impressive 20 miles with a MURS base station, meaning it might be a perfect choice for you if you’re only trying to keep in touch with folks in your immediate area.

Any Special Restrictions Associated with MURS Radio Use or Installation?

Yes. Transmitters are restricted to two watts of power and the height of your antenna, including the tower, cannot exceed 60 feet.

Licensing

No, happily it is not! MURS radio is license-exempt, meaning you don’t need to take a test or even pay to get a license in order to listen or transmit as long as you follow all the other relevant FCC rules.

Namely, for any emergency traffic being used on any of the five channels you’ve got to clear the airwaves and make way for it.

How Does MURS Compare with Other Radio Systems?

Most folks, including some serious radio enthusiasts, don’t know very much about MURS and how it stacks up to other, more common radio systems in use in the civilian sector.

For starters, MURS frequencies are far, far less crowded compared to CB, GMRS, and FRS.

They also transmit on the VHF band which gives them better coverage and range when outdoors compared to FRS radio. FRS, though, still works better in cluttered, urban environments.

A major consideration for potential MURS users is that they are not able to talk to GMRS and FRS radios, whereas those two systems can talk to each other.

Potentially a major advantage for large families or groups is the fact that MURS frequencies use private line codes which allow people to use the same channel, without hearing other users on that channel, as long as both parties are using the same code.

So even though MURS radio only has five frequencies, the 38 different codes mean you’ll have nearly 200 different possible combinations of channel and code. This will make it a lot easier to make a conversation harder to find or just prevent talking over each other in a group setting.

Lastly, MURS radios can make use of removable antennas, whereas FRS radios cannot. Considering how important the antenna is to your overall radio experience, being able to replace it or just switch it out for a better one might make the difference.

There are quite a few other differences besides, but those will have to wait for a more in-depth article!

Should You Get One?

If you’re thinking about getting a MURS radio as part of your emergency and disaster preparations, you can make a great case for it if you’re going to be in an outdoor area with a decent line of sight and a few obstacles.

It works especially well and has impressive range considering that it doesn’t require a license for use.

If used in a mobile capacity it provides superior range for vehicle-to-vehicle comms compared to FRS or GMRS in most settings, though the greater power available to GMRS radios might make a difference in truly wide-open spaces.

GMRS can also make use of repeaters to greatly extend range; sadly, the FCC has mandated that MURS radios cannot use repeaters for any reason.

Compared to the old standby of CB radio, CB looks better on paper because of greater power but CB radio frequencies are always, invariably clogged, and highly vulnerable to skip interference at extended distances.

That’s it, CB signals tend to go around or over obstacles better than MURS frequencies, don’t whether this will actually be an asset depends entirely on what you are doing with your radio.

All in all, MURS is certainly a suitable choice for close-range communications in a group setting, and made all the more attractive because of its plug-and-play nature and privacy code system.

MURS radio Pinterest image

In matters of survival, you’ve got to be crafty. You have to make the most of what you have and get the job done even with suboptimal tools. For instance, you might be forced to survive eating nothing but plain bread baked in a… Altoids tin? Really?

altoids tin bread on plate

Yes, I’m serious, but not that serious: it’s hard to imagine a set of circumstances where all you’ll have is an Altoids tin and the ingredients to make bread and be forced to survive on that alone.

That being said, it’s a fun little trick that can allow you to pop out a biscuit pretty much anytime and anywhere, even if you don’t have access to a kitchen or electricity.

It’s a fun little project to do if you’re bored, to try with kids, or just to impress your friends and family. You never know when a craving for fresh baked bread will strike! Keep reading, and I’ll show you what to do.

Altoids tin bread  tools and ingredients

Tools and Supplies

As you might have already guessed, you really don’t need much to pull off this recipe. Still, you will have a little prep work to do if you want to do it safely. Gather the following tools and materials, and then we’ll move on to the ingredients.

Altoids Tin: just a common Altoids tin with all the mints and paper removed. Nothing to it! Make sure it has the lid still, and that it’s securely fastened.

Steel Wool: you’ll need some coarse steel wool, 00 works well, to scour the paint and coating off of the tin. I know this seems superfluous, but it is important so you don’t release nasty chemicals into your bread during baking. If you don’t have steel wool, a copper or other metal brush will make short work of the paint.

Mixing Bowl, Small: any mixing bowl you want is just fine for this recipe as long as it’s clean. If you’re really in a pinch, you can mix the dough inside the tin itself, although it is a pain in the you-know-where.

Spoon: a small spoon for stirring the dough ingredients together.

Toothpick: you’ll use a toothpick to check the bread for doneness during the baking process.

Rack: to hold the Altoids tin over your heat source. There isn’t really a purpose-made rack for this sort of thing, as you can imagine. You can fashion one out of a bare wire coat hanger or some other kind of wire that can tolerate heat without releasing noxious fumes.

You’ll need to improvise, but in a pinch, you can usually use a couple of empty soda cans side by side to balance the tin on if you want.

Heat Source: you’re not going to bake bread without heat! For this task, a single large candle or two small tea lights will do the job. Make sure they’re as low as possible so you can easily position the tin above them.

Alternatively, you can use a hobo stove or Penny stove if you really want to show off your survival know-how and MacGyver skills.

Timer: some sort of timer so you know how much time has passed when you start baking the bread.

Ingredients

No surprises here, you’ll need common ingredients used for making bread dough, and a couple of optional add-ins.

  • Water: a little bit of water, just an ounce or maybe a little more. You need it just enough to bring the dough together.
  • Flour, Self-Rising: self-rising flour has everything that you need already in it, including salt and a leavening agent. You’ll need a ½ cup per loaf.
  • Salt: an extra pinch of salt is fine if you want a little extra flavor.
  • Olive Oil: a dash of olive oil will give your bread more flavor and make the whole affair just a little bit classier. Also, spare a dab to coat the inside of your tin so the bread doesn’t stick.
  • Herbs (optional): if you really want to kick things up a notch, stir some herbs of your choice into the dough. Rosemary, paisley, oregano, and thyme are all good choices.
  • Shredded Cheese (Optional): bread and cheese go together like, well, bread and cheese. A pinch of shredded cheese will make your finished bread delectably tasty.

That’s it. Grab your apron; it’s time to bake.

Instructions

Give these instructions a quick read-through before you begin so that you know what to expect.

Step 1: Strip and wash the tin. First things first, time to strip that tin. Grab your steel wool or your wire brush and give it a good clean.

cleaning the Altoids tin

Step 2: Clear workspace. Clear the workspace where you want to bake the bread. You can do this pretty much anywhere because it doesn’t need much room, but you must take care to do it on a heat-proof surface.

If you want to do it on a desk, floor, or somewhere else, put down a tile or some type of heat-resistant coaster or trivet.

Step 3: Mix dough. Dump the flour into your mixing bowl, along with just a dash of olive oil and the extra salt if you are using it. Stir.

mixing the dough

Very slowly, drizzle in just a little bit of water at a time as you continue to stir. Keep adding the water until the dough just comes together. It should be a sticky blob, not runny and not dry.

Step 4: Coat tin. Use a couple of drops of olive oil on your fingers and coat the entirety of the tin’s interior. This ensures your bread won’t stick. If you skip this step, your bread will tear out and crumble as you try to remove it, and that will spoil the presentation. We can’t have that.

coating inside of tin with olive oil

Step 5: Dump dough into the tin, smooth. With the dough formed, use your spoon and carefully dump out the dough into the bottom of the oiled tin. Use the spoon to spread it around in a level layer.

adding dough to tin

Look closely and make sure the dough is not coming up more than halfway on the bottom part of the tin. If it does, it’s going to overflow during baking when it isn’t firmed up, and you’ll have a nasty mess to clean up and a potential fire hazard.

Remove a little bit of dough with the spoon if you need to. Sprinkle the cheese on top, if you are using it.

Step 6: Position and adjust the rack. Before you kick in the heat, place the rack over the heat source and assess things. When your stove or candle is lit, you want the flame to stop just shy of the bottom of the tin. If the flame is contacting the tin directly, you’ll have burnt bread for sure.

baking rack

This isn’t an exact science for obvious reasons, so play around with the positioning of the rack and the tin until you have it just right before you ignite.

Step 7: Ignite heat source. Light your candles and place them on the heat-proof surface that you’ve chosen. Spare another couple of moments to make sure there is nothing flammable that could get near it, or you’ll have more to worry about than burned bread.

Step 8: Place tin over heat source. With the fire started, position the tin on the rack and double-check to make sure the spacing is correct.

placing tin on rack

Step 9: Close lid gently, start timer. Swing the lid on the Altoids tin closed gently; don’t snap it shut. We want to help hold heat in and bake the top of the bread evenly, but not prevent it from rising.

bread baking inside metal tin

With this done, start your timer or watch the clock. You’ll let the bread bake for about 10 minutes before you check it. Time to wait.

Step 10: Check for doneness. Once the 10 minutes have elapsed, carefully flip open the lid using your toothpick, then poke the center of the loaf with the toothpick. When you pull it out, check to see if any dough is sticking to it; if it comes out clean and dry, your bread should be done.

poking finished bread with toothpick

Step 11: Finish baking if needed. If the toothpick is moist or has dough clinging to it, it needs to bake longer. Gently close the lid as before and give it another two to three minutes before checking it again in a fresh spot with the toothpick.

Step 12: Remove from heat and cool. Once your bread passes the toothpick test, cut the heat or carefully remove the tin from the heat and allow it to cool for a couple of minutes.

Step 13: Tap out bread. Once you can safely handle the tin, swing open the lid, flip it over, and tap out the bread onto a plate.

Step 14: Eat and enjoy! Break out the fine china and your best Merlot, then serve your Altoids tin bread with a flourish and enjoy a round of applause from your friends and family.

And it’s as simple as that. Now no matter where you are and what you are facing, at least you’ll always be able to make the warm, comforting goodness of fresh baked bread.

Altoids tin bread pin image

You ever heard the expression that squirrels are just rats with good publicity? I think it’s true. Their faces are cuter, their tails are adorably fuzzy and they look more wholesome overall. But in the end, they are just rodents, and so get up to rodent activities.

a set box squirrel trap

For instance, they can break into your attic and cause all kinds of havoc, and they’ll remorselessly steal food from your bird feeders. With the cost of birdseed today, that is a legit crime as far as I’m concerned…

But maybe you don’t want to kill the squirrels to get rid of them. I understand; they are pretty cute.

Maybe it’s best just to trap one in order to send a message. Or maybe you’d like to do it as a fun diversion with one of your own kids or your nieces and nephews. Maybe you can relocate it! Squirrels are wily, but they can be caught.

And I promise you’ll have good luck with this classic, manually operated trap. With a little bait and a little patience, you’ll soon have a problematic squirrel in your custody.

squirrel trap materials

What You’ll Need

I’m telling you, this is as simple as any trap gets. In fact, it’s so simple it has been the archetype for all sorts of comedic movies and cartoons. Nonetheless, it works on sound trapping principles, and is actually effective as long as you choose the components with care.

Box or Crate: the primary part of your trap, you’ll need a sturdy box that can actually contain the squirrel. Make sure it is sturdy enough to resist immediate attempts to bite, claw or lift it. Bigger is a little bit better here, within reason.

I like to use something about the size of a laundry basket so a squirrel can’t dash out of it instantly if it senses the jig is up. A larger crate will give you a better chance of capture when you trigger the trap, but when they’re too big, they get hard to handle.

Weight: you need a weight to help hold down the box or crate above. This could be a rock, a stout book, a weight plate, a paver tile, or anything else. Just make sure that you can securely attach it to the top of the box with tape or else it will stay put when you rest it there.

Stick: just a stick. Or anything stick-like. It could be a dowel rod, an actual branch, some scrap threaded rod, or anything else. It just needs to be able to physically hold the box up on one end, and also long enough so that the box is propped up about 18 to 24 inches off the ground. That’s it!

Cordage: you’ll need some kind of cord or line to tie around the stick that you’re using as the prop rod. It must be sturdy enough to withstand a quick, forceful jerk. Fishing line works well or you can use paracord, twine, or anything else you have handy as long as it is long enough.

You’ll need to set up a good distance away from the trap in ambush so the squirrel will actually enter the trap. I like to have at least 30 feet / 9 meters between me and the trap, and more is better.

Bait: anything that squirrels eat will work to bait your trap. In my area, Eastern squirrels love to eat black oil sunflower seeds and peanuts in the shell. That’s what I recommend you get because they are readily available and dirt cheap.

A small pile of them means that the squirrel is more likely to sit there and try to eat them instead of grabbing them and dashing off.

Thin, Sturdy Panel (Optional): assuming that you actually want to truly capture the squirrel, you’ll need a sturdy panel to put under the trap.

It should be several inches wider than your box or crate is on all sides so you can hold the box closed once you capture the squirrel and easily pick it up. Ideally, it will be thin and rigid, so if you want to you can slip it beneath the box with the squirrel inside.

I told you this was super simple. With all of your materials on hand, it’s time to get down to setting the trap.

Making Your Squirrel Trap, Step by Step

The following steps will help you put together an effective trap in a matter of minutes.

Step 1: tie cordage around rod. This is how you’ll arm the trap, because you’ll pull on the cordage sharply to yank the prop rod out from under the crate, allowing it to fall.

tying cordage around rod

Note that you want to tie the cordage on whatever end is going to be at the bottom, in contact with the ground, assuming the ends aren’t the same.

Step 2: pick location. Assess the area. Where do you usually see squirrels congregating to eat, rest, or observe? Where do you see them going to and fro? This is where you want to place the trap.

Step 3: optionally, place panel on ground. If you want, you can put the panel on the ground ahead of time so that, when the trap closes, you can pick it up by the panel with the squirrel inside securely.

placing trap floor

Squirrels tend to be somewhat more wary of this arrangement, so if you want a better chance of success, set the trap on bare ground (but you’ll need to slide the panel under the trap carefully after you catch the squirrel otherwise).

Step 4: Orient trap opening towards hiding spot. Wherever you plan on waiting for your squirrel to enter the trap, make sure the trap is aimed that way so that you can see into it.

box on top of trap floor

Step 5: run cordage to hiding place. Starting at your hiding place, start laying out your cord – and make sure you have plenty. You should easily be able to reach the trap location with some slack left over.

holding trap cord in hand

Step 6: prop up crate. Carefully, with the tied end of your stick against the ground or panel, prop up the box so that the opening is facing your hiding place.

placing the stick

The edge of the crate should be balanced on the stick so it’ll drop instantly when you pull the stick out from under it. Make sure it isn’t so delicate that the wind or vibration will cause it to fall. If necessary, make adjustments on either end of the stick or the edge of the crate to get a little more security.

Step 7: bait trap. Carefully, so it doesn’t disturb the trap, place the bait against the edge of the crate that is on the ground on the inside.

trap with bait

Note that you don’t want the bait to be touching the far wall. Squirrels will be a little more comfortable if the bait seems to be in the open and easily accessible. Make sure its far enough away from the open edge that the rodent must enter the trap.

Step 8: go to hiding spot. With the trap set, return to your hiding place and wait, being careful not to knock the trap over.

Step 9: take slack out of cordage. Carefully, gingerly, take the slack out of your cordage so that it is still resting against the ground but nearly taught. The idea is that once you give the cord a sharp pull, the prop rod will fly out from under the edge of the crate allowing it to drop instantly.

Step 10: wait. Settle in and wait for your hapless squirrel to come along. If you are dealing with urban or suburban squirrels, they should be very used to the comings and goings of people and will come along shortly.

waiting for the squirrels

Step 11: allow squirrel to enter trap. Once the squirrels see or smell the bait inside, the temptation will be overwhelming. Don’t jump the gun! Let the squirrel go all the way inside the trap and actually pick up some of the bait before you yank on the cordage to activate the trap.

Step 12: activate! Briskly pull the cord to pluck the stick from beneath the crate. If you set it up right, it should fall before the squirrel can react, trapping it.

Step 13: secure. If needed, slip the panel carefully beneath the edge of the crate while keeping it in contact with the ground as much as you can. If you do it right, the squirrel won’t be able to slip out. Watch your fingers! Squirrels can and will bite. If you already had your panel in place, he’s caught.

Step 14: caught! Congratulations! If everything went according to plan you have caught a squirrel with your simple trap and can do with it what you will.

If this is a catch-and-release operation, just for fun, or to hopefully to terrorize the squirrel into leaving, you can simply lift up one end of the trap and watch him bolt away.

Helpful Hints

  • Make sure the crate can fall flush and flat on the ground. If anything could possibly obstruct an edge of the crate, your squirrel can easily slip out. They are surprisingly agile, and can squeeze through any space where their skull can fit. Make sure no rocks, leaves, bait or uneven ground could give your squirrel an avenue of escape.
  • Secure the bait. Squirrels have lightning reflexes, and don’t be surprised if you see them get away with the bait several times, or dart in and then dark back out before you can react. Gluing the bait down with a little bit of peanut butter or something else that is sticky and safe will convince the squirrel to sit where he is and try to eat it.
  • Try and try again. If your squirrel keeps getting away, make adjustments. Try propping the box up more or less. Put the bait in a little deeper or a little closer to the edge. Put it closer to one corner. Experiment, and you’ll have him.
  • Lull cautious squirrels into a false sense of security. Particularly cagey squirrels, or squirrels that have escaped a capture attempt several times, will stop falling for your trap or won’t go for it in the first place. If so, just leave the box out in that spot, disarmed, and give it a few days. When squirrels see that it isn’t doing anything, they will lose their fear of it. Then you can arm the trap and try again to catch them.
squirrel trap Pinterest image

One of the single most important survival resources, especially in long-term survival scenarios, is food. Sure, lots of folks put emphasis on water because you can only go a few days without it, but just a few days without food means your mental and physical energy tanks are going to be empty, and you’ll be struggling to keep it together.

homemade survival bars

But the problem with storing lots of food for long-term use is that most of it won’t last a long time: Food spoils and requires constant rotation. There are special survival foods out on the market you can buy, but most of them are very expensive on a per-calorie basis…

You can take care of both of these problems at once simply by making your own survival bars at home from stockpiled ingredients. They are nutritious, sweet, filling, and capable of lasting a very long time, up to 20 years in the right conditions.

Best of all, it’s a whole lot easier than you might think with just a few simple ingredients and tools. Keep reading and I’ll tell you what you need to know below.

Will These Survival Bars Keep You Alive?

Yes, they sure will. Although they are not nutritionally complete, they have a lot of calories for quick energy, in the form of carbohydrates and protein alike, along with a variety of vitamins and minerals that your body needs.

Not something you can live on alone, and you probably won’t want to because of menu boredom, but they definitely beat starving or going without.

Do They Taste Good?

Yes, they do. They are very sweet owing to high levels of sugar, but this is a necessary trait for them to provide lots of energy in a very small package.

If you want a savory survival ration, you might want to look at a different recipe, but if a sweet treat sounds like something you’d like, these are wonderful.

survival bars ingredients

Ingredients and Tools

You need only a few ingredients to make this recipe, and some basic kitchen implements. Check out the list below, gather what you need, and then we will get started.

Oats, Regular or Quick, 2 Cups: common oats that you can buy at the grocery store. Regular, rolled, or quick-cooking varieties are all good. Avoid varieties like steel-cut oats that require extended cooking times.

Powdered Milk, Non-Fat, 2 Cups: powdered milk will help to bulk up and bind the ingredients in the recipe together, and add some much-needed protein.

Use any variety you want as long as it’s nonfat and fresh. Now’s not the time to use an opened package that has been lurking in the back of your pantry!

Gelatin Dessert Mix, 3 ounces: any gelatin dessert mix that you want to use will be perfect here. It can be Jell-O or any other brand.

Citrus flavors work well and impart a nice fruit and cream flavor to the bars, but you can use any flavor you want. Note this is not pie filling or pudding! You want the mix that makes the jiggly stuff.

Protein Powder, Whey, 3 Tbsp: whey protein powder adds tons of protein to these bars, which is important for sustained energy. Most recipes tend to be pretty low in protein so consider this a necessary ingredient to craft the perfect survival bar.

Honey, 3 Tbsp: honey adds even more calories, improves flavor, and also acts as a binder which will help your bars hold together after baking. Without it, they will turn into a crumbly kind of granola.

Sugar, 1 Cups: white sugar. That’s it.

Water, appx. 3 Tbsp: plan on meeting about three tablespoons of water to incorporate your ingredients into a coarse, crumbly dough.

Note that you might need a little bit more in order to attain the right consistency, add in half-tablespoon to tablespoon increments. I’ll note this in the recipe instructions where required.

Mixing Bowl, Large: a large mixing bowl will hold all of the dry ingredients and then allow you to mix in the wet ones to form the dough.

Saucepot, Small: a small saucepot, holding about a quart or even a little bit less, should be adequate for preparing the wet ingredients prior to mixing.

Whisk: a whisk is useful for thoroughly mixing your dry ingredients together, and stirring your wet ingredients when simmering, but it won’t be useful for combining the wet and dry ingredients. They are just too thick and chunky.

Wooden Spoon: a wooden spoon is the perfect manual tool for mixing all of your ingredients together and incorporating them. It will be a workout, but works just fine.

Stand Mixer (optional): if you have one, this recipe is the perfect time to bust out a good stand mixer since the dough gets very thick and heavy once formed. Not strictly necessary for this operation, but very nice to have!

Baking Pan: you’ll bake these survival bars in the oven, and to do that you’ll need a good baking pan. It should be sized at least 9×11 inches (8×29 cm), and at least an inch deep.

Rolling Pin: flattening, compacting, and forming the mixture is essential if you want the finished product to actually hold together as bars. A rolling pin or similar tool is just the ticket for this process.

Parchment Paper: it is vital that you line your baking sheets with parchment paper to prevent the resulting bars from sticking to the pan. If you have to pry them loose, they’ll shatter.

Knife: any good knife will help you cut your formed dough into nice, tidy bar shapes.

Pastry Cutter (optional): if you want your bars to look a little nicer, or just one excuse to use the tool, you can use a pastry cutter to cut your bars to size.

Food Storage Bags: any long-lasting survival food is only as good as its packaging. At a minimum, invest in heavy-duty plastic food storage bags for storing them.

Vacuum Sealer and Mylar Bags (optional): to maximize shelf life, store the bars in a vacuum-sealed mylar bag that is rated for food storage. These will keep your bars fresh in storage for many years on end as long as the storage conditions are favorable.

And that is all you need. Not too bad, right? Now let’s get on to the instructions.

Step-by-Step Recipe Instructions.

The following recipe instructions are quite simple, but nonetheless, you should review all of the steps in their entirety before you begin. This will give you a better idea of what to expect.

Step 1: combine dry ingredients, mix. In the large mixing bowl, add the sugar, powdered milk, protein powder, and oats. Use your whisk to thoroughly stir them together until totally combined. Set aside for now.

mixing dry ingredients

Step 2: combine wet ingredients. In your small sauce pot, add the gelatin, honey, and water. Stir everything together thoroughly with the whisk. You want a smooth but viscous consistency. Add just a little more water if needed.

mixing wet ingredients

Step 3: bring saucepot to boil. Bring all the ingredients to a rolling boil, whisking thoroughly once it starts to simmer. As soon as the ingredients come to a rolling boil, remove them from the heat.

wet ingredients brought to a boil

Step 4: combine wet and dry ingredients. Carefully pour the wet ingredients into the mixing bowl containing the dry ingredients. Stir everything together thoroughly with a wooden spoon, and be ready to put in a little effort because it will thicken significantly. You have a stand mixer, now’s the time to use it.

mix wet and dry ingredients

Step 5: add water if required and knead. If the dough isn’t coming together, add a little more water a half tablespoon at a time. Use your hands to combine all the ingredients thoroughly.

kneading the dough

Step 6: test dough for consistency. Grab a small quantity of the dough and then squish it in your hand like you’re trying to crush an egg. The dough should hold its shape once you relax your grip. If it crumbles immediately, add a little more water, mix, and try again.

testing the dough

Step 7: line pan with parchment paper. Cut enough parchment paper to completely cover the pan all the way to the top of the sides. It’s helpful to leave a little bit extra in case of overflow.

Step 8: Place dough into pan.

dough inside pan

Step 9: press out the dough. Using your hands, pack the dough into a uniform layer.

spreading the dough

Step 10: roll dough. Use your rolling pin to press and compact the dough all the way to the edges of the pan. Ideally, your dough should be about half an inch thick or a little less. Thicker bars are much harder to bite into.

rolling the dough

Step 11: slice dough into bar shapes. Grab your knife or your pastry cutter and carefully cut all the way through the dough to form bars. I like to cut them into 4×3-inch bars.

slicing the dough

Step 12: bake at 200° F for 2 Hours. Preheat your oven to 200° F / 93° C, and once the temperature is fully up, pop the pan in. Set your timer.

Step 13: remove from oven and cool. Once the bars are finished baking, pull the pan out of the oven and set them aside to completely cool.

removing bars from oven

Step 14: lift out parchment paper and separate bars. Once the bars are totally cool, carefully lift out the parchment paper and then separate the bars from one another.

Step 15: pack and store. Store your bars in an airtight container of your choice and then keep them in a dark, dry room temperature environment for maximum shelf life.

Step 16: done! You are tasty, filling survival bars are finished and ready to eat.

Maximizing Survival Bar Shelf Life

These survival bars can last a surprisingly long time as long as they are stored properly. One of the most important factors for long shelf life is a good storage environment. The idea is room temperature or a little cooler, say between 60° F and 70° F (between 15° C and 21° C).

Also, keep them in the dark and dry. Moisture is the enemy! Keeping them out of direct sunlight and away from drafts will help prevent condensation which will absolutely ruin them.

Lastly, it pays to invest in better containers. Common zipper food storage bags work fine, but for maximum shelf life, you’ll definitely want to consider investing in those vacuum sealer bags. Those will allow your bars to last as long as anything you might buy off of the shelf or rack at the camping store!

If you store them in a vacuum-sealed bag as soon as they cool, and keep them in a temperature-stable storage environment, they should keep for a couple of decades. In a plastic storage bag, they will keep for about 5 years or longer.

As always, check, test and if needed rotate at periodic intervals!

Recipe Variations

  • Try different gelatin dessert mixes. As long as you are using powdered gelatin dessert mix, there’s no harm in trying other flavors. Maybe you’d like cherry instead of citrus? Anything goes here as long as you stay away from the pie filling and pudding varieties because they just won’t work.
  • Try different protein powder flavors. Another way to add different flavors is by switching out the protein powder. If you have a favorite brand or a particular flavor that you really enjoy, now’s the time to use it.
  • Chop the oats. You can enjoy a different texture altogether if you chop your oats prior to preparation. A few quick pulses in a food processor will be enough and tend to make the bars a little denser, texturally.
survival oat bars Pinterest image

Having a CB radio in your vehicle is a great way to keep in touch with other people in your group or other vehicles on the road, particularly truckers but also people like yourself who want to be a little bit more prepared. They are especially useful when cell phone signal is weak, or towers are out of action.

Baofeng HAM radio, walkie-talkies, flashlight and two chemlights
communication devices inside bug out bag: a Baofeng HAM radio, walkie-talkies, flashlight and two chemlights

But if you talk on a CB radio like you would on the phone, you’re going to clog up the channels. This will only ever piss people off, and you’ll miss important information from whoever you’re trying to communicate with.

To facilitate effective, crisp exchanges of information and also protect what is being said from outsiders, CB radio users have developed a long and colorful list of codes, slang terms and lingo.

Some of it’s just for fun, but much of it is useful as you’ll discover. Keep reading I’ll tell you about 49 of the most important terms to know.

Common 10 Codes

10 codes are short numeric codes that can convey questions, answers, status, orders and more.

They take a little more practice to memorize, but if you want to exchange sometimes complex concepts as quickly as possible using radio, they are indispensable, and commonly used by law enforcement.

10-1

Receiving poorly. This means that you aren’t receiving transmissions reliably or clearly. Lets the listener know the prior information might have gone missing.

10-3

Stop transmitting. A professional and brief way to tell someone that they need to be quiet or that their mic is potentially stuck on.

10-4

Okay, message received. Note that this just lets the other person know that you received their message. It is not necessarily a denial or acknowledgment, so make sure you let them know one way or the other.

10-6

Busy, and stand by. Used when you want to let someone know that you need a moment to deal with something before you pick the conversation back up. Often used when accessing need-to-know information.

10-7

Going off the air, or out of service. When you’re going to be away from the radio for a time or are shutting it down, use this code.

10-8

On the air or in service. Meaning that you or someone else you are referring to is able to receive radio calls.

10-10

Transmission complete, standing by. Sometimes shortened to just “10,” it lets hearers know that you are done transmitting and are standing by to receive a response.

10-13

Advise on conditions. Refers to weather, road conditions, and other factors.

10-16

Make pickup at. Used for giving instructions for pickup and transport.

10-18

Anything for us? A request for information, tasking, or work.

10-20

My location is, or ultimately what is your location. Often conveyed as “What’s Your 20?”

10-41

Please go to channel. Instructs listener to go to whatever channel is relayed after this code.

I made a full list of all the CB radio codes you might want to check out.

CB Slang

10 codes are great, but some of the most useful and certainly most entertaining CB radio lingo is in the form of slang.

The following represents a very, very small cross section, and hardly all of it, though you are bound to find these useful especially if you’re traveling by truck or some other vehicle.

Handle

Short for CB handle. This is a nickname akin to a screen name or username on the internet. Often describes something about the user. Generally, you get to choose your own, and this is encouraged because it helps cut down on confusion when talking to multiple users.

Driver

When using CB over the road, generically refers to anyone else unknown to you who is on the frequency.

Roger

Yes, or okay.

Come Back

Used to tell someone that you want to talk or that you didn’t hear their last transmission.

Come On

Used as a response to someone else who’s requesting to talk to you. E.g. “I hear you partner, come on.”

Copy

Also, copy that. The last transmission was heard and acknowledged.

Affirmative

Yes, or I agree.

Negatory

No, or I disagree. You can also use negative, but negatory is often preferred because it is phonetically different from affirmative and less likely to be confused when communications might be garbled or broken.

Break

A term used to tell other people on the channel to stop talking so that you can start talking. Should be used responsibly in times of emergency or when information is critical and needs to be relayed urgently.

Alligator

Refers to a tire or pieces of tires, specifically those from tractor trailers, that are laying in the road, but more generally reverse to any debris in the road that might cause damage to a vehicle that drives over it or hits it.

So named because it can “bite you” and damage your vehicle or cause injury and accident.

Boogie

To go fast or speed up.

Back it Down

Reducing speed, or a request to slow down.

Backed Out of It

When a vehicle cannot maintain its current speed and has to slow down or downshift.

Bear

Law enforcement. The cops. The fuzz. 5-0. Lice.

Plain Wrapper

An unmarked police or other law enforcement or security vehicle; a low-profile vehicle devoid of markings, livery, or insignia.

Jackpot

Refers to emergency vehicle lights on and flashing. The lights themselves are typically referred to as a gumball machine, specifically when on a police cruiser.

Checkpoint Charlie

A checkpoint where inspections, interviews or other certain law enforcement contact will occur. Often refers to DUI checkpoints, but can be used for any others.

Greasy

Slick or slippery. Often refers to snow and ice, not just chemical contaminants.

Ho Chi Minh Trail

Infamously refers to California’s Highway 152 which is notorious for an extreme number of automobile accidents, but more generally refers to any road which is currently clogged with accidents or known to cause them.

Black Eye

A headlight is out. Can be used to refer to the status of your vehicle or another vehicle.

Brush Your Teeth and Comb Your Hair

Surreptitiously lets people listening know that law enforcement are out scanning for speeders with radar guns or stations, or potentially looking for a vehicle in the convoy. i.e., look your best and act right, don’t draw attention.

Bumper Sticker

A vehicle that is tailgating or following way too closely.

Donkey

Behind you, or more generally to the rear. For instance, “Me and Billy are on your donkey.” “I got a bogey on my donkey.”

Radio

When using a CB radio, the term radio always refers to the CB.

FM

When communicating on a CB radio, FM, short for “AM/FM,” always refers to an AM/FM radio set.

Front Door

In front of, or the front of a vehicle.

Back Door

Something behind you. For example, such and such a vehicle is at your back door, a pursuer is at your back door.

Go to Company

Tells the listener to go to a designated channel to continue the conversation. Often used when a channel needs to be vacated for whatever reason.

Go Your Ears On?

A general request asking if nobody in particular or a specific person is listening to their CB.

Shutter Trouble

Having trouble staying awake.

Got My Nightgown On

Getting ready to go to sleep.

Ratchet / Ratchet Jaw

To continuously talk on a channel, preventing other people from transmitting or getting a word in edgewise. A ratchet jaw is a radio user who does this frequently or is notorious for it.

Reading the Mail

To listen to CB conversations without talking or communicating.

Sandbagging

The same as reading the mail; to listen to CB conversations without chiming in.

Short Short

Meaning a small or short amount of time. Time sensitive.

TYA

Tune Your Antenna. Can be used as a status notification that your radio transmissions are bad or failing, or that you have a weak signal. Also used to instruct other senders to check their set for functionality and reception.

Bambi

Refers to any deer, living or dead.

Road Pizza / Pizza

A road-killed animal of any kind on or near the road, or a pedestrian struck by a vehicle.

cb lingo Pinterest image

If you spend any amount of time getting into amateur radio, there’s no doubt you’ve already seen how important antenna selection and setup are for success. The best radio in the world is no good without a good antenna, and even the best antenna can be hampered severely by improper placement.

Baofeng UV 5R5 HAM radio
a Baofeng UV 5R5 HAM radio

But particularly when it comes to VHF radio, for any purpose, antenna height is extremely important. But why is that? Why does the height of a VHF radio antenna matter so much?

The height of a VHF radio antenna matters because VHF signals are easily blocked or disrupted by obstacles. Making sure your antenna is high enough will help get your signal out over those obstacles and let you receive clear, static-free signals from farther away. It really is that simple…

It’s always a good idea to get your radio antenna as high as possible, but if you are transmitting or receiving VHF signals, be they audio or visual, you’ve got to get it up there so you can reach past any intervening obstacles like buildings, trees, or mountain ranges.

There’s a lot more you’ll want to know, naturally, so keep reading and I’ll tell you all about it.

VHF Radio is Highly Dependent on Line of Sight

VHF radio signals, be they from a ham radio, aircraft, marine radio, handy-talky, or anything else are generally considered line-of-sight signals. This frequency range, anywhere from 30 to 300 MHz, can easily travel several dozen miles in good conditions but it travels in a straight line and does not go around obstacles.

Because of this, they’re said to propagate based on line-of-sight, which is actually determined by the radio horizon, not visual horizon. That gets into a more complicated part of radio theory, and something we don’t have to discuss here for you to understand the practical problem.

In short, the higher your VHF antenna is, the farther away the horizon becomes, and the more capable the antenna will be when transmitting or receiving.

Obstacles Will Seriously Degrade or Block VHF Signals

As mentioned, obstacles and VHF signals just don’t get along, and the obstacles will always win.

Trees, neighboring buildings, hills, and anything else you can think of will easily degrade VHF signals if there’s not a repeater to help pass them along, or if the sending station is not already at the highest point out to the horizon.

You can easily see this for yourself in your own home, or with your handheld radio, if you’re trying to transmit or receive in a valley, next to a woodline, or in a built-up area with tall buildings around you.

Since we can’t get rid of most obstacles for one reason or another, our only option is to reposition the antenna for better line of sight or raise it to get past the obstacles.

How High Should Your VHF Antenna Be?

The rule of thumb is to place it as high as you can. Broadly, anywhere from 15 to 70 feet off the ground.

Usually, higher is always better when it comes to reception in the presence of obstacles and transmission of the same. This is especially important when you are transmitting or receiving on the upper end of the VHF range.

However, you must check your local municipal, county, state, and relevant federal regulations when it comes to antenna height!

You might be restricted for the overall height of the antenna itself, or the maximum allowable height for installation depending on zoning and a host of other factors.

It will be heartbreaking to get your antenna set up and dialed in only to get an order from officials telling you to tear it down!

Is Higher Always Better for an Antenna?

Generally, yes, but not always. It’s possible that getting your VHF antenna up there, really up there, will introduce more interference because it will be capable of picking up staticky signals from farther away that are dissipating, increasing noise.

In these cases, lowering the antenna is a good idea as it’ll cut down on unwanted reception. This assumes, naturally, that you can still clearly send and receive.

Keep this in mind because you might be better off with a shorter antenna that is on a higher mast, mount or other installation location. Especially if it’s easily adjustable or configurable, this might give you better overall control for dialing in the sweet spot for placement.

In any case, do not hesitate at all to experiment with raising or lowering your antenna, and moving it to a different location.

And do this incrementally, because a change of just a few inches might have a surprisingly big impact. Ideally, you won’t have any obstacles at all near it for at least a 5-feet radius.

Other Things You Can Do to Improve VHF Reception and Transmission

VHF antenna height is still only a piece of the puzzle when it comes to optimizing reception and transmission.

Depending on your circumstances and objectives, using a directional antenna can make a huge difference as long as you know how and where to aim it. VHF amplifiers and preamplifiers will allow you to boost transmission power and improve reception respectively.

Other good options for increased performance are reflectors which can bounce your signal off of or over obstacles, or help to maximize your reception when you are at the very limit of what your set can do.

Lastly, don’t forget that a repeater is a viable, but often pricey, option for extending range in both directions. Expect to spend at least a couple hundred dollars for most applications, and it might cost upwards of $2,000!

If all else fails, consider upgrading your antenna. Aluminum antennas are okay, but you’ll invariably get better overall performance from copper or brass. Start by trying to get the correct height dialed in, and if that fails, look into the options listed above.

One of the very best things you can do for yourself when it comes to ensuring you have continuity of communications in times of trouble is to take up amateur radio, often called ham radio.

two Baofeng ham radios next to two Faraday cages
Baofeng radios are inexpensive, small, and capable of communicating over miles.

Completely self-contained, as long as your set is powered, you can broadcast and receive from anyone else that’s out there as long as they’re within range.

Old fashioned compared to cell phones, yes, but still incredibly useful and also a worthwhile hobby in and of itself. However, talking on the radio is an entirely different exercise compared to talking on the phone.

There are strict rules of procedure and etiquette that must, or should, be followed if you want to show respect and get it in turn. I’ll tell you about nine of the most important radio etiquette rules to always remember below.

Respect Frequency Rights

This is a big one, and one that I see beginning ham ops run afoul of from time to time, often to their embarrassment.

You must remember that the FCC has split shared band users into two categories: primary and secondary.

As you might expect, users in the primary category have priority and right-of-way when using these shared bands. Secondary users can only use them at all when they aren’t being used by primary users.

For instance, 219-220 megahertz is typically used as a marine traffic frequency. They are the primaries, and they have right-of-way. Secondary users, for whatever purpose, can only use those frequencies when they aren’t being used by marine users.

Don’t make the mistake of hopping on there and trying to claim you were there first when a primary user comes along. You’ll be corrected harshly and immediately, and rightfully so!

The only exception to this rule is if you have legitimate emergency reasons for being on the channel at that time. We’ll talk more about that in just a bit…

Be Mindful of the Time

Pay attention to the time when you’re trying to transmit and talk on your radio, especially if you just want to have a long conversation, what’s known as a ragchewing session in ham parlance.

As you might expect, traffic increases precipitously on the weekends, at least in the United States, when the work week is over. But if you’re transmitting anytime during the week, especially during the middle of the day, there will be a lot less traffic assuming all things are equal.

You don’t know what people will be doing on the radio waves on the weekends, and so your usual channels for chatting with a friendly and regular contact might be covered up. Don’t be afraid to reschedule or move to a different channel, and be prepared to look to find some clear air.

Know When and How to Break In

When you tune to a channel, for whatever reason, don’t just start talking out of the blue.

Stop, wait, and listen to see if anyone else is already using the channel or having a conversation of their own.

I like to wait about 5 minutes to be sure. If someone is talking, make sure you note any call signs that you hear and pay attention to see if it is a conversation that they might want other people to jump in on. They might not!

If you know the channel is clear or you have an opportunity to jump in, key the mic and announce yourself using your call sign per usual with proper phonetic alphabet. Include your name and location if desired or required.

After announcing yourself, state your intentions for why you are on the channel or ask if you can join the conversation. Done courteously like this, others that are on the frequency should let you know politely if it’s okay or not.

Don’t Talk Over People

This one should be obvious, but you’d be surprised how many people get on the air with a ham radio after coming over from CB or something else and just turn into ratchet jaws, stepping on people left and right.

Don’t talk over anyone deliberately, and if you do accidentally, just stop transmitting and apologize later so you don’t completely foul up the conversation. If you have an honest emergency, call for a break, but otherwise never transmit over someone.

Know Which Frequencies You Shouldn’t Chat On

If you’re just wanting to casually chat with people or find distant contacts on the radio, know what frequencies to dial into to accomplish that.

The trick is, there aren’t really official frequencies for doing so, but there are rules of thumb for avoiding popularly used frequencies for the purpose.

Your best bet is simply to avoid those that are often used for specific purposes at specific times, like DXing, Morse code, club activities, and more.

There are differences at the local, regional, and national level also, with ham clubs and competitions occupying certain frequencies at certain times of the week, month, and year.

It pays to be in the loop for this sort of thing so you can avoid clogging up airwaves and making people angry. Signing up with the ARRL, state, and local clubs is a great way to stay abreast of this activity.

Learn the Lingo

More basics, but you’d be surprised how many ham operators go for a long time without getting this stuff under their belt.

Learn the phonetic alphabet, your Q-codes, lingo, slang, and everything else so you can interpret conversations quickly, and also maintain brevity while on the air.

It’s okay if you’re new and a little slow or unsure of yourself. Everyone started somewhere, and most veteran radio operators will be happy to help you along and be patient. But there’s no excuse for staying a newbie forever.

Be Aware of Emergency or Professional Traffic

This is a biggie. Always, always be alert for the presence of emergency or professional radio traffic, and clear the air right away when you notice it.

Aside from being Federal law, minutes matter when lives or property are on the line, so don’t screw around. Note that this also applies to vetted amateur operators on official or volunteer business, like those belonging to ARES.

CQ Correctly

This is a subtle one, and one that’s easy to get tripped up on…

If you want to reach out to someone to chat with who might be monitoring the frequency, you can’t just broadcast asking if anyone’s out there who would like to talk. That’s broadcasting, and not allowed if you recall the rules and regulations you were tested on.

You need to do it correctly, and that means you need to say your call sign followed by “monitoring” if you are communicating via a local repeater, or else announce CQ, a code that asks if anyone is monitoring the frequency and would like to talk.

Simply announce CQ three times, followed by your call sign, and wait for an answer.

Always Identify and Sign Off Properly

Another “gotcha” that new ham-ops often forget. You must identify yourself at least every 10 minutes while on the air, and at the end of a communication by using your call sign.

This isn’t just good manners, no, it is, but it’s also a legal requirement. If you don’t identify yourself periodically while on the air, even in the midst of a conversation, you are conducting an illegal unidentified transmission.

If you are DXing or chatting with someone in another country, you must still identify yourself in English no matter what other languages you speak or what your contact is speaking.

ham radio etiquette pin

When it comes to wilderness survival, getting your hands on enough food is challenging. But no matter where you are, chances are pretty good there will be some variety of small game that can be caught.

the two wooden pieces together

Animal protein is one of the best things you can get when it comes to calories in the bush, so you should get it at every opportunity. And setting up traps is one of the best ways to multiply your efforts in that regard. You can have multiple traps set up and ready to spring even while you sleep or focus on other tasks.

And one of the best traps for reproducing is the simple, humble snare… Snare traps have been around since basically forever, and you don’t need much to make a good one. Learn how to make an easy but effective one with the guide I will share with you below.

Learn Where the Prey Will Be!

It’s a good time to remind you that, no matter how effective any given trap is, it isn’t going to do you a lick of good if you don’t understand where your prey will be!

It is imperative that you get in tune with the environment: find out what paths your quarry takes to travel to and from water or when entering or exiting their den or bedding area. Once you know where to set your trap, or traps, the battle is half won.

But the other half of the battle is picking a good spot along those routes that will allow your trap to function with maximum effectiveness. Keep that in mind as you read the instructions below.

snare wire tools materials

What You’ll Need

The best thing about the classic snare trap is that it’s so simple and quick to make with just a little bit of practice.

Assuming you have a few basic supplies and tools with you already, all you need is a little bit of time and soon you can have half a dozen traps set and ready to nab your quarry.

Snare Wire, around 20 inches (50 cm) in length: the most important part of our trap.

Snare wire or some other thin metal wire is critical because, compared to most kinds of cordage, it’s flexible enough to cinch down on the limb or body of the animal we’re trying to catch, but strong enough to resist being chewed through by that same animal desperate to escape.

Paracord (or more snare wire), 6-7 feet (80 cm). This length depends on the height or length of the branch or sapling you use. If setting multiple traps, make sure you have a roll of it.

Dowel rod or Drill Bit: a small dowel rod, or lacking that, a pencil or pen, or smooth, uniform twig about 3/8 of an inch (1 cm) in diameter, is ideal for making a nice and perfectly formed loop in your wire that is essential for the function of the trap.

If you’re really in a pinch, you could even use your pinky finger, a roll of chapstick, or something like that – as long as it’s round and sturdy enough for you to wrap the wire around to form a loop.

Wire Cutter: you’ll need something to cut the wire. If it’s thin-diameter stuff, you could use your knife but it’s going to tear the blade up. Use a wire cutter attachment built into the sheath or a dedicated wire cutter – or snips if you have them.

Knife or Other Carving Tool: you’ll need a carving tool to fashion notches and trenches in several pieces of wood that you’ll gather in order to form the components of the trap and make them work together.

Whatever you can get your hands on that’s better suited for this task, the quicker and easier the work will go. A hatchet will work, for instance, but a good, sharp camping or bushcraft knife is better.

Two Small Branches: you’ll need these to form the hook and the base of your trap. These are the components you’ll be carving the notches into that interface with each other to form the triggering mechanism of the snare.

These should be significantly thicker and sturdier than your dowel rod, at least half an inch thick for the hook and closer to an inch thick or larger for the base.

Young Sapling or Springy Shrub: you’ll need a springy sapling or shrub to serve as the energy source for your snare.

It should be tall and elastic enough that you can bend the top down far enough to put the trap under considerable tension, like a bow.

When activated, this is what will supply the energy to your wire, cinching it down, lifting the animal and, hopefully, keeping it securely in place until you show up to collect it.

You can use a young sapling for this which is ideal; just make sure it will immediately whip back into its original shape when you bend it over!

Note: Leave the sapling in its place: don’t cut it or break it in any way.

And that’s it! There are 101 variations on this trap, but this is one of the oldest, simplest and best using the most commonly available materials.

Steps

The following steps will tell you how to make an effective and simple snare trap. Read through all of the steps, check out the photos, and then circle back before you start practicing so you’ll know what to expect.

Step 1: create loop in wire. Taking your dowel rod or other similar item, make one and a half complete turns around it with the wire:

making the snare wire loop

You should have at least 3 inches of wire extending back over the standing part of the wire.

Step 2: twist working and standing part of wire together. Now simply twist the working end of the wire over the standing part repeatedly, like so:

twisting the snare wire

You can rotate the dowel rod or other item like a windless to assist with this. Make sure it is snug, then knot to secure and keep it from slipping.

Step 3: remove drill bit. Now slip the rod or drill bit out of the loop you just formed. Take care not to deform the loop.

removing the dowel rod

Step 4: form noose. Now slip the opposite end of your wire through the loop you just formed to make a simple noose.

slipping snare wire through loop

This is the active part of the snare that will cinch down instantly around the leg or body of an animal once the trap is activated. Assuming, of course, that all goes well.

Step 5: prep hook. The hook is the thing that holds the noose and connects to the line, which is the other part of the wire connecting the hook to the sapling.

carving wooden hook

Using your knife and the smaller of the gathered branches, split it in half along three-quarters of its length. Then make a clean, 90° cut to remove that long piece.

Take the time to clean up the resulting flat surface so it’ll mate neatly with the piece you’ll prepare in the following steps.

Step 6: carve notches in both ends of hook. Now taking your cutting tool, carve a shallow notch around the circumference of both ends of the hook. This will allow you to secure the noose and the line to the sapling.

hook with two carved notches

Step 7: carve the base peg. The base peg is the thing that you need to secure into the ground; the part that will securely anchor the hook and the whole trap when it’s set. Make this from the larger of the two branches.

Cut off one end at an angle so you can drive it into the ground like a stake:

sharpening base peg

…then cut an identical or nearly identical surface into it to match the hook:

carving base peg

Here’s how the two wooden pieces will fit together:

fitting base peg and hook

Step 8: Place base peg. Very near where you want the target location to be for your trap, securely anchor the base peg into the ground.

hammering base peg into ground

Make sure it won’t come out even with a couple of good tugs so you’ll know it is strong enough. Remember, this must be near and in line with the sapling you will use to provide power to the trap.

Step 9: measure line. Now you need to bend the sapling over toward the base peg enough that it will have some snap when you release it. If it doesn’t, your trap won’t activate quickly enough or forcefully enough to capture your quarry.

Once you think you have it on the sweet spot, take note of how much distance is between the end of the sapling and the top of your base peg. This is how much line you will need.

Typically, this is the distance from the tip of the sapling to the ground when its fully bent, plus another foot or two.

Step 10: attach line to sapling. Using the measurement you just established, securely tie or anchor one end of the wire to the end of the sapling.

tying the sapling

Step 11: check fit of trigger components. Before we complete the assembly of the trap, take the time to fine-tune and check the fit of the hook and the base peg. It should look like you have hooked the little legs of two uppercase Ls together.

the two wooden pieces together

They must fit securely so the trap will remain armed, but not be so snug that they won’t come undone when disturbed by your prey. You might need to fine-tune this later.

Step 12: attach noose to hook. On the same end that you carved out, the one that connects to the base peg, attach the working end of the noose securely to the hook around the notch you carved in its circumference earlier. Make sure that the noose cinches up easily when you pull on the working end.

attaching noose to the hook

Step 13: Tie line around opposite end of hook. At the other end, securely tie or secure the free end of the line hanging from the sapling you tied in step 10. You should now have the hook connected at one end to the sampling by the longer line, and at the other end of the hook, your noose.

tying paracord around hook

Step 14: set snare. Now, carefully pull down the sapling keeping the hook under control with your other hand.

Once it is pulled low enough to fit the hook into the base peg, carefully fit the two together so the trap stays under tension. If there is not enough tension or too much, you should adjust the length of your line between the hook and the sapling.

snare wire trap from afar

Step 15: test it. You’ve got to be sure that the trap will spring easily when the target animal blunders into it. Using a long, sturdy stick and taking care to stand in a safe spot, tug on the noose and see how easy it is for the trap to trigger.

Too easy means you’ll be getting accidental activations and wasting time. Too hard means the animal can pass through it and take the bait without setting it off.

Step 16: adjustments. If necessary, change the positioning of the base peg, the geometry of the hook, and corresponding surface on the base peg, the length of your line or noose, and the tension of the sapling. Once you get a feel for it, you’ll be able to get it just right in no time.

Step 17: set trap and place bait if you have it. Once you have all the kinks worked out, set your trap one last time and place bait in the target area. Make sure you come back to check on your trap regularly if it isn’t within line of sight or earshot. Animals can escape if left alone!

Step 18: finished! Your snare trap has been built, tested, tuned, and is now set and ready to bag you some dinner.

If you’re not near it, you’ll have to look really closely to notice it. The green paracord and greysh-brown snare wire fit really well with the surroundings:

Variations

  • Don’t have a knife? You can still make this trap work by finding a hook and base peg that have angled branches you can snap off. With a little fiddling, you can make the two hold together just by hooking the stumps of the branches together. No carving required!
  • Animals not entering trap? Try using a baited trigger approach. If you have soft bait like peanut butter or something else, you can smear it on the bottom of the hook so that your prey must actively tamper with it to get the bait. This works especially well if you can position it so that the prey must stick its head through the noose.
  • Try a horizontal base peg. If you have something small and sturdy, like a nail or screw, or a crevice that you can wedge a wooden base peg into, you can have it sticking out of a surface horizontally. You can then attach the hook to it directly under the end of the base peg.
snare wire trap Pinterest image

If you’ve taken it upon yourself to get ready for those disasters and crises that life can sometimes throw our way, you’ve probably heard of an EMP before.

solar flare

In the context of prepping and survival, this is the event that will knock out much of our electrical grid, and destroy any equipment or vehicles that rely on circuit boards and other, similar components.

Seriously worrisome stuff, and depending on who you ask they can be damaging on a regional level or even borderline apocalyptic at the national level. But just what is an EMP anyway?

An EMP, or electromagnetic pulse, is a short burst or pulse of electromagnetic energy. Created by natural phenomena or man-made technology, EMPs can disrupt, damage, or destroy electrical grids and equipment.

When you hear EMPs discussed in the context of a survival situation or catastrophe, most folks are talking about major events that could knock out society or most electronics, but EMPs can actually be really small and relatively weak, too, doing little more than disrupting communication signals or causing electronics to behave erratically.

The proliferation of weapons that can cause massively powerful EMPs, though, means that this is one threat that you must learn about and get ready for. Keep reading and learn more…


The Science Behind EMPs

As mentioned, an EMP is defined as an electromagnetic pulse, and maybe broadly categorized as a type of transient electromagnetic disturbance

However it is created, an EMP typically covers a very wide band of frequencies, ranging from very low to high, specifically excludes infrared, visible, ultraviolet, X-ray, and gamma ranges despite the source.

Because of this wide frequency range, emps might have a visual component in the form of aerial lightning or sparking and arcing from conductive materials, though this isn’t the main threat of the event.

If you were to look at an EMP as a pulse waveform model on a diagram, you would see that it would have a sharp spike, the build-up to the maximum intensity of the EMP, followed by a relatively slow decay. This is the typical form of instantaneous EMPs like lightning strikes, nuclear detonations, and similar “one shot” instances.

However, in the case of EMP generators, prolonged solar activity like coronal mass ejections, and even specific phases of a nuclear EMP, might take place as a succession of pulses, with a form that looks like a rising and falling wave repeated at mostly regular intervals.

The interactions of each wave, or pulse, will have various effects depending on the material or device that is interacting with. If the resulting voltage surge is enough to create a spark, that can start a fire or ignite flammable materials or vapors.

More complicated devices relying on precisely controlled currents will be disabled or overloaded, potentially damaging or even igniting.

Sensitive materials like hard drives, tapes, and magnetic media will be disrupted or completely wiped clean of data. Even more mundane materials like wood could potentially be ignited in the right circumstances by the heat-induced.

Ultimately, the science behind an EMP is relatively easy to understand, but the interactions it has with other materials and technology are incredibly complex.

How are EMPs Created?

EMPs can be created and projected by a wide variety of different phenomena, including natural events.

When it comes to substantial, damaging, or massively destructive EMPs, the two biggest concerns are nuclear electromagnetic pulses and non-nuclear electromagnetic pulses, or NEMPs and NNEMPs respectively.

As it turns out, you don’t only have to worry about the apocalyptic blast and flash of a nuclear warhead: the donation will actually create a powerful EMP as an additional effect by changing electric and magnetic fields.

This will then have negative interactions with all sorts of electronics and various electrical systems, typically in the form of a massive and damaging voltage surge.

A nuclear bomb that is detonated high up in the atmosphere is actually even worse when it comes to creating an EMP, because the gamma rays that are generated will ionize free electrons, and the whole pulse will have a much wider area of effect, even if the effects of the blast are greatly lessened or mitigated entirely due to altitude. Non-nuclear EMPs take the form of a specialized generator-type weapon system, not a bomb.

Other than that, lightning strikes create potent, localized EMPs as can strong electrostatic discharges resulting from friction or other sources. Another EMP source, one that is wildly varying in strength, is a coronal mass ejection, or solar storm.

When the resulting solar winds strike Earth, they can once again cause havoc with electrical systems, and sometimes even cause widespread damage as with the 1859 Carrington event.

Nuclear EMP Phases

Concerning the most likely EMP threats that preppers face today, nuclear EMPs, the pulse will have three distinct phases even though, to us, the event seems to occur basically instantly.

Understanding the discrete phases of an EMP also provides clues into how it can damage vulnerable technology and materials. These phases, broken down into E1, E2 and E3, are detailed below.

E1. Early phase. This is the sharp spike or leading edge of the pulse, producing high-intensity effects over a very wide bandwidth, though it is extremely short in duration.

The E1 component lasts no longer than a couple of microseconds. The E1 component of a nuclear EMP is produced by the emitted radiation interacting with the atmosphere around the detonation.

This is the component of the pulse that typically propagates along power lines, cables, antennas, and other similar conductive materials and induces high voltages and current. Highly likely to severely damage or destroy all electronics and sensitive materials.

E2. Intermediate phase. Also created from the interaction of radiation and the surrounding atmosphere. Significantly longer than the E1 phase, lasting up to a couple of seconds by itself.

Notably, this phase of the EMP is highly similar to the EMP created by natural phenomena like lightning strikes, although there is no attendant current surge as with the E1 phase. This is equivalent to a severe static discharge concerning electronics and other vulnerable assets. 

E3. Late phase. Created by the relatively slow particles propelled by the nuclear fireball interacting with Earth’s own magnetic field. Although relatively weak, this phase can potentially last upwards of several minutes though it could be over in seconds.

Though this is the “weakest” of the phases, it’s the longest lasting and shows a marked similarity to natural EMPs produced by coronal mass ejections and other cosmic activity. That said, it’s considerably more powerful than even the strongest recorded natural event.

The sustained nature of this phase can produce immense current surges across all conductive lines and materials, and is likely to result in overload, overheating, and damage.

Can You See an EMP?

Not usually, though you can often see the source or its interactions with various things, and sometimes see the visual side-effects.

Lightning is one good example, and solar storms can cause visual phenomena akin to the Aurora Borealis in the atmosphere. Potent EMPs can also cause sparking and overheating of some systems.

Obviously, you’ll likely be able to see an EMP that is created by any kind of nuclear detonation, though one that is caused by a specialized generator or other weapon system might likely be invisible and undetectable. You’ll only know it has occurred by the effects it has on the electrical grid and your electronics.

Are EMPs Harmful to People?

To a human being, not typically. The EMP component doesn’t directly affect flesh and blood, be it people or animals though intense magnetic fields can cause mental or visual disturbances in some cases.

As a rule of thumb, even a powerful EMP is unlikely to directly injure humans, but it’s still possible that the strongest, or those with an origin point nearby, can cause harm. If you’re in contact with a conductor during the event, letting go could result in a shock, especially if you move away from it.

Likewise, it’s not impossible that any extremely strong electric field could cause a breakdown of the very molecules in the air and then a dangerous or even deadly arc of electricity.

These effects on humans have not been widely studied concerning nuclear non-nuclear EMPs, but a basic rule of thumb is that any field strength under 200 kv/m will not result in serious injury.

Keep in mind, though, that whatever causes the EMP itself as a secondary effect might well be deadly or very harmful, as in the case of lightning, switching electrostatic discharge, nuclear weapons, etc.

EMPs Can Easily Cause Injury or Death from Secondary and Tertiary Effects

The real problem for people is what the EMP will do to the things we rely on. Vehicles may shut down without warning, computers will turn off, aircraft can go out of control, and vital infrastructure we depend on may be destroyed.

The grid will almost certainly be severely damaged or even totaled outright, bringing society to a screeching halt and sending us back to the Pre-Industrial Age in the blink of an eye.

Refrigeration, life support, water supply systems and so much more that are entirely dependent on electricity and increasingly on computerized control interfaces, will be out of commission or operating at greatly reduced efficiency.

The follow-on effects of such widespread and total damage or disruption will of course place entire regions, maybe even the entire country or large parts of the globe, in severe jeopardy.

How Bad Can EMPs Be for Electronics?

The effects on electronics and electrical systems depend entirely on the strength of the EMP and the sensitivity of the components or system in question to electromagnetic interference and voltage fluctuations.

A minor but still significant EMP might cause computers to malfunction, monitors to flicker, and cause static, popping, or “washout” type interference of communications, be it a cell phone, radio, or something else.

More intense EMPs, or vulnerable systems like unshielded circuit boards, might be overloaded to the point of damage necessitating various components to be replaced before proper function can be restored.

A sustained EMP in the form of a solar storm might also result in a total communications whiteout that is equivalent to ongoing jamming.

Lastly, the most powerful EMPs, especially if the origin is very close to your location, can result in dangerous overload and attendant burnout, causing widespread fires and total destruction that can only be corrected by a thorough overhaul of the electrical grid or replacement of all affected parts.

Some electronics will simply be utterly destroyed and have to be replaced entirely.

What Should You Do to Prepare for an EMP?

Preparing for an EMP is first about protecting vulnerable but essential gear, vehicles, and other possessions, ensuring redundant capability in case of loss, and preparing for the second and third-order effects that will invariably strike society and maybe even the nation in the wake of a powerful and widespread event.

Smaller electronics can be shielded from even potent EMPs by placing them in a Faraday cage, usually in the form of a bag, can, or box that has a fine metal mesh enclosing all sides that will basically intercept the damaging emissions before they reach your electronics.

When it comes to preparing for the aftermath, it’s all about the basics: You’ll need food, water, a generator, tools, and everything you need to sustain yourself and your family for quite a long time, likely.

In the case of equipment that is susceptible to EMPs and difficult to shield, like vehicles, choosing an older make and model that relies less on electronic control means that your ride is less likely to be damaged in the first place, or even totally immune to event.

Vehicles that have only a few such computerized components might be better prepared for the event by having Faraday-shielded spare parts on hand and the know-how to replace them yourself. That will get you back on the road.

EMP Pinterest image