Learning how to build a fire is one of the most fundamental survival skills. Whether you are forced to endure a bitter cold in the remote wilderness or you’re dealing with the aftermath of a catastrophe in a suburban or urban area, fire will always provide light and warmth, along with cooking and signaling capabilities…

Lots of preppers, though, focus on starting the fire through various means, whether primitive techniques or the best modern lighters. What’s just as important, and arguably more important, is knowing how to build a fire to achieve your desired results and manage your fuel supply.
In this article, I’ll tell you about the five types of survival fires you should know how to build. Keep reading, and we will light it up.
Star Fire
Ideal for: adjusting light and heat as needed, and regulating fuel consumption.
If you don’t need a ton of heat but do need flexibility, the star fire is the way to go. The only trick is that you’ll need a larger, clear area to build on compared to most other fire designs.
Assembling it is the picture of simplicity: place your tinder and a small amount of kindling at the center of the site, then arrange your larger pieces of fuel in a radial pattern around it, flat on the ground.
It should look like a star, or perhaps a sunburst if you prefer, hence the name. Then just light up your tinder.
The logs and branches will start to burn, but they will do so individually, more or less. As they start to burn down, you can keep the fire going by moving some or all of the fuel closer to the center; doing so will increase both heat and light as needed. To reduce either, pull the logs back slightly.
Teepee Fire
Ideal for: quick and easy builds, versatile campfires, and conserving firewood.
This is as classic a camp and survival fire as you can get. The teepee fire is so named because of its resemblance to the semi-portable Native American structure of the same name. If you aren’t dealing with challenging conditions and just need a fire put together quickly, it’s hard to do better than the teepee.
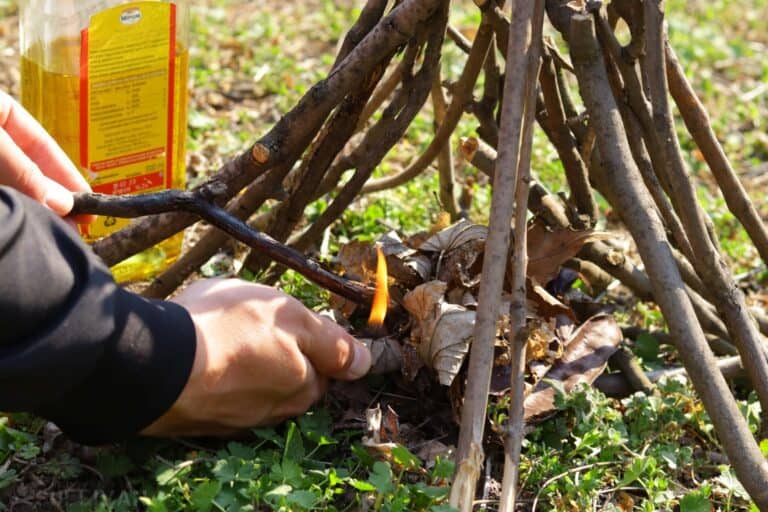
Construction is simple: build a small pile of tinder at the center of the fire site, and then place your kindling around that.
Grab larger branches or other fuel and set one end on the ground, leaning the other end to meet over your tinder pile. You might need to fiddle with two or three such larger pieces to get the basic structure in place.

Once that is done, add a few more larger pieces and then fill in the surrounding spaces with smaller ones.
Make sure you leave plenty of gaps for airflow and a small space so you can reach your tinder. Light it up, and the entire teepee structure will catch fire, throwing out a ton of heat and light all at once.
You can regulate fuel consumption by using fewer pieces of firewood at the beginning and adding pieces to the burning structure more slowly over time. Keep in mind, though, that all of the fuel will catch and burn pretty much immediately.
Dakota Fire Pit
Ideal for: keeping a low profile, cooking, and staying warm.
There are few types of survival fires that have the mystique and the good reputation of the Dakota fire pit. Using a quirk of thermodynamics and a little bit of elbow grease, a Dakota fire pit burns hot and uses relatively little fuel compared to other types on this list.
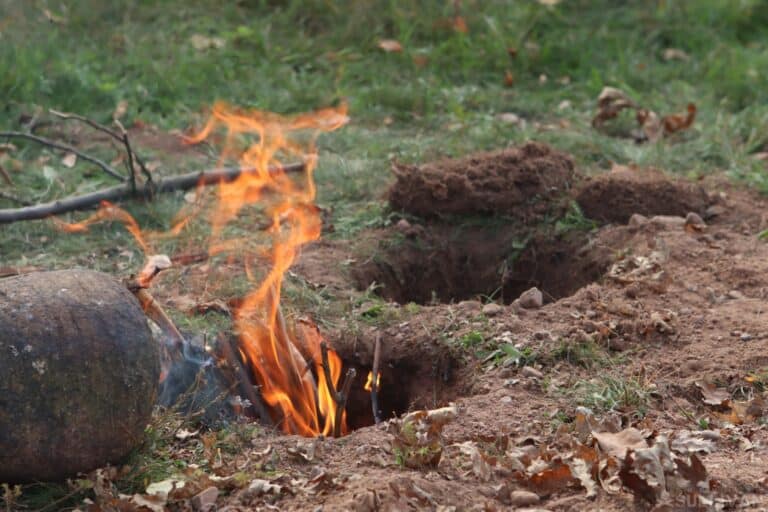
The trick is that you’ve got to do a little digging to set it up. To begin, dig a hole that is 10 to 12 inches in diameter and about a foot deep at the site of the fire.
Then, upwind of that hole and about 10 inches away, dig a smaller one, about 8 to 10 inches in diameter. This hole should be angled to connect to the first hole you dug at the bottom. This second hole serves as an air intake to feed your fire.
Start building your tinder and kindling bundle at the bottom of the larger hole, and once that is done, light it and slowly start adding your larger pieces of fuel. If needed, you can blow into the air hole or fan air into it with a sleeping pad, tarp, or something similar.
Keeping the fire below the surface greatly minimizes its visibility, and the improved combustion cuts down on smoke. This is great for helping you stay hidden, but remember that’s not ideal if you’re trying to signal for rescue!
Swedish Fire Log
Ideal for: an above-ground, long-lasting fire, cooking with pots or pans, and signaling.
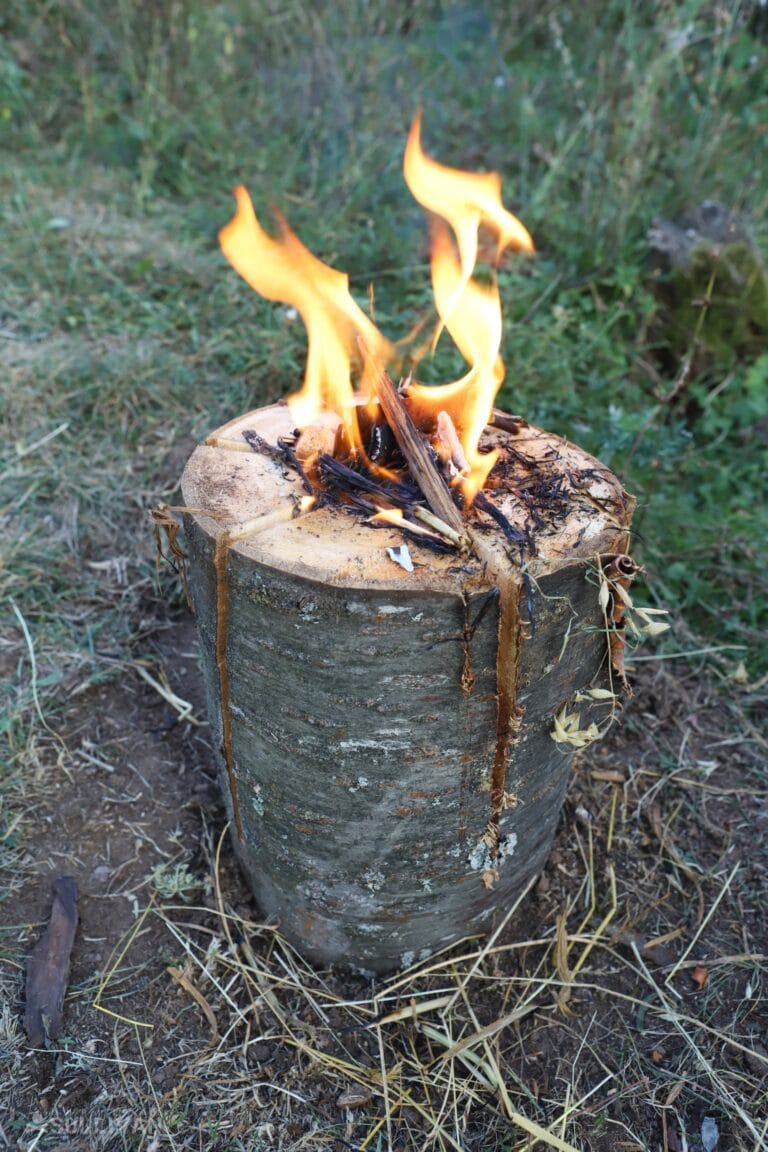
A truly clever but labor-intensive method for building an above-ground fire, the Swedish fire log, sometimes referred to as the Swedish torch, is little more than a large section of log with a hole drilled through the center from the top and another one drilled into the side before the log is partially split in an X shape- but not all the way through!
In essence, it stands up a little bit like a stool, and when it is lit, it provides a handy cooking surface. The trick is that you’ll need access to power tools if you want to do the job quickly and easily. Without them, you’ll need to put in a significant amount of sweat equity with an auger and a hatchet or axe.
Once all the prep work is done, you can stuff the bottom of the hole with some tinder and small kindling, then simply light it up. The log will burn evenly and slowly from the inside out, and it makes a roaring hot fire at the top of the hole.
Top-Down Fire
Ideal for: building on wet or muddy ground, and making a long-lasting fire.
Everybody can build a great fire in ideal conditions, but what separates the true survivalists and outdoorsmen from the groupies is getting one going and sustaining it when conditions are terrible.
If you are on wet, soggy, or muddy ground, or you just need a limited fuel supply to last as long as possible, build a top-down fire.

It’s easy to make: simply lay your larger pieces of fuel in a triangle or square shape on the bottom, then start stacking smaller pieces in the same shape on top, going smaller and smaller as you go. At the very top, put your bundle of tinder.
When you light it up, the tinder ignites the smaller fuel at the top, and the fire starts burning downward. This is in distinct contrast to most fires, which are lit near the base and burn upward. This is a great fire because it burns slowly and evenly, maximizing light and warmth over time.

Top down fire!! that’s how we start our woodstove fires! light it and forget it. it’s perfect for camping, too! set some big logs, then smaller ones, teepee your way to the top and light a fire starter or some paper and kindling. then get busy setting up camp! lots to learn here, good article!! Thanks!