The monkey fist is a neat little device that originated several hundred years ago on sailing vessels. Often referred to as a sailor’s knot, it started life as a halyard line tied around a cannon ball to toss the mooring line to a dockhand.
Another use on ships was as a lifeline to be thrown to anyone unfortunate enough to fall overboard…
The knot added weight to enable a farther throw. It also gave the cold, wet sailor something to catch onto as the rope slipped through their numbing fingers. This use as a lifeline reflects its intended purpose today; as a lifeline to save you when your life is in peril.
Lead and Leather
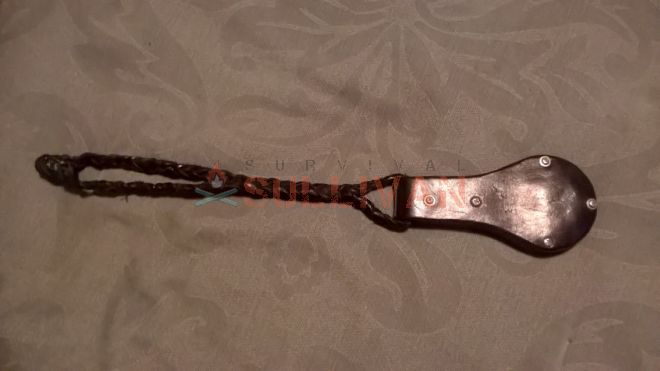
I had never heard the term “monkey fist” 20-25 years ago when I made myself a leather head smacker (I still have it). It consists of four layers of fairly thick leather surrounding a 4 ounce lead disc. The total weight of object is 6.15 ounces.
The two middle layers are cutout to accept the lead disc. The outer two layers are one piece that folds over to create an open end, through which you can affix a cord. I glued it together with rubber cement and put screws through it. The screws were mostly for looks though.
I made my cord with braided leather tied off in a topknot. It has three strands that I started a braid in the center. I braided about 3,” and then did a double strand braid for about 3” more to make it a single strip. Then I separated it again, and braided it into two strands again until it is joined by a topknot to make a wrist loop.
Paracord and Other Cordage
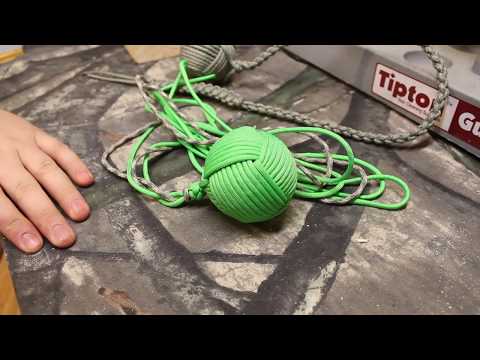
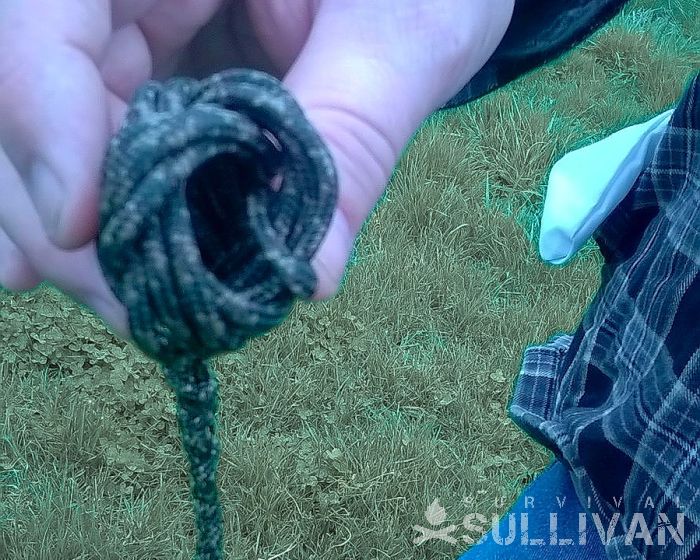
First off, you need a length of strong cordage like paracord or something similar. I went straight to YouTube to try to watch instructional videos. I had to gather a few to have the most efficient and successful build with the tightest strings, so you do not lose your interior ball, rock, metal ball bearing, etc
This video is good up to the tightening of the knot which is the hardest part to do, and I had to work out how to do that part, but it’s good to watch the build before that:
I had to experiment to find the length that was right for the most functional size. I figured it out by trial and error. It turns out that for a 1 1/8” steel ball bearing I used a 12’ length of cord to get the best results.
I only used 9’ the first “successful” attempt, but that was a little too short to tie a good handle. The 12’ length let me tie a decent handle, but it wasn’t a particularly fancy handle. You might need a longer length of cord if you plan to tie a more complex handle. I don’t really know any complex cord tying techniques to be honest, but I think I am going to try to learn a few now.
I watched several videos, read several tutorials, and tried to tie my own monkey fist knot. I just so happen to be exceptionally skilled with my hands, yet I couldn’t seem to get this to work. I began to think it wasn’t a real thing, you know how the internet is.
First Attempts – No Jig
My first attempt was with cargo tie down cordage I bought from Walden’s world o’ Chinese cheap stuff. It seemed like good cordage, 50 feet on a spool for $4.20. I got it because I only have black paracord and thought the multi-colored cord would be easier to see the details. It is easier to see by the way, just so you know.
I first attempted to tie a monkey fist by means of the “finger method”. Needless to say, it was a dismal failure. I followed the directions exactly, but my hand fatigued after the first six or seven tries. When I got to the third step where you remove the coils from your fingers to run the third pass “through loops”, I basically ended up holding a tangled mess of line.
I switched to the black paracord and tried again. It took several attempts before I got anything that even remotely resembled a monkey fist (like a dozen tries). Even then it was loose and unstable, and soon ended up another tangled mess of line.
Jig Time
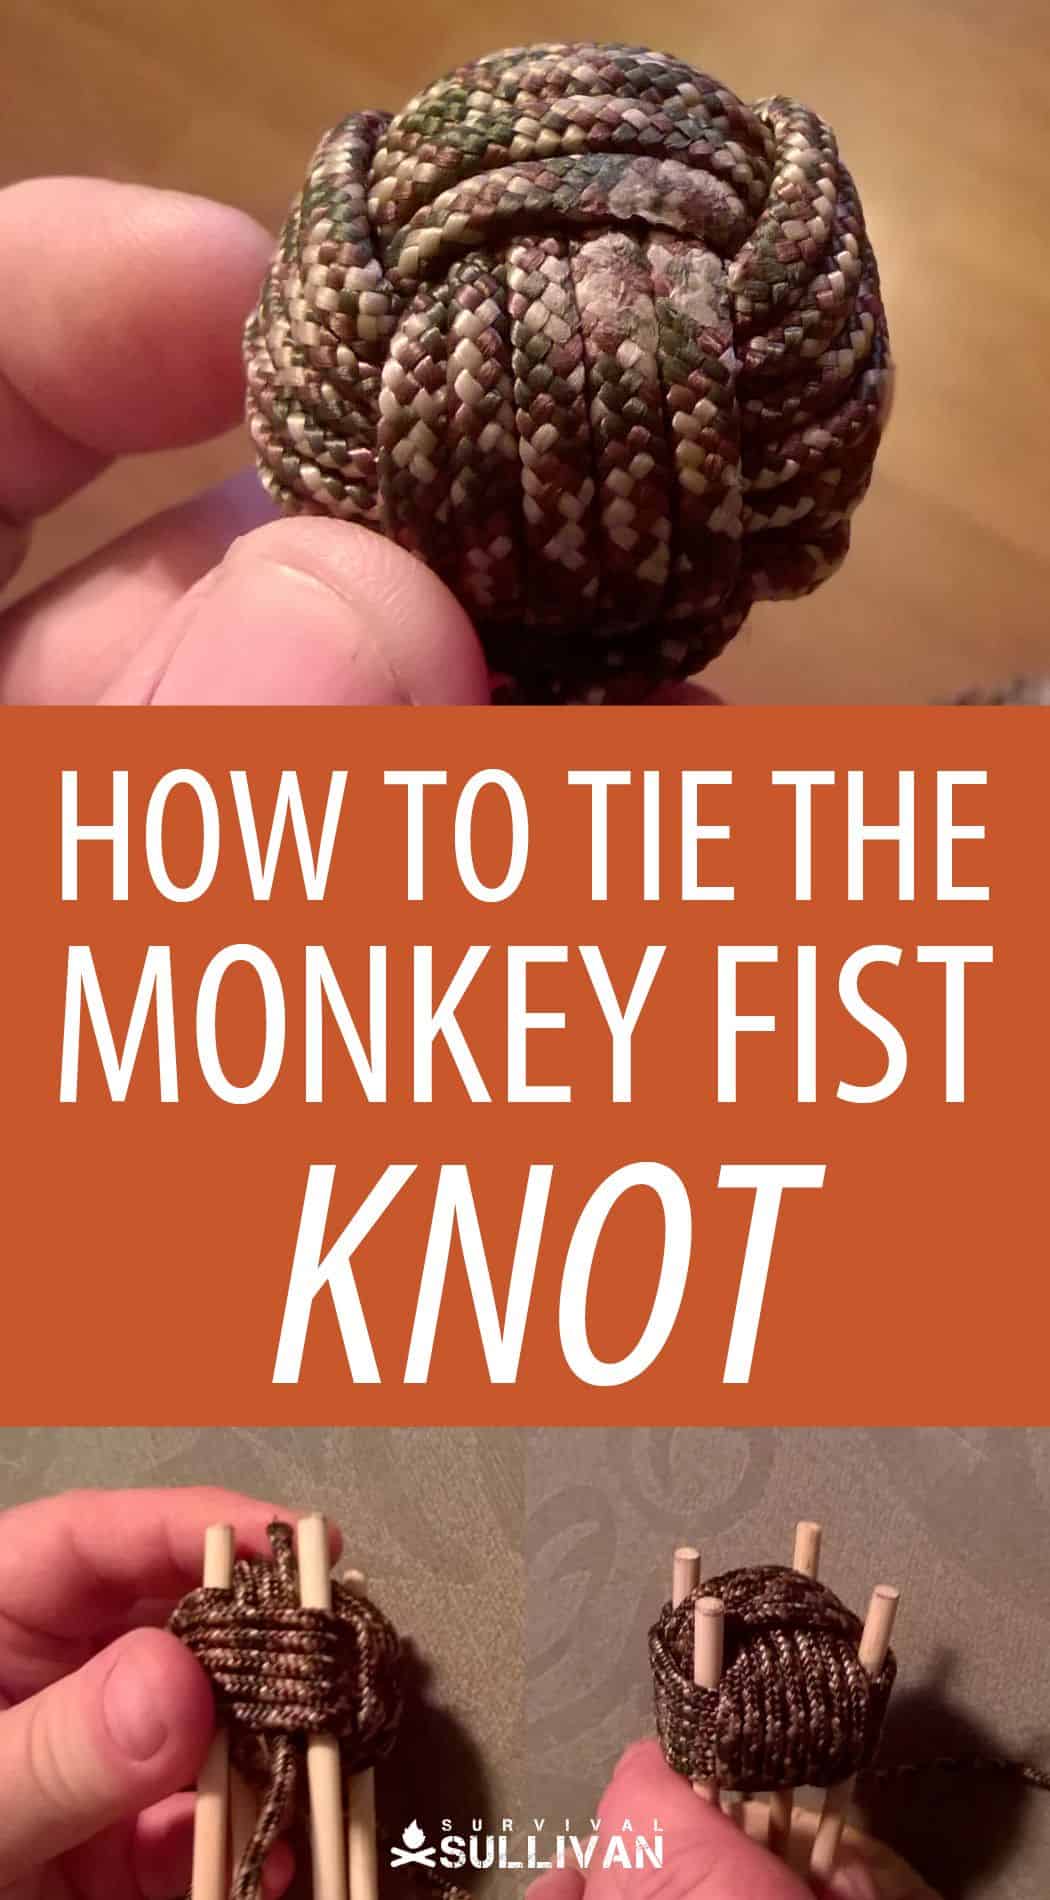
I finally gave up on the finger method and made a jig. I also switched back to the camouflage cord because it is stiffer. Even with the jig, it still took several attempts to get something that looked like a monkey fist (like another dozen or so try). But I soon found out that just because it looked like a monkey fist, doesn’t mean it is a monkey fist.
Making the Jig
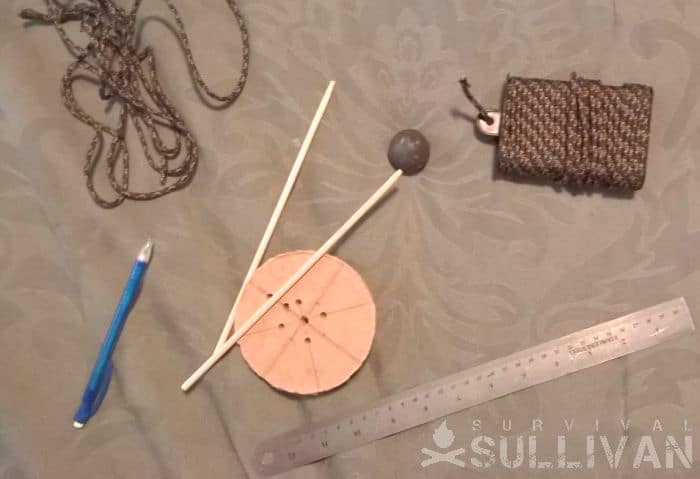
Making the jig was easy. I just used a 4” disc of 3/4″ MDF that was a left over from some other work that I kept several pieces to use as knife sharpening wheels for a bench grinder.
They work great for that, by the way, you just need some Tripoli metal polish, and it’s on (but that’s another story).
The disc had a center hole drilled in it so I used that to help me mark an “X” on the disc.
I used a ruler and drew two intersecting lines on the disc. Then I set the ball I intended to use in the center (that hole helped it sit still too). Then I used a pencil and lined up the edge of the ball by eye, and marked each line. This gave me four marks to drill a hole.
I used a pair of chopsticks from a Chinese takeout restaurant (yes, seriously). They’re bamboo.
I cut the tapered ends off, and then cut them in half. That gave me four equal length dowels. They fit the holes I drilled perfectly and snugly. I used no glue, so that I can move them if I decide to make a different sized monkey fist.
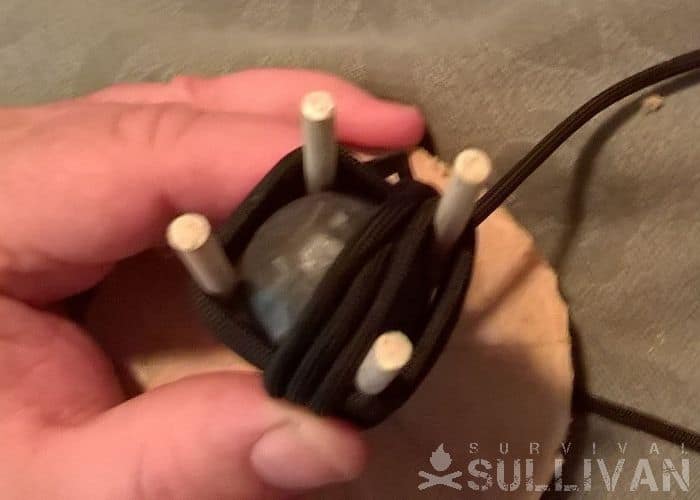
I also drilled an extra hole to run the loose end of cord through to hold it firmly out of the way. This slack will be used later to tie a handle, so be sure to leave plenty.
I left about 2’, but if you tie a complex knot in the handle you might need 3 or 4 feet of slack on each end.
After I finished the jig, I tried my hand at tying a monkey fist knot again. Yep, I ended up with another failed attempt, again, but I got further along.
It would seem that every time I removed the ball of loops from the jig and tried to do the third set of loops, it would become a confusing ball of string. Ending up again with merely another tangled mess of failure, but never give up. Failure just means you learned another way it didn’t work and it’s an important part of any process.
Third Try’s a Charm
Whenever I took the ball off the jig to try this third wrap, it always fell apart into a tangled mess. This gave me an idea. Rather than removing the ball of loops from the jig, I simply tied the entire knot on the jig before I removed it.
After the first two wraps that just go over the outside of the ball, the third wrap goes back through the loops of the first wrap (the loops that went around the sticks).
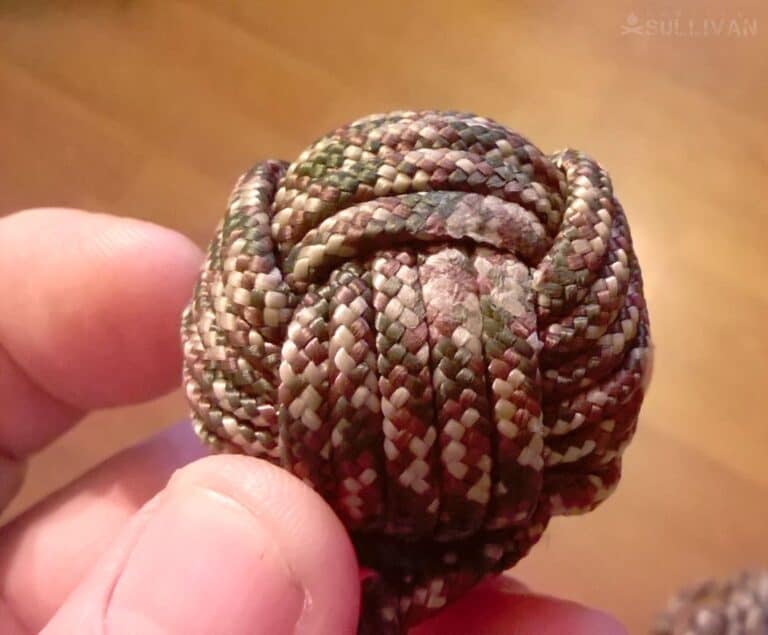
To accomplish this on the jig was almost impossible with paracord because it is too limp. I had to try to stuff it through with a stick or a little screwdriver. I gave up on the paracord. The camouflage cord I used though is kind of stiff. Because of this, it was fairly easily pushed through the loops that were held open and in place by the sticks.

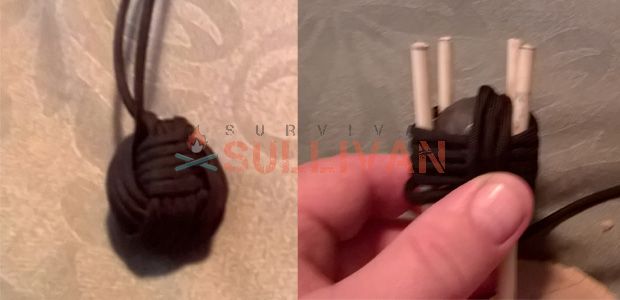
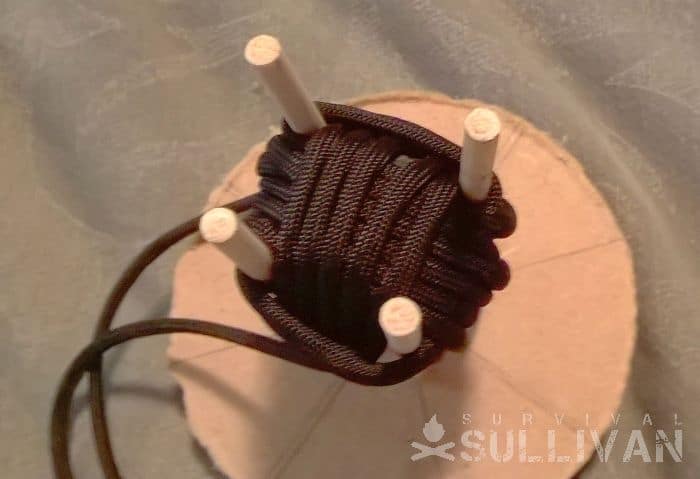
With this cord I managed to get the third wrap on it with the ball still on the jig. I tied it tightly too.
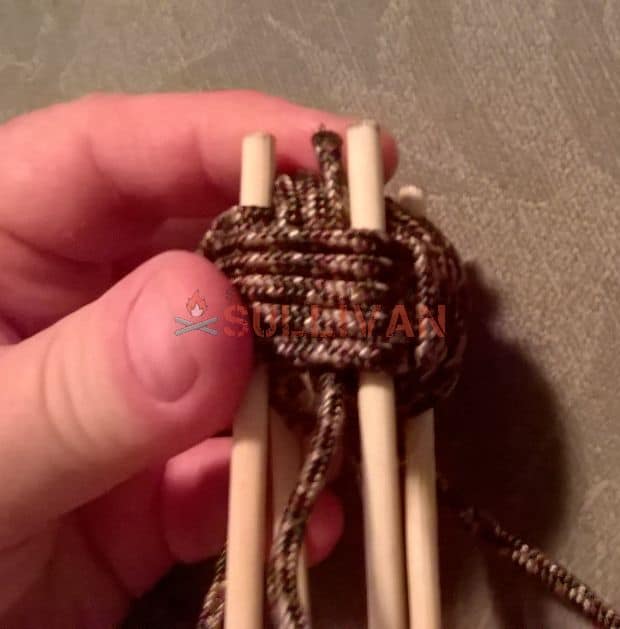
When I had the third wrap on the ball as tightly as I could on the jig, THEN I removed it from the jig.
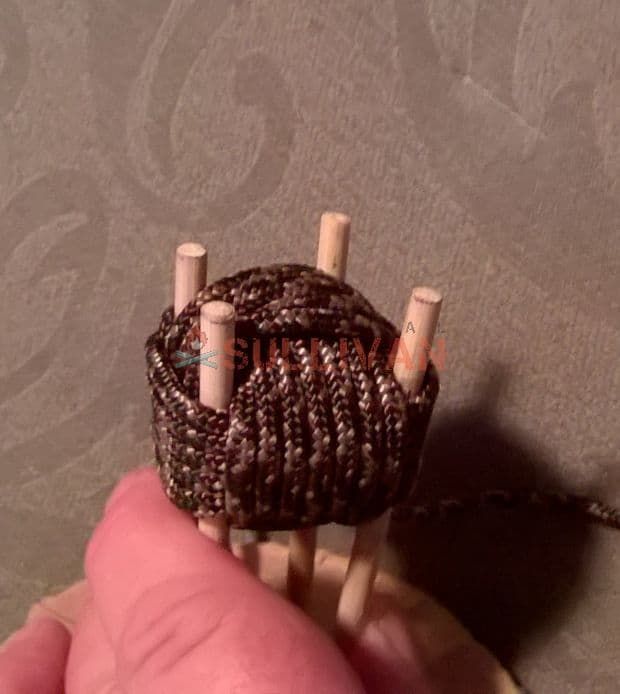
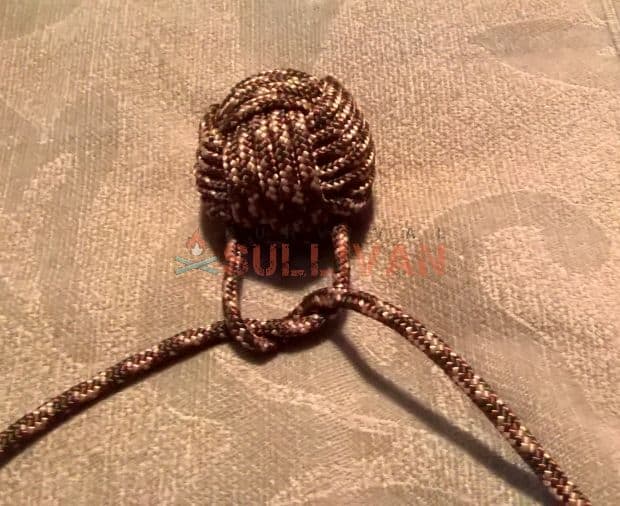
All that was left then was to do the final tightening of the ball of cord.
Finishing Up
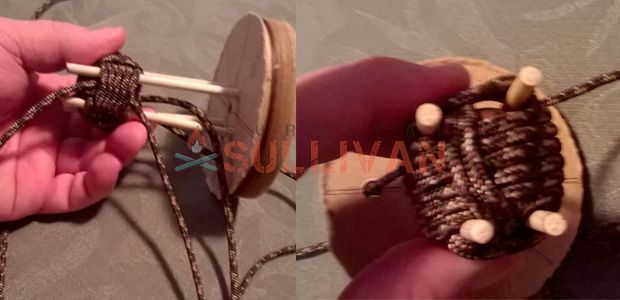
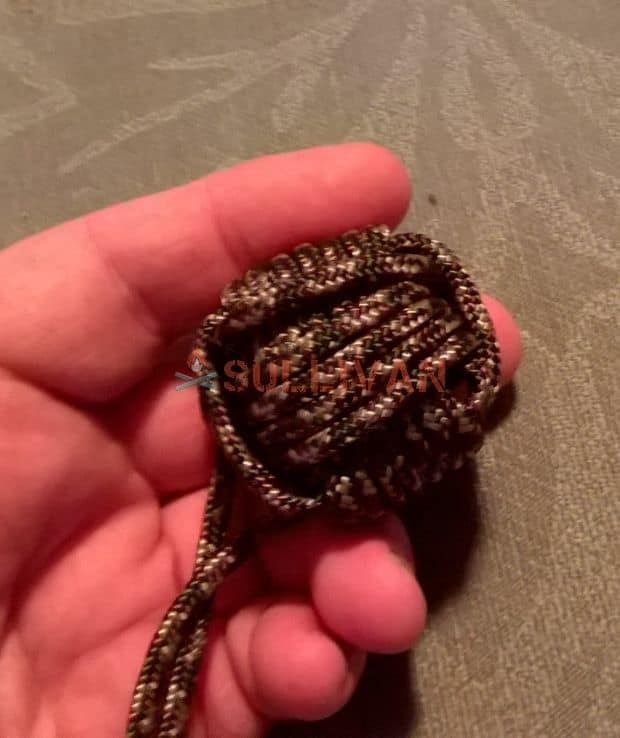
All that was left to do, there’s an understatement. This is actually the most difficult part of the project. To tighten the cord wraps around the ball you have to trace the entire length of the cord to the end, or the beginning really.
The innermost strand is where you have to start. You then gently pull each cord loop one at a time through the monkey fist.

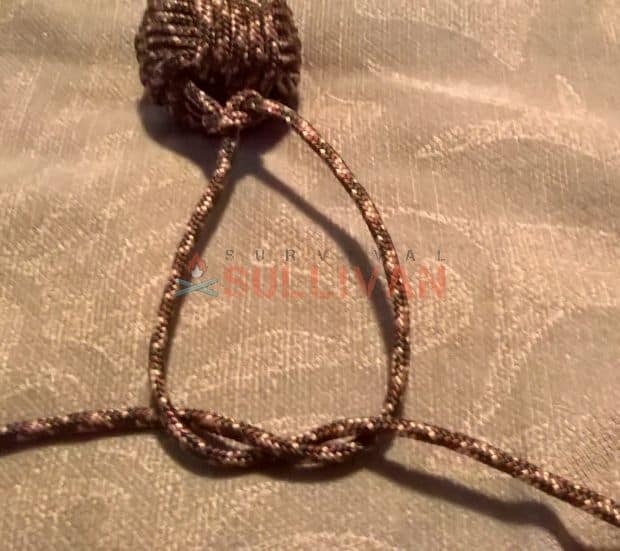
Go around the monkey fist in circles pulling the cords snugly until you get to the free end, which you then pull to take out more slack.
If you try to get it too tight in one pass, you WILL mess up the project. You have to go around two or three times slowly taking the slack out as you go around the monkey fist.
Consider that if you have a five strand wrap, you will pull 30 times to go around the entire monkey fist ONE time.

This is a time consuming and tedious part of the construction. Oddly, every video I saw left out this part. I had to use a mini screwdriver to pick the strand out, in order to pull them tight.
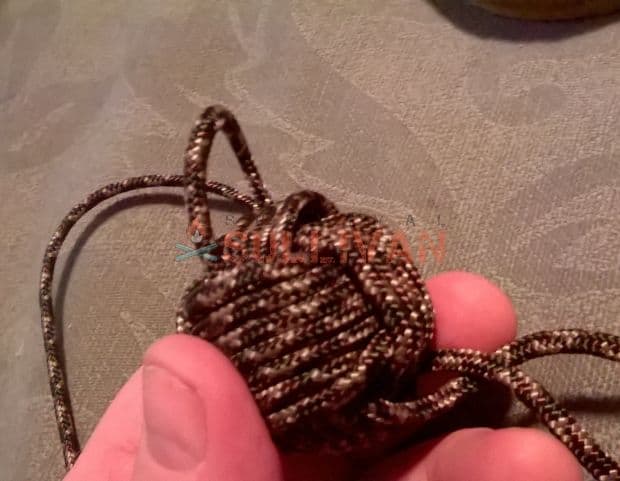
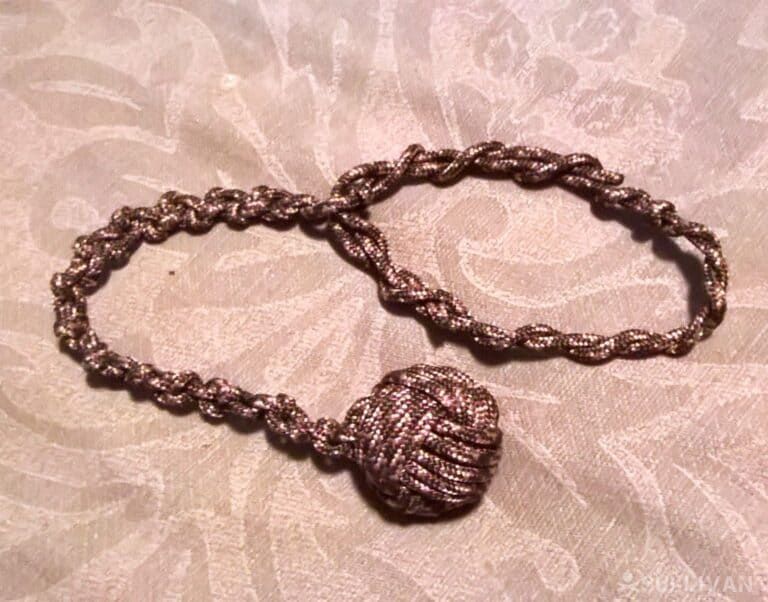
Altogether, I’d say it took about 2 minutes to wrap the ball in the jig, and another 15 minutes to tighten the slack out of it. Once you get the slack out, you will then use the two loose ends to tie a handle. I tied a simple handle because I don’t know any fancy knot work yet for tying cord, but I’m going to learn.
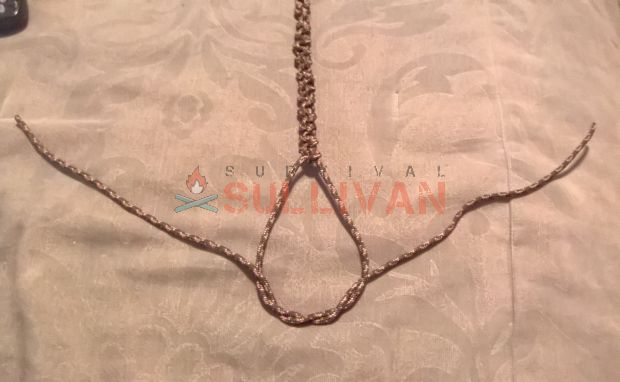
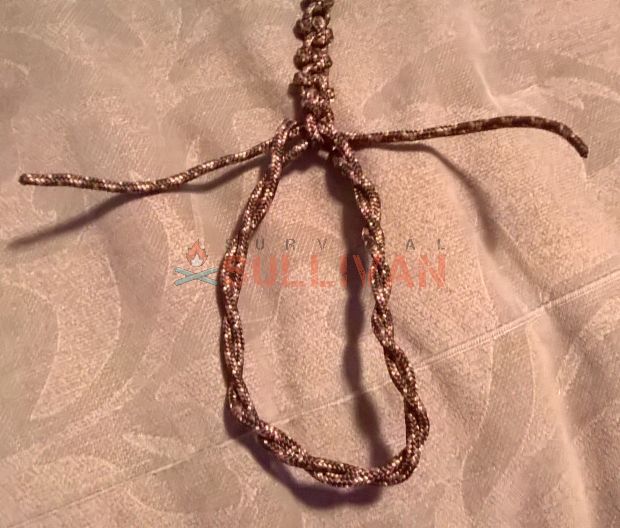
For mine, I just tied a series of simple square knots. You know that first crisscross tie you make when you tie your shoes? I just did that over and over.
Then when I got to the loop for the wrist strap, I just did a twist and then put the ends back through the twist. Not the best knotwork, but it worked well enough for me to execute the destruction pictured below…
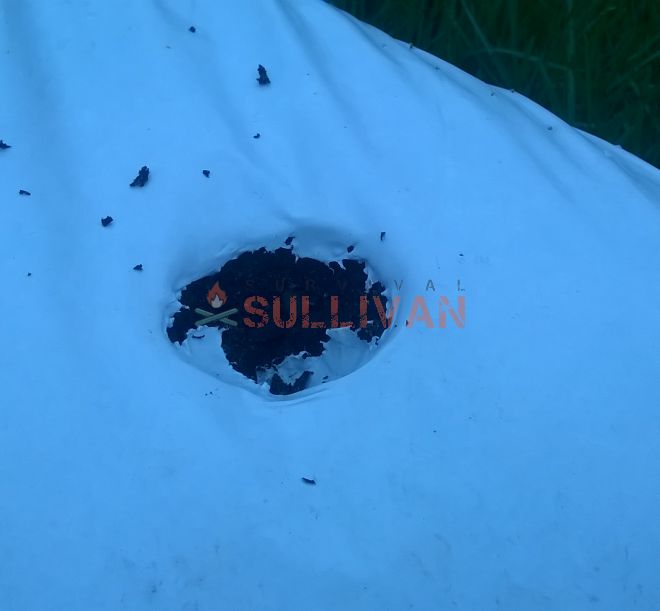
I punched a good hole in a hard bag of dirt:

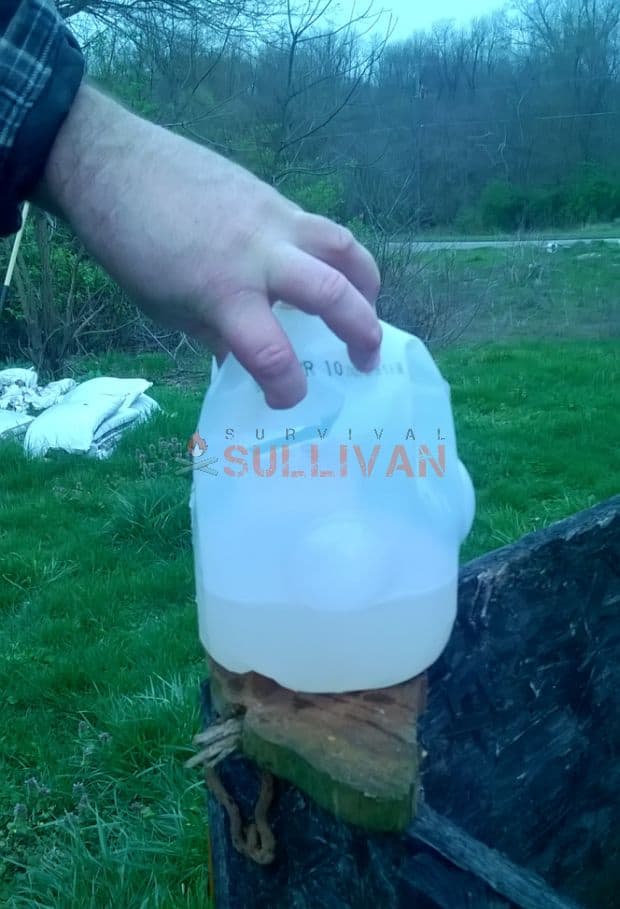
I busted a gallon jug of water.
I also smacked a can of mystery canned goods:
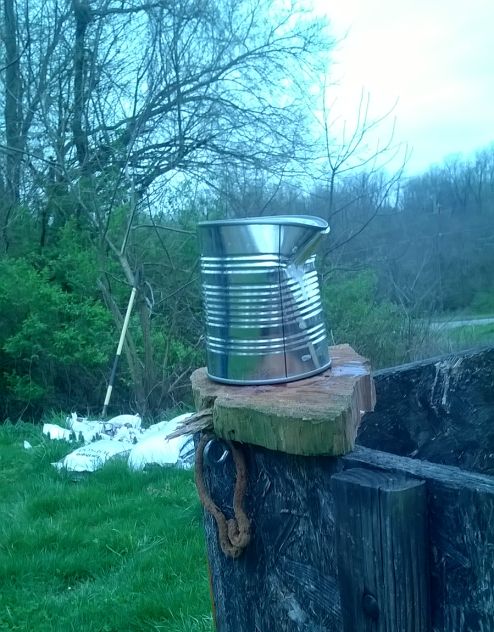
In the video, I used my first “successful” wrap but the steel ball went flying when I hit the can (pictured above):

I actually used the video to see which way it went to be able to get it back.
So at this point, I went in and made a new one. My third try. I came back out and then I busted a piece of wood several times, then I broke a brick with only two whacks.
After the brick the cord showed a little damage, but it was still together. I’d say that hitting bricks aren’t on the normal use list, so if you don’t do that the monkey fist will probably last longer. I can see it splitting a noggin of an attacker pretty good though.
I know I sure wouldn’t want to get hit with one. Judging what it did to that bag of hard dirt, and the fact that it broke a brick, tells me it could probably break an arm or even some ones sternum if you hit them in the chest. I would rate the monkey fist as a lethal weapon.
Last Whack
I hope this article helps you be able to tie your own monkey fist knot. Apparently, it is very difficult to find a good tutorial video online that is complete.
I showed these videos above to illustrate a point. They have been watched over 1 million times. Yet, neither have the complete, or fully correct, information to complete it from beginning to end for something you can hunt with and perform well in survival situations. This seemed to happen a LOT. So this article is to help make a survival level monkey fist, not just a keychain.
This was a new thing for me, and I enjoyed learning how to do something new and share it with you. I will tie several more of these until I get good at it. I’m also going to learn how to tie a couple of good knots in paracord for future projects. I’ve wrapped a couple of knife handles with paracord, but nothing fancy.
I’d like to tie a monkey fist with leather if it will work. If I use wet leather, then when it dries it will draw up even tighter and really seal that ball in there.
This is a good example of the fact that it’s a good idea to keep learning new things, and failing is a big part of reaching success. Think of it as you were successful at eliminating things not to do to reach your goal.
Try to learn something new every day if you can.

Eric Eichenberger is an avid outdoorsman, skilled marksman, and former certified range officer and instructor with nearly 40 years experience handling and repairing firearms.
A skilled craftsman with a strong love for working with his hands, Eric spent 20 years as a carpenter and custom woodworker in high end homes. As a gold and silversmith he has created hundreds of pieces of jewelry over the years using the lost wax casting method.
The grandson of humble country folk, he was raised with the “do it yourself” mentality and so is accustomed to coming up with unique solutions to problems utilizing materials at hand.
Thanks, Eric, for taking time to work out problems in tying a really useful Monkey Fist Knot. No question that the real work is in the tightening of the knot, as demonstrated by your field testing to destruction. Finding 12 feet of rawhide may be a challenge and ensuring that leather laces somehow overlap/stay glued together (thread-wrapped?) to complete a similar project when they are wet may also pose similar problems when it comes to the tightening process.
Your articles does reveal a couple of other concerns about shortfalls in today’s learning via YouTube. Often, videos have not been well thought through as one would develop a learning experience for another. They are often “from the hip”. That gives a great immediacy and casual personal warmth to the demonstration, but often omits critical information that the presenter enjoys which is not passed along to the viewer simply because the “instruction” is provided from the presenter’s viewpoint and not the learner’s.
The other concern you address is failure. Most often, YouTuber have wonderful success in what they present and that is what we have come to see – how to do a thing correctly so we can solve a problem. But, once again they fail to convey their considerable skills that account for so many little reasons they have point-to-point success, while we experience (sometimes) significant trial-and-error mistakes on our way to the success we finally achieve.
Your “new learning experience” bridges those shortcomings – this time – and helps us to see/read what creating a finished product is going to cost, so that we can count its value ahead of time.
Thanks!
Thank you for your input, I am glad you enjoyed the article. I try to present realism in my work, otherwise its not beneficial to others. Eric
I enjoy this thanks