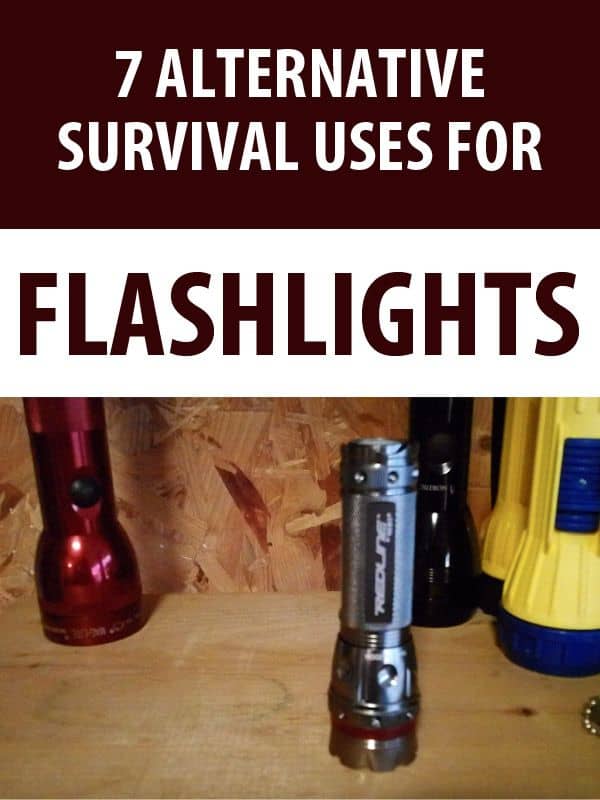
A flashlight is a ubiquitous and vital tool to help overcome one of man’s most glaring weaknesses- our poor night vision.
I’ll bet dimes to dollars there is not a single reader of this article that doesn’t have a flashlight at home or in your vehicle, and any prepper worth their salt will have one in their EDC, have at least a couple in their BOB or cached with their supplies wherever they store them.
When you need to see in the dark a trusty flashlight is often the first thing you should reach for. From all-night hikes to exploring a large structure with no power, flashlights push back the shadows. But is that all they are good for? Are there other uses for flashlights besides general illumination and shadow puppets?
Yes, and it pays to know them! From multi-purpose hacks that help you store gear more efficiently to field and survival uses you might not have thought of, a quality flashlight adds significant capability to any savvy survivor.
In this article I’ll shine some light (sorry) on lesser known or utilized techniques you can use with your flashlight and tips to help you maximize its inclusion in your BOB. Read on to find out what they are.
A Quick Primer on Flashlights
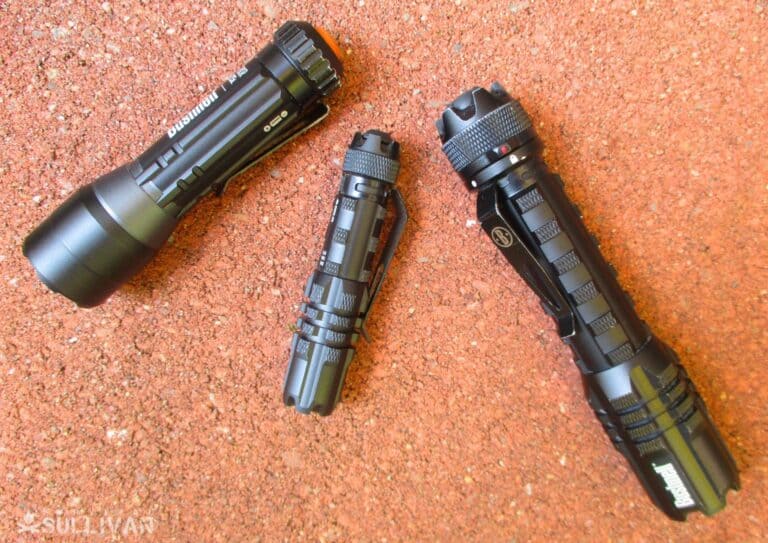
We are facing a flood of riches on the flashlight market today. I won’t even get into all the different manufacturers, models, types of lamp or emitter, switchology, modes and more.
That could be a series of article by itself! I do though want to specify a few things about them as it will pertain to the info in this article and your criteria for selecting a light in general.
First, all the info in this guide is tailored for handheld lights in particular, not weapon-mounted flashlights, headlamps, lanterns or anything else. The reason for this is these tips all revolve around a consistent design characteristic consistent among 95% of handheld flashlights: they all have a tubular body!
Why this is a prerequisite will make sense as you read. Suffice to say the odd shapes of WMLs and tiny size of headlamps make them inappropriate for some of these techniques, some will work with any light-emitting tool.
Second, for a general purpose light, I recommend you get one that has as much output as available while still having a decent battery life. When you need light for many purposes, you generally need plenty of it.
True, some tasks like basic navigation, work or camp lighting don’t need much in the way of light to be achieved, and in those situations a low-output mode or headlamp may well work better and save battery power.
Nevertheless, you’ll never wish your handheld was dimmer. If in doubt, get a secondary, less-potent light for those purposes or select a model with a dimmer mode.
Lastly, buy the best quality you can. Many cheaper lights can still have a frightfully high output, but they really suffer in areas of ruggedness and durability, especially their switching.
A drop or bump may not break them (at first blush) but some of the techniques you will learn are abusive on the light, well in excess of its design parameters. A well-made light can shrug off such treatment but a lesser one may not. Just something to think about.
Now, let’s get to the techniques.
LED or Incandescent for Survival?
When considering any flashlight for a survival context, one of the most common questions is whether you should choose an LED (light emitting diode) or an incandescent light.
Well, I hate to spoil this story but the fact is that LEDs have all but supplanted incandescents in common use. In fact, incandescent flashlights are getting harder to find as the years go on.
When comparing the two, LEDs seem to have all the advantages. They are brighter, use less power, run cooler and are measurably far more durable than any incandescent bulb.
Many LED lights are also multi-mode capable, with programmable or selectable brightness settings, strobe or blinking signal options or even different colored outputs, such as red light, for different tasks or situations. Those are all desirable factors for a survival oriented flashlight.
This is not to say that a regular flashlight is not a viable option. A modern incandescent light might prove to be entirely capable of handling most tasks in a survival situation despite its on paper inferiority to LEDs.
But there is one advantage that incandescent lights have that might be overlooked by some shoppers. Incandescent light is much closer to daylight spectrum normal compared to the bright white, or cool blue, appearance of the average LED.
Will this make a difference for most users in most situations? Probably not, but it is worth pointing out that our eyes are at their perceptive best when utilizing light closest to the daylight spectrum of the sun.
Brightness Considerations
There is something of a race to the top when it comes to lumens, candela and candlepower among flashlight manufacturers.
In fact, it closely makes the horsepower “arms race” seen among automobile manufacturers. Consumers, it seems, just want more and that’s all there is to it.
The pertinent question for our sake is whether or not we want all of that brightness, and if too much brightness has negative effects in a survival situation. The answer is, as with most questions of this type, nuanced. Put another way, “it depends.”
For a hard working light, more brightness is generally a good thing. More light lets you perceive ever greater detail in darker conditions.
More light is definitely worthwhile if you are trying to signal for rescue or to someone else in your group. More brightness is better, usually.
But there are some downsides to using a light that is far too intense for the task at hand. For close range work, it is possible to wash out whatever it is you are working on due to backscatter, or reflected light glaring into your eyes.
If you are trying to maintain a low profile, any light might give away your position but the brighter the light is the more noticeable it is and from a greater distance.
Then there’s also the facet to consider of power consumption. Just like more powerful engines guzzle fuel more quickly, more powerful lights will rapidly drain batteries, all things being equal.
You can only “rob Peter to pay Paul” in this equation: You must use more batteries or ones with denser energy storage to maintain an equivalent run time or give up run time at a certain output. There is no other way around it.
It is for this reason that I highly recommend preppers invest in an LED light with switchable outputs, be it high-low, low-medium-high or something else.
This allows users to select how much light they need for a given task and use only the amount of power necessary.
This generally lets you get the very most out of your batteries and adapt your light to the job at hand for only a modest increase in complexity of operation.
If I can warn you about one thing, however, it is that many cheap flashlights with this capability usually don’t last as long as you’d like them to.
It is often the switching or controller element of the light that gives up the ghost first, though the LED itself may continue to function just fine. If you like the idea of a light with variable output, invest in a good one.
Improve Grip and Store Cordage
Instead of stashing a hank of cordage or line by itself, you can whip or wrap it around the tube of your flashlight’s body, and store your cordage efficiently:
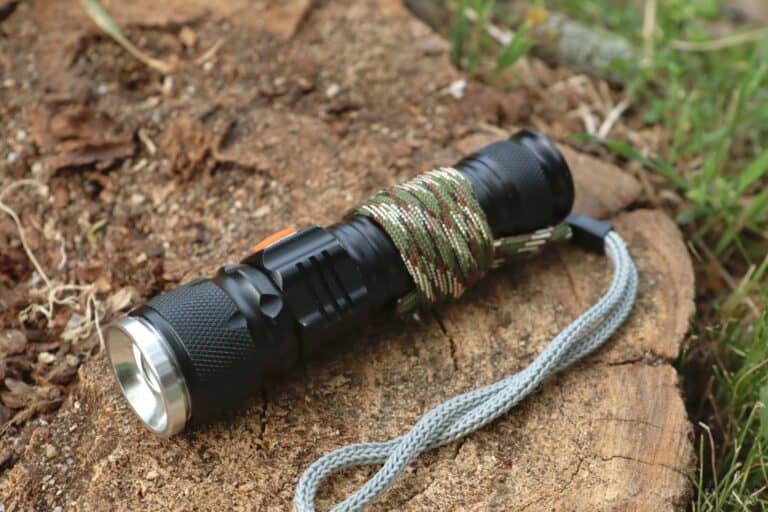
A great variation on this tip is to wrap your duct or electrical tap around your light, as flat folding it can lead to faster degradation of the tape and leaving it on its factory roll is an inefficient use of space.
This technique works best with slim, small diameter cordage depending on the length and size of your light. A larger light can accommodate huskier cord or line.
Several perks from this technique: whipping or wrapping cord or line around your light can improve your grip on it, especially with gloves on or in wet conditions. It is also a fairly simple affair to add a lanyard during this process.
If using tape, here’s a great tip: create a tab of tape at the end of the light body opposite the lens. Bulk it up a little bit, and use this as a mouthpiece to bite down on when you need to go hands-free.
Instead of the traditional, risky and fatiguing between-the-teeth method, you can bite down on a soft tab of tape and still control your light.
Yes, headlamps are better for hands-free lighting, of course, but if you have a handheld light already why not make it a little more capable in the role?
And be honest: for quick jobs you aren’t going to rummage through your pack and whip out your headlamp, you are going to stick that light between your teeth, tie your knot, open your MRE or whatever, and drive on. We all do!
Lastly, this technique scores you the benefits of all important redundancy. If you have your light, you’ll have at least a little cord and tape with you also. If you have a multi-tool in one pocket and a light done up like this in the other, that is not a bad first-line toolkit, in this author’s humble opinion!
For Signaling
Analog will have its revenge in a massive and society crushing disaster. A bright light can be seen for miles at night, and the human eye is predisposed to noticing it. This is one of the reasons you want a light with high output. You can strobe or blink it on and off to get attention or signal potential rescuers.
If you are working with a group or your family, you can establish simple codes using the light to communicate instantly across great distances with no noise.
If you care to take the time to learn Morse code, you can transmit intricate info or have conversations, albeit not as quickly or conveniently as texting or email! Morse code is still taught and retained as a tertiary mode of communication around the world.
Lights with different colors can be used to discreetly signal danger or something else to returning party members.
The possibilities are only limited by your imagination. At any rate, take the time to learn or make up a few simple queries and responses with your group, and the most essential Morse code phrases like SOS.
Low Visibility Reading and Pathfinding
Let’s say you have a flashlight that does not have a low observable color or even a lower setting.
Maybe you don’t want to completely obliterate your night vision or signal your location to everybody in the county just because you need to rummage in your pack at night or pick your way down a winding in perilous trail.
No matter what kind of light you have, it is possible to use it in a low visibility, low observable way. There are a couple of ways to accomplish this.
The first is to drape a thicker piece of cloth, like a sturdy bandana, over the lens to greatly dampen the reach and intensity of the beam. This might provide a gentle glow suitable for careful navigation or reading at very close distance.
An alternate method is to wrap a cone or tube of material around the head of the flashlight immediately behind the lens. you’re kind of going for a shape that looks like those traffic control wands you sometimes see police officers using or ground crews directing aircraft at any airport.
This could be cardboard, plastic or anything else you have handy.secure it to the head of the flashlight with tape or heavy elastic and you’re good to go.
Depending on the opacity and type of material, your flashlight will produce a glow that can be seen at closer ranges or a greatly constricted beam that is much easier to control.
Either way, when you want to keep a low profile this is an easy field expedient method worth trying.
Glass Breaker
Breaking glass safely and quickly can be important in emergencies. To get in or out of a building or extricate yourself or someone else from a vehicle.
An alloy or steel flashlight will usually have plenty of strength to withstand striking glass, and a longer model will give your hand some much needed standoff to keep your flesh away from shards or chunks of sharp glass.
But to turn your flashlight into a really effective glass breaker, you can choose a model with built-in crenellations around the bezel, or purpose designed glass breaking studs on the tail. Both will focus the force of a blow onto a very small surface area of the pane, breaking it easily.
If you don’t have or don’t want to spring for a fancy, spiky flashlight, here’s a wasteland approved trick that works like a charm: find a small, roughly pyramidal chunk of hard ceramic, maybe a piece from a spark plug sheath, broken body armor, tile or a substantial piece of crockery, and tape it securely to the tail of your flashlight with the “base” flat and the “point” of the pyramid poking through a slit in the tape.
Wind and drive the tip of the ceramic into a window or pane of glass and it will shatter with ease!
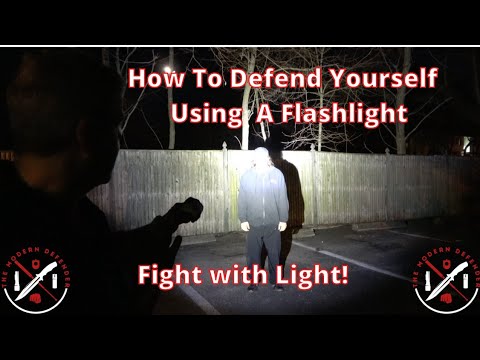
Self-Defense
A powerful flashlight is a great tool to have in a personal confrontation or fight, and gives you a couple of different options when it is in your hand doing its job.
While it should not be your first choice in blunt implements, a hardened piece of metal or plastic is always harmful when applied vigorously to an assailant.
The ergonomic shape of a flashlight makes it a better improvised melee tool than some others. Depending on the size of your light and your own skill, strikes to hard and soft targets on the body as well as pressure points and joint lock techniques become viable.
The aforementioned crenellations and spikes sometimes found on lens and tail of modern tactical flashlights can drastically increase the power of a blow, and afford surfaces to rake and scratch exposed skin on an assailant in a clinch.
The other, and in my mind, more valuable function of a flashlight in a defensive situation is its ability to degrade an opponent’s vision.
A powerful stream of white light shined into the eyes creates a “wall” of light that makes perceiving anything beyond it very challenging. This effect is very pronounced in conditions of low light or to dark-adapted eyes.
Aside from perceiving the light itself, judging distance, movement and positioning can become troubling for your adversary, and used in conjunction with other skills, can handily give you a major advantage in a fight, or even diffuse it before it starts.
And, no, even the most powerful handheld light will not truly blind an adversary, though that word is commonly used to describe the effect this technique has on them.
The effect of shining a light into their eyes will range from distraction level to severe degradation of sight. This is one time where high output makes a tremendous difference in outcome.
Destructive Techniques
The following techniques are labeled ‘destructive’ because they will or are very likely to break your light, and therefore should be performed only in extremis or you are very literally out of options.
Hammer
Most handheld lights have a flat bottom or beveled flat somewhere on the body. If your light is made of metal, you can pound something or drive a fastener by striking with it. This technique is not recommended for use with plastic flashlights for obvious reasons!
The weight and density of a flashlight will give you more oomph than expected from a small device, and can make short work of most tasks. As I mentioned above, this is really though, and you should only do this if you have no other tool or object suitable to the task.
Fire Starter
If your light is incandescent, not LED, you can use this trick to make a pretty good electric fire starter, though it requires a steady hand to pull off without completely wrecking the light.
First remove the lens of the light to expose the bulb, or take it out of the light completely, depending on your design. Next carefully, carefully break the glass of the bulb without destroying the filament inside. This is a small trick by itself and a great reason to carry an extra light or bulb assembly.
Once that is done, reinsert the now glassless bulb assembly into the light and switch it on. If you did well, the filament will light up and burn per usual. That filament is ferociously hot, that’s why it glows, and will easily ignite fine, fuzzy tinder held close to it.
Work quickly, as without its protective bulb and nitrogen or argon gas charge the filament will rapidly burn away in oxygen. Use a steady hand and the right tinder and you should light tinder right up.
Again, this is pretty far from even a D-List fire starting technique, but it is an option if others fail and you need to get a fire going pronto.
You can replace the lens assembly over the busted bulb to give it some protection in case your filament has enough life left for another attempt, but the lifespan of most filaments treated so will be measured in minutes, if not seconds.
Starting a Fire: Take Two
We learned of one way to start a fire using an incandescent flashlight, but perhaps a more elegant solution that works with all flashlights is to take the battery or power pack from the light and use it to start a fire directly.
As you might expect, this will rapidly discharge, even damage, the batteries and can prove to be a little dangerous, so I only recommend one does this when the flashlight is destroyed or on its last legs. A desperation move, if you will.
To use this technique, all you need to do is grab the batteries and then look for a metallic object that you can connect between the positive and negative terminal on a battery.
One of my favorite items for the purpose is a length of steel wool, but you might use aluminum foil, a metallic gum wrapper or anything else that will conduct electricity.
Make sure you get set, first, building an effective tinder bundle and having your kindling ready to light.
Short the two terminals as described above and the middle section of whatever you’re using for the purpose should begin to glow red hot. This will easily light prepared tinder, particularly if it has a little accelerant on it.
If you have a flashlight with a nominally non-removable, rechargeable battery or batteries, this technique will still work.
You just need to take some time to open up the casing of the flashlight and extract it without puncturing the battery. most batteries of this nature have their positive and negative terminals fairly close together, so a little experimentation should quickly show you which is which.
Now, you shouldn’t need me to tell you that this operation can be a bit risky, particularly for your fingers, if you aren’t cautious since most modern batteries, lithium batteries in particular, are highly energetic. As always, use your own good sense, be safe and wear eye protection if you have it.
Craft a Fishing Hook
Another great way to repurpose a busted flashlight or one that is not going to hang on much longer is by crafting fishing hooks out of the components.
Some of the best parts for this purpose are a spring steel pocket clip, a reshaped piece of a plastic body or tail cap or even a carefully sized and ground sliver of the lens or a circuit board.
You don’t have to stick with the traditional curved fishing hook, either. A gorge or choker hook can be made just as easily and probably with less work.
If you have a thin knife, needle or awl, you might even be able to drill a small hole to thread onto your fishing line. if you can’t do that, it is possible to whittle a couple of notches that will allow you to securely lash and tie the fishing line to it. Secure it with a little bit of duct tape for extra insurance prior to casting your line out.
just because your flashlight is out of action does not mean it cannot serve you well one last time.
Craft Spear Points or Arrow Heads
This is another great technique to give a busted flashlight a worthy send-off, or a way to create a critically needed tool when you are desperate.
The components of most flashlights, even cheap ones, can be reshaped with a little bit of elbow grease into frighteningly sharp, pointed heads suitable for crowning spears or arrows.
Some careful observation will show you have many options when using your flashlight in this way, particularly if you have a flashlight with a body made from aluminum.
Glass or lexan lenses are easy to work with, and can be honed to razor sharpness with any nearby abrasive surface. these are perfect for making arrowheads capable of bringing down small and medium game.
An aluminum body can be mashed, folded and then scraped until it takes on a frightening edge, one that will stand up to repeated, hard use. Ideal for bagging larger game, or protecting yourself from four or two legged critters.
Is also possible to reshape the pocket clip of the flashlight, slivers of the casing and other components into multiple, thin points that can be used as a trident or gig for bagging the most delicate game on land or slippery prey like fish or amphibians.
Practice These Uses Today
Your flashlight is your first friend when darkness falls, and an invaluable ally. But most lights can bring more to the table than just light.
These techniques, used judiciously, will get you out of a tight spot, make better use of existing resources and give you the means to prevail over your situation.
Don’t let your flashlight be a one-and-done tool! Practice the above techniques now to learn the limits of your tool, and yourself, before the S hits the proverbial F.

Charles Yor is an advocate of low-profile preparation, readiness as a virtue and avoiding trouble before it starts. He has enjoyed a long career in personal security implementation throughout the lower 48 of the United States.
The batteries can also be used to start a fire, using a thin aluminum gum wrapper placed on the positive and negative terminals.
In my opinion the author and I have widely different concepts about both flashlights and survival situations. I tend to take a long view – how can I assure myself of light for a period of months and even years? The continuing disaster in Puerto Rico is an example of what troubles me. WHAT IF the power is off for a very extended period. A ‘set the shrubbery on fire’ flashlight will work out if and only if I have unlimited stocks of batteries. I was greatly influenced by this book by Roger Ekirch:
https://www.amazon.com/At-Days-Close-Night-Times/dp/0393329011
Going back a couple of centuries when almost all lighting systems were both dim and expensive was a real eye-opener for me. If the alternative is no light at all, I don’t give a hoot about brightness.
“A bright light can be seen for miles at night, and the human eye is predisposed to noticing it.”
This is a problem in quite a few situations. I may have some very good reasons for not wanting to be seen at all. In such cases I want a flashlight which will barely illuminate my path. There could be tactical situations where I’d like an extreme light source as a “dazzler”, but I’ve not yet found a model I deem reliable enough to purchase.
Using my lights as clubs or glass-breakers simply doesn’t appeal to me. A 6D Maglite is just too large to tote around on the small chance it’ll be needed for such work.
“Lastly, buy the best quality you can.”
I agree with this suggestion on one condition: that the purchaser also buy only top-of-the-line batteries. Recovering Maglites with leaking batteries has been mostly unsuccessful for me. Chinese Alkaline batteries tend to be crap. When they leak, they destroy everything surrounding them. My everyday flashlights have adapters to hold AA Lithium batteries. The others are stored empty, and the battery stocks are getting a lot more attention than they once did. That’s because they behave like potatoes – one bad one can and will spoil the whole bag. Or in the case of batteries, the whole box.
Hood the light. Wrap a cylinder of paper or other material around the lense housing so that you have a tunnelled light, confining the illumination to that circle. That or use a red or green (green makes sense where lightning bugs are common) permanent marker to color the lens, leaving only a small unmarked piece for a clear white light.
“This is a problem in quite a few situations. I may have some very good reasons for not wanting to be seen at all. In such cases I want a flashlight which will barely illuminate my path. There could be tactical situations where I’d like an extreme light source as a “dazzler”, but I’ve not yet found a model I deem reliable enough to purchase.”
Look for a discontinued 9V PALight, a 9V powered flashlight with the LED locater beam. Excellent where a low light signature is needed. I use it in my deer hunting kit for illuminating the path to the deer blind. Three settings – locator, low and high. Not a high powered dazzler by any means.
My 3-D Maglight is a formidable weapon. If push came to shove, I wouldn’t hesitate to crush someone’s skull at the risk of breaking my light.
I have found several high end flashlight as Goodwill stores (Surefire, Saber light and Pelican). also so some mid-range lights too. Just be sure to check that there has been no battery leakage. A lot of them I have purchased for less that $2.00 each. They were dirty and greasy but cleaned up just fine.
I was shocked the first time I found a working Maglite at a junk store. I suppose the younger generation just doesn’t appreciate what Grandpa had, and the junk store employees don’t have a clue about pricing. My last 4D cost me $3. If I were a boss at Maglite, I’d look into reviving the C-cell lights. The batteries would be in sealed and removable units capable of holding C-cells, AAs, or AAAs. (to protect the aluminum body from leaking batteries) The LED bulb (modular/replaceable) units would have the most modern “regulation” systems so as to suck the batteries dry. Some of my old Eveready flashlights with these electronics will still produce ‘penlight’ levels of illumination even when the two AA cells will barely register on a battery tester. The antique incandescent 112 and 222 bulbs may laughable by modern standards, they ain’t bad at all when the alternative is total darkness.
In Chapter 11 of his 1979 book “Nuclear War Survival Skills” Cresson Kearny described how some people simply can’t handle total darkness.
http://www.oism.org/nwss/ — The updated book can be gotten, but IMO you’d be a fool not to buy the thing in a hard copy.
In his particular situation a big box of tiny birthday candles would have been a blessing. A several hundred hour night light would have worked equally well. A recent test with one of those aforementioned Eveready AA lights had 60 hours of non-stop light from two old alkaline cells. Even better:
https://www.amazon.com/Pak-Lite-ULTRA-Flashlight-Lithium-Battery/dp/B008I6KKIU/ref=sr_1_1?ie=UTF8&qid=1534376472&sr=8-1&keywords=9v+led+pak+lite+ultra
They claim 200 hours of light from a single 9v battery. Next is the “Zachary” modification to the Pak Lite:
https://www.amazon.com/Mosuch-Battery-Holder-Standard-Connector/dp/B000LFRTIK/ref=sr_1_7?ie=UTF8&qid=1534376334&sr=8-7&keywords=8+aa+battery+holder
(you’ll find these at eBay for a fraction of that price) Fill 6 of the slots with AA batteries, and the remaining two with dummies. A certain size of red metric nut and bolt sold at the farm stores is a perfect AA replacement. Many, many hundreds of hours of light from this rig.
The best thing to do with a Maglite that has had batteries that leaked is to take it to work and smash it in a machine and than just send it back for replacement.