Ask gardeners about their least favorite gardening activity and they will probably respond with, “Weeding!”
As gardeners we would much rather be involved in planting, transplanting, pruning, and harvesting the abundance the garden has produced.
From first-hand experience, I can tell you that the fight with weeds doesn’t have to be eternal if you bring in working solutions like layers of carboard, newspapers, and thick layers of mulch.
As these break down, they improve the soil so earthworms can get to work and you can avoid digging in the deep rich garden soil.
As gardeners we would much rather be involved in planting, transplanting, pruning, and harvesting the abundance the garden has produced. From first-hand experience, I can tell you that the fight with weeds doesn’t have to be eternal.
I’ve worked on garden beds that haven’t been weeded for more than a few minutes in years. In fact, there’s a whole art and science of advanced weed control that can see you virtually eliminating weeding from your gardening to-do list.
This affords you the time to focus on other prepping or leisure tasks. In smaller home scale garden spaces, the perfect place to start is with sheet mulching, using newspaper or cardboard as a weed barrier.
Sheet mulching, also called lasagna gardening, is a method for fertilising and building soil, starting new garden beds (or adding fertility and organic matter to existing beds), and smothering weeds all at the same time. It involves layering compost or other nitrogen rich organic matter with carbon rich materials like newspaper.
It can be as simple as a layer of compost and newspaper on the ground with a couple of inches of wood chips tossed on top, or as sophisticated as a multi-layered masterpiece of alternating super-rich compost, newspaper, vegetable scraps, chicken manure, sawdust, rotten hay, wood ashes, branches, yard bags full of leaves, packing paper, chopped corn cobs… you get the picture; there are a lot of different options for materials.
One of the great things about this method is that it also looks quite attractive, since you can top it all off with your preferred mulch. If starting a new bed, you don’t even have to till, remove sod or deal with the existing weeds.
Close planting, and that think layer of mulch will drastically reduce weeding. Because the soil will be healthier and richer in organic matter and nutrients, your plants will also be healthier, and much less susceptible to pests and disease.
Once you establish your beds, all you have to do from year to year is add more mulch, and plant (unless you choose to plant the garden in question with perennial plants, of course).
The soil underneath your multiple layers of organic material will stay cool and moist, cutting down on watering as well. This time-saving aspect of this technique makes it a perfect way to start new garden beds at your retreat (the place you have set up in case the SHTF), especially if you aren’t there often.
The Basics of Composting
Regular composting in a contained bin or pile can be very effective at conveniently breaking down food scraps and any other organic materials you may acquire, but it’s actually not the most efficient way to get nutrients into the soil.
Landscape design teacher, and co-founder of the massive permaculture (ecology based design) movement, Bill Mollison, put it like this in a design course pamphlet:
“Now let me tell you about composting as against mulch,” he wrote. “Every time you compost, you decrease the nutrients, sometimes to one 20th of the original. Usually, though, you get about a 12th of the nutrients out of compost that you get out of mulch. So what have you done by composting? You have worked hard to decrease the nutrients badly. Most of them go into the air. Composting consumes them.”
Bill Mollison
In typical composting, he wrote:
“… you are taking a lot of material, putting it into a small place, and letting the whole of the decomposition activity happen under hot conditions which can be appropriate for some things. When you mulch, you are spreading those materials and letting the process occur much more slowly on the surface of the soil. Any leach loss goes into the soil, and the general level of activity spreads across the whole of it. By the time the mulch has reduced to compost, most of the action has finished. If you want to get maximum value out of what you have, sheet mulch it. If you want to increase your nutrient base, do it efficiently.”
Bill Mollison
Basically, sheet mulching is composting directly where you need the nutrients most: right in your garden.
Disclosure: This post has links to 3rd party websites, so I may get a commission if you buy through those links. Survival Sullivan is a participant in the Amazon Services LLC Associates Program. As an Amazon Associate, I earn from qualifying purchases. See my full disclosure for more.
Toby Hemenway, another garden designer, and author of Gaia’s Garden, the top selling permaculture book worldwide, also extols the virtues of merging your compost pile and garden into one, to the extent that he used to throw his vegetable scraps directly onto his garden.
I can attest to this method myself, and it’s one of the reasons I like having my garden directly in front of my house: I can just toss scraps out the door right into the garden. Later, I’ll put some bits of mulch over it if it begins to build up a little.
Mark Shepard, is a permaculturer who runs the 106 acre sustainable New Forest Farm based on the STUN principle (Sheer, total, utter, neglect). He grows 14 varieties of food on his farm in Viola, Wisconsin without the kind of effort we have come to believe farmers need to put into their land.
He claims that:
if there was a 2% increase in the organic matter of agricultural land worldwide it would draw down sufficient carbon, thus reducing atmospheric CO2 levels to those between 1850 and 1900, usually referred to as the “pre-industrial” period.
Mark Shepard

In typical compost piles, experts recommend aiming for a carbon to nitrogen ratio of about 30:1, but with sheet mulching, it’s fine to aim for anywhere between 30:1 and 100:1.
Carbon rich materials are generally brown and dry – like newspaper, cardboard, dry autumn leaves, sawdust, wood chips, and shredded paper.
The nitrogen component would come from moist green materials like fresh green grass clippings, trimmed leaves and branches from your orchard, and other plant, fruit and vegetable scraps, animal manure and fresh weeds that have been recently pulled out (providing they have not seeded yet).
If you have too much nitrogen rich stuff, the material will get hot and smelly as it rots, but if there is more carbon rich material, then the process will be a lot slower.
For a garden as opposed to a compost heap, you probably want it to be slower so the micro-organisms and earthworms can get to work.
Earthworms work within a defined temperature range – too hot or too cold and they suffer. When it’s too hot they die (above 95 degrees Fahrenheit), and when its too cold they burrow deeper into the soil and won’t benefit your upper layers with their activity.
Hemenway recommends 4 to 8 cubic yards of mulch for between 100-200 square feet, or about 6 to 10 bales of hay or straw. Just make sure that if you’re using hay, it’s well rotted, or you put it at the bottom of the pile so the seeds will rot. Straw can sometimes contain seeds too, so look closely at the straw before buying.
Now that you know some of the basics of sheet mulching and composting, let’s get down to the step by step how of it:
Step 1: Get together the materials you’ll be using. Don’t be shy about asking your neighbors for extra leaves, piles of scrap newspapers (consider asking them to save some up for you) or old cotton or wool carpets they might have laying around.
A great place to find large boxes for cardboard is at appliance or bicycle stores. Just make sure not to use any shiny newspaper pages or boxes, because the colorful shine contains heavy metals and other toxins in the ink.
Step 2: The day or evening prior to sheet mulching, water the soil at the site if the ground is dry.
You can use a sprinkler if you don’t have the time to wait around.
This is to encourage the micro-organisms that will be at the bottom of the pile, and to make sure there is moisture underneath your layered pile. It can be hard to penetrate the final pile with water, but once moist, it stays moist for a long time.
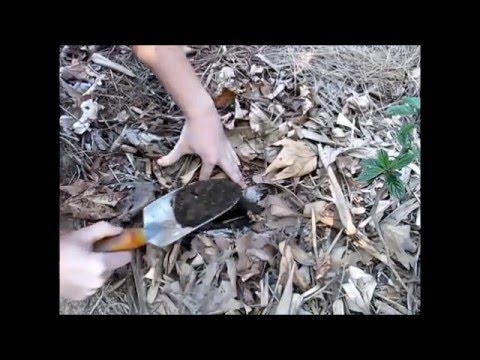
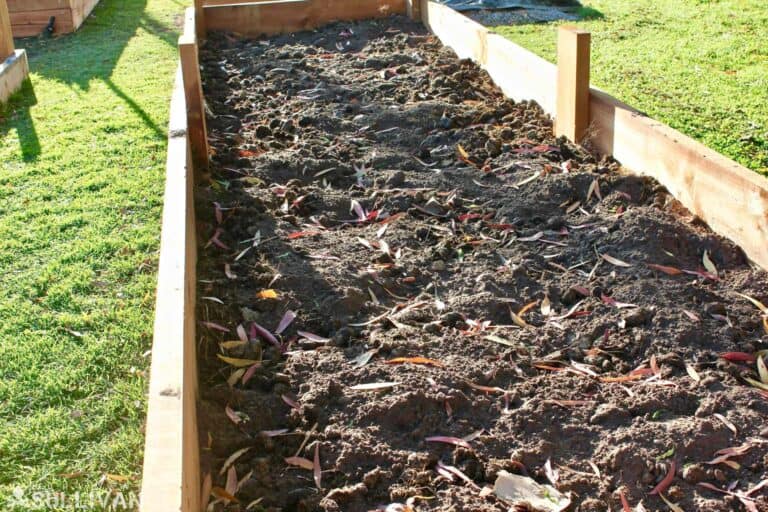
Step 3: On the day of mulching, cut down weeds and other vegetation. Leave the debris directly on the soil. It will be part of your sheet mulch.
Step 4: Add amendments. If you really want to enrich your soil, you can add things like seaweed powder, rock dust, green sand, or volcanic minerals. Consider doing a soil test to determine what amendments are necessary. For soil that is overly acidic, you can add lime. For soil that is too alkaline, sulfur or gypsum will balance it.
Step 5: Fork the soil. Especially if you have a compacted soil, you might consider using a spading fork to break up and loosen the soil at this point, which will also work in your amendments. This action will help bring water and oxygen into the soil as well. Just be careful not to turn the soil too much, as disrupting the soil layers is bad for the soil ecosystem.
Step 6: Add the first layer. The first thing to add is a nitrogen rich material such as manure, waste produce from restaurants, animal bedding from the barn, or compost. The more concentrated the organic material, the less you need.
For example, non-composted manure could be used if you aren’t going to plant in the beds immediately (consider starting a bed the previous year and letting it break down into rich soil), but you’ll only need a bit of it. Composted manure that has straw bedding in it can be used in larger quantity. Next, moisten this layer before adding the next.
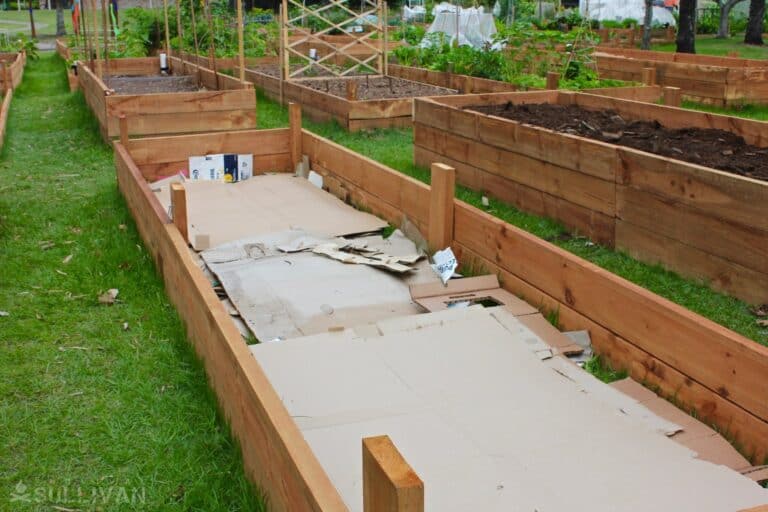
Step 7: Add the smothering carbon layer. Next, lay down your carbon rich smothering material such as a layer of newspaper mulch or cardboard. Water the material frequently to keep the wind from blowing it away.
Although newspaper can be easy to find in large quantities, cardboard is especially useful since it can cover the ground much more quickly, particularly if you find large boxes. Make sure to overlap newspaper or cardboard by at least 6 inches, or even up to a foot.
If using newspaper, make it about 1/2 of an inch thick, or 1/8 of an inch minimum. Avoid walking on the material as it can tear it, especially if wet.
Step 8: Add the next nitrogen layer. As you might have guessed, now is the time to add more nitrogen, such as another thin layer of manure.
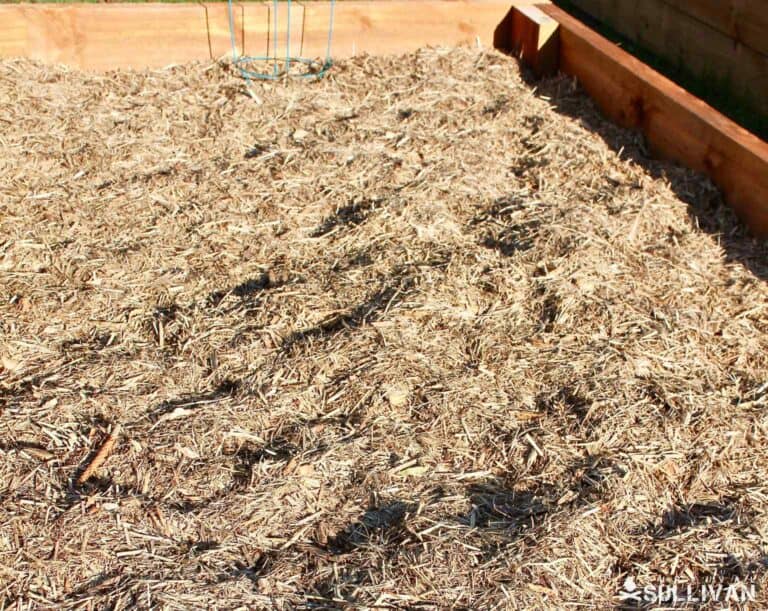
Step 9: Add the bulk carbon. At this point, it’s time to add a nice thick layer of carbon such as seed-free straw, although some seeds in this layer aren’t a big deal, since this is ideally still the bottom of the pile and the seeds will mostly rot rather than germinate.
You may wish to sprinkle a bit of seaweed or other nitrogen rich amendment into the carbon if you’re doing a nice thick layer, which should be at least 8 to 12 inches thick. As you build the layer, water it (or use a sprinkler) every few inches to dampen it (but don’t make it soggy).
Step 10: Next comes the compost layer: Assuming this is your second last layer, on top of the previous bulk carbon layer, add 1 to 2 inches of compost, manure, or several inches of food scraps if the bed will have time to break down and compost for a few months prior to planting.
Never plant into non-composted manure or food scraps, however. If you plan to plant within a few days to a few weeks, 1 or 2 inches of sheet composting will suffice as a seeding or planting medium.
Step 11: Repeat until the final layers: You can continue adding more layers if you wish, until the final layers, which should be a finished compost at planting time, followed by 3-6 inches of organic mulch matter that is completely weed (and root) free. I prefer wood chips for this layer if possible, because they last longer as a mulch material.
Step 12: Planting Time: When you want to plant seeds or plants, all you have to do is push the mulch aside in lines or circles and plant your seeds or plants. The closer you plant your plants together, the less opportunity weeds will have to come up.
And there you have it. Follow these steps and you’ll have a low maintenance, highly moisture retentive and nutrient rich soil. It may be a little more work in the beginning, but in the long term, it will save you a ton of time weeding so you can focus on growing more food.
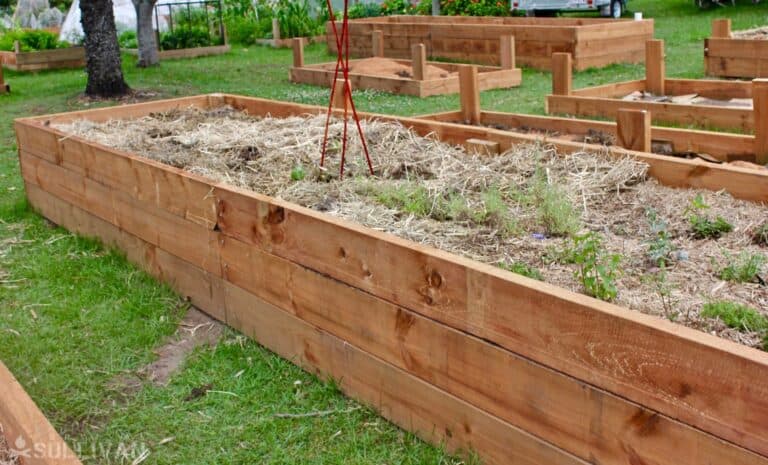
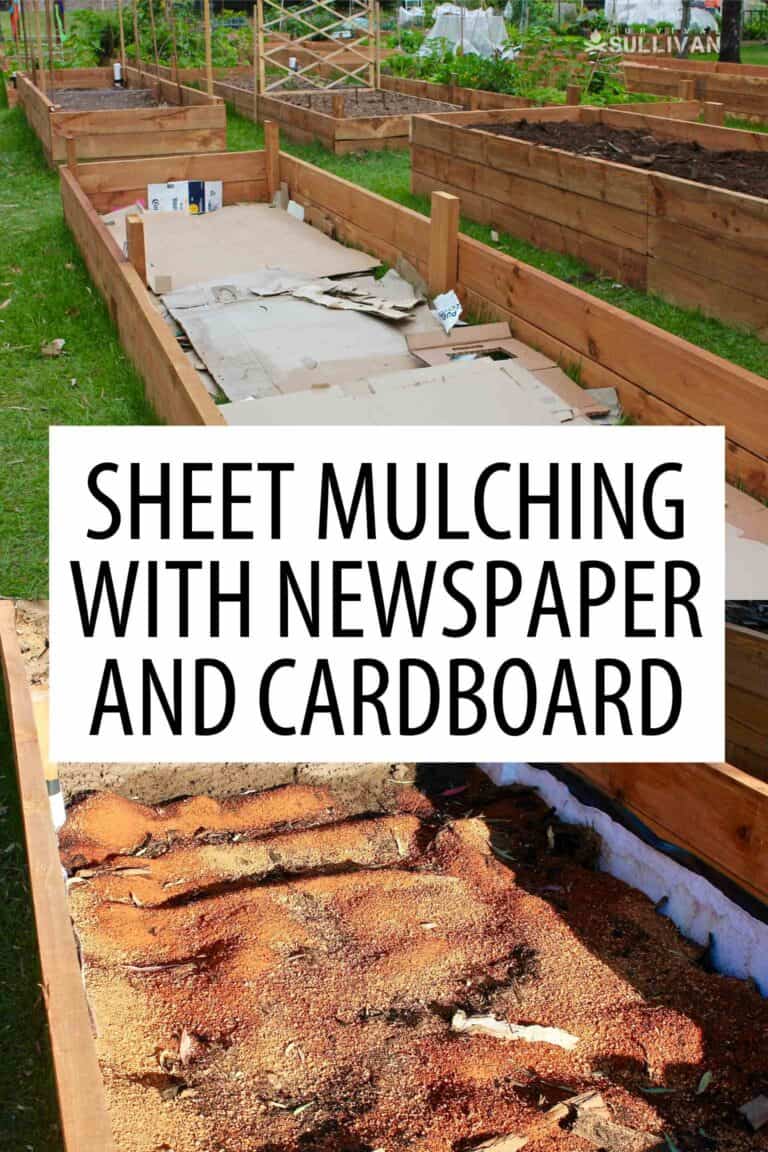
The following series of photos indicate how raised beds are being made and filled for a community garden project in Australia, but the technique can be used on ground level beds too. Each person filling their bed may have slightly different views, and there will be variations on what they choose to include
For example, some won’t include horse manure as they feel it has too many weed seeds in it, and will only use cattle manure.
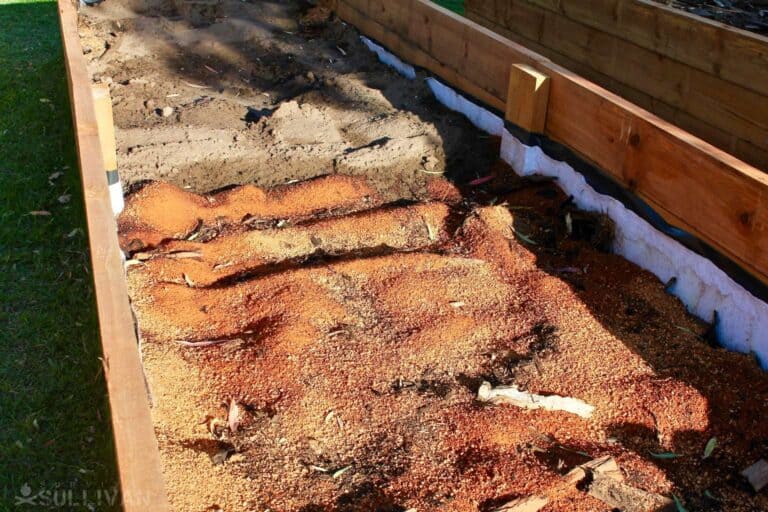
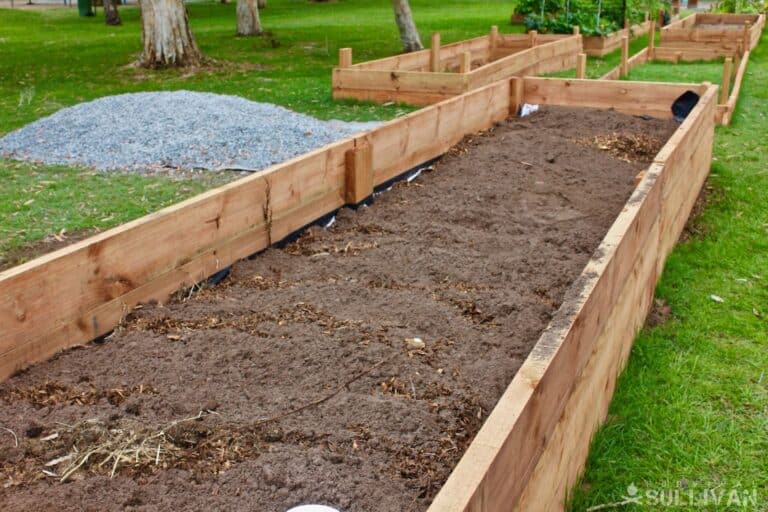
The particular project featured in the photos is situated within a city park so there is plenty of cardboard available as well as shredded paper and sawdust. In country areas you may tend to rely more on mulches from other organic material.
Any weed seeds that do manage to germinate and sprout up between your plants will be very easy to pull out in such a loose, moist garden soil.
If you have any of your own time-saving techniques for creating new garden flower beds or vegetable beds please feel free to share any insights or experiences of your own in the comments below.
updated 11/15/2021 by Jeanie Beales

Traveler, photographer, writer. I’m eternally curious, in love with the natural world. How people can survive in harmony with nature has fueled my food safety and survival gardening practices.
At the age of 12, I found a newspaper advertisement for a 155-acre farm at a really good price and showed my parents one Sunday morning. They bought it and I happily started planting vegetables, peanuts, maize and keeping bees with the help of the local labor.
Once I married wherever we moved it was all about planting food, keeping chickens and ducks, permaculture and creating micro-climates. I learned how to build wooden cabins and outdoor furniture from pallets, and baked and cooked home-grown produce, developing recipes as I went along.