With the rise of social media, it is impossible to log-in to any page related to guns and not see a tricked-out pistol, shotgun or rifle complete with an incredibly intricate brand name (or custom) camo pattern.
The rise of Cerakote and hydro-dip graphics coatings have made it possible to have your gun dolled up in any conceivable pattern of camo, from the subtle to the absurd.
This begs the questions: why should I camouflage my own guns, and do I need to shell out hundreds of dollars to do it? Is reducing visibility within the capabilities of the average gun owner? Read on to find out.
Why Camo?
Camouflage, simply stated, is concealment by some means that alters or obscures appearance. In our example, we are talking about camouflaging our guns. For long guns particularly, being unable to conceal them under our clothing means that, if not finished for concealment, they are highly visible, whether in the daytime or night.
This is an issue when you are attempting to hide, or someone is searching for any indicator of human presence. A black or blued gun also shows up obviously on night vision systems, and can even stand out in the night, being too dark or reflective compared to their surroundings.
Camo is situational to the environment, and what you are attempting to hide. That’s a topic that has taken up volumes all by itself. Thankfully, a few simple maxims apply to virtually any environment you may find yourself in, and I can promise you’ll be ready to grab some paint and be ready to go by when you finish this article.
What it won’t be is a detailed dissertation on camouflage theory, but rather a crash course in what works for getting an effective pattern on your gun quickly, easily and inexpensively using common spraypaint.
Some people balk at the idea of mere spraypaint going over the lustrous, immaculate finish of their particular gun, and would not settle for anything less than a beautiful, official camo pattern applied by stencil and the diligent attention of a custom gun coater.
To this I say, it is your dollar, so have it however you like. But the truth is that the added expense of having a specialized pattern applied professionally may very well not equate to an increase in concealment.
No doubt professional applications will be very attractive looking, but they are expensive. Cerakote is a greatly durable and corrosion resistant finish, but most guns come from the factory with a rugged finish already applied.
If all we need is camouflage, is an application of Cerakote the best use of our funds? Hydro-dip coatings are even worse, as in addition to being costly, they cannot be touched up when damaged. Your guns are for working, that means shooting, and training, with all the dings, dents, scrapes and scratches that entails. You are training, aren’t you?
This is not to say you have to spraypaint or finish all of your guns. My pistol, being most times concealed under my clothing, keeps its flat factory black finish, save for a healthy amount of wear and scuffs.
If you are not concerned with concealment, then leave your guns as they are. But if you are worried about being detected, and then perhaps being shot at when that occurs, you should be paying attention.
Basics and Supply List
Remember this: First, all we are trying to make the gun look less like a gun. Second, we want the gun, and ergo ourselves, to blend in with the surrounding environment as much as possible. To accomplish this, we will need a only a few supplies and a little elbow grease. Have a look at our shopping list, here:
- Spraypaint, flat finish, in shades of tan, khaki, brown, green and flat black (Ideally Aervoe brand, but Rustoleum or Krylon work perfectly.)
- Note: For the color range above, if you have a few shades of each color you can craft just about any scheme you want, but if you are in a hurry or on a budget, a light tan and a green or brown will be adequate.
- Optional: clearcoat spray, matte finish
- Painters Tape
- Mask- piece of camo net or mesh material large enough to cover gun, or use heavy paper with random shapes cut in it.
- Drop Cloth for work area
- Stand or hanger to suspend gun while painting
- Foam earplug
Don’t go crazy if you cannot find a specific shade of paint that perfectly matches your existing clothing, equipment, or your favorite manufacturer’s shade of flat dark earth, or wolf grey, or whatever.
The Tactical Fashion Police are everywhere, and merciless, but you have greater priorities than winning Instagram glory. We have bigger fish to fry! Onward!
Preparation and Priorities
First, try to use quality paint. Don’t settle for $1-a-can discount brands, as they are likely to fail in application and wear way too quickly to be worth the pitiful savings.
Aervoe brand was recommended to me a long time ago and it is what I use, owing to superior durability and a wide range of camo specific colors. If you don’t want to order it, or track any down, old standbys like Rustoleum or Krylon are just fine.
Second, while you can easily touch up a painted gun, to maximize your efforts, pay attention to prepping your surfaces. Any painters or surface coating pros out there reading along are nodding their heads; they know! Before you do anything else, ENSURE THE GUN IS UNLOADED.
If your gun is very grubby or oily, now is a good time to clean it. Once that is done, wipe out the inside well, reassemble, and then thoroughly degrease the exterior surfaces using any common, residue-free gun degreaser.
Do this wherever your paint is going to be applied. Make sure no oil is seeping from inside the action, and take care not to get oil from rags or fingerprints back on it when you are done.
Now take your earplug, roll it up tightly and stuff it in the muzzle to seal it. If the bore is very large or very small, you can use a wad of cloth or paper towel.
Mask well the lenses and buttons of flashlights, optics and lasers. If they have lens covers, and they close and seal tightly they should be fine. Close all dust covers, ejection port doors and such.
Generally we are trying not to get paint inside the action. You may want to mask off action bars on pump shotguns or rifles, but if you follow my instructions and use a light touch, it will not make much difference.
Detach any accessories that you do not want painted. Rubber materials will accept Aervoe paint pretty well, but your mileage may vary, as all rubber is a little different.
Now we are ready to paint.
Painting, Step by Step
Head to your work area. If you can do this in direct sun or in a warm, dry place your paint will dry faster and be ready to use sooner. Place your drop cloth and account for overspray. Shake the daylights out of all your paints. Shake it good? No, no you didn’t. Shake it again, put some vigor into it!
Follow your steps below for a dependable all-purpose pattern, but understand your color scheme will differ depending on your exact environment. Remember; always spray light coats from about 12 inches away! And don’t forget to periodically shake your cans as you go.
- Hang or place gun on fixture.
- Using a tan color, spray the entire gun with light, broad strokes. Do this for two light coats, waiting a minute or two between them. This is your basecoat for most every pattern. Don’t worry about complete coverage.
- Place your mask over the gun.
- Using a light brown, spray in several different places on the gun. Don’t coat the whole gun.
- Rearrange mask on gun.
- Using dark green color, spray several other locations on the gun, per #4 above.
- Using lighter green color, lightly spray entire gun. This will help to blend colors together.
- Allow paint to dry for recoat time according to mfg. instructions.
- Optional: Remove mask, using clearcoat mist entire gun to improve durability. Beware, as a heavy coat even with matte clear will make the gun shiny.
This process minus setup and dry time should take you about 30-45 minutes, no more. If it does you are over-thinking it. Depending on ambient temperature and humidity, your gun could be ready to shoot or handle in as little as a couple of hours.
Other Considerations
If your finish becomes worn or scratched, you can simply shoot a little more paint over the area and, presto! Good as new. Likewise, a shift in locale or change in season can mandate a new pattern for maximum efficacy. Simply spray a new pattern right over the old one.
Bear in mind, for nearly every climate, tan or light brown will be your base color. An obvious exception is areas where snow is plentiful and stays on the ground. Green will only be your primary color in places where vegetation is typically tropical, dense, plentiful and stays green most of the year.
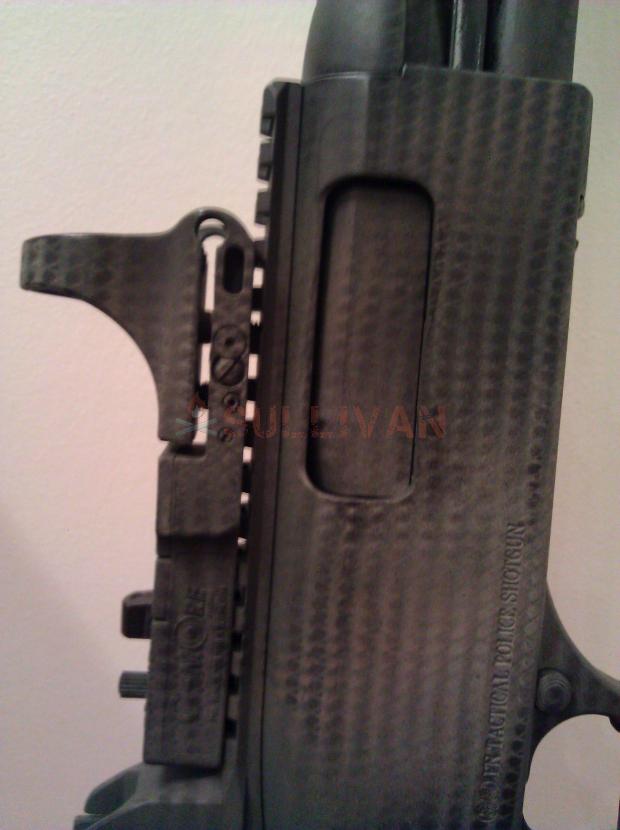
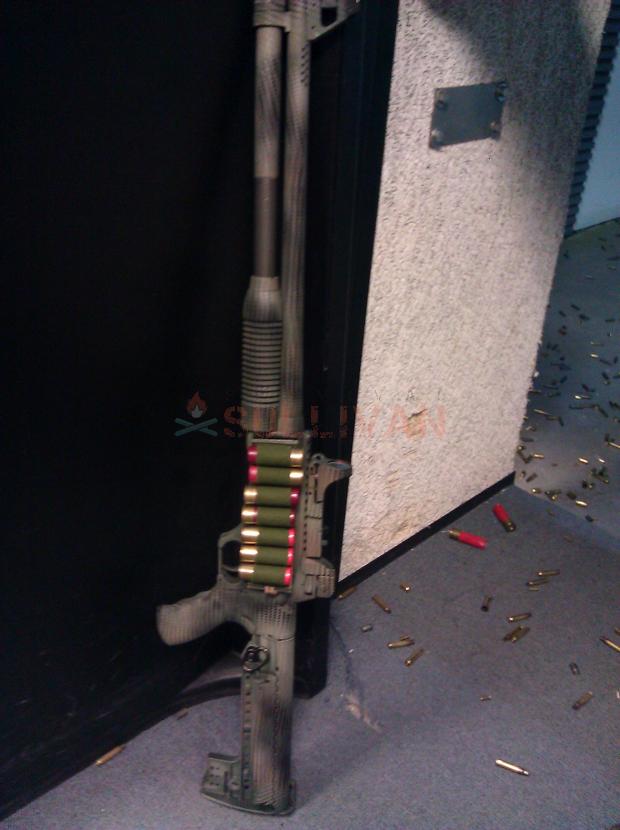
Take a look at my shotgun in the following picture; when I was in Florida, I added a little more green to the pattern on my shotgun. Honestly, it might have been a little too much, but it turned out acceptable. Anything is better than black!
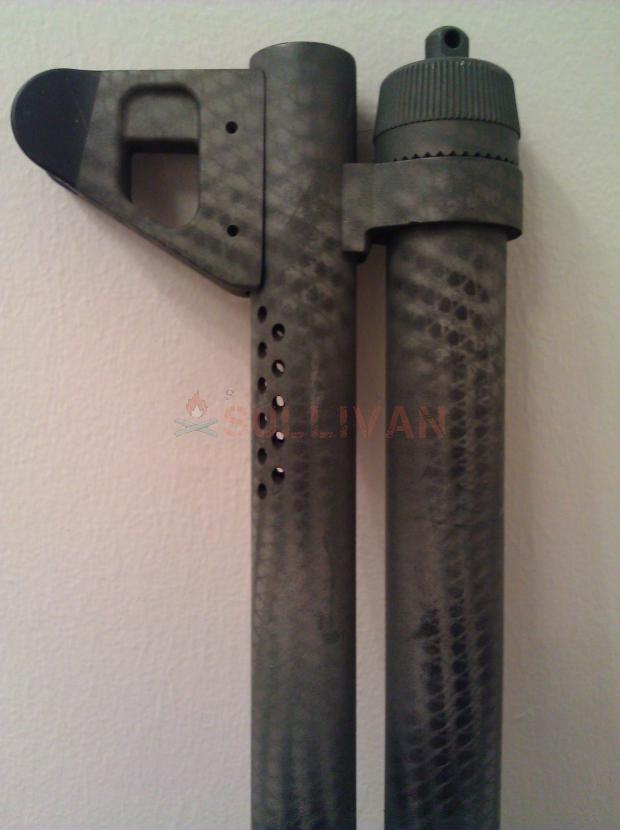
Take a look at the close-ups and you can see the subtle depth and texturing where the colors meet, resulting from the masking. You’ll notice I painted the optic and all.
I see too many people unwilling to paint expensive red dot sights and scopes. Not sure why. You did after all buy this thing for a purpose, and to have a big, black wart on top of an otherwise camouflaged gun could be an easy telltale.
Check your gun against various backgrounds outside. How does it blend in? If it doesn’t meet your needs, what do you need to do differently? Are the colors off? Too much or too little of a given color?
Is it shiny? Or is the contrast jarring? Occasionally, a little black here and there will add the illusion of depth, but be very careful: black rarely occurs in nature, save as deep shadow. When in doubt, trend more toward blends of brown and tans.
There is a whole lotta’ brown in nature, most places. In the event that you have botched your paint job, you can simply start over with new paint. No need to strip it until you have many layers of paint on it.
Should you need or want to strip the old paint, look for a paint stripper that will work on spray paint and is safe on metal, taking care that it will not attack aluminum, which is a component in most guns today.
I have used Citristrip brand gel many times, and it works well, is widely available at big-box home improvement stores and, mercifully, not very noxious to handle.
Conclusion
Following these simple instructions, you can camouflage your guns, and many other pieces of equipment. Your priority is to make the gun harder to see. To accomplish this, you can pay a professional to apply a coating or wrap, or you can do it yourself with spraypaint.
Unless I have a gun with a badly mauled finish, I would rather spend my money on training and ammunition. With just a little practice on what you have learned, you too will be turning out effective and fast camouflage for less than $50.
Have a favorite pattern? Do you think specific patterns are worth the expense of application? Let us know in the comments!
Chad Nabors specializes in firearms, with a strong focus on concealed carry and pistols. His background is in commercial sales and training, and armor development and testing. He has trained many citizens on the pistol from basic to advanced skills. He is a vociferous proponent of the 2nd Amendment, and believes that defense of self and family is a moral obligation. He can be reached at grimgunner (AT) gmail.com.
Great article!
Especially using brown/tan as a base colour!
Here in my part of Texas, much of the forest goes brown due to lack of water much of the year.
The methods mentioned will also work on clothing for inexpensive camo.
Hi Terry. Thanks for reading.
I’d be interested to see how the paint holds up on various fabrics. Have you tried using it on various kinds of clothing?
looks like you used the same mask as I did. I used black base, tan, dark green, love the results.
I did some basic camo paint on one of my long guns too. Krylon ‘camo’ colors in the browns. I did not do the net masking thing. It seemed like too fine of detail, given the mission of breaking up the outline of the gun when viewed at a distance. By the time you can see such details, you’re close enough to see the gun anyhow.
One “rule” I followed was to have color change “lines” across the signature silhouette features (like the barrel, mag, stock, etc. Mostly using wide masking tape cut into curving amoeba-like shapes.
I did try to mix smaller ‘dots’ of higher contrast with larger areas to visually suggest near vs. far. Still, not a lot of surface area to a gun. It’s mostly long edges that need broken up visually.
Hey, Mic. Yeah, the detailing added by fine netting may be too small to make much difference in most circumstances, using a large (coarse) mask or even a handful of grasses or leaves can make an adequate mask to bust up the lines of the gun with shifts and changes in color as you did.
Camouflage theory is a discipline unto itself, and I remain impressed, and a little worried, at the depth of intricate detail the camo cognoscenti try to achieve for their guns and equipment. No doubt they can turn out very impressive results if one cares to take the time.
Thanks for reading.
I have a sd9ve s&w pistol with a silver slide. would like to paint it black. what do you suggest? Thanks Bob
Hey, Bob. You can use Aervoe in any of the black colors to achieve good results. Please understand that holsters of any kind will wear paint from a handgun slide fairly quickly, but if you are simply wanting to reduce shine and contrast that will be the ticket. Don’t forget to mask off your sights.
Thanks for reading.
I used pinkng scissors to cut leaf patterns in an old t shirt for masking. Trial patterns on mags first to get the touch I wanted for the weapon.
Hi, Al. I’m sure that will work just fine. People make templates and masks out of all kinds of things. Cloth will have an advantage in conforming around the contours of the weapon.
Thanks for reading!
I use camo bow tape on my guns. Just cut and wrap and you can cut to fit where needed. This way I can update or repair as needed.
I watched a show on cable TV a few years ago where a person was painting their 1100 shotgun for turkey hunting and the dummy painted the magazine tube. Next shot was him showing off his fancy paint job and the gun would not cycle. So a little bit of thinking and checking and knowing what you are doing before you just slap on the paint.
Sir
When I camo my firearms and gear, I trend toward larger splotches, similar to the camo patterns we use on Marine trucks, and the original NATO woodland camo BDU’s. I have found that small areas of camo tend to blend into a solid mass color at any distance, and the visual break-up I was looking for fails. The larger splotches tend to remain individual colors.
For those that want to test the necessity to camo their gear a few photos should prove the point. I had several photos of troops moving through underbrush at Camp Lejeune, at varying distances. The troops in camo with camo load bearing gear were nearly invisible at 50-75 yds, yet the ‘black rifles’ gave away their positions, nearly every time.
For those purists like me who balk at the idea of defacing your pristine treasure > Get a 2-inch roll of painters ‘BLUE” tape. Roll out 10 feet or so- spray PAINT THE TAPE with a 2-3 color combination…can use a small bottle of White-Out to highlight, and Scripto markers to dress it up (if needed) after the paint dries. just put the painters tape on the barrel & stock while in the field-way quicker, and the tape cab be removed & replaced several times…don’t litter
I use bow tape on my long guns. I can peel it off anytime I want and can change it too. Much cheaper and does not damage the finish. It works on wood, plastic and metal. and can be cut so size to fit. Also adds a bit of non-slip surface on the guns.