Many people have been trying the clay pot heater idea and reactions are definitely mixed. Some claim it works well while others are disappointed in the results, and there are constant innovations taking place to the basic construction as people search for the optimum design.
However, if we consider the Inuit people who managed to survive in extreme conditions in snow houses with a whale-oil lamp then there’s something to be said for the radiant heater.
The aim is survival – not to turn a freezing night into a California summer indoors. Besides their use in survival situations, there are a number of elderly people on a limited income who use these heaters despite their limited ability to heat up entire rooms.
Table of Contents
The Basic Idea
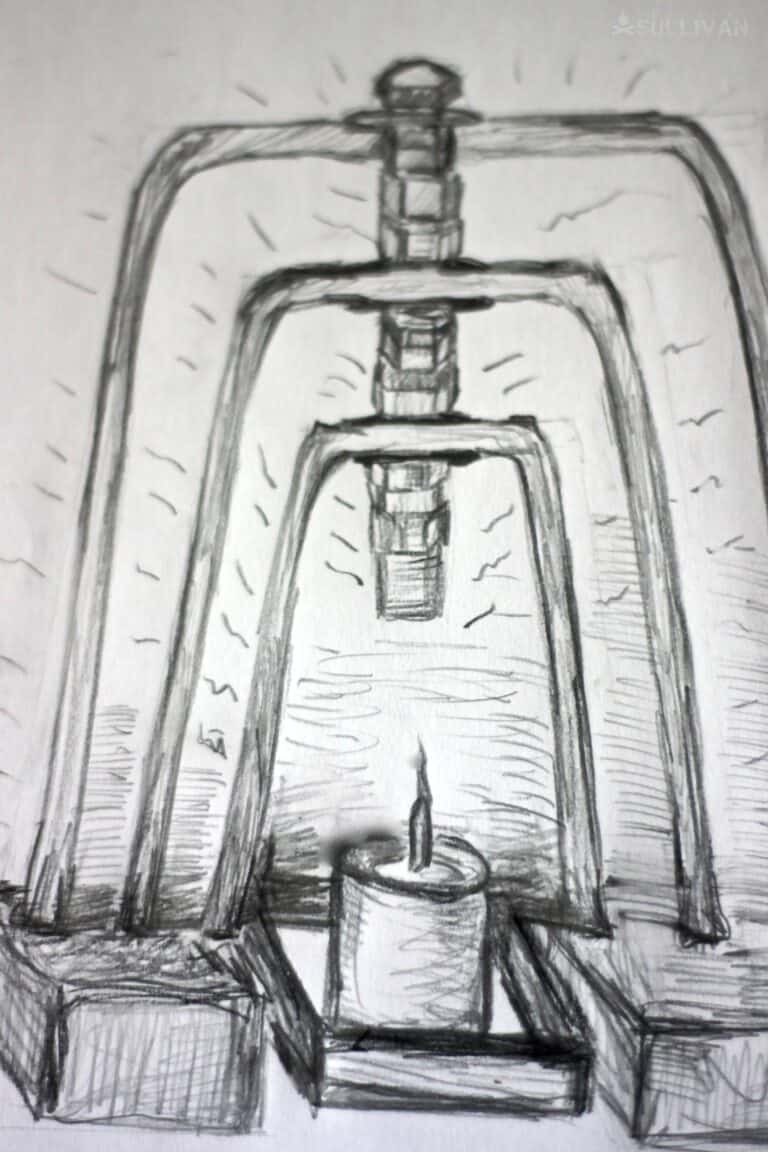
The idea is a simple one – terracotta heats up slowly, and retains the heat quite well so if you take three or two terracotta, pots and put them one inside the other with space for air to move in between then the terracotta absorbs the heat from one single candle.
The air between the walls of the pots heats up, radiating outwards through the pots to help heat the room. The nuts and bolts that hold the clay pots together are integral to the heating process as the steel that is heating up is radiating the heat to the terracotta as well.
Does A Clay Pot Heater Really Heat a Room?
The guys who are into the science aspect have worked out the candle power versus the size of the room and came up with all sorts of figures – which we won’t go into here – if that is what really interests you then you can click here to find out more.
Most people want to know if the clay pot heater is going to keep them relatively warm. No, it is not going to raise the temperature of the room a lot – and it all depends on the size of the room.
If you’re using it in a room with a high ceiling or with lots of windows, well there isn’t going to be much difference. If you are using it in a small size bedroom or study that is around 9 feet by 9 feet then it will raise the temperature sufficiently to take the edge off a freezing winter.
Where to Place a Clay Pot Heater
If one wants to derive any benefit it needs to be near you. It’s our fingers and toes that feel the cold. In extreme conditions, your body concentrates the blood flow around the vital organs to keep you alive.
However, be very cautious about placing the heater near your feet. Though keeping the extremities warm is important, you risk kicking the setup with your feet by accident.
What Pots Should I Use?
You can nest two or three terracotta pots inside each other, but two is really the sweet spot. Only use three if they’re too thin, otherwise the 3rd one might trap too much heat, so the whole thing won’t get as hot.
Avoid glazed pots; use unglazed ones, with no paint or finishes.
Each pot should be able to nest within the other with around an inch or so of air space in-between. For a larger heater use one 12 inch diameter pot, and one 10 inch. For a smaller setup, use 2 pots with the following diameters: 10 inch and an 8 inch.
We all want to save money, and our first reaction is to see what clay pots are hanging around the garden doing nothing useful.
However don’t haul pots out of the garden that are wet – the pots must be thoroughly dry to avoid the risk of heating unevenly then cracking and exploding sending pot shards flying all over the place.
Also, check the pots carefully for cracks. Under the heat, they may just break and then there goes all your effort.
Make sure that there’s no residue on the pots – moss, algae growth, chemicals used when spraying the plants that were in the pots, varnishes, or paint – one doesn’t want to create fumes that may affect breathing indoors.
While you may want to work to get rid of the paint on a pot, it’s better to start off with a plain one. This, of course, means less work for you, and reduced costs.
DIY Clay Pot heater Steps
There are a number of different ways and different sizes but these are the basics – once you have made your first one and tested it you may be totally happy or you may want to look at where other people have taken the idea.
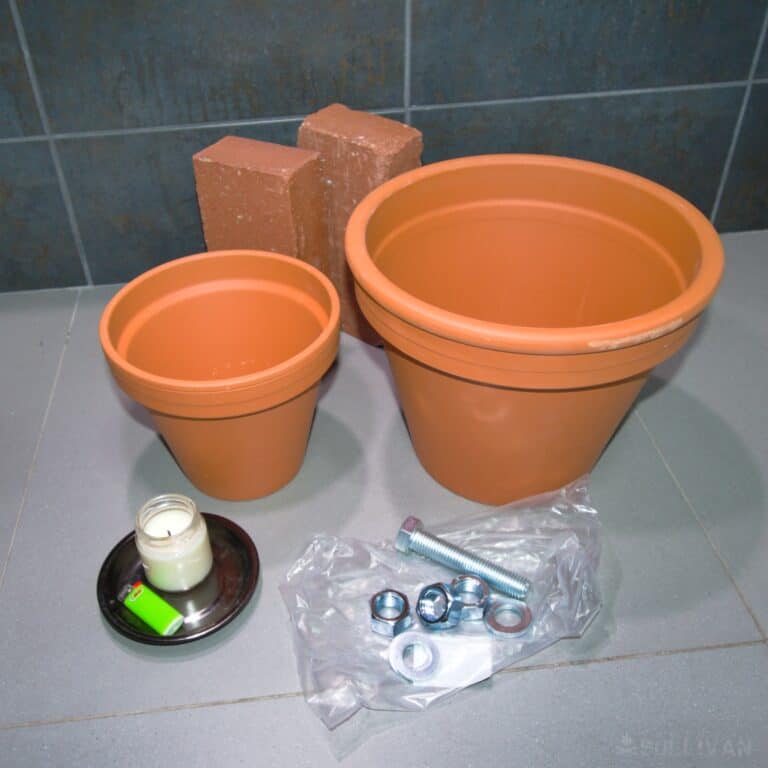
List of Tools and Materials
- one 10 inch terracotta pot (with drainage hole on the bottom)
- one 8 inch terracotta pot (with drainage hole on the bottom)
- one piece of threaded bar or a bolt around 6 inches long. Check the holes on the pots first before you buy the threaded bar or bolt as it should be a bit smaller than the pot holes (to allow for the metal to expand when it gets hot).
- 3 nuts
- 3 washers
- Small roasting tin or other shallow metal containers in which to stand the candle(s)
- Two bricks (or flowerpots) on which to balance the heater.
- 1 or 2 candles
- Fire-retardant mat (or something similar) to place the whole setup over
The Steps
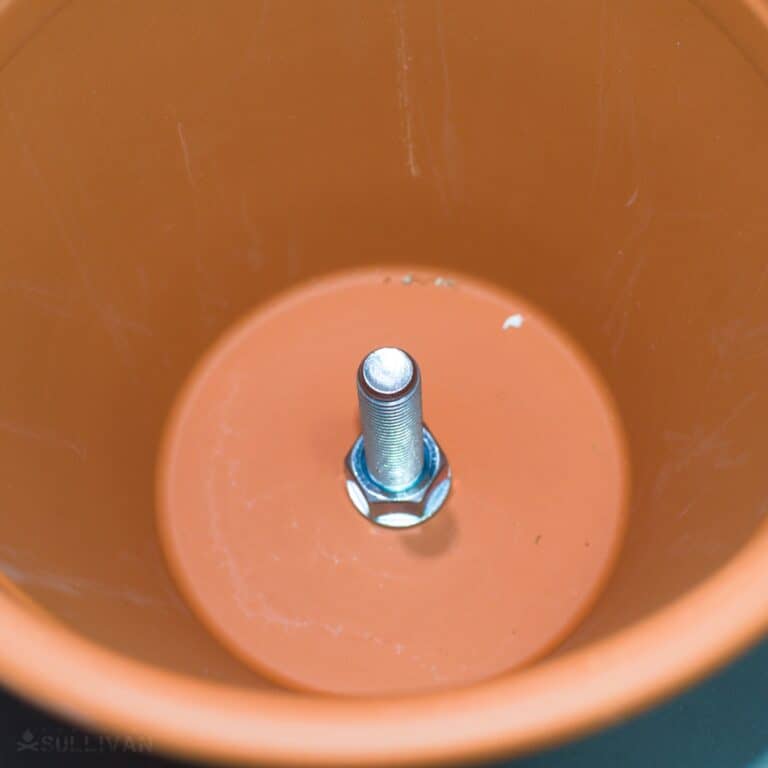
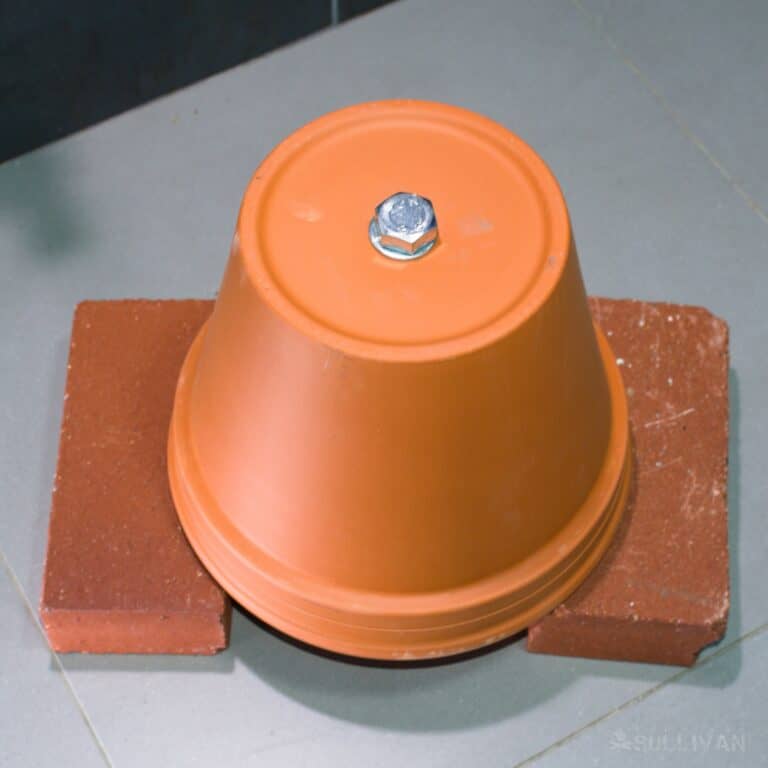
Step 1. Put the bolt / threaded bar through the bottom of the largest pot from the outside so the long piece is sticking up the middle of the pot.
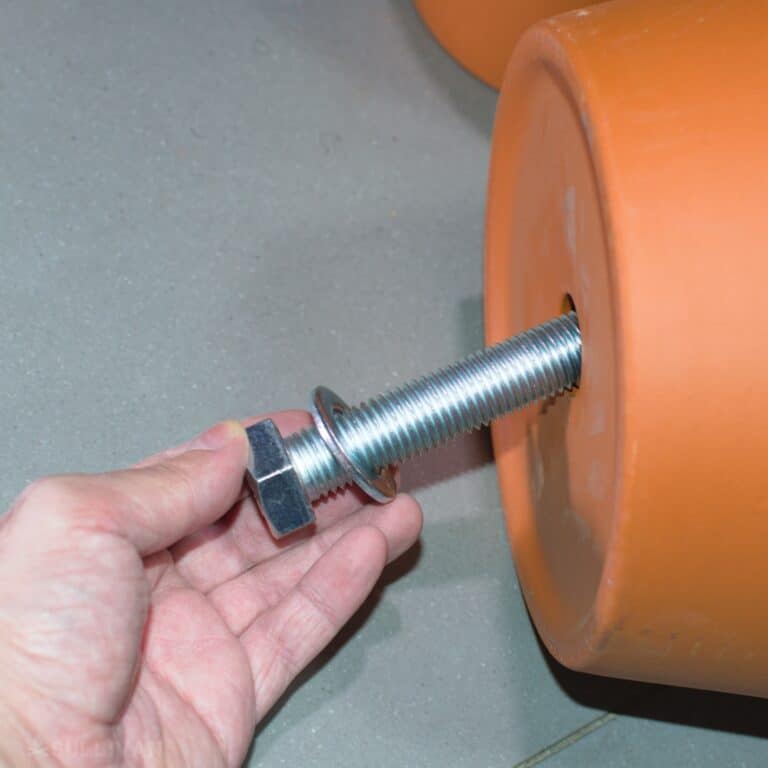
If it’s a threaded bar, put a washer and nut on the outside, and fasten. As you can see, I’m using a threaded bolt so only have add the washer. I’ll only use two bolts instead of three in my project.
This is what the pot looks like now on the inside:
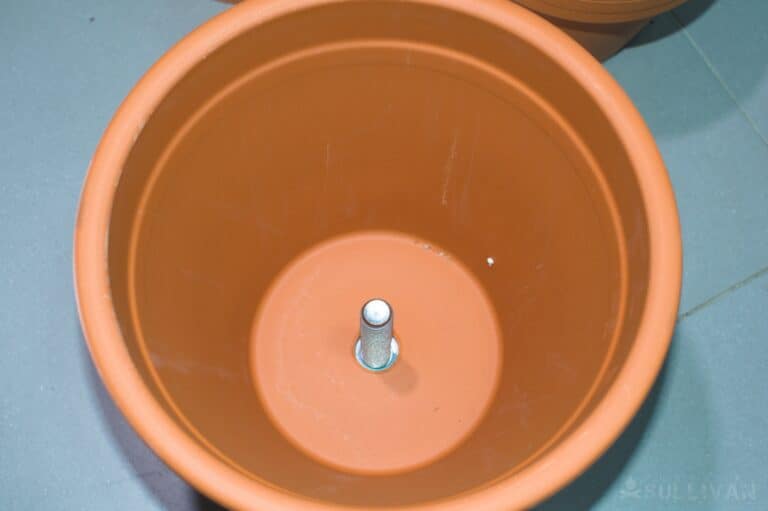
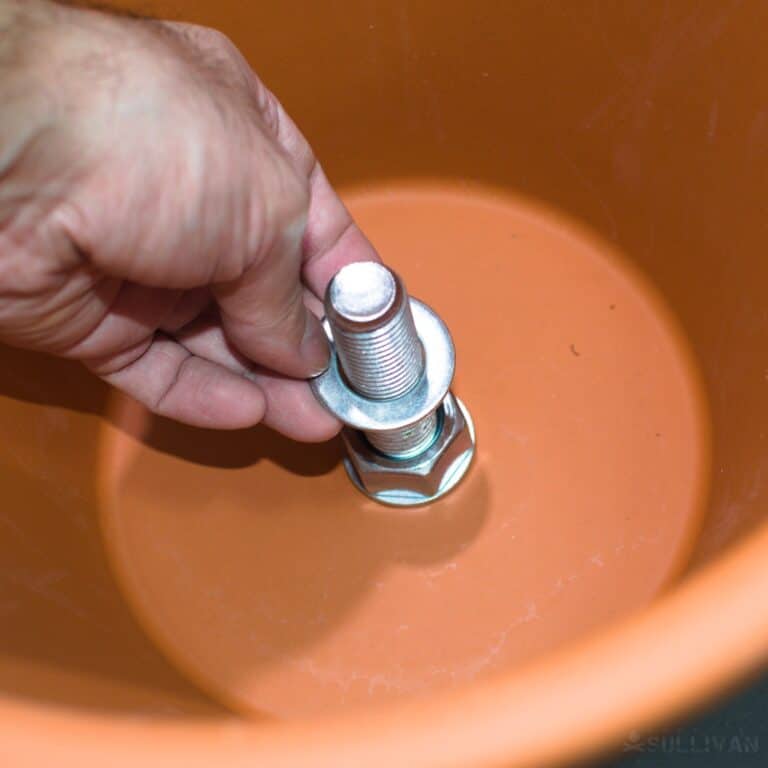
Step 2. Then, place a washer on the inside shaft, followed by a nut:
Optionally, you can add another nut. The two nuts will create a bigger air pocket in-between the pots.
Fasten into place, but not too tight, otherwise you may crack the pot – just enough to be firm.
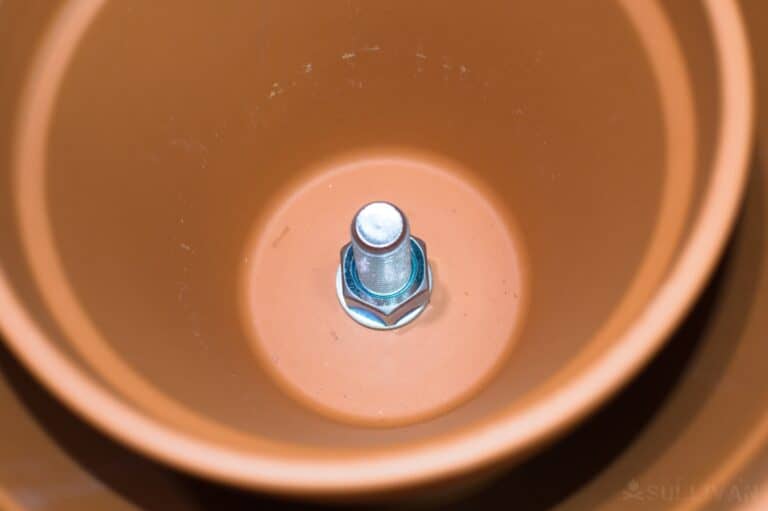
Step 3. Add a washer (the second one inside the first pot):
Step 4. Slide the second pot over the threaded bolt inside the first pot. Then add a washer and a nut – and fasten the nut like so:
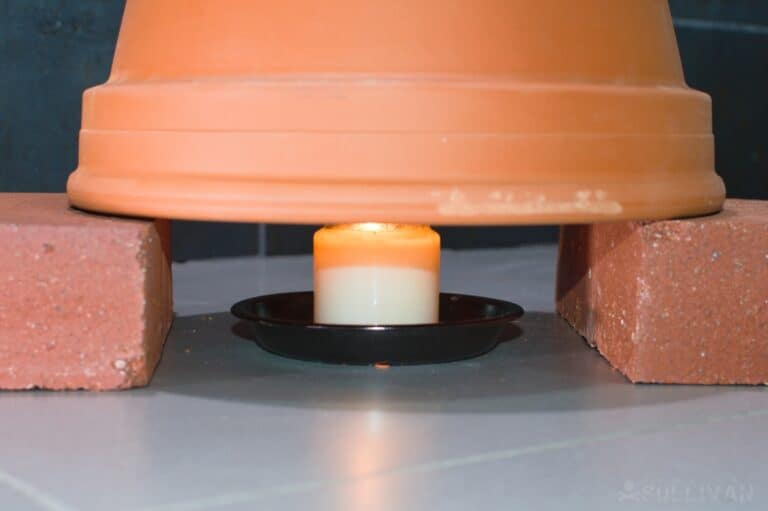
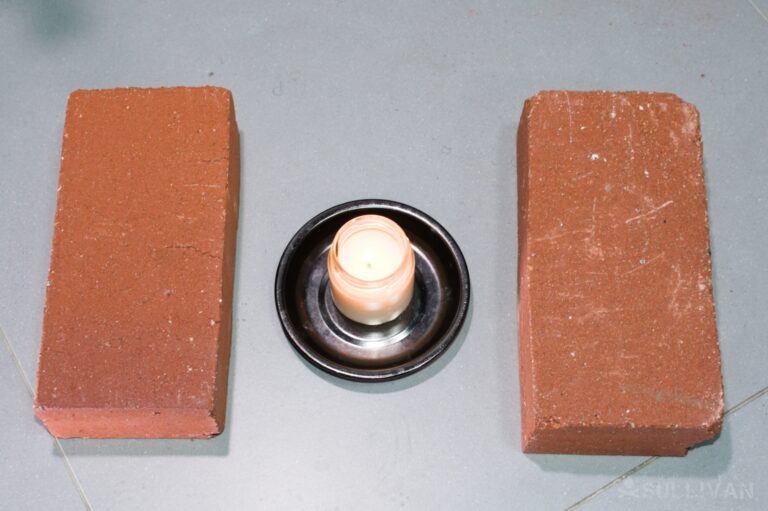
Step 5. Place the metal container on the mat, then the candle inside. Place the two bricks on the mat on both sides of the metal container with the candles.
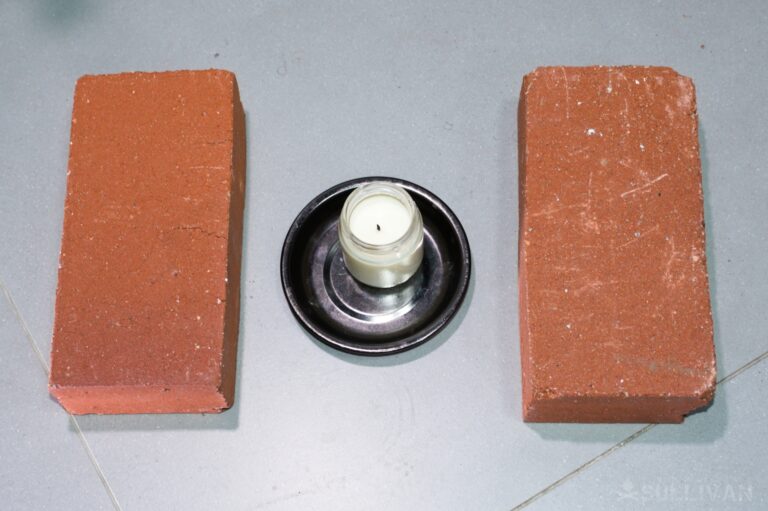
As you can see, I don’t need a mat since I’m doing this on floor tiles…
Step 8. Light the candle(s) up…
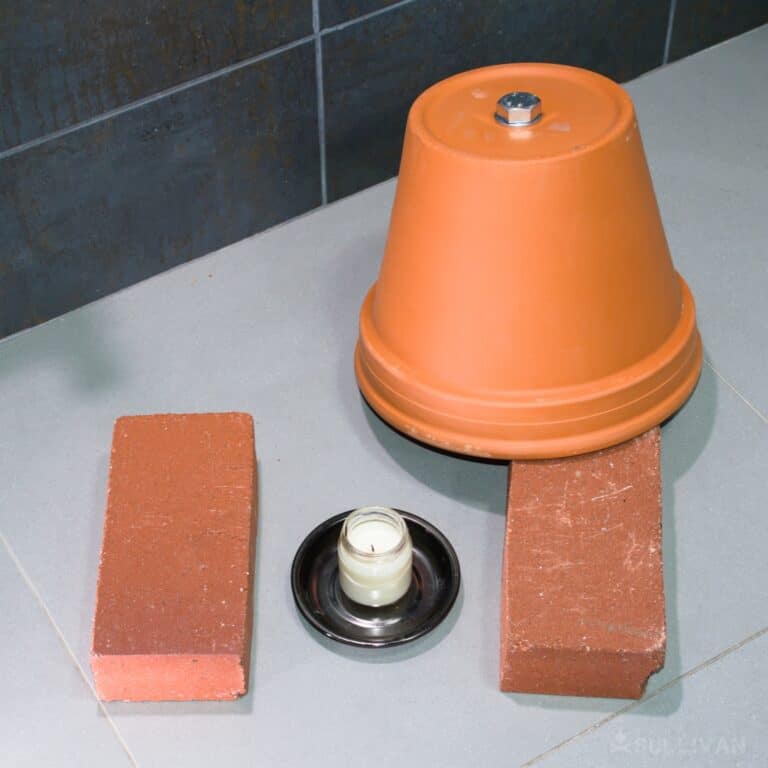
Step 9. Place your clay pot heater on the two bricks so it balances evenly.
And that’s it! You just have to wait a while until it is nice and warm, and starts radiating heat. Some people even place a coffee mug on top to keep the contents warm.
You can adjust the height of the candle to the pots – too far away it will take a long time to heat. If it doesn’t seem to be working well then raise the height of the candle – but not too close!
The Three Pots Variation
If the clay pots are thinner, you can use three pots instead of two. This changes the list of tools and materials as follows:
- you’ll need a 3rd clay pot that’s 8 inches in diameter (with drainage hole on the bottom)
- you’ll need two nuts instead of one
- 6 washers instead of 3 washers
- 5 nuts instead of 3 nuts
You’ll need to add a few more steps, too:
- Add a second nut after you’ve placed the 2nd pot inside the first.
- Add another washer.
- Add the 3rd pot inside the second.
- Add yet another washer.
- Add the last bolt.
Choosing the Right Candles
With any project, there are a whole lot of little details that will affect how well it works – and these tips are not all mine – this is a “wisdom of the crowd” article where lots of people have tried out the idea and given their input on what they felt didn’t or did work for them.
This is where there doesn’t seem to be consensus of opinion. I’ll leave you to decide!
Candles in a Tin
People advocate candles in a tin as the safest option– they are stable, burn consistently, and there is no risk of breakage or melted wax. They last for around 50 hours depending on the quality.
Tealight Candles
Tealight candles are what’s typically used in these projects, as they’re small enough to fit under the pots. Get the better quality candles that last around 5 to 6 hours, though. This heater isn’t meant to be used permanently – only when the power fails – so the expense is OK.
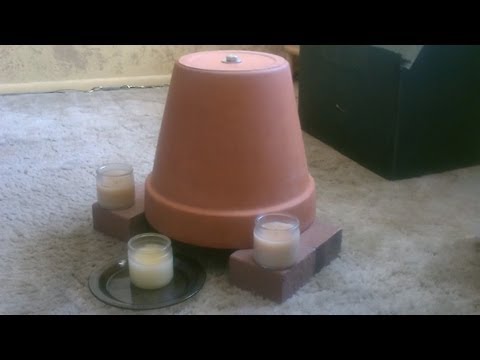
Four candles give more heat than one making it more efficient – but don’t place them right up against each other – leave some space in-between. You’ll know why if you watched the video about the guy and his clay pot heater that flared during the night on his boat.
Standard Household Candles
Average long household candles tend to fall over, and may reach too high. You want the flame about halfway up the pot – so you are going to have to put another brick underneath – making it less stable.
You can cut them down, but then you’re probably going to have to replace them at least once during the evening. A better option is to buy the shorter candles, or cut the taller ones in half and deal with changing the candles.
Candles in glass containers
Candles in a glass container are usually high quality if made in the US, but the cheaper ones manage to crack their containers – we don’t want to clean up glass and melted wax- also they can be expensive.
Still, candles in glass last a long time – people who have used the Yankee Candles say there isn’t a problem. Overall, these wouldn’t be my first choice…
Safety Tips
Warning! A clay pot heater could start a fire!
There are dangers attached to these heaters – you have a flame and need to be extra careful that children, animals, and adults, particularly seniors don’t get hurt.
The design of the heater can also affect safety – so be sure to stick with the design.
Isn’t the candle going to suck all the oxygen out of the room?
Some people are worried that the candle is going to consume all of the oxygen. Read here for some answers. What we should be worried about is the level of carbon monoxide.
What about Carbon Monoxide poisoning?
The FAQs on carbon monoxide are worth reading. Here you will find out why the steel bolt in the clay pot heater coming in contact with the open candle flame causes a rise in CO output.
Many people die annually from CO poisoning, and many thousands are taken to hospital for treatment after inhaling the gas. The trouble is the gas is odorless, colorless, and tasteless so you won’t know the levels are too high if you’re asleep. If you are awake you may feel giddy and disorientated.
The best is to install an alarm. It depends on your situation – if at home then one hardwired into your electrical grid is an option. If you are living a more survivalist lifestyle off grid then there are battery-operated CO alarms, but these need to be checked regularly.
The most advanced option is a smart carbon monoxide alarm. It works in sync with the home automation system and does its own diagnostics to make sure it is working properly.
The question then arises – why would someone with a smart home with a fully automated system be using something as basic as a clay pot heater? Here is a link to a video on installing a CO detector:
Allow for some ventilation
In order to avoid winter chills, people tend to close all openings, so there is a risk of CO poisoning if the room is small and fairly airtight. When using a clay pot heater make sure you have sufficient ventilation.
Redesigning the Heater
There are a number of adaptations using solar power and a little gadget that run off electricity to help the clay flowerpot. This video of a redesigned flower pot heater gives you one interpretation.
We are however looking at survival – in a bug-out/emergency situation, one needs the simplest and most efficient method. If you have your flowerpot heaters ready assembled with a candle and some matches buried in an emergency cache or available in an emergency location you are ready to get warm indoors.
Warming and Cooking Outside Using a Big Clay Pot Heater
The invention of the ancient Mayans, chimineas, are still used today and are a practical and fashionable item to have in an outdoor area. This big clay pot with a bulbous body, straight vent, and cut-away side allows for hot coals to be placed inside for heating, grilling, and baking.
It’s not a clay pot heater and it doesn’t use a candle but wood or charcoal, but the chimney may be worth considering as an outdoor option in milder climates. If used indoors, there needs to be a properly installed system for venting.

Traveler, photographer, writer. I’m eternally curious, in love with the natural world. How people can survive in harmony with nature has fueled my food safety and survival gardening practices.
At the age of 12, I found a newspaper advertisement for a 155-acre farm at a really good price and showed my parents one Sunday morning. They bought it and I happily started planting vegetables, peanuts, maize and keeping bees with the help of the local labor.
Once I married wherever we moved it was all about planting food, keeping chickens and ducks, permaculture and creating micro-climates. I learned how to build wooden cabins and outdoor furniture from pallets, and baked and cooked home-grown produce, developing recipes as I went along.
Chimineas can be used as a vent less fire place just use jelled alcohol can get at fire place supply store can order on line. Worked well for me. candles can work to.
Stop wasting time with these ignorant ideas you are not going to stay warm if your heat source does not produce the needed BTU’s of energy to effectively raise the temperature. It does not matter if you can store the weak heat in clay..candles won’t heat a room.
The point is to warm your hands and feet. In a survival situation, it’s good to have back-ups. 🙂
Actually they do we just used candles for 2 days to keep our reptiles warm when the power went out in GA
Works great in my garden hoop house. Maybe this is a better use than home heating.
For some reason u don’t have a logical mind,cause if u did,” u wouldn’t criticize this other persons idea of keeping warm,” further more u have no common sense in survival methods.
You have not tried it or been cold, apparently. As long as the infrared/radiated heat is created by heating the surface oi the clay pots, you will be warm(er). And guess what? Use more than one!
Unless you have invented perpetual motion, you can’t get out more than you put in. FACT. (Dieters take note).
While the terracotta pots and steel bolts may briefly hold some heat that would otherwise have been lost to the environment, there is no more heat!
Insulate your space and the end result would be the same, with or without flower-pots.
They do look nice though.
You can only get out what you put in!
Just like with your body, if you didn’t eat it you won’t put any weight on.
One candle heat = one candle heat.
Insulate your space well-enough, and one candle will heat it! i.e.an igloo. The terra-cotta may hold some warmth for a while, but it is not creating any heat.
I am considering using of of these heaters for emergencies in a small basement room, the object would be to keep the room above freezing even if it is 33 degrees f, in order to have a supply of liquid water for drinking and preparing dehydrated emergency food. Two of the walls are concrete walls the other I intend to insulate, the room is around 10 foot by 10 foot, I think think this would do the job. I live in Minnesota and if you lost utilities for an extended period of time that would be it for you. A person can live in the cold, but you can only a last few days without water.
High density foam STOPS air infiltration and works great! Also radiant barrier reflects heat back if used correctly it’s simple and cheap. Menards and Lowe’s carries it. I have both types and enough RB for some neighbors .
Duluth MN here! I’ve seen an incandescent floodlight used to keep the water pump inlet from freezing, in an insulated heat resistant foil lined box. Wouldn’t help for when the electrical goes out, but for other times, this is a cool trick, fairly efficient too, as far as resistive heating goes.
Hi, some designs do not use the bar and nuts. The pots are different sizes, which creates the air space and they are supported on a heatproof or heat-resistant base, with the heat source just below the larger opening of the pots. This reduces the risk of CO (carbon monoxide) build up due to the iron or steel. It might also encourage air to flow through and increase the heat to some degree, just as adding air heats up a fire.
Hi, thanks for the informed article! I’m researching this for my own purposes, and others. I’d read that people were using galvanized bolts, and I know for certain that heating these give off toxic fumes, I didn’t have to read this criticism of your design myself, as I’d experimented with blacksmithing. Please specify stainless steel?