A rocket stove is one of the best stove designs for maximizing heat output, minimizing fuel consumption, and cutting back both smoke and sparks while burning.
Functioning by, essentially, forcing a little bit of fuel to burn extremely hot and completely, they are marvels of efficiency. Believe it or not, though, they function on simple principles that you can replicate yourself using nothing but bricks for the main build.
It’s an awesome and practical afternoon project, and a great skill to have in your bag of tricks. Read on and I’ll tell you everything you need to know to build it yourself.

Tools and Supplies
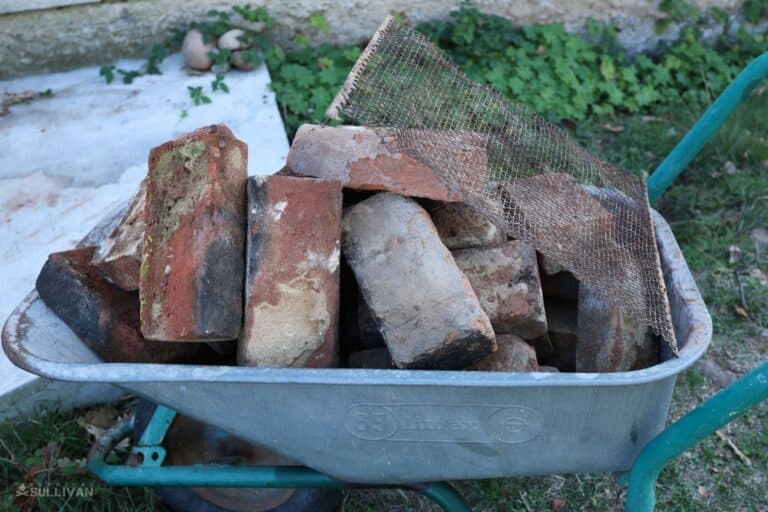
Bricks: Any solid brick that is heat resistant and suitable for use in building or other masonry will work here. For a stove the size of the one shown below, you’ll need about 30.
Note that you must use bricks that are completely dry and non-porous: stones or other materials that absorb water may explode if heated! If you can, choose nice, clean bricks that are square and nestle together tightly.
Metal Mesh: Flame-proof metal mesh, grating, or a similar material. This is what’s used to hold and support your fuel while it is burning. Note that mesh is better because as your fuel burns and breaks down, it is less likely to fall through and onto the ground or surface below.
Level, Flame-proof Surface: Use your head. You should only build your stove on a stable, and flame-proof surface. You aren’t mortaring the bricks together, just stacking them, and you don’t want the risk of it toppling over. Likewise, you don’t want to set the surrounding area on fire!
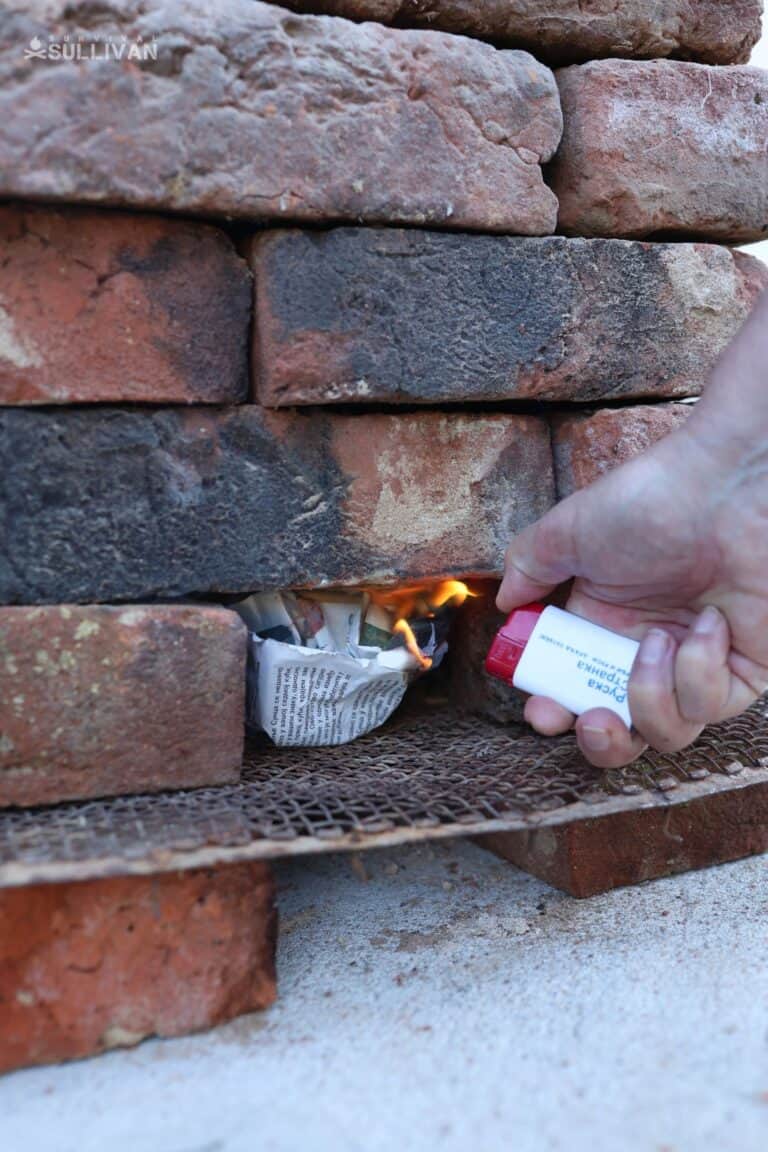
Fuel and Lighter: You won’t have a fire without fuel and something to light it with. Twigs, sticks, and smaller pieces of firewood work fine, but you can use cardboard, newspaper, or anything else suitable for burning. Obviously, don’t burn anything toxic, especially if you’re going to cook on this stove.
Step-by-Step Instructions
Step 1: Gather materials, clear space. Start by gathering all of your bricks and the mesh you’ll use for building the fire. Sweep off and, if necessary, level the area where you plan to construct the stove. Make sure you move all flammable materials well back from the site for safety.
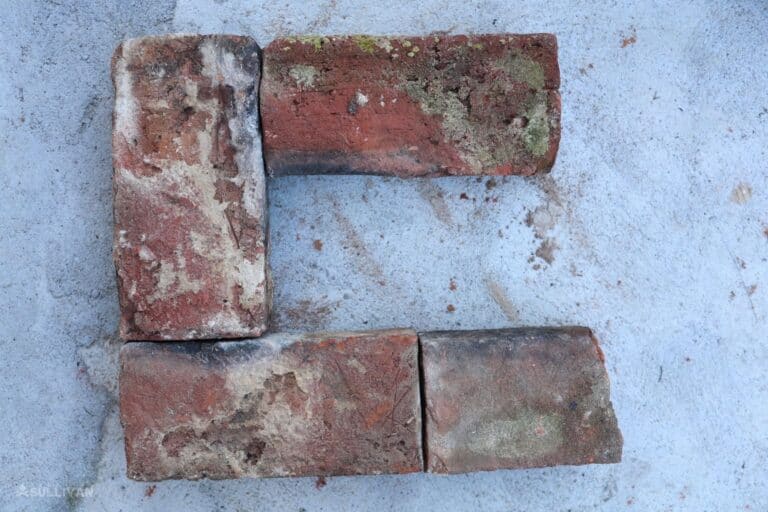
Step 2: Create C-shaped first layer. Grab four bricks and lay them down in a C shape as shown. The opening should point toward you or wherever you plan to load the fuel from. Note that it’s okay if one leg of the C is a little longer than the others; I used a half brick here as you can see, but you don’t have to.
Step 3: Place mesh on the first layer. It should completely cover the bricks, and it’s okay if it hangs over a little bit. Just ensure that the mesh is sturdy and capable of supporting whatever fuel you place on it.
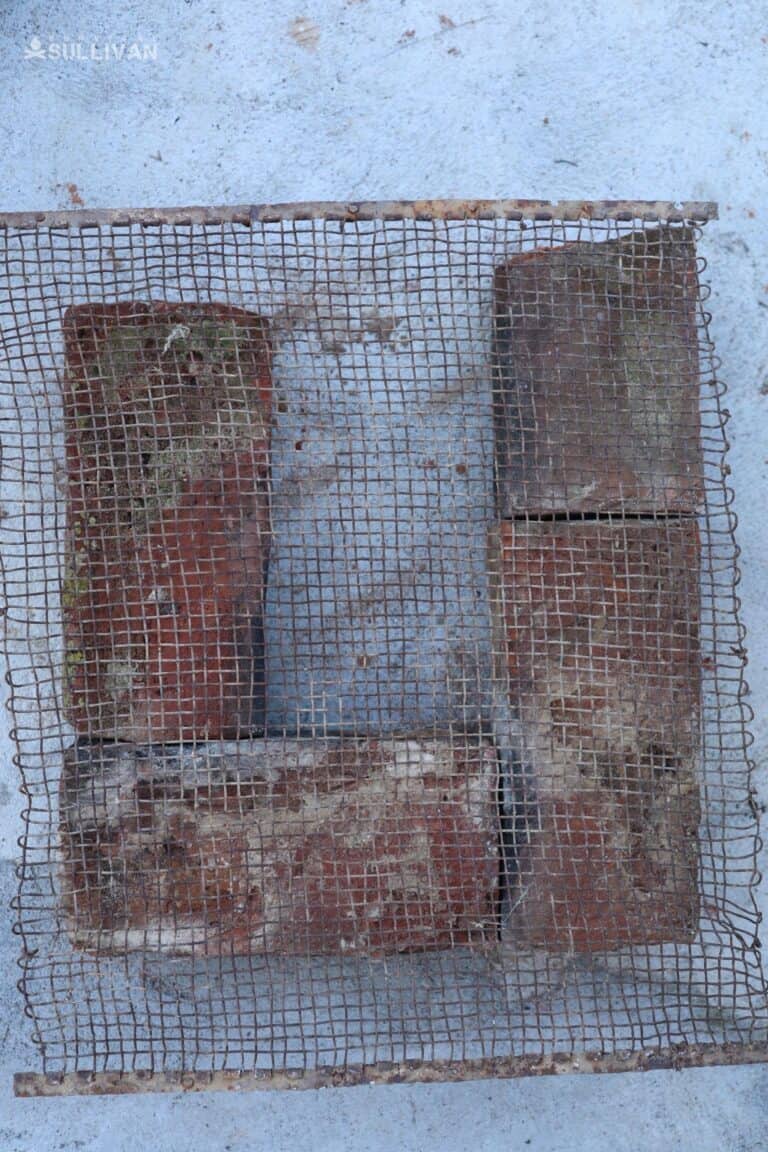
Step 4: Add a second C-shaped layer. Duplicate the first layer of bricks in the same arrangement for the second layer. Make sure the opening of the C is on the same side. This will hold the mesh in place and is the spot where you will load the fuel. Together with the opening below, it lets in a draft of air that makes the rocket stove work so well.
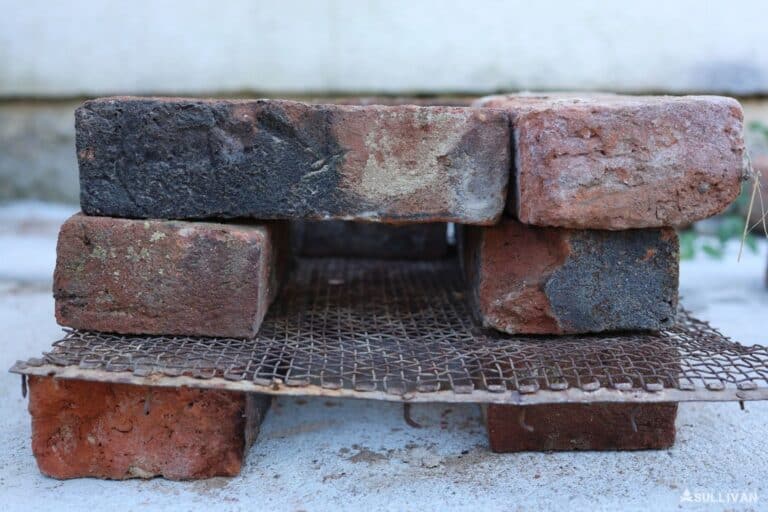
Step 5: Build the stack layer by layer. Now keep laying the bricks in the arrangement shown, butting the narrow end of one against the side of its neighbors. The interior should form a square. Make sure the bricks lay flat and fit against one another snugly. As you build, offset the following layers so that the edges of the current layer don’t line up with the ones below. This provides better insulation and stability.
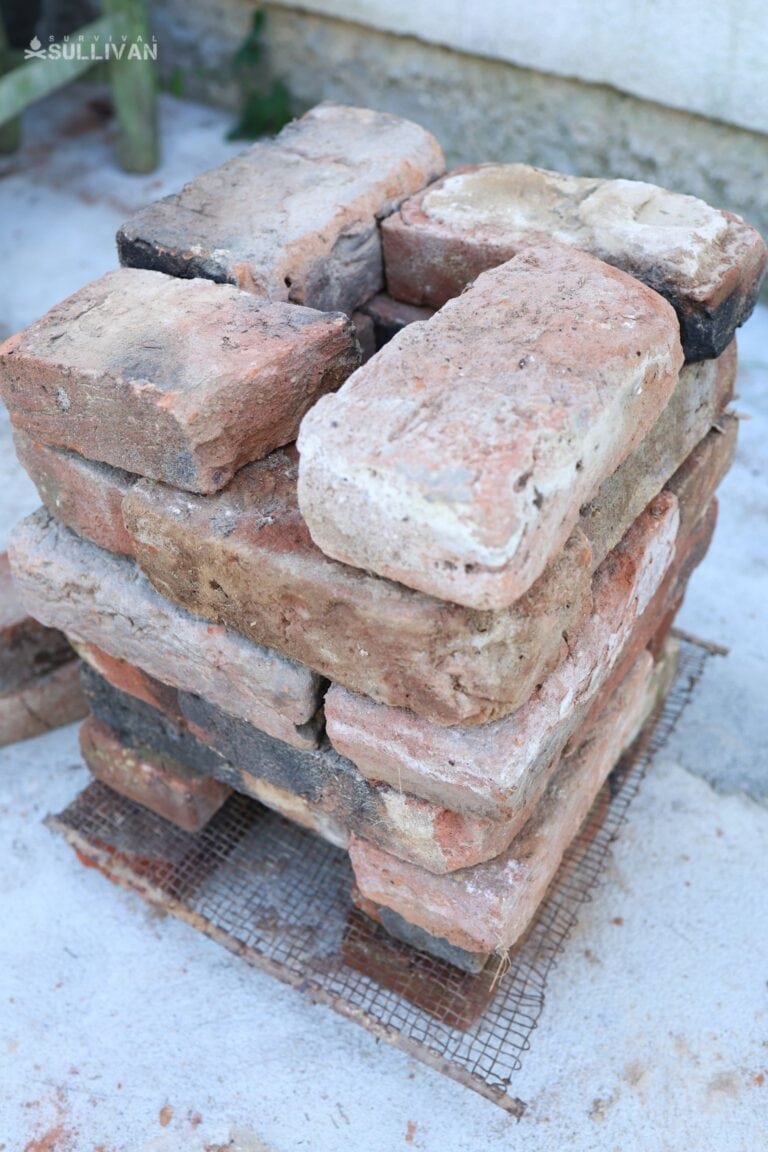
Step 6: Keep “chimney” straight and uniform as you build. This is easy work, but take care and do a good job. Assess the interior of the stove, the chimney, as you go to make sure it stays even on all sides and that no brick protrudes into the chimney space.
Step 7: Place two more bricks to hold the pot. Once you finish the last complete course of bricks, you should have two left. Place these parallel on top on opposite sides so you have a place to set your pan or pot. It’s helpful if your cookware rests perfectly level, so switch out these bricks if you need to until you get it just right.
Step 8: Place fuel and tinder on top of mesh grate. Place some fuel inside the opening near the bottom of the chimney, making sure that it is on top of the mesh grate. Don’t overload it! You want plenty of air to get in around the fuel.
Step 9: Light and feed fire as needed. Light the fuel, using tinder or a little shot of accelerant if you need to. Add fuel normally as you would when tending any other fire.
Step 10: Finished! That’s it. You’ve built a practical and efficient rocket stove using nothing but bricks and a little bit of time.
Tips and Tricks
Use smooth, tight-fitting bricks for best results.
Rocket stoves only enjoy their marvelous efficiency when they are properly insulated against heat loss and maintain a controlled draft from the bottom to the top.
As mentioned, using high-quality, smooth, and uniformly sized bricks will make all the difference in your results. A wobbly and ill-fitting stove is not only less safe, but it’s less efficient!
Start small and add fuel as needed.
If you’ve never used a rocket stove before, you probably aren’t aware of just how hot they can get and how little fuel they need to produce that heat. Don’t load it with lots of fuel at first until you get a handle on it; start with just a little fuel, check the heat, and add more only if you need it hotter.
Using sparky or smoky fuel? Make the stove a little taller.
One of the best things, I think, about rocket stoves is the fact they produce a lot less smoke and sparks compared to a typical campfire.
That tall chimney and extraordinarily hot operation means that most smoke and sparks burn up completely before they reach the top. But, if your fuel is crackly and extra smoky, consider making the stove a little taller to provide for more complete combustion. That will do the trick.


Tom Marlowe practically grew up with a gun in his hand, and has held all kinds of jobs in the gun industry: range safety, sales, instruction and consulting, Tom has the experience to help civilian shooters figure out what will work best for them.
Excellent. I have been wanting to build one and now I will. Thank you