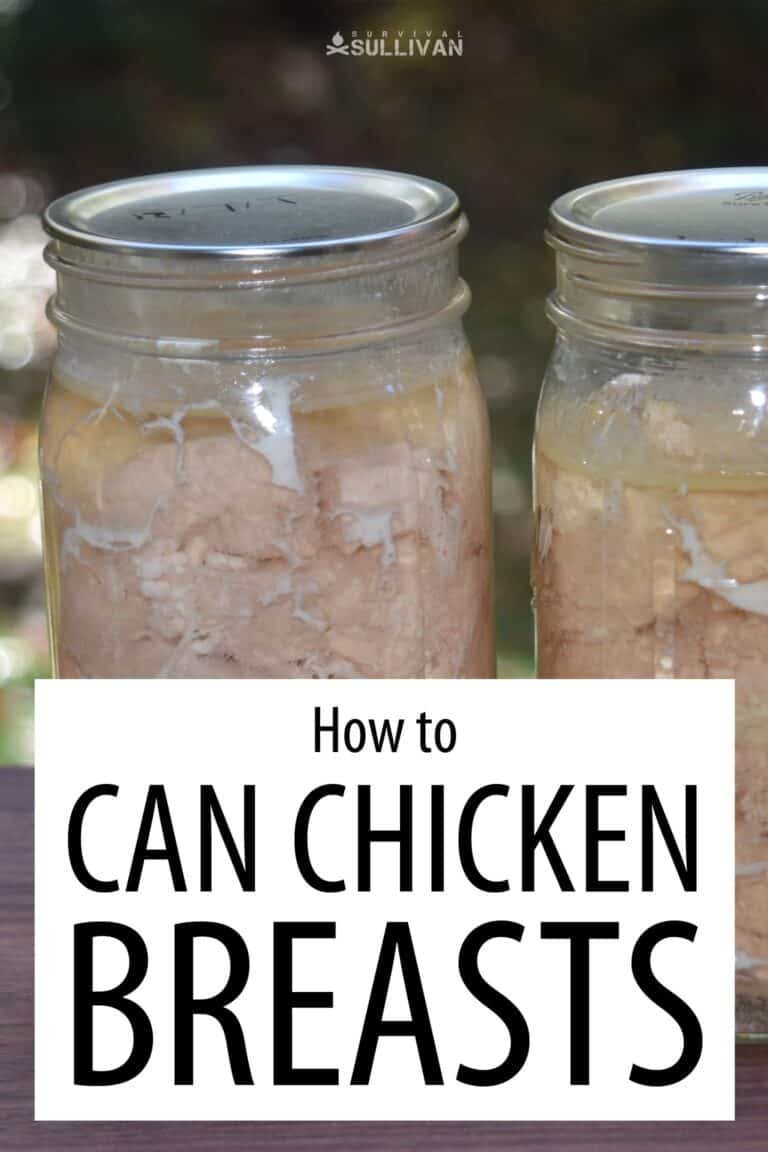
I’m a self-admitted chicken-acholic. I have yet to meet a recipe for chicken that I didn’t like. I could probably eat it every day – with the occasional break for a good burger. When we got a pressure cooker, the first recipe we canned up was chicken breasts.
This was for two reasons. First, I could easily find a half-dozen ways to use a quart of canned chicken. Second, it’s simplicity. As you will see, there really isn’t much to it.
Over the past 10 or so years, I’ve gotten more adventurous with pressure canning. Once or twice a year, I still put up a simple batch of chicken. It’s the ease and utility of it. When chicken goes on sale, the pantry gets filled out.
Two quarts of chicken, or about 4 pounds of chicken breasts
So let’s take a quick look at how and why you could also fill out your pantry with canned chicken breasts.
Why Add Chicken Breasts To Your Pantry?
Not convinced based on my enthusiasm? Good call. Let’s dive deeper.
Ok, let’s start with the utility of the equipment. You will need a pressure canner. More on this later, however, it is a necessary expense if you want to can low-acid foods or meats. Once purchased, by you or a group (e.g., to distribute the cost) the world of canning will truly open up to you.
A pressure canner will help you lay aside chicken, pork, beef, soups, stews, corned beef, and too many other things to count.
Next, is cost. Protein costs money. Usually a lot.
Canned chicken at my local store costs about six times what I can buy raw on sale. Specifically canned is about $0.30 per ounce.
Raw boneless, skinless chicken breasts on sale are about $0.99 per pound, so $0.06 per ounce. About once a year, I find it at $0.85 per pound or closer to $0.05 an ounce.
When those sales hit, I try to buy as much as possible. It’s not unusual for me to pick up 40 pounds at these sales.
Finally, there is flexibility. Chicken is the original white meat. The number of preparations for it is astounding.
With that in mind, pressure canning will change the texture. Home-canned chicken will be very similar to commercially canned varieties. There is no changing the effect the process has on the meat.
While canned chicken will never provide the same meal as barbequed, you can still do a lot with it. From chicken salad sandwiches to taco night, all the way to soup, there is a lot to do with this original white meat.
Pressure Canning
To preserve chicken or other meats, you will need a pressure canner. Traditional water-bath canners only cook food at 212 degrees Fahrenheit (100 Celsius).
This is sufficient to kill off bacteria in the right environment (e.g. acidic brine with a pH of less than 4.6). 212 F is insufficient to kill all bacteria in all environments. For this, we need to use some physics.
The temperatures achieved in a pressure canner reach 240-245 degrees Fahrenheit. Pressure equals increased temperatures–it’s physics. This suffices to preserve chicken, pork, beef, soups, and stews safely.
You still need to follow a few rules, though. The good news is that there are many books and reference materials that will guide you in the right direction.
The other thing to get used to is the long canning times. Many the water-bath recipes I use only have me boil the jars for 15 minutes. Add in a half-hour to get the pot to a boil and you can do several batches in an afternoon.
Pressure canning is a bit more of a process. There’s the initial warm-up, venting, then cooking time. Cooking times for chicken will be about 90 minutes. Then you need to let everything cool and come back to ambient pressure. The average batch takes about 3 hours.
Because of this, we invested in a pretty big canner. Our All American 925 canner will do 9 quarts or 19 pints. At 2 pounds of chicken per quart and one pound per pint, I can put up almost 20 pounds of chicken in that 3 hours.
Let’s look closer at the equipment you’ll need for your first of many batches of canned chicken breast.
Equipment
Disclosure: This post has links to 3rd party websites, so I may get a commission if you buy through those links. Survival Sullivan is a participant in the Amazon Services LLC Associates Program. As an Amazon Associate, I earn from qualifying purchases. See my full disclosure for more.
Gone are the days of my grandmother’s pressure canner threatening to blow up the kitchen. Today’s canners are built better and have multiple safety systems. They are, however, a significant expense.
I highly recommend purchasing a new pressure canner. Avoid the thrift shops and eBay for now. Get used to one without the concerns of a bad seal or faulty gauge.
You may notice that these canners are a lot sturdier than traditional water-bath canners. The added material provides increased strength. These canners support the development of increased pressure, and with the pressure comes increased temperatures.
It may be unnecessary, but I’ll say it anyway. The pressures achieved require you to pay a lot more attention to your canner, and to the process. Always be intimately familiar with your canner regarding use and maintenance. Never leave your canner alone when the heat is on.
You will also need lids, jars, and it will be convenient to have a jar lifter and lid magnet. These two items make things a little easier.
Returning to jars and lids. The ones you use for water-bath canning are just fine. As always, make sure that re-used jars are free from cracks and chips, and always use new lids.
If you find a screaming deal on jars, double-check they aren’t decorative. These are not made for canning and will probably break during the process.
I’ve inherited many of my jars. Recently I received several cases from a friend who was a second-generation user and getting out of canning.
Most of the ones I used I’ve received from my family. Others I’ve purchased when needed. The short of it is, take care of your glass and you’ll pass it on to your kids.
Rings are another component that last forever. As long as they are rust-free, you’re good to go. Once your jars have cooled, remove the rings and give both the jars and the rings a quick rinse. Occasionally, a little juice will escape during the canning process. It’s best to wash this off.
A Few Pressure Canning Precautions
Before we begin, a few things to watch when running your pressure canner.
Start with temperature. Always use “consistent” temps with glass jars. Preheat your jars if you are filling them with hot food. Likewise, use room temp jars when packing cold food – like this recipe.
The same goes for the water in your canner. You will most likely start with 2-3 inches of water in the canner. When canning hot food, it’s best to warm up this water. Simply put it on the stove, turn on the heat and monitor it until it’s a similar temp to the food.
This recipe calls for raw-packing chicken. The chicken will come out of the fridge, get cut up, placed in the jars, and then into the canner. Tap-cold water should be in the canner to minimize the risk of breaking a jar.
Next is jar preparation. First, wash and rinse your jars. After you put the chicken in the jar, wipe the rim with a paper towel dampened with vinegar. This cuts through any grease on the rim and allows for a good seal.
Altitude is your final concern. You need to increase canning time based on altitude. This starts at about 1000 feet above sea level. Read your manual and adjust accordingly.
Ingredients
For each quart of chicken, you will need 2 pounds of raw chicken and one-half teaspoon canning salt.
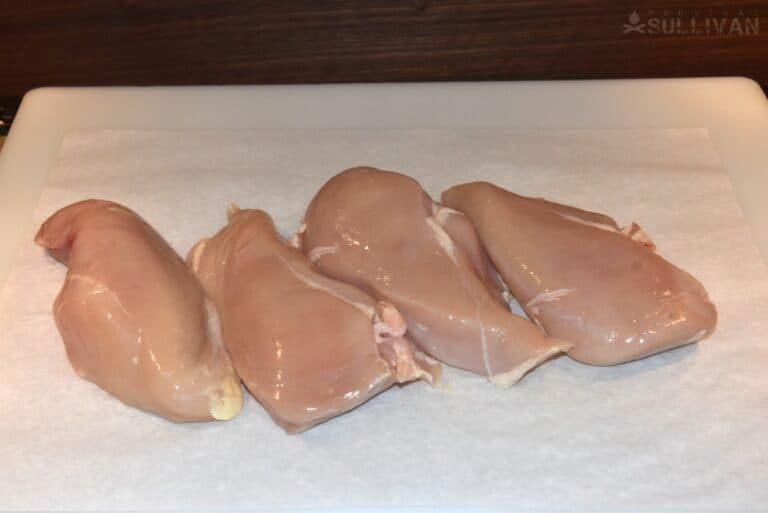
For chicken, I recommend boneless, skinless breasts. There’s little waste and the texture of the final product is great. You can also can boneless thighs and bone-in legs, thighs, and breasts. I haven’t tried these recipes yet as I’m focusing on bulk preparations. Maybe later.
You can also get bone-in breasts or whole chickens. This is great if you are skilled at quickly breaking down a bird. But, as I usually find boneless, skinless on sale, I use that.
Next, you need salt. Canning salt is best. The primary difference between canning salt and table or kosher salt is anti-caking agents. Manufacturers include these additives in table and other salts to keep them flowing in your shaker. They also cloud up liquids to which they are added.
Canning salt doesn’t have these additives. This keeps any canning liquid clear as the anti-caking agents can cloud things up. Don’t sweat it if you don’t have any, or if can’t find any.
Preparing Your Chicken
Two steps await your chicken. Butchering and canning. Let’s dive in.
Butchering
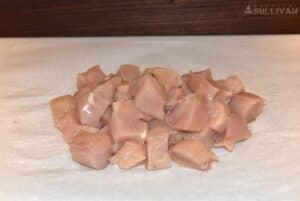
The reason I like boneless and skinless breasts is that they are easy to prepare.
You will need about 2 pounds per quart or 1 pound per pint. Simply trim off any remaining bone, cartilage, and fat.
You can leave the fat if you want. It won’t hurt the canning process and it adds calories and flavor. It will mostly liquify during canning and then solidify at the top of the jar, so you can scrape it out if you want later.
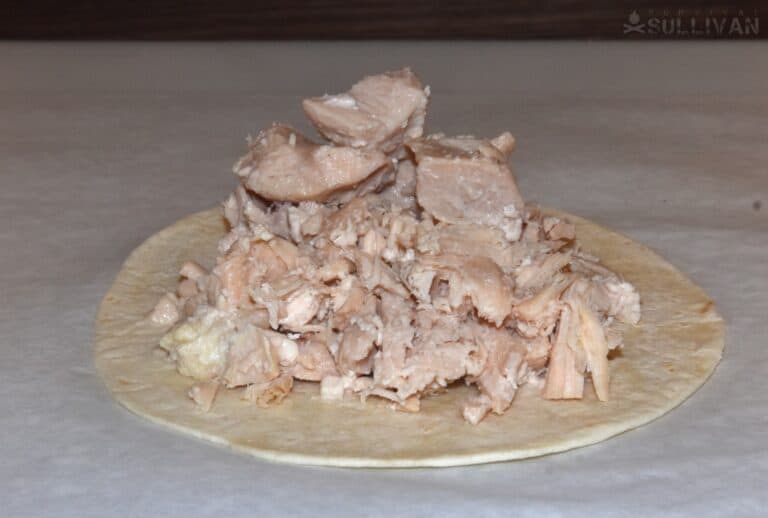
Cut each breast into pieces no bigger than ¾” cubes. Smaller is ok. Just no bigger. At the times and temperatures, the heat won’t penetrate completely into the meat.
Raw Canning
For chicken, you have two options: hot pack and raw pack. For hot pack, simply cube up the chicken and then cook it, usually by boiling. There are two good reasons to hot pack. First, it shrinks down the meat. This means you can get more in the jar.
With hot packing, you will also need to add liquid into the jar, as the chicken won’t make its own broth. The liquid you add is the second advantage. You can flavor it however you want. Want a little extra spice? Add some in.
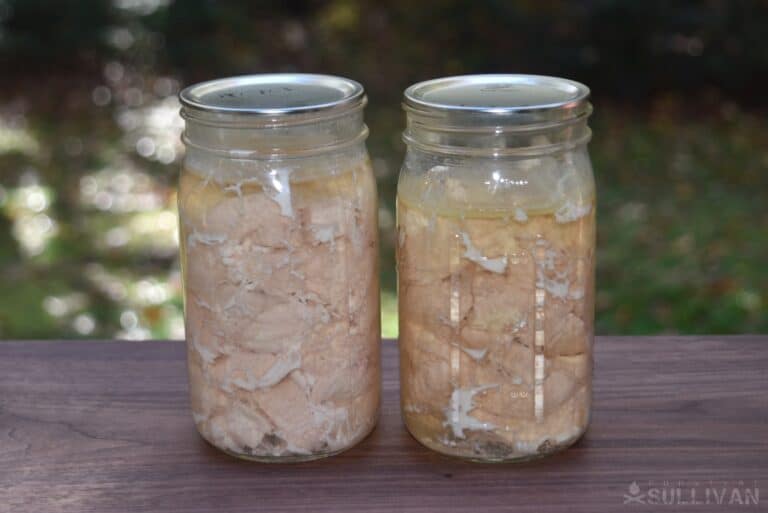
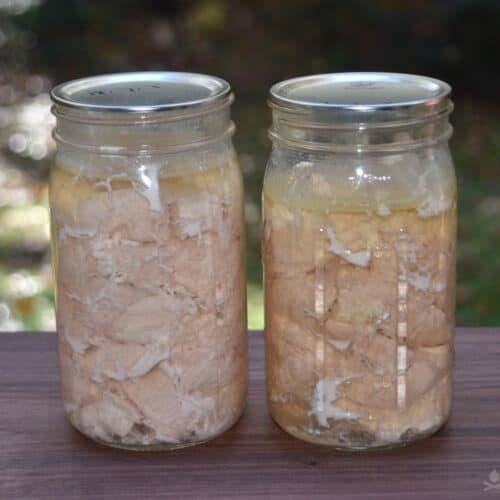
Raw pack is just what it sounds like. Cut up the raw chicken, pack it in a jar, seal it up, then can it. It doesn’t get any easier than this. The canning process takes about 3 hours, so there is plenty of cooking time. By the time you’re done, the chicken has cooked through.
Raw packing is not only easy but results in the best broth you will ever have. Pack the chunks in the jar and after cooking, they will naturally shrink releasing their juice.
Even if your recipe for your chicken doesn’t use it (e.g. chicken salad), save the juice. Trust me, you’ll find a use for it.
How Long Will Your Canned Chicken Last?
Canned chicken won’t last forever, but it will last a long time. According to the USDA, home-canned goods are safe for 1 year, and commercially canned food is safe so long as the seal is good.
Your interpretation is up to you. Honestly, I have had a few jars (across the spectrum of everything I preserve) that have been more than a year. More like 5 years.
Canning safety is all about your senses.
First, inspect the jar. Is the seal intact? That means the lid is dimpled and the vacuum is good. Is the lid rusted? Does the jar make a hiss as the lid comes off? This means that air is pulled into the jar because of the solid vacuum.
Next, inspect the liquid and the food. Is the broth appropriately clear? Is the chicken the right color? Is there anything floating around that shouldn’t be?
Finally, when you crack the seal and take a sniff. If it smells off… It is.
If in doubt, toss the jar. Food safety is no laughing matter. Trust your senses. I canned hundreds of jars in my lifetime, and less than 10 have ever gone bad for me. When they did, they were really bad. Off-colored food, brine, horrible smell, and plenty of junk growing in the jar.
Canned Chicken Breasts Recipe
Ingredients
- 16 pounds chicken breasts boneless, skinless
- 4 teaspoons canning salt or pickling salt
Instructions
- Sanitize your lids and rings by bringing them to a boil in a separate pot.
- According to the canner’s manual add water making sure it is close to the temperature of the chicken (cold).
- Dice your chicken meat, ¾” cubes.
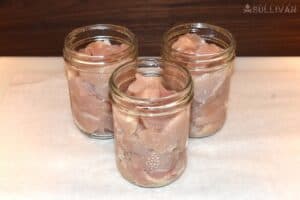
- While ensuring 1” of headspace, fill each jar (quart) with 2 pounds of chicken – there will be air spaces, that’s ok as they will fill with the juices of the chicken.
- Top each jar with ½ teaspoon of canning salt.
- Dampen a paper towel with vinegar and run it along the jar rim to clean off any fat or oil.
- Position the lids and rings on each jar and finger tighten – you do not want them too tight.
- Put the sealed jars into the pressure canner. Leave 1-inch spaces between them.
- Place the lid on the pressure canner and tighten it, and turn on the heat to the high setting.
- (All American specific) Once the canner comes up to full steam, set a timer for 10 minutes giving it time to vent. When the timer goes off add the weight to the vent. The temperature will come up to between 240 and 245 degrees F (that's 115 -118 C) and the weight will jiggle.
- Set the heat so that the weight jiggles every 5-15 seconds.
- Set a timer for 90 minutes (75 minutes if you're using pint jars).
- Shut off the heat when the timer goes off.
- Let the cool to 200 degrees F (93 Celsius). When the canner hits 200 degrees F (93 Celsius) remove the weight.
- Let the canner rest for a further 10 minutes.
- Loosen up the lid on the pressure canner, then carefully take out the jars one by one using the jar lifter – warning they are still very hot.
- Let the jars to cool to room temperature. You should eventually a ping sound coming from each jar, meaning it's safely sealed.
- Test the lids with your finger to make sure they're not flexing.
- Leave the jars to cool, preferably overnight (just to be safe).
- Once the jars are finally cool, be sure to remove the rings, and give the jars a quick rinse.
- Store the jars in a cool, dark place, but not before adding a label on them with the date and contents.
Notes
- Sanitize the quart jars before use. You can use a dishwasher for this.
- The following instructions are for our All American canner. Your instructions may vary.
Canned Chicken and Storage Conditions
As with all food storage, cool, dry, and dark is your goal.
Elevated temperatures will accelerate any chemical processes. The colder it is, the slower they are. Try to keep them below 70 degrees Fahrenheit (21 Celsius) and closer to 50F (10C) is better.
Next, keep them dry. Moisture can attack and rust the lids. Lids are coated and designed to resist corrosion. That being said, minor scratches and nicks happen. These, given the improper environment, will lead to rust.
Mild surface rust is OK. If during your reviews, you see a little rust, cycle those cans to the front. Always check the seal to make sure it’s intact and that the rust hasn’t penetrated the lid.
Finally, keep them out of direct sunlight. Sunlight can break down both texture and nutrients. The darker the better. The longer your canned goods will stay and taste fresh.
Basement storage is a great way to meet these requirements. They are dark and cool. If your basement is damp, run a dehumidifier to dry it out.
Glass jars can be heavy, therefore you should store them only on sturdy shelves. There is nothing worse than a crash that wastes hours of work and hundreds of dollars of jars and chicken.
Kept in the proper conditions, you’ll have at least a year of protein storage!
Canned Chicken Cooking Ideas
Now that you have a basement filled with canned chicken, it’s time to put it to work filling your belly.
I’ve been known to have a few bites right out of the can. For keto followers, canned chicken is the ultimate high-protein snack.
Add a little salt, spice, and olive oil to up the fat content and you’re good for a few hours after your snack. Even better, add a few heaping tablespoons to a salad.
Almost as easy, and just as filling, is chicken salad. Simply drain your chicken, and mix it with mayonnaise, chopped celery, and onion. If you prefer it sweet, add a little sweet relish. Put a few scoops on a roll and you have a great sandwich.
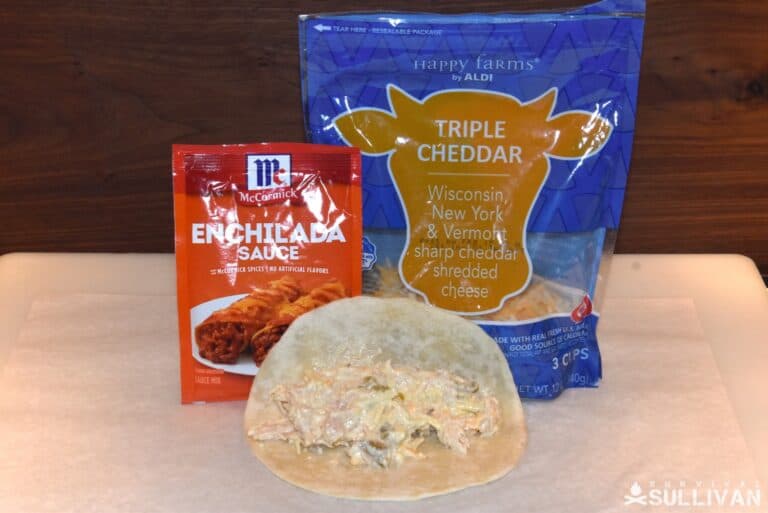
For a warm meal, we head for the Mexican spice section of our cupboard. Again, drain your chicken and mix with a can of cream soup. We use cream of chicken.
Add in a dollop of sour cream, some chopped onions, a few shakes of oregano, chili powder, and smoked paprika.
Add a half cup of the mixture to a flour tortilla and roll up the tortilla, then stack enough tortillas into a baking pan to fill it. Top with salsa and lots of shredded cheese, and bake. Serve with more salsa and sour cream.
Chicken is one of the most versatile proteins. Don’t stop with these recipes. A simple search for “Canned Chicken Recipes” yielded everything from chicken and rice, cream cheese chicken, chicken parmesan balls, to ranch chicken cheese dip and chicken noodle casserole.
Not The End, But The Beginning
I hope I have relayed how easy it is to put up a healthy, inexpensive, and tasty protein source for you and your family. If the process of pressure canning seems intimidating, let me assure you it is safe and easy.
Every quart of canned chicken you put up contains almost 1500 calories, 72 grams of fat, and nearly 200 grams of protein. Those numbers should be enough to get you started.
If they aren’t, then think about all the wonderful things you can make with a pantry filled with this versatile home prep.
Give this recipe a try the next time you have your pressure canner out. If you don’t have one, then consider starting a jar for a pressure canner fund. As canned chicken is just the start!

My passion is empowering people with the knowledge to prepare for personal, local, and regional emergencies. I went to school for engineering and computer science and spend my days in the security industry.
Very well done.Good information.We have used1/8 teaspoon of powdered chicken bullion for a little extra flavor.
A pint of chicken with powdered milk,butter powder,and a cheap pack
of Alfredo mix over any pasta makes a good meal.Try cooking it on a
Rocket Stove for a little adventure.
I have home canned foods and jams that are 9 or more years old. its as good as the day I canned them
help, I have canned my chicken but their is a black spot on one of the pieces of chicken i just caned and a couple of specks in another bottle is something wrong?
Susan,
I’m not the author of the article but I’d throw away that can ASAP.
Burnt? Above juice?