There’s a glue out there for every conceivable application, from arts and crafts to simple repairs, woodworking to upholstery. If you want to keep the one right adhesive on hand for every situation, though, you can spend a small fortune.
A better approach in most cases is simply to make your own in whatever size batch you need for the job. Making glue is an ancient practice, and one that’s even more attainable today thanks to modern technology. It’s also a good skill to have in your repertoire should you ever need glue and find yourself without it.
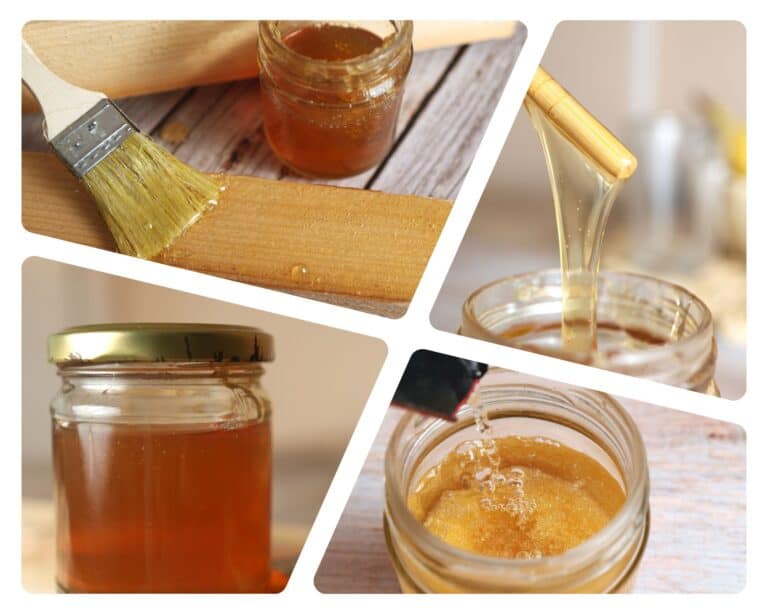
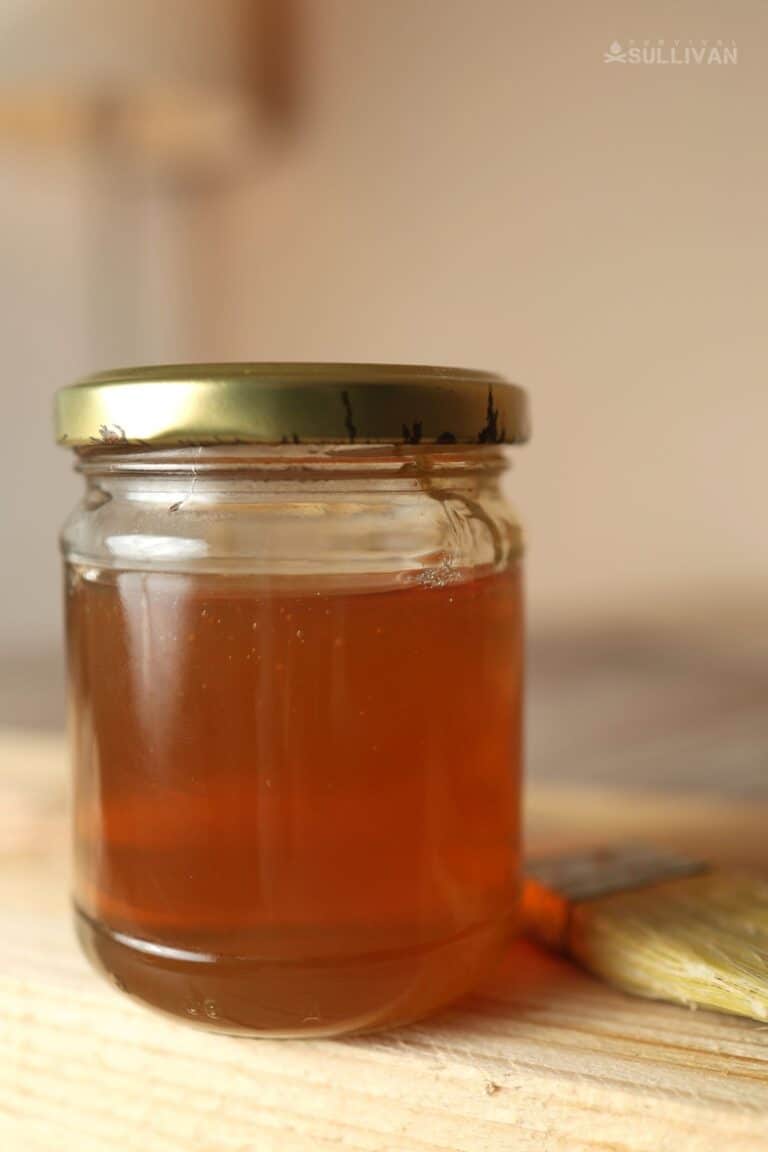
And in this guide I’m going to teach you how to make a super easy, semi-permanent glue using gelatin. This one works really well for sticking labels to your glass canning jars, or sticking paper for crafts, for instance. Keep reading and I’ll tell you what you need to know.
Supplies
Water: Tap water works just fine here. Unlike some other glue recipes, which have proven to be a little sensitive to various chemicals found in most municipal tap water supplies, this one is not. You’ll need equal parts water and gelatin.
Gelatin: Yep, just common, plain gelatin. Obviously you don’t want to use any of the flavored stuff. Gelatin is pretty much all collagen, and with careful processing it makes a marvelously effective glue. Again, you’ll need equal parts water and gelatin, so plan your batch size according to the size of your project.
Salt, non-iodized: The only oddball ingredient here, if you want to call it that. You don’t want to use common iodized table salt. Get your hands on the non-iodized stuff and keep it just for this purpose. Luckily you don’t need much—just one part salt to every four parts water/gelatin.
Small saucepan The trick with this procedure is cooking the glue mixture for a good while under low, consistent heat. I use a small saucepan with water for the purpose, as the jar containing the glue acts as the inner vessel in a double boiler.
Slow Cooker or Glue Pot (alternate): A slow cooker or glue pot is perfect for this process if you have one, but neither is necessary. Note that you can use the cooker you usually keep in your kitchen because the glue will be contained in a jar during the process and you’ll avoid a mess.
Thermometer: Precise heat control is a necessity for our procedure, so you want to get a kitchen thermometer with a low range starting at least at 125°F / 52ºC.
Mason jar with lid: A common mason jar with a lid and band, sized according to the size of the batch you’re making. Remember you will use equal parts gelatin and water, so plan accordingly!
Plastic squeeze bottle (optional): If you don’t have a mason jar or would prefer to keep your glue in a ready-to-dispense container, get yourself a heat-resistant plastic squeeze bottle of the kind commonly used for dispensing condiments.
That’s all you need. I’ll take you through the instructions in the very next section…

Instructions
Read over all of these steps carefully before you begin. There is very little actual work involved in this process, but you’ll want to know what to expect so you can time everything precisely.
Step 1: Add gelatin to jar. Dump all of your gelatin into the jar and give it a little shake so it settles.
Step 2: Pour warm water. Slowly pour the warmed water over your gelatin:
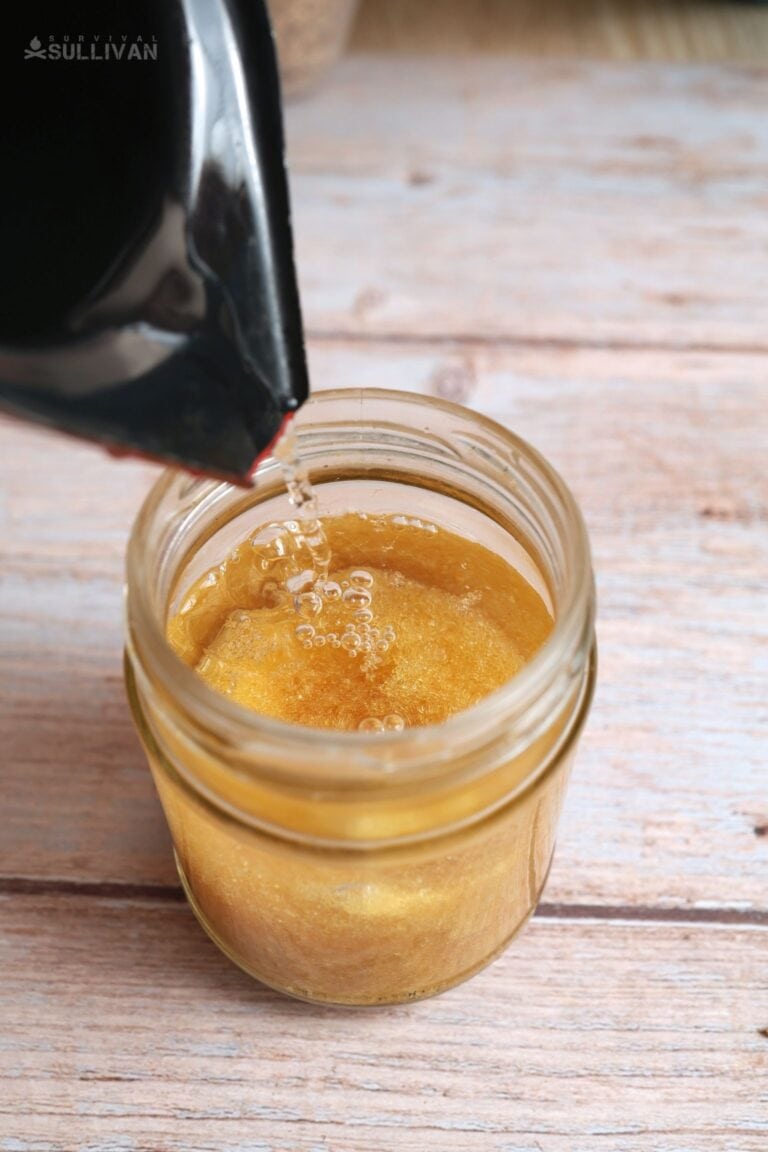
Step 3: Stir until combined. With all of the water added, stir everything vigorously until fully combined. The mixture should still look a little cloudy and you might have some small bits stuck together floating around. That’s okay.
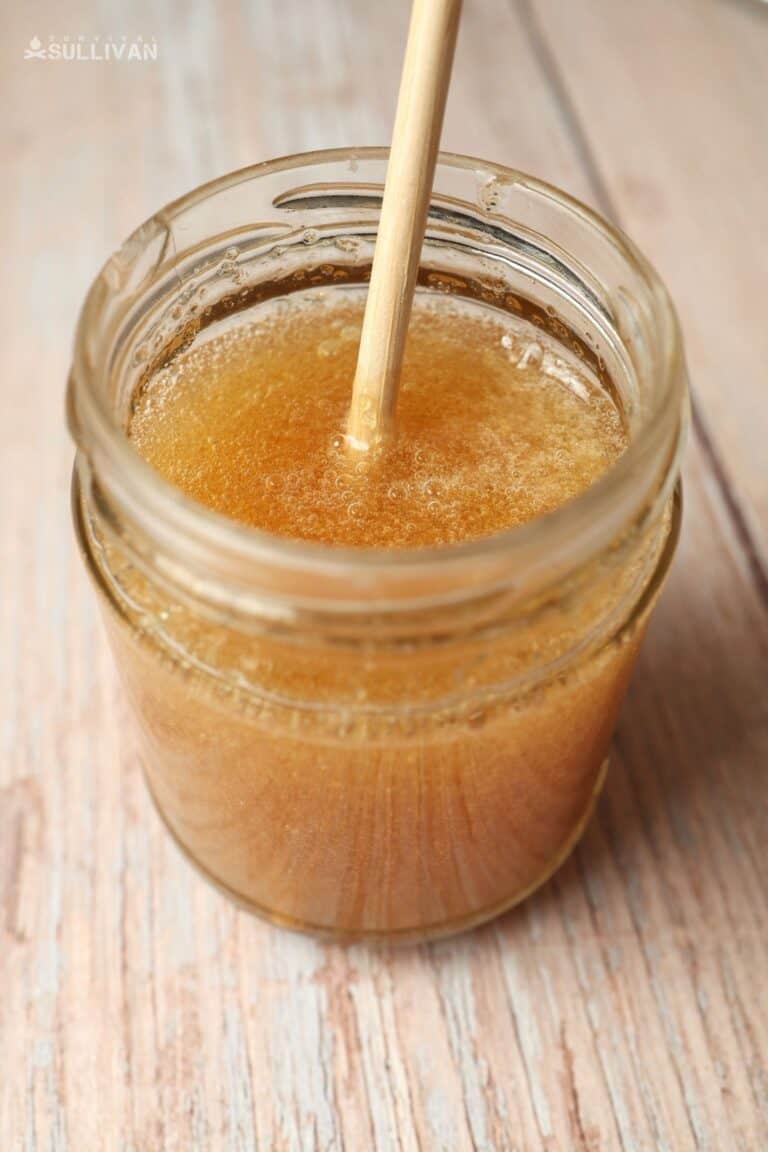
Step 4: Cap jar, shake, and allow to rest. Put the cap on your jar or bottle tightly, make sure it is sealed, and then shake the mixture hard for about a minute. Check to see if all of the little clumps have disappeared and the glue mixture has a uniform color. If it’s not completely combined, shake or stir again as needed.
Once everything looks good, set the container aside for about a half hour to rest. Then move on to the next step.
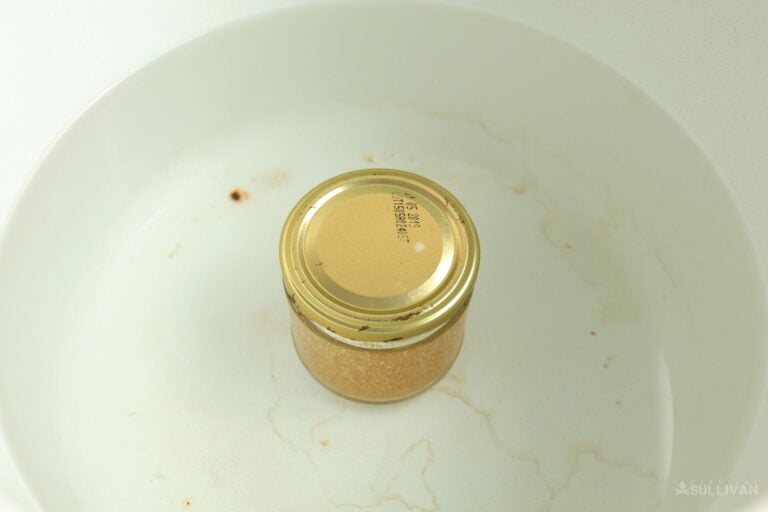
Step 5: Fill saucepan with water, place jar. Fill your saucepan with enough water to cover the neck of your jar. Make sure you account for displacement of your jar to avoid an overflow. Turn the heat on low and attach your thermometer. After your glue mix has rested for 30 minutes in the previous step, place it in the saucepan.
Step 6: Gently heat jar for two hours. Adjust your heat to keep the temperature at about 145°F. Don’t let it go over 150°F for any length of time; this will hurt the finished product. With the temperature stabilized, leave the glue mix to heat for about 2 hours.
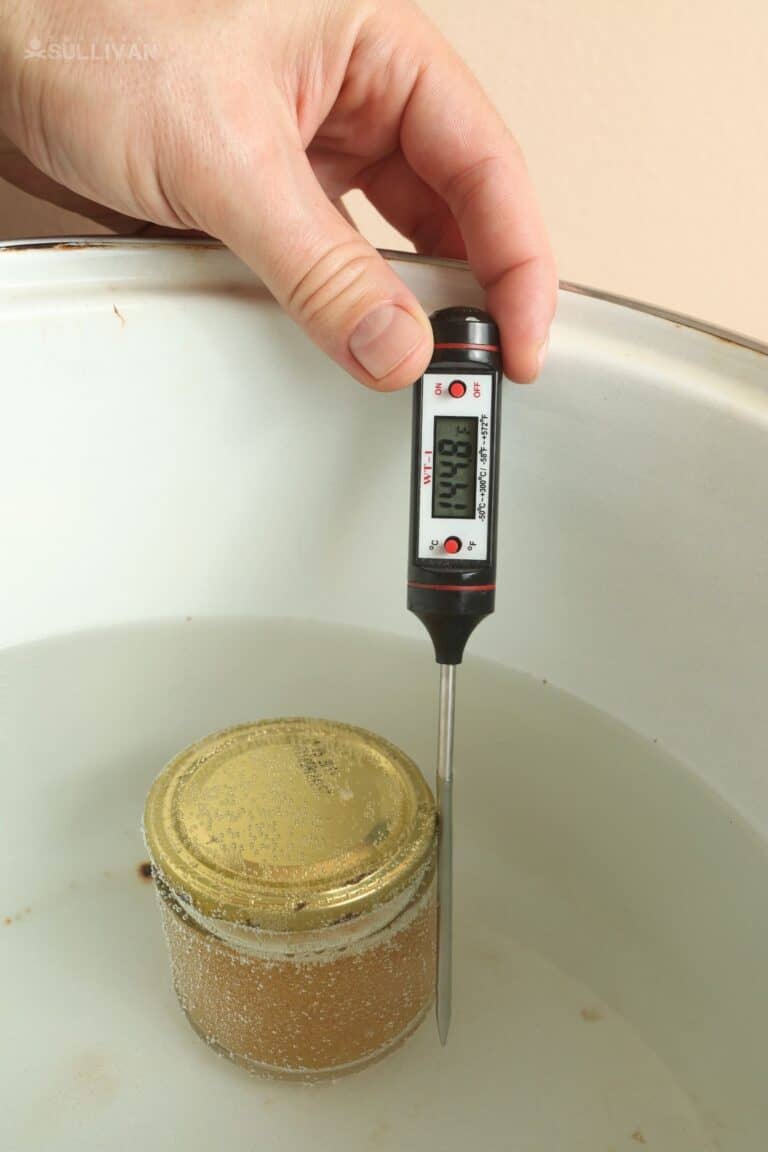
Step 7: Remove jar from heat, refrigerate overnight. After 2 hours have elapsed, remove the jar, let it cool down on your counter for about an hour, and then pop it in the refrigerator. Leave it overnight. Note you can leave the water in your saucepan; we’re going to be using it again tomorrow.
Step 8: Reheat jar for two hours. The next day, take the jar out of the fridge and put it back in the saucepan on the same setting to achieve the same temperature. Let it heat for another 2 hours. Make sure you check the thermometer periodically!
Step 9: Check consistency. After another 2 hours of processing, check the consistency of the glue for spreadability. It shouldn’t be too thin and runny, but if it is chunky or if it won’t spread easily, add just a little more water and continue to heat as before. Once you are happy with the consistency, your glue is ready to use.

Step 10: Apply glue. If you aren’t using a squeeze bottle, the best way to apply this glue is with a brush or disposable applicator like a popsicle stick, skewer, or scrap piece of leather. Clean up the aftermath thoroughly with dish soap and water, but be warned that most brushes will never go quite right again, so don’t use your good ones!
Step 11: Refrigerate leftover glue to prolong shelf life. Your glue will keep and stay viable for quite a long time if you protect it from heat and humidity. Pop leftovers in the refrigerator and they will be ready to use for months. Simply warm them up to room temperature or using a bowl of warm water immediately prior to use.
Step 12: Finished! You are all done. Congratulations on making your own batch of easy, cheap, and effective gelatin glue.
Why Is This Glue Called Semi-Permanent?
Because it can be weakened and, potentially, removed through the application of heat. Using a heat gun or even leaving thin workpieces in the sun for a few hours may be sufficient to loosen the bond and allow removal.
Is This Gelatin Glue Actually Strong, Then?
Yes, though that doesn’t mean you can use it for anything! You should use it for paper, mostly, but feel free to experiment – and drop a comment below to tell us what you tried to glue and how it went!
Most things will tear out or rip before the glue fails, especially if you get a good bond via clamping when applied. The trick to getting maximum strength from it is in the cure time: give it at least 3 hours to form a strong bond, and overnight is better.

Tom Marlowe practically grew up with a gun in his hand, and has held all kinds of jobs in the gun industry: range safety, sales, instruction and consulting, Tom has the experience to help civilian shooters figure out what will work best for them.