Dental emergencies are often more painful than they are medically serious. This only holds true however if you live in a western country with good access to healthcare.
If there comes a point in the future where emergency dental treatment is no longer an option for you, it’s imperative you have a dental emergency plan in place.
Untreated dental problems can be so painful they become debilitating, i.e. you cannot function on important tasks, and eating a sleeping become a struggle. You only get two sets of teeth in your lifetime, so obviously you will want to be taking good care of your teeth now to avoid dental problems in the future.
There are some scenarios however where even good oral hygiene and care can’t protect you. Any trauma to the mouth or face could damage a tooth, gum or the underlying nerve root and bone.
Despite the fairly wide range of issues you could face from injury to infection, there are a few basics that should be in every prepper’s emergency dental kit.
Disclaimer
The information in this article is provided “as is” and should not be mistaken for or be a substitute for medical advice. While Shane Jackson is a doctor, he is not your doctor, so consult your physician before trying any of the advice presented on this page.
Always seek the help of a professional. Neither the author nor www.SurvivalSullivan.com or the company behind the website shall be held liable for any negative effects of you putting into practice the information in this article.
Basic Dental Emergency Kit
This kit is the absolute bare minimum that should cover the widest range of possibilities. Bear in mind you want to have a more complex kit than this, but if you are stuck without outside help, you can get by with the below.
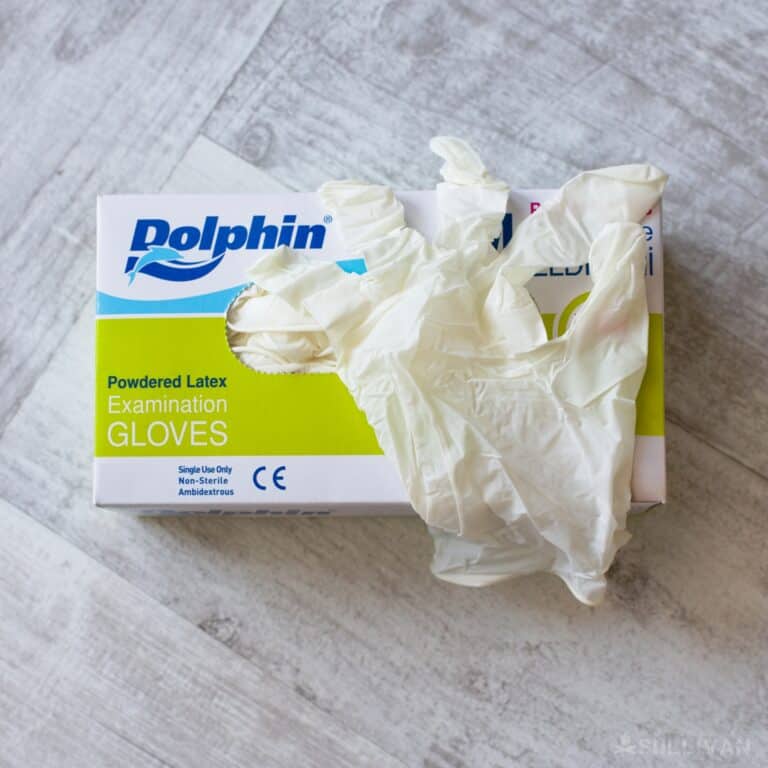
- Gloves – Medical gloves would be the best choice, but any thin glove should do. Extra cautious folks may want to buy vinyl instead of latex gloves. Latex allergy is fairly common, you don’t want to cause someone to have an anaphylactic reaction when you’re trying to help them! Either way, make sure you wear some type of glove that is clean or has been sterilized in boiling water. You want to avoid bringing bacteria from your finger into a dental wound or infection.
- Salt water – The first antiseptic and antibacterial known to man. Any wound with or without debris should be washed out with a salt water solution. This is made at home easily by mixing a few tablespoons of salt with a tall glass of water. This mix should hold off any immediate infections from taking hold.
- Small mirror – you can use a spoon if you cannot find a small enough piece of mirror. This will be needed to get a proper look at the wound. Do not use a mirror broken into smaller pieces as you will likely end up cutting the gum or cheek by accident.
- Light source – Use the sun, a candle or a light in conjunction with the mirror so you can get a good look at the wound you are trying to treat.
- A toothbrush! – Don’t forget to include it in your emergency pack. In fact, you should stockpile as many as you can, since they’ll be hard to come by when store shelves are empty.
Intermediate Dental Emergency Kit
This kit should include all of the above and some easy-to-find extras from your local shops. You will notice the above basic kit doesn’t even have pain relief! You will probably want to include some as outlined below:
- Alcohol wipes – an upgrade to the salt water rinse in the basic pack. They come in individual packets and the fact you can use them just on the affected area means you are less likely to feel sick from the 99% alcohol solution.
- Floss – Often sharp and hard bits of food that seem to be stuck impossibly between teeth are removed much more easily with floss than anything else. Using floss is also safer than using anything with a sharp end. Remember you always want to avoid causing further injury!
- Cotton Balls – These and great and multi versatile parts of your emergency dental kit. They can plug bleeding caused by a knocked out tooth, they can be soaked in pain relief and applied directly to an exposed root or provide a barrier between s broken tooth edge and the inside of your cheek. Definitely a worthy addition to your kit.
- Ibuprofen / Paracetamol – use either of these as your pain relief of choice. They are easy to come by and take the edge off bad pain. Just make sure to read the package, never take more than 4g of paracetamol a day – that’s four lots of two paracetamol tablets.
- Vaseline – this is also found easily in drug stores and can cover nerve roots and empty fillings. If your tooth has fallen out and you want to take it to an emergency dentist to have it refitted one of the best ways is a tooth storage solution. If you don’t have one to hand covering the tooth in Vaseline could prevent it from dying while you wait for reinsertion.
- Gauze – useful for plugging bleeding like the cotton balls, but also has a dual use for gripping and holding the tongue. Those gloves can be slippy when wet! Make sure you are buying gauze that comes in a sealed packet from a pharmacy or drug store. You don’t want to introduce outside bacteria into the mouth unnecessarily.
Advanced Emergency Dental Kit
This kit includes everything from the previous two kits, but with a few harder to find and more expensive items. Some may come at a price, but anyone with dental issues will tell you it is much better to rid yourself of dental pain and problems as soon as possible.
- Clove oil – This can be ordered online or in your local drug store. This is oil from the same cloves that you cook with. It has a very strong taste, and contains active compounds which have been used for centuries for nerve and tooth pain. It has a low side effect profile, meaning it’s safe for almost anyone to take.
- Disposable cold compress – these should be in your general emergency kit already. Don’t rely on the freezer ones in case you end up without electricity. The snap and go cold compress can be held at an affected tooth and reduce swelling, pain and further damage.
- Topical Anesthetic – This is usually some sort of ‘-caine’ like Novocaine but definitely not cocaine! This will provide good immediate relief but there is one downside. Local anesthetics like this are very short acting, meaning if you have severe pain you will end up applying the treatment often and running out of your supply. Although it can be the most effective treatment in some cases you should not rely on it as the sole pain relief you have.
- Hydrogen Peroxide – A much stronger antiseptic overall than salt water or alcohol wipes. Make sure you read the instructions first before swilling this around your mouth. Make sure you spit the solution out and don’t swallow!
- Dental wax – This is used by dentists to coat braces and the sharp edges of broken or fractured teeth. Luckily it is available at local drug stores for the public to buy.
- Tooth solution – If you can get access to a dental or medical center you may want to be investing in a tooth solution. This is a vial of salt water that has been made up to be the same salinity or saltiness as our body. This is much better than covering the tooth in Vaseline, and could mean a greater chance of you tooth being reimplanted successfully. Bear in mind you have a few hours to have a tooth planted, it certainly won’t happen the day after an accident.
- Temporary filling – A paste that can be more expensive than other items but is a life saver. If a filling is knocked out the tender tooth root underneath will be exposed to the elements and cause considerable pain. Smooth the paste over the area to get almost instant relief.
Some Final Warnings
No good guide emergency guide misses out what you shouldn’t be doing! Often these things are as important as knowing the right steps to take. Our top three things to avoid in a dental emergency will save you a lot of pain and blood so make sure to remember them!
- Don’t smoke! Probably the most important point on the list. When you have a fractured tooth there is always the danger that the nerve root is exposed. Smoke from tobacco is very drying and contact with this dry air causes searing pain in the nerve. Smoking also will dry and damage the edges of any wound you have of your gum or cheek. This delays the healing process and could lead to any wound becoming infected instead of healing/
- Don’t take aspirin for pain relief. Stick to acetaminophen / paracetamol instead as this will lessen your pain without the blood thinning side effects of aspirin. You don’t want to start losing more blood than you have to.
- Don’t drink alcohol to numb the pain! Having a drink or two with an injured tooth or gum is fine, but if you have a more serious injury to your face, jaw or tooth don’t drink in an attempt to ‘take the edge off’. Drinking this amount is just like taking another blood thinner and could slow any wound healing.
Shane is a medical doctor with over 8 years experience in both hospital medicine and surgery. He’s completed over 2 years of surgical work focusing on trauma & orthopaedics alongside maxillofacial surgery. He has been involved in education since medical school and have written courses and taught classes.
Having trained in Advanced Trauma and Life Support he is at the forefront of practical, out-of-hospital medicine which can be applied by the public to save lives.
Many survival dental kits can be purchased on-line, including one
with tooth extractors and everything. If you’ve got the bucks.
Find out who is really your friend, ask them to extract that bad tooth for you…
little known home remedy if you’re in a pinch with an exposed nerve,from cavity or if you get a dry socket after having a tooth pulled.Mix a couple drops of clove oil with either shortening or soft (honey comb type) bees wax ,warm it enough to get it in a small rounded syringe,fill the cavity or hole,it gives almost instant relief. Bear in mind this is only temporary,and will have to be reapplied as it dissipates,but will get you thru until you can get to a dentist!
This is probably is as important as a medical kit itself. Infection is our number one enemy (in both good times and bad). To be able to take care of a dental emergency in a SHTF situation, gives them a great advantage. I’m no doctor (don’t do this :)) – but maybe consider some sort of animal antibiotics to add to the kit. As always, put an expiration date and inventory regularly to make sure all items needed stay up to date and in the kit. Respectfully, The Breakaway Homesteader.
What type of antibiotic would work for a dental infection?
Amoxicillin in the first line antibiotic for dental infections.
For toxicity purposes, wouldn’t swishing with and/or swabbing the area with Listerine, and/or vodka and using coconut oil preferable to using isopropyl alcohol wipes and Vaseline/petroleum jelly?