To say you’ll never become anyone resembling a good and capable, confident shooter without practice is no exaggeration and there are few who would dispute such a claim. After all, practice makes perfect.
Yes, indeed it does, but a common stumbling block to said practice is the costs associated with it: as far as getting in the reps with a gun, of any kind, it is expensive.
The costs of ammo and range time accrue quickly and can strain your finances. Add in the cost of professional training and developing your skillset with a firearm can become expensive indeed compared to some other skill like martial arts or primitive habitation.
So what is the well-heeled and well-intentioned prepper on a budget to do? No practice at all, or practice intermittently? No sir and no ma’am. Shooting is a skill with a short half-life, that is to say it decays quickly if you don’t work at it. No, the answer is one that will not cost you anything beyond a little imagination and dedication: Dry fire.
Table of Contents
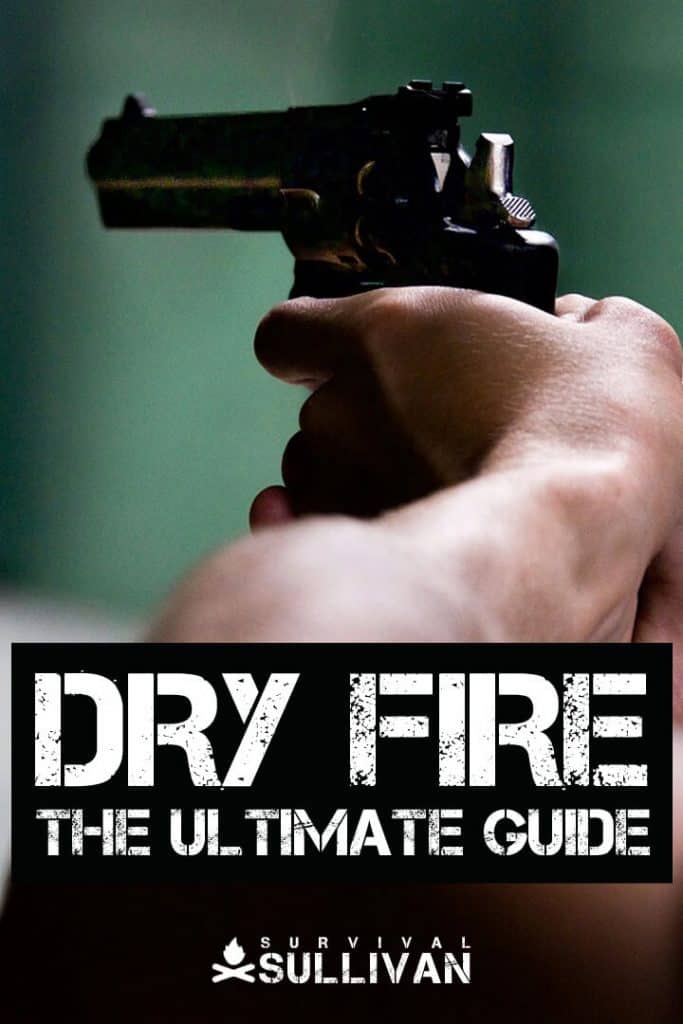
What is Dry Fire?
Dry practice, most often called dry fire practice or just dry fire, is a method by which one will engage in practice or even training with their firearm without using any live ammunition. It specifically means to press the trigger and trip the sear with an empty chamber.
Far from an idle pastime or method of ascertaining a gun’s proper function or tuning, dry fire is an immensely potent tool for improving skill at arms.
Dry practice can be used to refine every single component of the shooting process except recoil control and verification of your shot, and for the latter that is becoming less of an issue thanks to modern electronic training aids.
Consider that the actual act of shooting, all the way up to actual ignition of the primer and powder charge in the cartridge, changes not one iota whether it is performed “hot,” that is live, or dry, with no ammo in the gun.
Everything from the acquisition, draw and reholstering of the gun to the alignment of the sight, trigger press and reloads can be performed over and over again ad infinitum all for the cost of a little sweat equity in the comfort and convenience of your own home.
Do not be deceived that dry practice is not “real” practice, will produce no improvement or is of no value because a bullet does not leave the end of the barrel.
While it is true that live fire is always best, dry fire practice can yield drastic gains across most characteristics and skills so long as it is done properly and consistently.
The best shooters in the world will dryfire their guns five or even ten times in practice for every live round they touch off on the range. If it is good enough and valuable enough for those with nearly unlimited access to ammunition, it is certainly good enough for the rest of us normal earth people.
What Dry Fire Practice Will Do for You
Done consistently, often and properly, you can expect to experience the following improvements as a result of dry practice alone:
- Better accuracy resulting from improved trigger control and refined application of shooting fundamentals. Greasing the groove works across all kinds of physical activities, shooting is no different. The more you correctly repeat the actions required for good shooting with a high degree of fidelity, the better your shooting will be when you go live.
- Better speed: a faster reload, a faster draw, and quicker time to target. Quite a few components of defensive shooting do not involve firing a shot or pressing the trigger at all. Both kinds of reloads, drawing from concealment and presenting the gun cleanly and efficiently to the target can be practiced quickly and repeatedly without even stroking the trigger.
- Greater confidence at all ranges. Ingraining correct procedures and your personal rhythm for completing the shot process will yield better performance at longer range, especially with a pistol. If you have been struggling near the 25 yard line, a prescription of regular dry fire on a reduced size target will help.
- Improved reactions. Less bumbling, fumbling and hitching when surprised or startled. Repeating an action enough times under a “go” or startle stimulus will eventually wire that action to a default response, i.e. a reflex. If, under a sudden threat, your pistol is already clawing skyward while most people are turtling, you’ll have a decisive advantage.
- Malfunction practice. Most common malfunctions can be easily set up using dummy rounds and empty cases so you can practice this all important skill with safety before you need to confront such a thing live.
Dry fire is not a hobby, not a gimmick and definitely not some Charles Atlas bunk. Dry fire works if you do and do it properly. I’ll show you how to get started in the rest of this article.
What Dry Fire Practice Can’t Do For You
As important as it is in the evolving shooter’s repertoire, dry fire loses a few things compared to live fire:
- No verification of shot without additional training aids. If your sights are on, you know where your gun and ammo impacts at a given range and your sights are on the target when you break the “shot” dry, you can be confident that it would have resulted in a hit. That being said, without a hole in a piece of paper, a splat on steel or a blip from a laser marker you will not be able to confirm and collate your shots to perform diagnostics on anything you might be doing wrong.
- No blast means no stress. This is a bad thing if you are one of the bazillions of shooters who suffer from flinching. Your flinch will very likely not manifest when you know there is no kaboom coming. Relentless dry practice and refinement of the shot process can help somewhat through positive reinforcement, but the only way to beat the flinchies is through exposure to the stimulus and sheer determination.
- No recoil means no opportunity to practice recoil control. While “hang on to the gun” seems to be the only part of that phase of the shot process, the finer points must be practiced live so you can learn the moans and groans of how your gun behaves when shooting at speed. You won’t really be able to work on getting the gun settled, the next shot prepped and delivered on target under recoil and at speed unless you go hot.
- You might not be able to truly simulate a follow-up shot. Depending on your firearm’s trigger and the way it behaves, you might have to manually recock the hammer or run the action to reset your trigger between dry pulls. This is not the end of the world, but it can make training with any gun not utilizing a constant double action pull a bit cludgy. Take my typical DA/SA carry pistol. When dryfiring that first long trigger pull I should get a short, crisp single action pull for subsequent shots. No such luck when dryfiring unless I manually run the slide to cock the hammer or do so with my thumb.
While this seems to be a fair laundry list of shortcomings, it is not so much to turn off any serious practitioner from dry fire in any circumstances. What you stand to gain is just too great compared to the few quirks and flaws that dry fire cannot cover.
In the following sections I’ll tell you what few things will make your dry practice sessions safer and more efficient and then detail some drills you can implement to improve your skills.
Equipment List
For the majority of guns, really the only thing you need is your firearm and your brain. That’s it. But there are a few things you can use to open up more exercises and to make your sessions more valuable and safer. List below, but in full disclosure I am biasing it toward handguns.
- Gun – Duh. That’s why we’re here in the first place! Any gun worth using is worth dry practicing with: bolt-action or semi-auto rifles, shotguns of any kind, handguns of all stripes. You get the gist.
- Dummy Rounds – Specifically a snap cap, which is a dummy round constructed with a special cushion or sprung panel where the primer would be to receive and soften the strike of the firing pin. Not 100% necessary, as the huge majority of guns are not harmed by dry fire contrary to common conception, but they sure don’t hurt and are also useful for reload and malfunction practice which we’ll get to in a bit. You can use what are known as action-proving dummies, which simulate a live cartridge in all aspects save a live primer and powder charge, to load in magazines or chamber in order to faithfully duplicate the weight and balance of a loaded gun.
- Magazines, empty – If applicable to your specific firearm. You definitely want the magazine in the gun while you are practicing, both to help improve balance and for a proper grip in the case of compact handguns. You will also need a magazine in the gun for most malfunction clearance drills.
- Ammo Carriers – Whatever you plan to reload off of, make use of it in your dry fire to practice those reloads. Belt pouches, ammo caddies, spare pairs- whatever you use and what works. Make sure you remove all live ammo sources before using them for practice. See next section.
- Timer or Timer App – Not purely necessary, but a timer that can give you a “go” signal randomly after you trigger it in order to refine your draw and time to first shot is helpful. If you are a serious shooter you’ll already likely have one of these and you can always get one for your smartphone in the form of an app.
- Crash mat – a piece of anti-fatigue matting or even an old blanket folded up a few times to lay at your feet will help save wear and tear on magazines and dummy rounds when dropped, and will also save your flooring.
- Target – This could be anything, from a dot on the wall to your typical targets you train with on the range taped up with a bit of painter’s tape. You’ll also want to come up with small targets for simulating acquiring a sight picture on a distant one.
That’s really all there is to it as far as equipment goes. Not as much as you might have been thinking if you have been a long-time reader of mine, eh?
Preparing the Practice Space
Dry fire practice does not demand much in the way of preparation, as so long as you have enough room to manipulate the gun and index on a target you are all set.
That being said, you preparation must be thorough and demands you total and constant attention, lest you court disaster and tragedy by getting the bang when you were expecting the click.
If you are distracted or still mentally sifting through the baggage of your day or what you still have left to do, now is not the time for dry fire practice.
THE FOLLOWING STEPS ARE NON-NEGOTIABLE WHEN PREPARING FOR DRY FIRE PRACTICE
- Ensure All Guns are Completely Unloaded and Clear of Ammunition
- Check it. Now check it again. No mistakes.
- All Live Ammunition and Loaded Magazines/speedloaders Must Be Removed From Practice Space
- Don’t forget to empty your worn pouches, pockets and bags of EDC magazines.
- Nearby or out of reach is not acceptable. Deposited in the next room or in a closed container is acceptable.
- Verify All Dummy Rounds and Practice Magazines are Free of Live Ammo
- It’s funny how lone live rounds have a way of infiltrating “sterilized” boxes, pouches and magazines. Never load dummy rounds mindlessly
- Redouble your caution if you use action-proving dummies that closely resemble live rounds.
- YOU MUST CHECK EVERY SINGLE ONE EVERY SINGLE TIME!!!
- Setup Target on Surface with Fewest Potential Unknowns Beyond and With the Best Possible Backstop
- “Know your target, your target’s background and your target’s foreground. What will stop a round? What won’t?”
- If you are inside your home, you should never dryfire in the direction of inhabited rooms or areas.
- All Rules of Safe Gunhandling Still Apply
- Dry fire is never an excuse to horseplay or get sloppy with your guns. That way lays tragedy and death.
Now, with all that done, you are ready t get to some practice.
Dry Fire Drills for Shooting Success
There are all kinds of ways to implement and modify various drills for dry fire success. Here are a few of my favorites.
Classic Fundamentals Drill
This is probably exactly what you are expecting. With your target on the wall, clear your mind and focus on perfectly executing all elements of the shooting process from the ready position.
Really focus on keeping your sights perfectly on target until the shot breaks. Start engraving what that perfect shot feels like so you can replicate it under any conditions on demand.
Don’t settle with a shanked shot. If it went bad, when, what element? Why? What, if anything caused it? The data contained therein is valuable if only you will take the time to mine it! I always begin and end my dry fire sessions with at least ten reps of this standby.
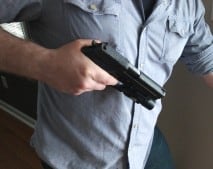
Draw and Shoot Drill, at Speed
Starting with the gun in the holster, or at the ready position if you aren’t using a holster, setup a “go” command and then present and press a single, well-aimed shot on the target at speed. A timer set to random start with a par time is ideal here. Lacking that, simulate it in your head as best you can.
Focus on precision and increasing speed to the point that you start botching it. Back off a bit, then try to stay at that speed for at least five reps in a row. That will be your new benchmark.
Reload Drill
Whatever guns you are using, practice reloading them, both from an empty and partially loaded condition. For a semi-auto handgun, this means practicing speed reloads and reloads with retention, or “tactical” reloads.
Don’t game it! For a speed or emergency reload, simulate actually pressing the trigger on the empty gun so you get the feedback of a dead trigger, and then begin the reload process. You’ll be wiring that stimulus in your brain and that will make you faster.
For a reload with retention, practice placing the partial magazine wherever makes sense for you, if that is in a pocket or back into a single pouch where you can access it later.
Your “fresh” magazines should contain dummy rounds, both to lend a little extra weight and also to allow you to properly index your support hand index finger just beneath the tip of the first loaded “cartridge” for maximum control upon insertion.
Keep in mind that doing those little things to increase fidelity with live fire training will pay dividends. Don’t skimp on them!
Malfunction Reduction
You can setup simulated malfunctions of all kinds using dummy rounds and fired, expended cases. Everything from a failure to fire, failure to feed and failure to extract or “double feed” can be quickly set up with a little practice.
Now, one note of caution: compared to a gun actually cycling from a live shot, most “hand crafted” malfunctions will not be as gnarly or hard to clear.
Some of them will be quite a bit easier than usual. For this reason, you should really step on it when applying remedial action. Give it some gas!
These are all skills that save lives when the stakes are high, and high-order high-speed problem solving is what separates gunfighters from mere gun-owners. Don’t neglect these drills in your dry practice regimen.
One basic malfunction that is all too common is applicable to all kinds of guns, especially revolvers and semi-autos: the failure to fire. A click, instead of a bang. This occurs for several reasons.
In a semi, it often happens because of a dud primer or a magazine that was not fully seated resulting in the slide missing the topmost round on the return stroke into battery.
That’s why you push the magazine all the way home until it locks then pull it to ensure it is locked in place when conducting your admin load! For a revolver, it is typically a dud round or empty chamber if you get a click.
There are a few specifics unique to both types that I’ll handle in their corresponding sections just below. You can check out some other article here on the sire for more in-depth coverage on dealing with specific malfunctions.
Semi-Auto
A semi failure to fire is always conducted the same way so long as you get a click. You tap the bottom of the magazine briskly to ensure it is seated, then you rack the slide to either load a round or extract the dud no matter which way it happened, then you are ready to reassess or continue shooting. Tap, Rack, Ready.
For your drill, conduct this with a magazine loaded with dummies so you can cycle through multiple reps without the slide locking back on you. First simulate a “click” by pressing the trigger on the target.
Do it right! Don’t phone it in just cause you are practicing malfunctions now. Upon internalizing a “click” bring the gun back into your workspace, briskly slam the magazine with the heel of your support hand before running the slide. Then represent the gun on the target.
Don’t press the trigger immediately! You may no longer need to shoot, and assessment is an ongoing part of the shooting process.
A mushy or dead trigger on a semi means the gun is out of battery. Assess: is the slide locked open/empty? If not and it appears normal, it may be just a hair out of battery, commonly caused by riding the slide home upon chambering a round. Briskly tap the rear of the slide with the heel of the support hand to seat it and try again.
Revolver
For a revolver, if you get a click, you just pull the trigger again if it is early in your load. If you have touched of a few rounds, you might have simply emptied the gun in all the excitement.
If it happens on the first or second round, you likely have a dud. Pull the trigger again. Two clicks in a row is usually your sign that the gun is empty or you have a broken firing pin.
A locked or frozen trigger in a revolver indicates major breakage, some object impeding the action or a cylinder out of battery. The latter is not uncommon.
To remedy, reach up with your support hand from below the gun and press the cylinder home while twisting it in its typical direction of rotation. Any perceived movement and clicking followed by the cylinder locking is a Good Thing. Try to fire again.
As a quick aside, revolvers are often touted as superior in reliability compared to semis, and supposedly they do not “jam.” This is patently false, as any seasoned revolver aficionado will tell you. Revolvers do malfunction; they just malfunction in different ways than semis.
While a semi requires working knowledge of various types of malfunctions and the steps to reduce them in order to get the gun working, they are far less likely to experience catastrophic breakage or tie-ups than a revolver is.
A revolver will generally experience two broad categories of malfunction: little ones remedied immediately by pulling the trigger again or pushing the cylinder back in place, or great, big fugly ones that require detailed disassembly on a workbench to remedy or repair. Not much in between. Just something to keep in mind for your practice.
While it pays to know what to look for when your revolver starts misbehaving, something like debris between the back of the cylinder and the breechface or an ejector rod unscrewing itself and preventing the cylinder from being released, these are rarely things you can fix quickly enough in a confrontation to make attempting them worthwhile.
For that reason, such techniques need not be attempted during dry fire.
Scheduling
I know this sounds infomercial cheesy, but I am telling the truth (sincerely!): you can see significant improvement in you shooting with just ten to fifteen minutes of dry fire practice 4 to 5 days a week.
In fact, frequent, shorter sessions work better for skill building and skill maintenance than long, drawn out affairs. If you are telling me you cannot spare that much focused time to better yourself as a shooter, well, I am not saying I don’t believe you but you either have a hellaciously busy life or your priorities are screwed up.
Just be sure to never, ever, never ever rush your safety checks and procedures before beginning practice, and you can squeeze in some high-quality, high-yield dry fire nearly anytime and anywhere.
Conclusion
Few practice methods have a bigger cost-to-value ratio than dry fire, and it is an indisputable tool for any shooter, from beginner to grizzled pro.
Take the time to plan your dry fire sessions around you goals and desired path to improvement and stick with it. You’ll notice improvement at the range after just one solid week of dedicated practice.
Charles Yor is an advocate of low-profile preparation, readiness as a virtue and avoiding trouble before it starts. He has enjoyed a long career in personal security implementation throughout the lower 48 of the United States.
I use a laser cartridge in my dry fire practice for feed back on where my rounds would hit.
I use a B27 target and at least 25 rounds in a CNS box on the target and random range shots while moving and drawing. My goal on the random shots is to keep them in the 9 ring.