Use it when packing your gear for your BOB, or just because you want your hatchets, knives, and other tools to have a comfortable, versatile grip. Paracord is an excellent choice when it comes to choosing a handle wrapping material.
Not only does paracord serve as a good grip material, but by wrapping your gear with it, you will have a supply of it on hand for tying things, making snares, and anything else.
Styles of Wraps
There are many techniques for wraps and knots that you can use when wrapping handles with paracord. If you are very patient, and good with knots, you can get downright fancy with it.
Last week I learned to tie a monkey fist, I tied mine around a 1” steel ball bearing. Nice and destructive. I have to admit though, when I finished it I didn’t like the way I tied the handle loop.
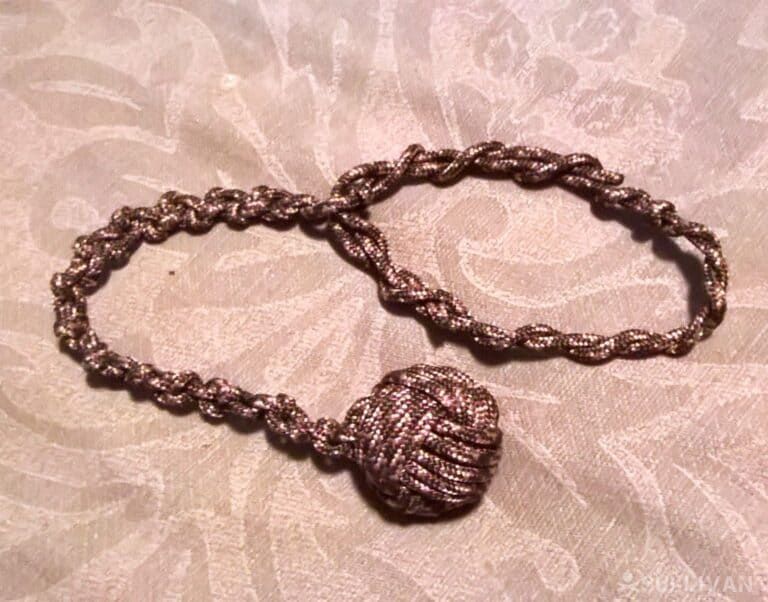
So, of course, I untied it and started trying to learn a better knot for it. It’s still not tied. Some of those knots get tricky, I think I might just braid it and be done with it. I’m pretty good at braiding.
Learning the Ropes… or Cords
I have used leather many times in the past to wrap a stick, sword, tool, or knife handle. I never really considered wrapping them with paracord to be honest.
I always looked at paracord as some good, strong utility cord to have balled up in the BOB, hunting pack, and in the back floor board of my car. You never know when it will come in handy. Like last fall when I tied a deer to my trunk with the paracord I keep in my car.
Stone Sling
But now I’m seeing paracord as a far more versatile material than I have previously given it credit for. I even wove a stone sling from paracord. To do it, I first pulled all of the inner strings from the outer casing. This made the cord lie flat and be lighter.
To make it I took one long piece about three feet long. Right in the center I made an elongated “S” shape. I then used another piece, this one longer, about five feet long if I remember correctly, to weave the pouch. I just left a few inches hanging and started weaving under, over, repeat.
When I got to the outer edge I just went around and back under, then over, under again. When I got to the end I just tied the pouch string to the other line. Then I went back and tie the loose end of the pouch string where I started to the main line, trimmed the ends and it was done.
Of course I took it right outside and tried it out. I’d never tried to use a stone sling before. It took a few tries to get the rock going in the direction I wanted it to. I think it’s safe to say I won’t be eating anything killed with my sling anytime soon. It’s going to take a lot of practice before that ever happens.
What I did learn though is that when you are swinging it overhead, let go and kind of point at what you want to hit and the rock goes where you pointed. So far I can hit the side of my garage with a rock, but I can’t pick which block I want to hit. I think I could just throw the rock and have better luck.
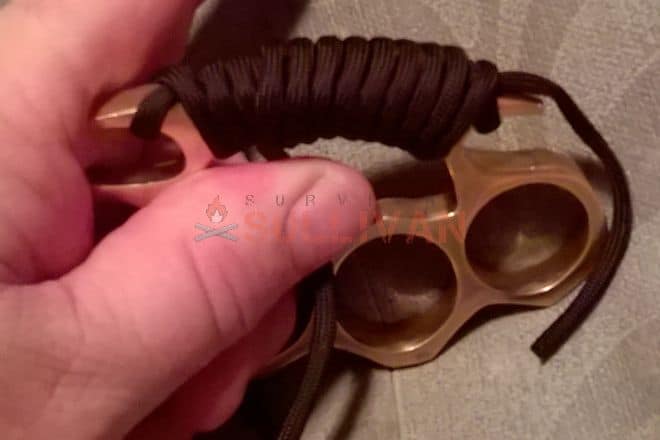
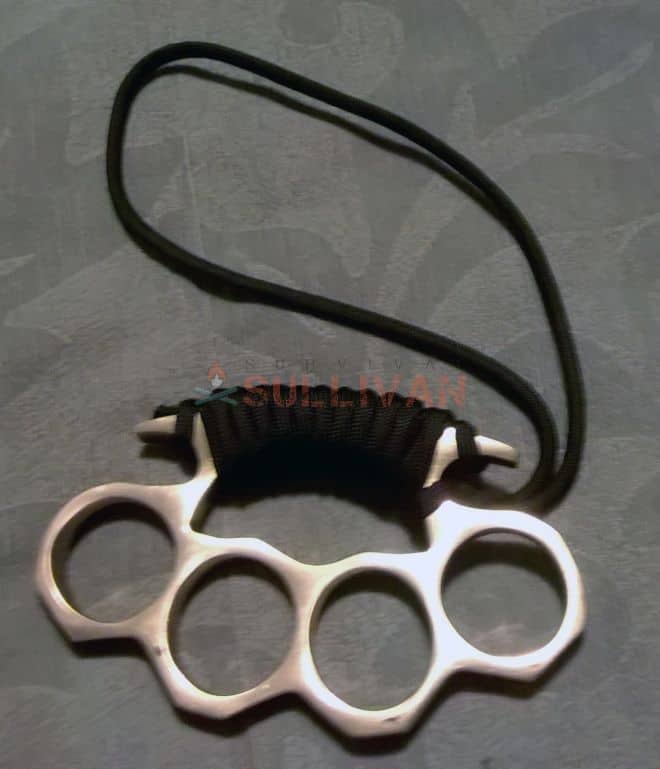
Brass Knuckles
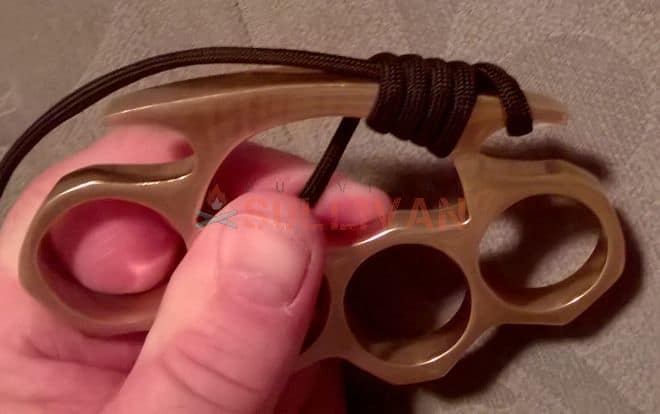
A while back, I started wrapping some brass knuckles with a leather string but the string broke when I tried to tighten it. So, they have just been sitting with a broken string hanging from them. But tonight, for this article, I got them out and wrapped black paracord around them.
It came out pretty good. The palm piece of the brass knuckles is much more comfortable now. I wrapped a few passes on them to make it bulky so it fit in my hand better and cushioned them in my hand.
I left a length hanging and tied a wrist loop so that “just in case” I don’t drop them. By the way, yes, I can carry brass knuckles legally because I have a Kentucky CCDW permit. FYI, CCDW means “Concealed Carry Deadly Weapons”.
It covers not only carrying concealed handguns, but also certain knives and other weapons like brass knuckles, blackjacks, and pretty much anything. Of course here you can carry most of those things without a permit. You just can’t carry them concealed.
Simple Wrap
I had this old, cheap sword since I was a kid. It was originally kind of like a cutlass, but I changed it into a different thing that has no name. Sort of katana inspired, but without the katana point.
It has a longer handle on it now, and the wood wasn’t pretty, so I wrapped it with paracord:
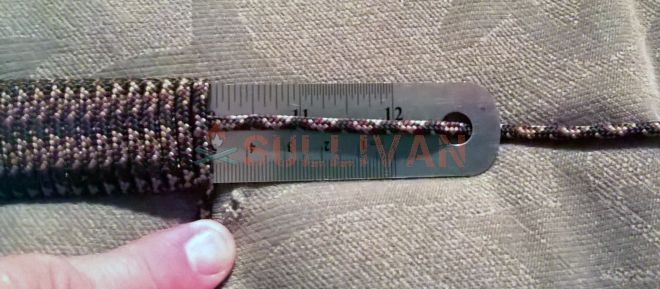
This is a basic wrap, you just lay a piece along the handle, then wrap back over it around and around. Easy. Here is a demonstration of the simple wrap pictured.

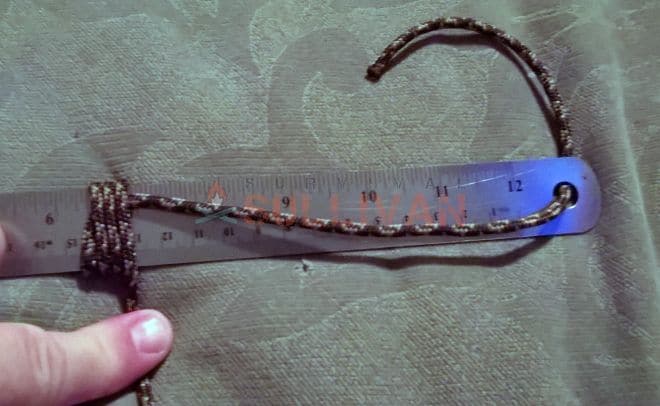

Basic Criss Cross Wrap
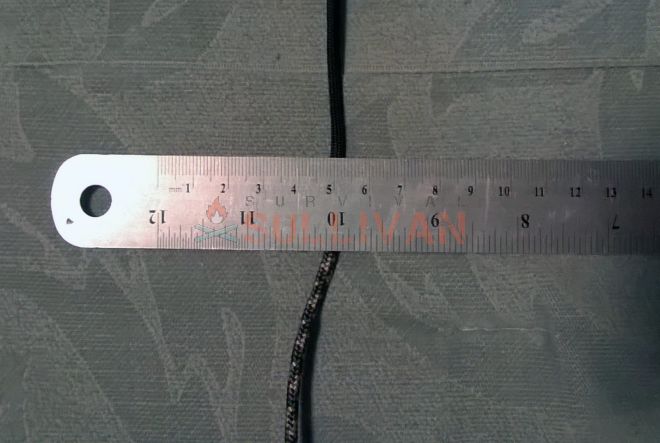
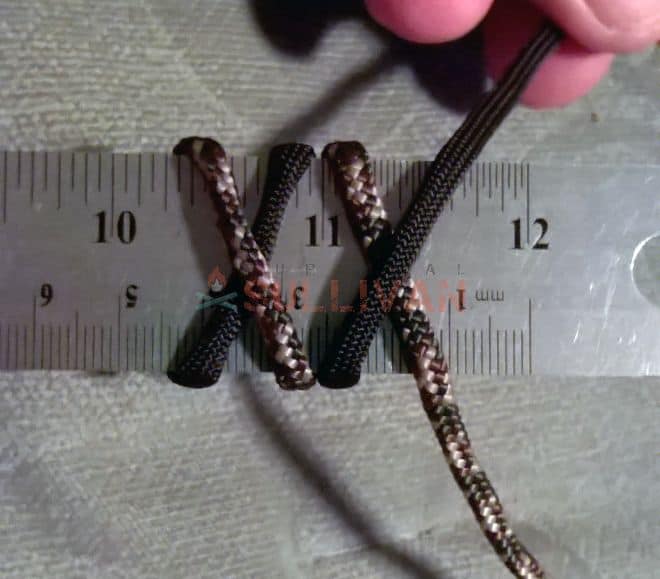
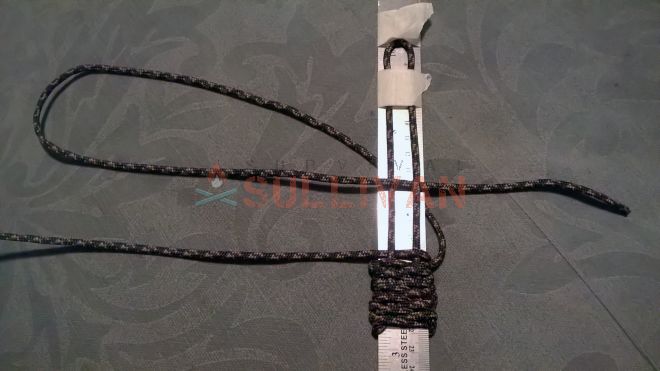
To start you just lay the handle in the center of a length of paracord. I wanted to show a couple of other simple knife handle wraps, but I didn’t have any handle-less knives to wrap. So instead, as an example I wrapped a metal ruler just to demonstrate the process.
The basic crisscross wrap is pretty simple and looks good. You can do this over a hatchet or walking stick handle as well, just to give it some extra grip, and also as a way to carry some readily available paracord.
You then just bring the lengths of cord up and over, crisscrossing one another. Then you go around to the other side of the handle and do the same. This way the pattern is repeated on both sides.
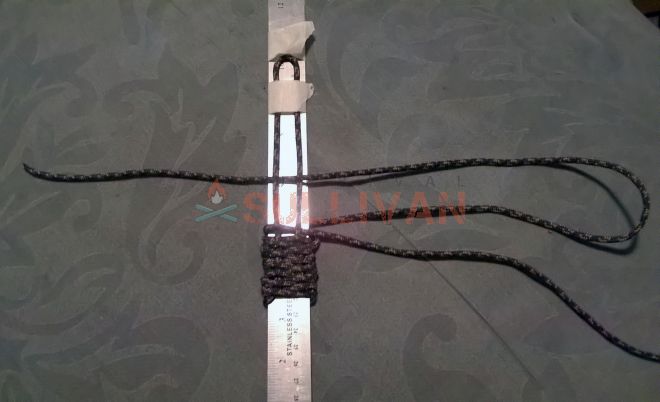
When you get to the end of the cord, or end of the handle, whichever you are going for, you just tie the cord against the handle.
You then take any extra length of cord left and make a wrist loop. If you just have a little cord left, just tie the ends and leave the little bit left over hang.
You can burn the ends with a lighter to keep them from fraying. If you have a substantial amount of cord left you can make a fancy wrist loop with some of those previously mentioned hard knots to tie.
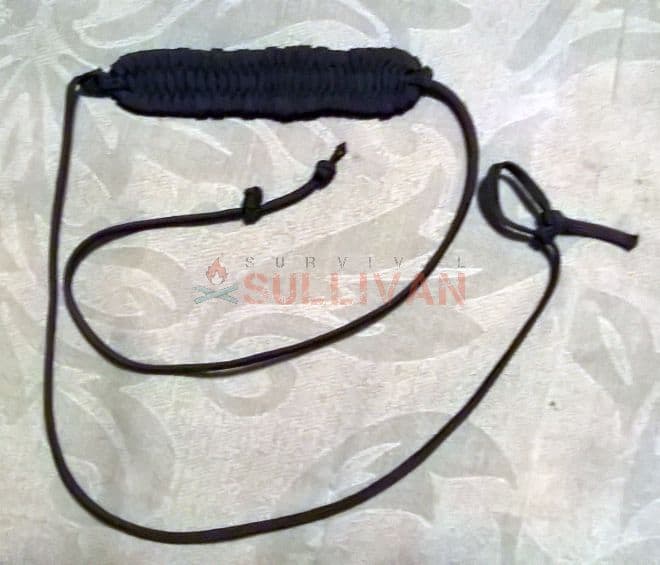
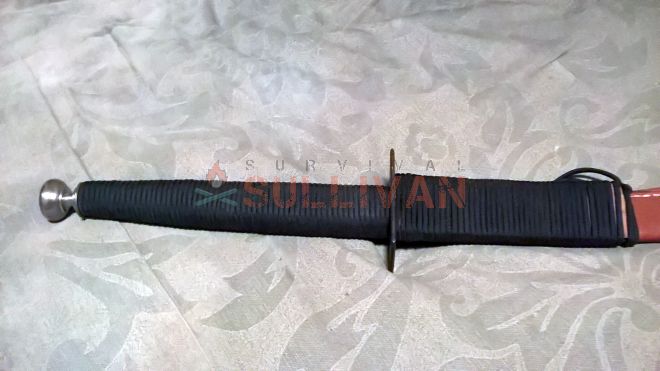
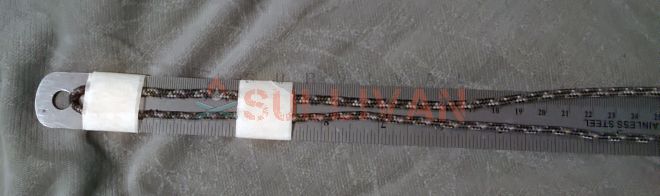
Handle Wrap
This wrap is a little more complex of a style. It is often used on sword handles, machete handles and the like. It creates a thicker layer of paracord on the handle and so is softer and allows for a firm, sold, no slip grip.
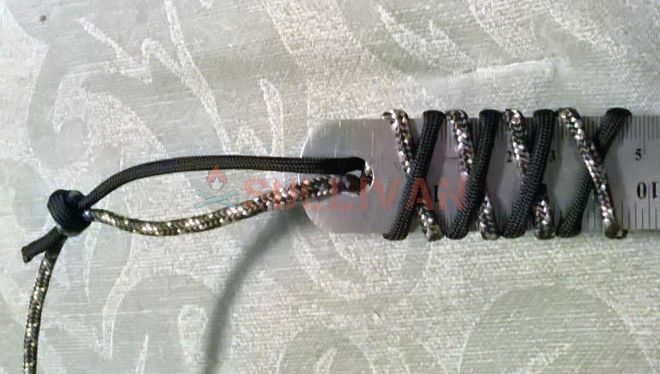
To tie this wrap, you start by laying a loop along the length of the handle:
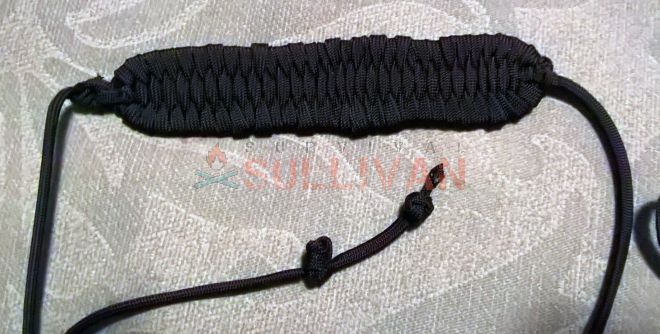
You then take the right side cord and go under the handle and come out on the left side. You then go across the front of the handle and tuck the end under the cord laying on the right side of the handle.
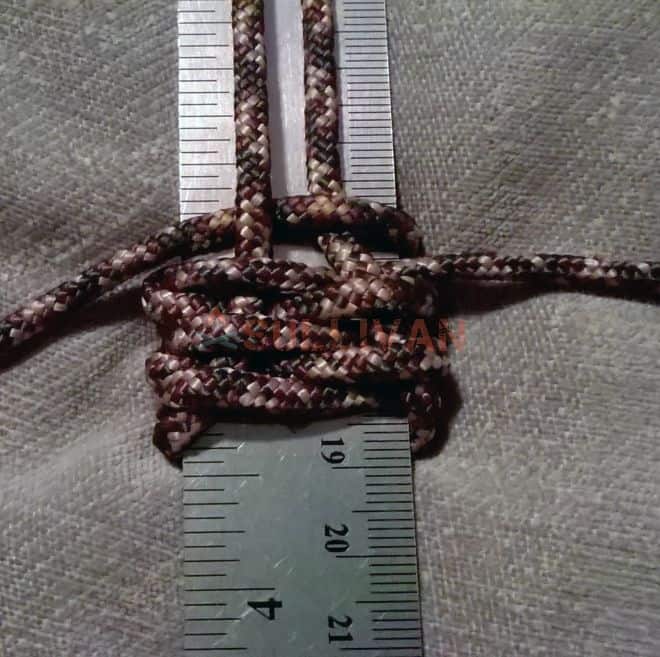
Then you take the left side cord and go under the handle and come up on the right side, then come across the front of the handle and tuck the end under the cord lying on the left side of the handle.
You just repeat this process over and over until you get to the end of the handle. To finish, you tie the ends tight against the handle. If there is a convenient hole in the handle you pass one end through the hole then tie the two cords together. Then you can tie the ends together to make a loop.
Like the other wraps, if you have enough length of cord left hanging after wrapping the handles, you can opt to tie a fancy knot work to make the wrist loop. I’m still trying to perfect that part of the process; as soon as I do I will bring you an update.
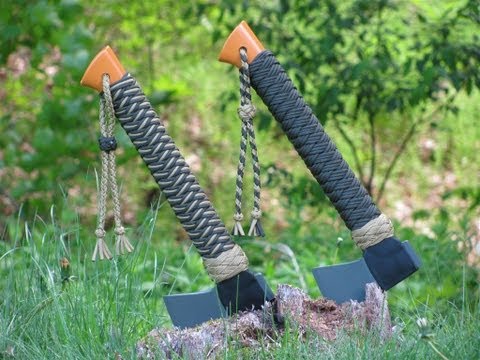
Here’s a video of a complicated axe handle wrap:
Wrapping Up
I know, but I just couldn’t help it. Wrapping the handles of your tools and knives with paracord allows you to make a comfortable, functional grip padding that also doubles as a handy way to carry some lengths or paracord with you.
You can also make other items from paracord like key chains (monkey fist), bracelets, rifle slings, and probably even a belt.
Using paracord on your everyday carry items and making wearable objects like bracelets from paracord gives you a handy way to carry it with you for your EDC. The uses are virtually endless for this handy cord.
Eric Eichenberger is an avid outdoorsman, skilled marksman, and former certified range officer and instructor with nearly 40 years experience handling and repairing firearms.
A skilled craftsman with a strong love for working with his hands, Eric spent 20 years as a carpenter and custom woodworker in high end homes. As a gold and silversmith he has created hundreds of pieces of jewelry over the years using the lost wax casting method.
The grandson of humble country folk, he was raised with the “do it yourself” mentality and so is accustomed to coming up with unique solutions to problems utilizing materials at hand.
do you have a video on how you did that to the brass knuckles? I have a pair I want to wrap like that.