The dilemma in a SHTF scenario is how to have food supplies that will last, and how to preserve the food you acquire. All food is susceptible to mold, bacteria, and insects if exposed to moisture and warm temperatures. Therefore, measures must be taken to keep food in a state that allows it to last as long as possible.
Food preservation these days is simple. Our dry food sits on a shelf, while fruits, veggies, and dairy are in the refrigerator. Meat is stacked in a deep freeze so we can thaw it out whenever we are ready. We have three freezers full of meat.
However, these methods become difficult if we have no electricity or if that electricity is limited. There are primitive food preservation methods that have been used for thousands of years. In this article we will cover ways to preserve your food without electricity.
Most folks, preppers included, take food preservation for granted. As I alluded to above, the very term conjures up thoughts and images of all sorts of modern solutions to this persistent societal problem.
We think of chemical preservatives, the ubiquity of refrigerators, modern packaging and rapid delivery that ensures food never has a chance to go bad.
That is all well and good, and we are undeniably lucky and blessed to be able to take advantage of it, but all of these processes have one thing in common and that is the incredible intricacy and amount of processes that make them work.
Compare and contrast that with ancient or substantially more primitive methods of food preservation. Though they have been employed by various societies throughout the ages, and most of them remain quite effective even today, they are all essentially skill sets unto themselves, and some are completely dependent upon environmental factors that may be out of your control.
the point is, any of the techniques on this list, or even several, might be the perfect solution to your food preservation problems in a short or long-term survival scenario but with few exceptions you should not have the expectation of whipping them together with perfect results the first time out.
These are skillsets, or technologies, that require prior practice and preparation to implement with anything approaching certainty in a successful outcome.
You’ll need to be familiar with every variable and every step in a procedure, and that means you need to practice these ahead of time, not figuring them out in the middle of a crisis.
Now as then, and always, screwing up proper food handling or preservation could result in you ingesting some pretty serious pathogens that could make you gravely ill or even kill you! You don’t want to get this stuff wrong.
Table of Contents
Dehydration
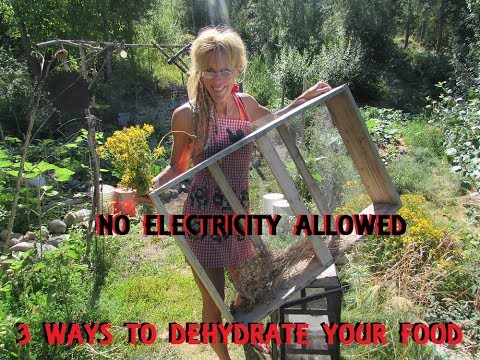
If you’re just beginning to learn about food preservation, one of the simplest methods to preserve food without electricity is dehydration. You can of course use an electric dehydrator if you have power available, but it’s also simple to dehydrate without any electricity at all.
All you need is a couple of screens, some sunshine, and a nice breeze. It’s a good idea to learn to dehydrate food because the result is lightweight, portable, and takes up a lot less storage space. You can learn more about how to dehydrate food without electricity in the video below:
Dehydrated meats, herbs, fruits, or vegetables, once done, should be kept in a cool dry area away from direct sunlight until you are ready to eat.
You can dehydrate foods by smoking, sun-drying, and using an electric dehydrator. For this article we will skip the dehydrator and focus on methods that require no electricity. Sun-drying food is the easiest method by which you can dehydrate.
For this process you will need to cut your food as thin as possible. It needs to be ¼ inch thick or less. Scoring both sides of the food will further help with the dehydration process.
You can either build a rack on which you can place your food, or you can string up your strips of food with cordage.
Ideally, you want to put your food in a spot that has direct sunlight but is also breezy. This will keep the flies away. It should be high enough that animals cannot reach it. Generally, it will take several days to sun dry foods.
You will know it is done when it has the consistency of jerky. When you squeeze the food, no moisture should come out. You can speed up the process by adding salt and spices.
Additional Resources on Dehydrating
Disclosure: This post has links to 3rd party websites, so I may get a commission if you buy through those links. Survival Sullivan is a participant in the Amazon Services LLC Associates Program. As an Amazon Associate, I earn from qualifying purchases. See my full disclosure for more.
- Preserving Food: Drying Fruits and Vegetables University of Georgia Cooperative Extension Service
- Beginner’s Guide to Dehydrating Food, 2nd Edition: How to Preserve All Your Favorite Vegetables, Fruits, Meats, and Herbs by Teresa Marrone
- The Dehydrator Bible: Includes over 400 recipes by Jennifer MacKenzie, Jay Nutt & Don Mercer
- Store This, Not That! YouTube channel
Fermentation
The process of fermentation is one that is not discussed much but is used by most civilizations. It is accomplished by combining yeast and sugars in a way that preserves the liquid and produces alcohol.
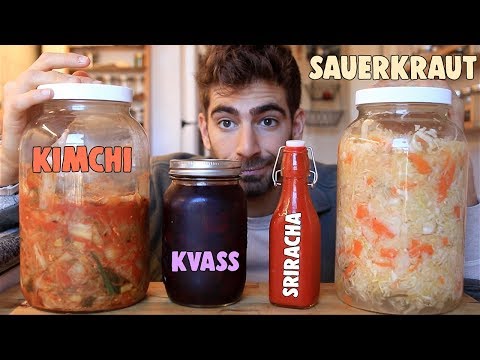
Whether used for trading or for yourself, knowing how to complete this process is valuable. The three types of fermentation are Ethyl alcohol, Lactic acid, and Acetic acid fermentation. You can ferment a wide variety of foods including fruits, vegetables, sugar, beer, wine, or milk.
The process of fermentation is complex and requires knowledge of how oxygen levels, temperature, and timing alter results. Sauerkraut, pickles, kimchi, sourdough bread, apple cider vinegar, yogurt, wine, apple cider, and beer are all made through fermentation.
The products produced can range from medicinal wines to products used to kill bacteria in water or wounds.:There are also a lot of health benefits that come with fermenting your food. The basics of fermentation are in the video below:
Vinegar Pickling
Everyone knows you can pickle cucumbers and you’ve probably heard of pickled eggs. But did you know that you can pickle just about anything? Pickling your vegetables, such as okra, tomatoes, or carrots can extend their shelf life up to three times longer than usual.
You can even pickle fruits such as peaches, grapes, and watermelon rinds. If you choose to boil the vinegar first, it can help to meld all the different flavors together but let it cool before adding your vegetables, so you don’t partially cook them and lose that wonderful crunch.
Additional Fermentation Resources:
- Yeast Fermentation Handbook Essential Recipes by Harmony Sage
- Fermented Vegetables: Creative Recipes for Fermenting 64 Vegetables & Herbs in Krauts, Kimchis, Brined Pickles, Chutneys, Relishes & Pastes by Christopher Shockey
- Home Fermentation: A Starter Guide by Katherine Green
Olive Oil Preservation
Used for centuries in countries of the Mediterranean region and notably Italy (called sott’olio), Spain (en aceite de oliva), and France (l’huile), preserving food with olive oil can help you bolster your long-term food stockpile.
Olive oil is best used to preserve foods that might normally be cooked in olive oil, such as meats, fish, certain vegetables, herbs, and cheese. Foods preserved in olive oil can be stored at room temperature for a year or more, in a refrigerator for several weeks, or the freezer for up to 12 months.
Decide how long you want to store your food so you can process it safely. To store foods in olive oil at room temperature, they must be prepared using a boiling vinegar or salted water solution first.
Tips for Preserving Food in Olive Oil
- Thoroughly dry vegetables after washing them
- Use vegetables free of rot or blemishes if packing in oil
- Since vinegar can react with some metal pans, use stainless steel cookware for best results when cooking foods to store in olive oil.
- Glass containers are best. Caps should close tightly. Use extra virgin olive oil to completely submerge food.
- As with home canning, use your nose and best judgment prior to eating food stored in olive oil. Do not eat food from containers that are obviously leaking or that have bulging caps.
Additional Resources for Olive Oil Preservation:
- Preserving Italy: Canning, Curing, Infusing, and Bottling Italian Flavors and Traditions by Domenica Marchetti
- https://www.youtube.com/user/SerjellaOliveOil
- https://www.youtube.com/channel/UCfem1zfgMHxbGwbM5dvN6Wg
Mineral Oil Preservation
One of things that many preppers are excited to find out they can preserve are eggs. Most Americans store eggs in their refrigerator to keep them from going bad. But the thing to understand with this is that store bought eggs arrive at the store having already been washed and refrigerated.
The natural bloom that would preserve those eggs was washed off during the packaging process. So, store bought eggs must be refrigerated or they will not last too long.
But if you are prepper who is raising your own chickens or if you have access to freshly laid chicken eggs, you probably already know that freshly laid unwashed eggs will keep just fine on your kitchen counter, out of direct sunlight, for several weeks.
But did you also know that you can use mineral oil to preserve those eggs for 9 months to a year!?The first key to preserving eggs using mineral oil is not to wash the freshly laid eggs until you are ready to eat them.
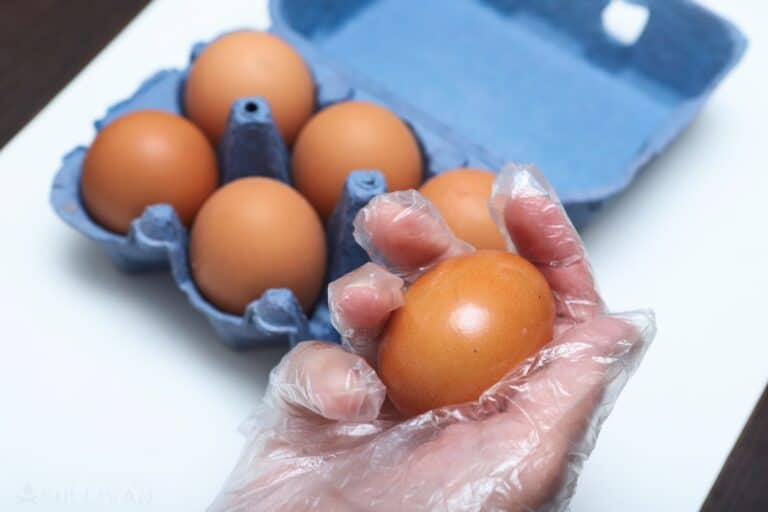
Washing will remove the protective bloom on the eggs and will allow bacteria to get inside the shell. Instead, lightly brush off any clumps of dirt or rub lightly with a towel.
Then coat the eggs with a thick layer of mineral oil. Be sure you have completely coated the entire shell. Place the egg in an egg carton. Store the eggs away from direct sunlight, on your counter.
Once a week for the first month, flip each egg over in the carton. After the first month you don’t have to turn the eggs anymore. You can move the eggs to a cool, dry place to store them until you need them.
When you are ready to use the eggs, fill a bowl with cold water and put the eggs into it. The eggs that float to the top of the water have gone bad. The ones that sink are good to eat. If you have any doubt, throw it out. Take the eggs that are still good and wash them off before using or before boiling for use.
Lye Preservation
A strange, rarely used but undoubtedly effective method of preserving food is through immersion in lye. Lye, AKA sodium hydroxide, works to preserve food chemically through the alteration of the pH balance present in the food.
This stuff is the opposite of acidic, being alkaline and extremely so, and food that is preserved in this way essentially becomes an environment that virtually all forms of bacteria are unable to survive and reproduce in. No bacteria means no rapid degradation of food as we know it, typically.
It sounds odd, and it is, but this method has a long and distinguished history in the preparation of several culturally significant dishes, namely Norwegian lutefisk but also in more common items such as olives and even certain breads like pretzels and bagels where the chemical produces that stereotypical crispy yet chewy crust.
Beyond radical, full immersion preservation sodium hydroxide is also used as a short-term booster to preservation by washing everything from vegetables and fruits to dry beans and even whole cuts of meat.
Other foods such as pastas, certain sweets and even grains can either make use of lye in production or preparation to extend shelf life or deliberately as a preservative.
The single biggest drawback to this method of preservation, aside from procuring enough sodium hydroxide to make the process viable, is the fact that it will completely change the texture and oftentimes the taste of food for the worse, unless it is used very sparingly in preparation as with breads.
Sugaring
Sugaring is sort of a cousin to salting and other forms of curing. Like both of those aforementioned techniques it works by drawing water out of the food that is being preserved, and once the food is dehydrated microorganisms such as the bacteria and other nasties we are trying to defeat find it difficult or impossible to survive. Once more, no bacteria and food spoilage is slowed or even halted.
Sugaring as a technique is actually employed most often as a final step and preservation, usually after initial dehydration via other means. Once the food is pre-dried it will be packed, in case or encrusted in sugar although sometimes this is done with a liquid such as syrup.
As you might have guessed already, sugaring is more effective with certain foods than others, and is typically employed with various fruits since they already have high sugar content. That being said, sugaring can lend itself to the preservation of vegetables and even meats, so it is adaptable like salt curing.
However, the advantage of sugaring is also its disadvantage. Sugars, and particularly dry, crystal sugars, can work in the opposite direction by attracting moisture and once moisture gets a foothold on the sugar an outbreak of yeast and subsequent fermentation is likely to occur.
While fermentation, outlined elsewhere on this list, is an effective method of preserving food when done properly wild, uncontrolled fermentation decidedly is not and will ruin your food. Sugar used in this way remains highly attractive to various species of animals as always, so be careful of that.
Despite these shortcomings, sugaring is relatively easy to implement and the wide availability and affordability of sugar in our modern era means it will likely remain a viable method for certain preppers looking to preserve their food.
Burial
To our modern sensibilities, preservation of food by burial seems positively outrageous, idiotic even. But despite the dissonance this causes in the minds of most Westerners burying food is one of the oldest, most effective and easiest methods of preservation there is.
I know it sounds impossible. How on Earth is burying food in the dirt, dirt that is swarming with bacteria and microorganisms of its own, supposed to keep it from spoiling? Trust me; the answer is definitely interesting even if burial is only viable in certain types of soil for certain kinds of food.
Burial as a method of preservation functions by a multipronged approach. First, it deprives bacteria of critical oxygen, oxygen without which they cannot function and reproduce. Second, burial lowers the temperature of the food and the environment that it is stored in, further hampering bacteria.
Even light is eliminated in furtherance of this goal. Lastly, certain soils that are uniquely suited to burial as a method of preservation are alkaline in nature, and as we have already learned alkaline environments just don’t work for bacteria looking to prosper.
So how do we implement burial for preservation? First, start by assessing the food. Generally, the sturdier the item in question the more suitable it is for being buried. Root vegetables are ideal since they are already optimized for prospering under the ground.
Fruits and vegetables that are similarly firm with generally impregnable skins are also good candidates. Believe it or not, you can even bury meat to preserve it though you’ll need to take a few extra steps involving ash from a cooking fire.
The meat should first be cooked a top hot coals and those coals allowed to burn down to ash. Once the meat is cooked all the bacteria inside it will be eliminated while the ash can sterilize and dry out the soil at the cooking site. By digging into that soil and then redepositing the ash the meat can be placed inside upon a bed of ash before being covered with the ash and finally buried for preservation.
Jellying
When you read jellying, your mind probably drifted to the canning of jellies, jams and preserves. You are wrong, but jellying as a method of preservation specifically refers to prolonging the lifespan of food by cooking it in any material that will solidify into a gel.
Gelatin, obviously, is one of the most common and remains one of the most popular substances for doing this but there are others besides, including agar and maze flour.
Heck, you can even take care of it using various other animal derived proteins, including a couple that are particularly useful obtained from worms and eels. If you have a weak stomach, you might not want to watch that part!
Although jellying immediately conjures notions of sweet foods it can be used for savory ones also, particularly aspics, broths and even soup. Believe it or not it can also be used to preserve entire cuts of meat while softening them, a useful advantage for those who have consuming sturdier fare.
Jellying is at its best when it can be used in conjunction with cold temperatures or a dedicated chiller or refrigerator, but it does yield a meaningful and useful extension and shelf life even at room temperature so long as the process is performed correctly.
Root Cellar or Cold Storage
For anyone over 50 years old or so, you’ve probably seen a root cellar or cold storage area used, most likely by your grandparents. A root cellar or cold storage area is a cool, dark, damp area used to store and preserve root crops like apples, potatoes, cabbage, beets, carrots, etc.
If you have an old home, you may have a section of basement that was turned into a cold storage area. A cold storage area is typically lined with narrow wooden shelves which typically included a lip at the front to keep glass jars from falling off and breaking during an earthquake or storm.
Ventilation is critical for root cellar or cold storage of produce so make sure you store fruits and vegetables in mesh bags, burlap bags, laundry baskets, or boxes and tray with large holes.
Before storing garlic, onions, potatoes, and sweet potatoes, cure them for 2 to 4 weeks by laying them out to dry (not in direct sun) at temperatures between 55-80 degrees, depending on the vegetable.
The outside skin will harden which helps them to last longer in cold storage. In primitive situations, root cellar storage can even be a trench or hole in the ground, or even a cavity beneath the roots of a tree.
Additional Root Cellar Storage Resources
- Cold Cellars for Year-Round Local Food and Farming, John Biernbaum, Michigan State University
- Root Cellaring: Natural Cold Storage of Fruits & Vegetables
- The Complete Guide to Your New Root Cellar by Julie Fryer
- The Complete Root Cellar Book: Building Plans, Uses, and 100 Recipes
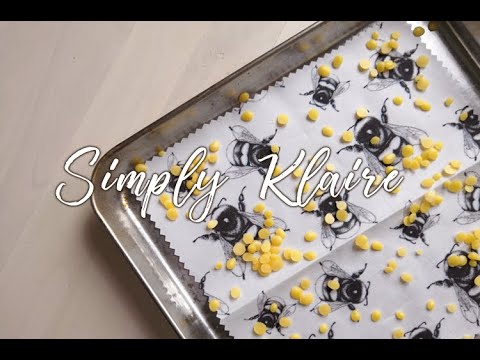
Waxing and Beeswax Wraps
One of the less commonly known ways of preserving food, especially fruits and vegetables is using beeswax wraps or other forms of wax. Beeswax wraps are an all-natural way of preventing loss of moisture and protecting food during long-term storage.
Beeswax can prevent shriveling and spoilage in cheeses, fruits, and vegetables. The wraps are similar to plastic wrap and cling firmly to your food to help delay browning, retain moisture, and prevent spoilage. You can buy beeswax wraps or make your own as shown in the video below:
Other types of wax that can be used for preservation of foods include paraffin, carnuba wax, shellac, and candelia wax.
You’ll find wax coating used for preservation most often on citrus fruits such as oranges, lemons, and limes as well fruits like melons, cantaloupes, apples, pineapple, passion fruit, peaches, and apples.
Wax is also used for preserving avocados, bell peppers, turnips, squash, pumpkins, eggplant, sweet potatoes, and cucumbers. To remove a wax coating simply scrub your fruits or vegetables lightly before eating.
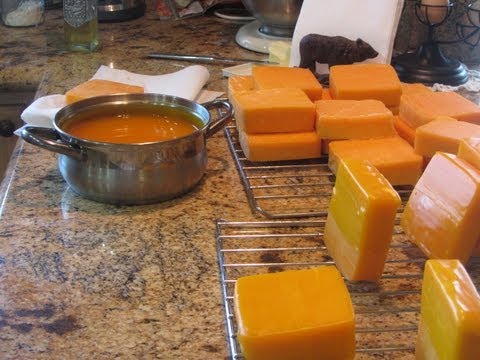
You may have even seen your mom or grandmother use paraffin wax as an additional seal on jam jars when canning. You can also preserve cheeses using wax as seen in the video below:
Additional Resources for Fruit Waxing:
- Using Wax to Improve Your Food’s Shelf Life/li>
- Linda’s Pantry
Freezing
The practice of freezing food can be much more difficult without electricity. When it comes to meat and fish, freezing is by far the best way to preserve your proteins.
To keep the food fresh, you will need temperatures at 30F or below. To do this you will likely need to pile snow or ice to create a chamber for storing your food. This would only work during winter months in most parts of the world.
If you are worried about animals and you happen to have weather that keeps the air temperature below 30F, you can hang your food in a bear bag. This would need to be at least 10 feet off the ground.
Freeze Drying
To take your long-term food storage to the next level, consider learning to freeze your dry food now while electricity is available. Just about any type of food can be freeze dried including vegetables, fruits, meats, and even desserts or entire meals.
When properly prepared and stored, freeze dried food can last up to 25 years! To top it off, food that has been freeze dried can be reconstituted and still have all its nutritional value and taste.
That means if you freeze dry food now, you can store it away and not have to think about it for at least a quarter century unless you need to.
If your budget can afford it and while you still have power available, you can freeze dry foods using a machine as shown below:

Additional Resource for Freezing & Freeze-Drying Food:
- Complete Hand Book on Frozen Food Processing and Freeze Drying Technology by Dr. Himadri Panda
- Fresh to Freezer by CQ Products, G&R Publishing
- Food Preservation: Freezing Basics by OSU Extension
- Harvest Right Freeze Drying
Canning
When I was a child, I spent my summers at my grandparents’ house in the Ozark Mountains. They had an enormous garden that was easily larger than their house.
Most of the fruits and vegetables that were yielded ended up in jars lining the walls of their garage. Canning ensured that they would always have a food supply even if the garden had an off year.
Fruits, vegetables, meats, and fish can all be canned if it is done properly. I started my canning career by making sweet pickles and then expanded from there. We have canned everything from tomatoes to peaches to bacon to venison.
For any type of canning (water bath, pressure canning), you will need mason jars of appropriate size, lids, rings, and jar tongs to remove the jars from hot water. Fruits and vegetables can be canned using a large pot with boiling water.
Meats typically require a pressure canner to get a good finished product. It should also be noted that dents in the lids or rings can be an issue along with any nicks along the lip of the jar. If a good seal is not created, the food will not be safe to eat.
Canning is an art form that can take years and years to perfect. By adding sugar, salt, herbs, and spices you can manipulate the flavor of the finished product in several ways.
For basic canning of vegetables, you will need to wash the jars, lids, and rings thoroughly. You will then need to heat all those elements in a large pot with boiling water. While still hot, add your prepared vegetables and liquids to the jar.
Apply your lid and ring and submerge the jars in boiling water with at least one inch of water above the lid. After 10 minutes, use the tongs to remove the jars and set them on a towel.
Let them sit and cool for a while and then check to make sure the lid is sucked in versus bulging out. If the jar and lid do not have a good seal, you will need to try and re-submerge the jar to create a better seal.
The video below is a very good overview of the basics of home canning:

Additional Canning Resources:
- Ball Complete Book of Home Preserving
- Ball Canning (YouTube)
- The Homestead Wife (YouTube)
- Appalachia’s Homestead (YouTube)
Cooling
While cooling your foods does not preserve them nearly as well as freezing them, there is always a need to keep them cool to preserve them for shorter periods of time.
Without electricity, your refrigerator is out of the question. Cooling is easy during the winter, but how do you keep your foods cool in the summer months?
Try a zeer pot, also known as an evaporation cooler. For years I looked for a way to keep food cool in the summer without electricity, and then I found this method.
This design works with the same principle as an electric refrigerator. For this project you will need two large clay pots with one slightly larger than the other.
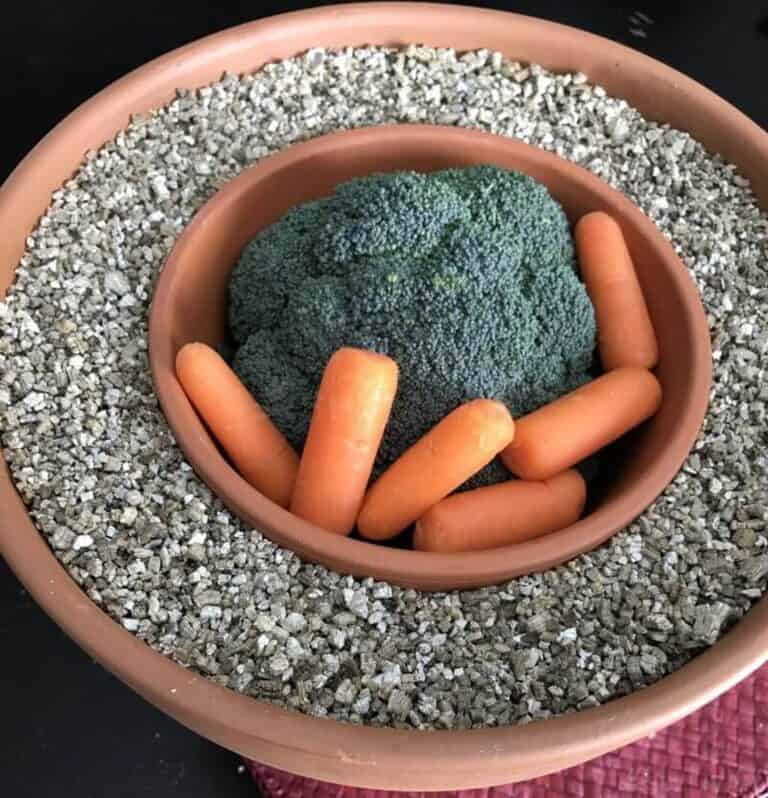
Put a layer of sand in the bottom of the larger pot and set the smaller pot on top. Then fill in the gap between the two pots with sand.
Douse the sand with water and place your food inside the smaller pot. Cover with a white towel and place the whole device in a breezy, sunny area.
The evaporating water will cool the contents by about 30F, which should keep it in the safe range to preserve your food for a while. You will need to keep adding water to the sand to keep it moist.
Additional Resources for Alternative Cooling:
- https://www.appropedia.org/Zeer_pot_refrigeration_(design)
- KTH Industrial Engineering and Management – An Experimental study on an evaporative cooler for hot rural areas
Drying/Smoking
By far my favorite method by which to preserve food is dehydration. By removing moisture from foods, you eliminate the potential for mold and bacteria to grow. It also leaves your food in a form that is lightweight and takes up little space.
Not all foods will dehydrate well, so you may have to blanch, boil, or pickle the foods before you dry or smoke them.
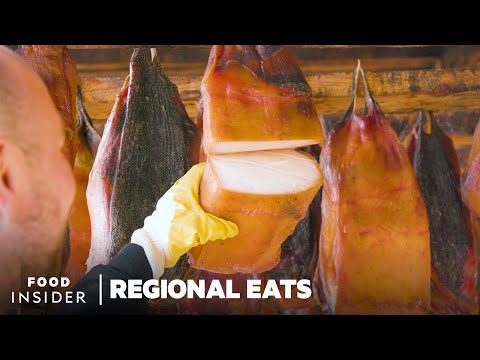
Smoking is my favorite method for preserving food. This process dries out the food and adds a pleasant smoky flavor. The smoke also helps eliminate bacteria, and the heat dries out the food faster.
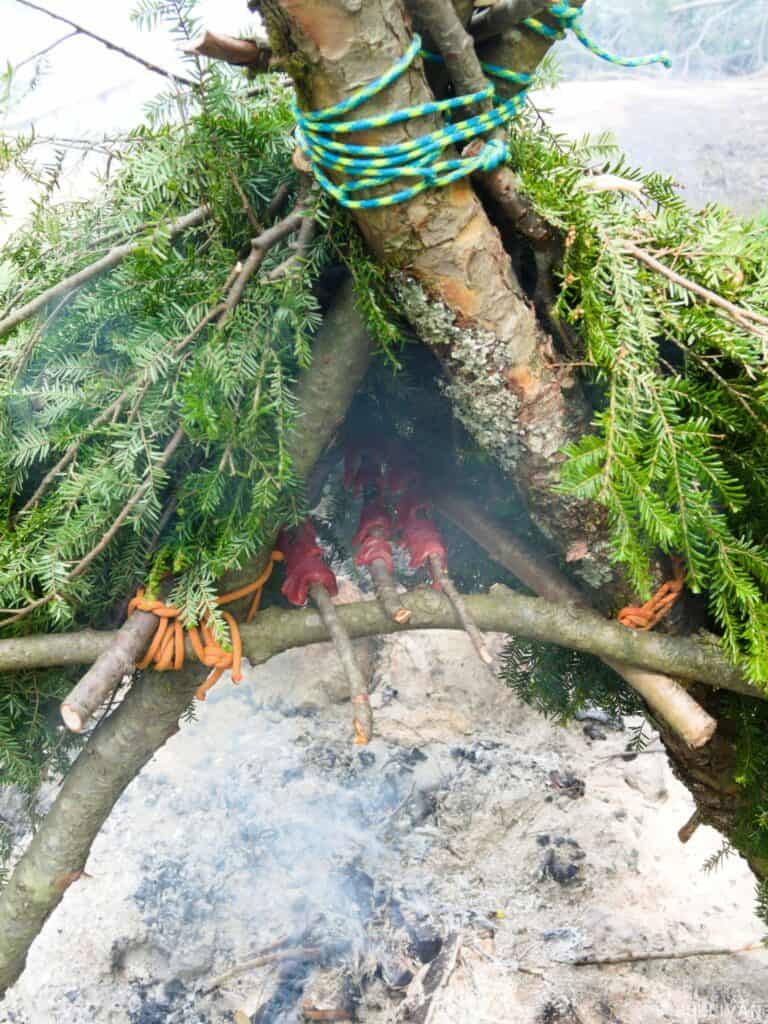
To smoke your food, you will still want to cut it into strips that are less than ¼ inch thick. Build a fire and let it burn down to coals.
Build a tripod above the coals and either build racks or use cordage to suspend the food. You want the heat to be mild enough to avoid cooking it.
You should be able to hold your hand above the coals at the height of the food for eight seconds before having to move it. It typically takes eight to ten hours to smoke most foods.
You can add salt and spices to speed up the process. If you want to hold in the smoke better, you can wrap a blanket or tarp around the tripod. Just be careful that it does not melt or catch on fire.
Heating
One of the most fundamental and useful methods of food preservation is simple heating. Heating is synonymous with cooking for most folks, though they are not truly identical and cooking is really just a catch-all term for all of the various processes and techniques that can be used to heat food in order to produce a specific dish.
But never mind that. Heating is among the most reliable ways to prolong the shelf life of food because it is so good at killing off the microorganisms, specifically bacteria, that cause decay.
These little nasties are quite sensitive, and there are precious few of them that can survive elevated temperatures to say nothing of extreme temperatures or open flames. This is why so many food packages warn people to ensure that food is heated to an adequate internal temperature.
No matter if you are frying, roasting, baking, smoking or anything else, so long as your food is heated through and heated thoroughly you can rest assured that all of the bacteria and other germs within our history.
Note that this does not prevent these bacteria from recontaminating the food once it cools down, which is why your food will still spoil eventually even after it’s been cooked.
Boiling
Sometimes we are trying to preserve a liquid, and not a solid, and in that case heating is still a viable option but thorough heating usually entails boiling.
The vigorous boiling of any liquid completely assures the destruction of microorganisms inside the liquid and this is why folks are advised to boil water in cases of potential bacterial or viral contamination. Ergo, boiling is a viable method to prolong the useful shelf life of a variety of liquids.
The great thing about boiling is that all that is required is a suitably sturdy vessel that can withstand the dramatic heating required and a heat source to raise the temperature of the vessel and the liquid within. Boiling is just as viable on your stove top at home as it is over your cook fire in the middle of the wilderness.
The downside of boiling is it requires a substantial amount of sustained heat for a prolonged period of time, and ergo requires a tremendous amount of energy. This means you’ll be consuming fuel at a rapid rate, so boiling is of a special use when fuel is abundant and must be done judiciously if at all when fuel is important and scarce.
Curing
Curing meat is the process of using salt and sodium nitrate to draw moisture out of meat. A mixture of salt, curing salt, and spices are rubbed all over the meat and then it is cooled for a week.
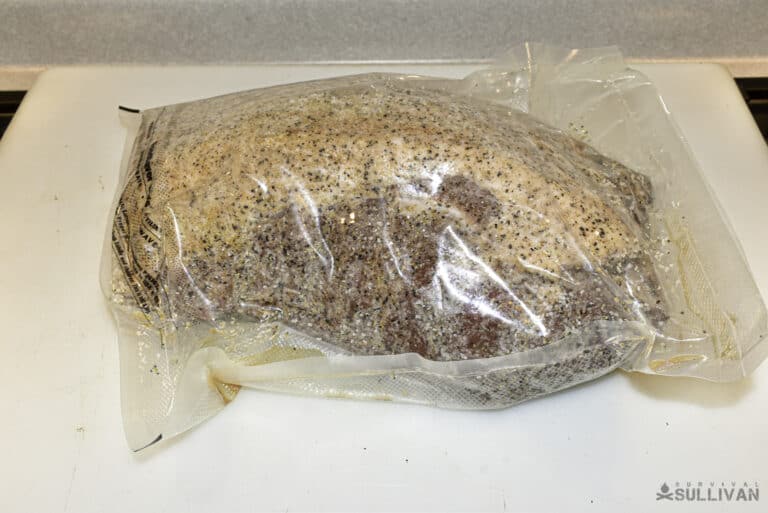
Then the meat is rinsed, wrapped in cheesecloth, and hung for anywhere from a few weeks to several years to dry and age the meat.
Salting
Salting is the process of completely encasing meat in a thick layer of salt for several days. The salt draws the moisture out of the meat creating a hard shell of salt. After the meat is done drying, the shell is broken, and the meat rinsed and dried.
Additional Resources for Curing including Salting, Drying, and Smoking Meats:
- Food Storage and Survival (youtube)
- Meat Smoking and Smokehouse Design by Stanley Marianski
- Build a Smokehouse: Storey Country Wisdom Bulletin A-81 by Ed Epstein
- Charcuterie: The Craft of Salting, Smoking, and Curing by Michael Ruhlman
- The National Center for Home Food Preservation Guide and Literature Review Series: Smoking and Curing
Preserving Meat in Lard
One final way that you can preserve food is with lard. This is an older practice and was primarily used to preserve salt cured meat such as pork and beef. You’ll need a small crock with a jar lid and a seal as well as a sheet of wax paper.
Use salt cured meat or cook the meat as you would if you were going to serve it. Then place the cooled meat into the crock and pour hot pork fat over it. Use enough lard to completely cover the meat so the level is a few inches over the top of the meat.
Place the wax paper on the top of the lard and seal the crock with the jar lid and seal. Place the crock in a cool place and the meat will store up to six months.
You can remove pieces of meat from the crock as you need it. After you remove the meat you need, push the lard back down completely over the remaining meat to keep air from getting to it. Never try to preserve meat with lard in a climate or area which gets extremely hot.
Additional Resources for Preserving Meat with Lard:
- Duck Confit for purchase
- Sensual Preservation: The Art of Confit

My name is Ryan Dotson and I am a survivalist, prepper, writer, and photographer. I grew up in the Ozark Mountains and in the foothills of the Pocono Mountains. My interest in survival started when I was in Boy Scouts and continued as my father, uncle, and grandfather taught me to hunt and fish. In the last few years I have started taking on survival challenges and have started writing about my experiences. I currently live in Mid-Missouri with my wife Lauren and three year old son Andrew.