For those who regularly spend time in the woods and mountains, the compass becomes a vital piece of survival equipment.
Prior to GPS becoming so popular and accessible, a compass was frequently used for geocaching, a form a treasure hunting for people of all ages. Every compass has at least the four main directions or cardinal directions on it.
Types of Compasses
The Button compass is the kind of compass you would find in a car. Button compasses work fine for simply “getting your heading” or figuring out which direction is North if you’ve gotten turned around.
They are not very helpful for navigating in the woods if you aren’t sure where you are or which direction you need to go.
Orienteering compass, also known as the mountaineering compass. This is the kind of compass with a magnetic needle that always points to magnetic north. It includes a dial or bezel that you must rotate to find which way to walk.
There is a direction of travel arrow and also meridian lines that can be oriented to the longitudinal lines on your map.
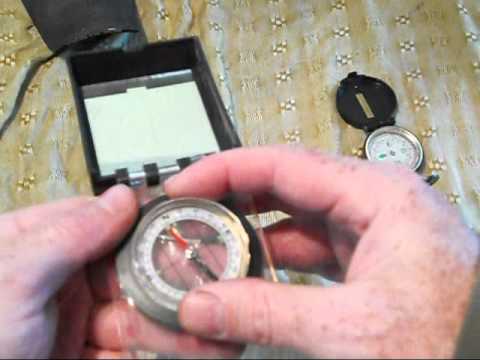
For more advanced hikers, there are prismatic and lensmatic compasses that have additional features, but still fall into this category. Some of these have phosphorous enhancements so directional arrows glow in the dark for easier readability at night. This video explains more on compasses and how they work:
Understanding and Adjusting for Declination
A compass arrow points to magnetic north whereas most maps have arrows that indicate true north. The difference between these is called declination and is measured in degrees.
Declination gradually changes every year. In the United States the amount of declination can vary from greatly from the East coast to the West coast. Learn more about declination in this video:
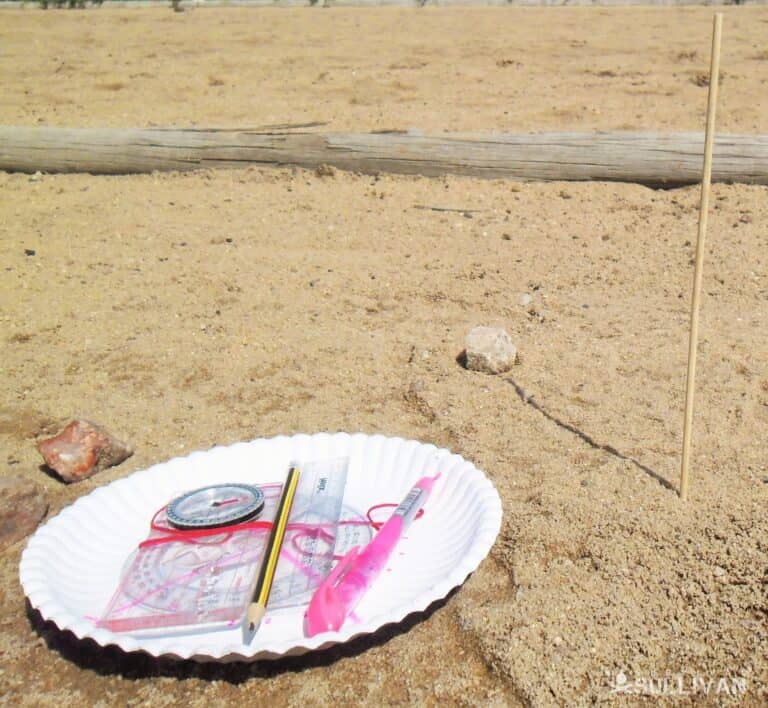
Steps to Plan Your Route and Stay Safe
- Make sure you let someone know where you are hiking, and approximately when you plan to return.
- Always carry a backpack with at least enough gear to get through if you are lost for several hours or even overnight.
- Once at your starting point, take a moment to visually orient yourself to the major landmarks on your map. Is there a river that runs along the eastern point or is there a major highway running north and south, a mountain to the west, etc.
- Print out or purchase a good map of the area where you will be traveling. The next video shows you how to plan a route, orient your compass and map, take a bearing to a visual landmark, and how to measure distance traveled by measuring and counting your stride.
- Before you start your hike, take a panic azimuth or back bearing . This means you take a bearing on your campsite or your cabin before you even leave. Write it down on your map so if you do get lost while exploring, you can simply put that bearing on your compass and follow that heading to come back. Here’s a demonstration in this video:
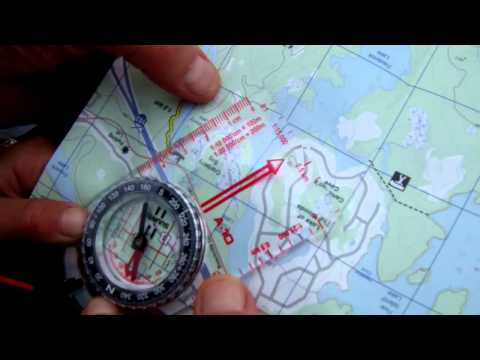
Scenario #1-Take a Bearing from a Map
Let’s say while hiking, you decide to head off the trail and make camp for the night. You get up the next morning early, unzip your tent and come out, only to find you are completely fogged in.
You can’t see any landmarks. You are know your location on the map but you need to find your bearing so that you go the right way to get back to the trail.
Position the compass so the plastic base creates an invisible line from point B, where you currently are, back to A, the location or trail you want to get to.
Keep the compass flat on the map and rotate the bezel until the lines inside the compass and the orienting arrow aim to true north. Take the bearing from the indicator on the compass base plate.
Hold the compass in front of you and slowly turn your body so the magnetic needle matches up with the orienting arrow on the compass. In front of you is the direction you need to travel.
Scenario #2-Visually Take a Bearing
Let’s say you are out hiking and you see a mountain ridge in the distance that you think would provide a great view of the area.
You’d like to hike to that ridge and take a look around but it’s quite a distance away and there is some dense brush and forest you will have to navigate through to get there. You need to take your bearing from the land.
First position the compass out in front of your chest with the direction of travel arrow aiming toward the mountain ridge in your line of sight.
If your compass has a sight, use this for more accuracy. Rotate the dial so that the north arrow matches up with the red needle. This is called “boxing the needle”. Your bearing will be at the index point on the compass baseplate.
Make sure there is no metal that could interfere with the compass. Identify a point that is in your line of travel to the ridge but not too far ahead.
Put your compass away and walk to that point. Then take your compass out and hold it out again, pick out another object or tree ahead and walk to that point. Continue this until you reach the ridge.
Scenario #3-Triangulate your position
What if you are out hiking and you trip and accidentally roll down a hill or a ravine? Perhaps you are even knocked out briefly.
When you get back up, you’re a bit disoriented. Looking around, both sides of the ravine look similar and you aren’t sure which hill to walk up to get to the trail. You need to triangulate your position to figure out where you are.
Look around you and identify at least two visible objects or landmarks that you can also locate on your map. Visual landmarks could be a mountain ridge in the distance, power lines, or even a lake or stream. As long as you can see it in the distance and you can find it on your map, it will work.
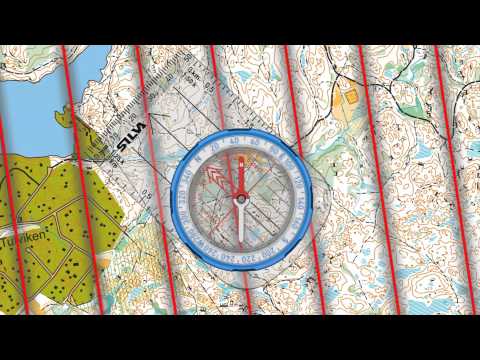
Find the bearing of the first landmark by sighting it with your compass. Position the compass on the map with the long side aimed at the landmark.
Without lifting it, rotate the entire compass so the orienting arrow and compass needle align with north on your map. Mark a line along the baseplate to intersect with the landmark on the map. You are somewhere on this line.
Repeat this process for the second landmark. The point where the two lines come together is your approximate position. If you can see a third landmark and draw that line on the map, your position will be within the triangle. This video demonstrates triangulation very well:
Common Mistakes When Using a Compass
- Trying to use your compass near metal objects such as weapons, belt buckles, zipper pulls. Even a pen in your pocket or battery in your watch or phone can interfere with the compass.
- Forgetting to orient your compass to your map prior to determining your direction of travel.
- Holding the compass incorrectly.
- Watching the compass as you walk instead of taking a visual bearing on a landmark or object and walking to that point.
- Not checking your bearing frequently enough.
- Neglecting to account for declination or using an outdated or incorrect declination for your location.
Buying A Compas
Disclosure: This post has links to 3rd party websites, so I may get a commission if you buy through those links. Survival Sullivan is a participant in the Amazon Services LLC Associates Program. As an Amazon Associate, I earn from qualifying purchases. See my full disclosure for more.
Buying your first compass depends on how you will use it and how advanced your orienteering and navigation skills are.
A basic floating-needle compass with a plastic base plate, similar to this Suunto A-10 Compass will suffice for most people. It has the basic features and is easy for beginners to use. A basic compass like this will cost you less than $30.00 USD.
More advanced backwoods or mountain hikers, may want a few extra features such as with the Cammenga Tritium Lensatic Compass. There is some debate as to whether it is actually military issued, though most reviewers agree it is the same compass minus the military marking.
You can pay more for a compass, some are as much as $200.00 USD, but if you pay attention to the reviews of actual users there really is no need for the average person to shell out big money.
There are quality compasses available that will not break your wallet and will still be reliable enough to count on when you are lost.
What if You Don’t Have a Compass?
- The first thing to remember is the sun rises in the East and sets in the West. Depending on the time of day, you may have to wait a bit to determine this.
- An analog watch can be used in a pinch to help you get your heading. Position your watch in front of you. Turn it so the hour hand or short hand points toward the sun. If you hold it this way, Noon is south. If the time is before 6am or after 6pm, then divide the angle in between the 12’oclock and the short hand in half and that way is south.
- Look to nature for help. The North side of trees will have less branches and more moss or lichen growing on them. It’s also a known fact that ants prefer to make their nests on the south side of trees and in the spring, snow will melt faster on southern facing slopes or the southern rock faces. Undergrowth will usually grow a bit thicker on slopes that face the South. These are not 100% reliable so check as many ways as possible in order to ensure you are going the correct direction.
- In the Northern hemisphere, the Polaris star is approximately North at all times. It may be easier for you to locate the Big Dipper first. Find the two stars near the end of this constellation and then draw an imaginary line up and about five times the length of the distance between the two stars. You should see Polaris and that direction is North.
- For the Southern hemisphere, use the Crux, or Southern Cross, to determine which way is south. It is a group of four stars close together. Though it’s named for the Crux or Cross, it may look more like a kite. It can be at different points in the sky, high or low in the Southern sky, low in the southeast or high in the southwest, depending on the season.
- The most accurate method, other than a compass, requires a clear sky and a lot more time. You can create a makeshift sundial using a straight pole about a yard in length, two smaller sticks, and a piece of string. At Noon the shadow of the stick will be to the South.
Act Now to Prep Steps:
- Research different types of compasses, buy the one for your needs, and add it to your BOB.
- Google the declination for the area you live in and the area where your BOL is located.
- Print out or purchase a good topographical map of the areas you frequent and practice identifying landmarks such as rivers, ridges, valleys, and high points by looking at the map.
- Learn how to use your compass and get out in the field and practice using it before you have to depend on it.
- The next time you are in the woods, pay attention to some of the “natural” ways to get your heading. Can you tell which way is North by looking at tree branches or moss? Use your compass to check to see if you are correct.
Although you may not use your compass regularly, it is a vital piece of survival equipment and something that you definitely don’t want to be without when you desperately need it.
If you haven’t already, explore some options for learning orienteering and navigation. It is truly a skill that every outdoorsman, hunter, and hiker should have and it’s not a bad skill for your average housewife or teenager to have, either.

Born and raised in NE Ohio, with early memories that include grandpa teaching her to bait a hook and watching her mom, aunts, and grandmothers garden, sew, and can food, Megan is a true farm girl at heart.
For Megan, the 2003 blackout, the events of 911, and the increasing frequency of natural disasters like Hurricane Katrina, spurred a desire to be more prepared. Soon to be living off-grid, this mother of four and grandmother of ten is learning everything she can about preparedness, survival, and homesteading.
I HATE the f—ing tweet, pinterest,and google that are pasted on my page when I try to read your posts! They obscure part of the screen and makes it very difficult to read. Post the damn things at the BOTTOM of the read if people want to use them.
Jerry,
I just checked and those buttons are disabled on mobile. It’s the only case when they could overlap the text. What device are you having problems on?