Every year, people around the world throw away SIXTY MILLION water bottles PER DAY! That’s 22 BILLION water bottles annually. Only about 20 percent (1/5) of water bottles are recycled. The rest find their way into landfills, ditches, creeks, ponds, lakes, rivers, and finally, the oceans.
So much so, that there is a massive floating island of plastic in the Pacific Ocean that is about the size of the state of Texas. This island is aptly named “The Great Pacific Garbage Patch”. This is a fine testament to the human creature and our ingenuity (in case you couldn’t tell, that last sentence was sarcasm).
When most people finish drinking from a water bottle, they simply toss it in the recycling or trash. After all, what can you really do with an empty plastic bottle? Well, it can actually serve multiple, extremely important purposes- especially in a survival scenario where supplies will be difficult to come by.
One of the most common types of trash you will find anywhere you travel are bottles. Both plastic and glass bottles seem to be the most likely garbage you will find, and this is good news in a survival situation.
These containers have dozens of uses if you know how to use them in their current form and also how to use the materials from which they are made. By the end of this article you will think twice about walking past bottles in the future.
By the way, if you’re looking for more survival items with numerous alternative uses, I suggest you take a look at the articles about duct tape, paracord and bandanna uses.
1. Make a Hand Washing Station
This is a great and simple way to use the plastic container. Just fill the water bottle completely up and hang it upside down. Make sure it’s hung as sturdy as possible to avoid wasting water.
Then, place it over a bowl (optional) and carefully unscrew the cap so that a small stream of water comes out. Make it so that gentle streams come out when the middle is squeezed. Tighten the cap when your hands are decently clean.
2. Build a Fish Trap or Even a Fly Trap
To make a fish trap, simply cut the top ¼ of the bottle off with a knife or other device. Then, fill the plastic body with bait and small amount of rocks so that it will sink.
The next step is the trickiest but still pretty simple. Tie the top of the bottle to the body so that the cap is now designed to be inside, the opposite of the way it comes in the store. Poke a few holes and use wires to make sure its stable enough to stay together in the water.
Fish and crawfish will then swim into the bottle for the food and you can snatch them up. Big fish won’t fit but you can definitely grab smaller prey.
You can use a similar method to build a fruit fly trap. Simply fill the bottom with orange juice or cider vinegar instead of fish food and seal the top with duct tape to make sure they do not escape. Then, you can just toss the bottle once enough have been caught in one vessel.
3. Make a Broom
Keeping a clean environment is a necessary part of staying healthy, even in a societal breakdown.
First off, remove the label and make sure to clean the bottle. Then, cut off the bottom of the bottle- just the part that helps is stand on its own. After this, slice tiny strips from the bottom toward the cap by either using scissors or poking holes and using a small knife.
Take a second bottle and cut it in half. Fit them together so that the bottle cap is pointed outward. You can either use nails or wire to keep it steady. Once this is done, place a pole into the cap and nail that in place. Just like that, you have a functioning broom.
4. As a Container for Liquids, Ice, and even Pesticides
This one may seem obvious, but there are some interesting twists on it. Of course, you can pour more water or soda back into the bottle.
However, keep in mind that they can also be used for soup and other liquid foods. Not to mention if you simply fill the water bottle and stick it in the freezer you now have solid blocks of ice.
Plus, if you plan on growing vegetables at your bug out location, bottles can be extremely valuable. You can put pesticides in them and carefully spray plants by poking a small hole at the top of the cap.
You can use a similar method to water roots by poking a hole in the cap and placing the bottle at an angle underground.
5. Make a Lantern
In many cases people have access to light that is just not ideal for lighting a room or the inside of a shelter.
A flashlight or headlamp directs light in a narrow beam. Sunlight helps, but again is only directed in a beam if you have a small opening for it to enter.
The process to build a lantern is relatively simple. First, fill the bottle up with water. Then, attach a flashlight or a headlamp to the exterior, directing the beam to the water bottle.
This will spread the light through the water and illuminate more surface area. If you don’t want to use a handy flashlight for this purpose, just drop a glow stick inside for the same results.
6. Start a Fire
Starting a fire with a water bottle definitely sounds left field but it works. You’ll need a bit of paper or leaves when things get really extreme.
Of note, paper with black ink burns faster and easier than simple blank paper. Since this is a delicate technique, rub dirt on the blank paper so that it will absorb sunrays easier.
Now, fold the paper in half three times. Then rip them in half so that they are half sheets with a middle crease. Now the bottle gets involved.
Here’s where things get interesting. Of course, rip off the label. Then, use the convex edge of the water bottle like a magnifying glass.
Slowly it will create a burn in the surface. Add the other pieces of paper or leaves to the burn slowly and blow gently left and right to gather more oxygen. Keep mind, the initial burn should occur in only a few seconds. If it doesn’t, start the procedure over again.
You have to have a cloudless day for this to work, and you will have to adjust the angle of your bottle lens and the distance from your tinder to get a small point of focus. Your tinder needs to be especially dry and fluffy with a low flash point.
7. Floating Device
All you have to do is tie a few bottles together, make sure they are inflated, and capped. Make sure to test it before relying on them. However, these are great water safety back-ups.
Floats work great for fishing and fish trapping to both indicate when a fish has been caught and to keep bait at a certain depth. This works by trapping air in a plastic or glass bottle and capping the top.
You can also use floats to help you swim if you have a long distance to traverse. Once capped, put several in a bag or attach them with duct tape and hold on as you swim. This will help you increase buoyancy.
8. Boil Water
That’s right, if you place a water bottle on gently roasting coals, you can actually boil water inside a bottle. Plastic is tough. It can handle the stress. Plus, the water itself will work to remove the heat from the bottle.
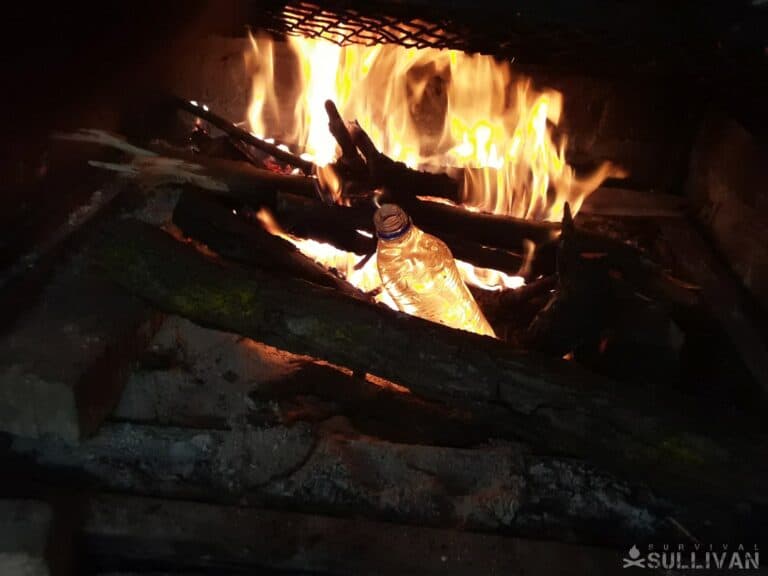
Now, this is only a technique for survival situations. Don’t just do this off the cuff on a camping trip when there is a plethora of other options available. There are chemicals inside the plastic that are not the safest thing to drink.
Only use a flame that has burned down to coals. If you put the bottle over a full fire, it will be hard to control how much the plastic is touched.
Also, make sure the bottle itself is only filled halfway up to avoid spillage and wasting water. Lastly, keep two wooden prongs handy to insert and remove the 2-liter.
9. Food Storage
You can store preserved and bulk food (rice, sugar, cereal) in a two liter for years with no trouble.
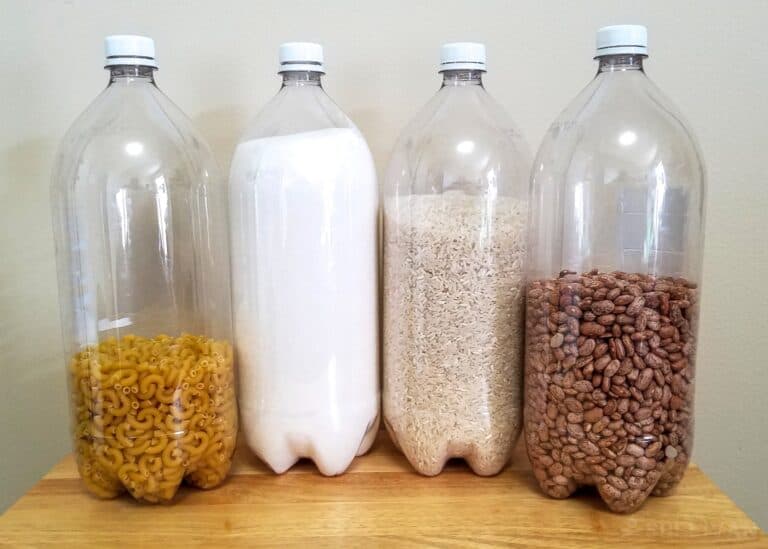
However, anything that may spoil after a period of time should only be kept in a bottle if it’s going to be eaten relatively quickly. There is one type of food in particular that shouldn’t be kept in water bottles, not for too long, at least, and that’s high fat food.
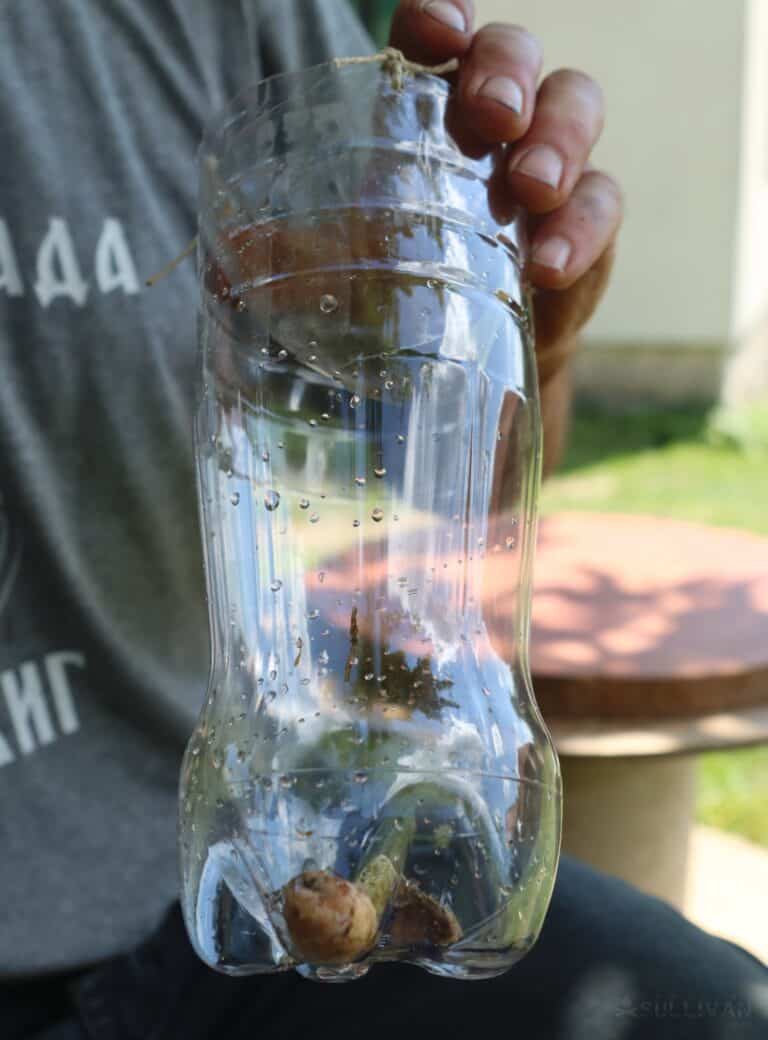
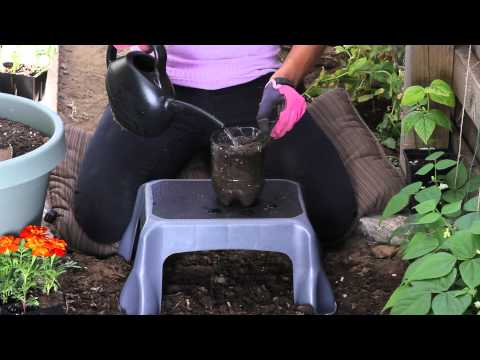
10. Grow Seedlings
You can make a plastic bottle your own personal greenhouse. This is especially handy in winter months.
You’ll be able to somewhat control the environment for the plants and make sure they don’t die on you before they become food. Plus, it’s a great protection against insects that will eat it before you get a chance.
The process is fairly simple. Just cut a 2-liter in half. Place quality soil at the bottom. Fertilizer is an option, but it is not completely necessary for success. Then, place the seeds with enough water to make the soil moist into the bottom and reconnect the top.
As the water evaporates, it will condense on the skin of the bottle and trickle back down to the soil. The bottle creates its own environment. You won’t need to water. In 5-7 days, depending on the plant, you’ll have a quality seedling.
11. Make a Cup/Scoop
This is a great money saver while preparing for a disaster. Reusing plastic bottles for cups will help you put your savings toward building up your bug out location and buying other important materials.
First, cut the bottom of the bottle about a ¼ of the way up with either a knife or scissors. Leave about an inch connected to the bottle. Then, cut two vertical lines on each side so that there is a skinny strip that is attaching the bottom of the bottle to the rest.
Remove the excess plastic so that only the strip, the bottom, and the top of the bottle remain. Then, cut the top fourth so that it is separate. One inch of the upper bottle should still be connected to the strip.
Now, for the last step, simply bend the strip and connect the one-inch remaining at the top to the very bottom so that the strip becomes a handle. This may take a few tries but it is simple once you get the hang of it.
These cups can also be used as sturdy scoops in the wild or bug out location.
12. Replacement Funnel
You can make a backup funnel easily out of a 2-liter. Just cut the bottom off, remove the cap, and that’s that.
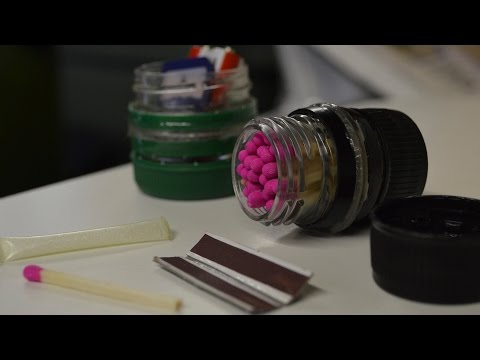
13. Build a Waterproof Container Out of Plastic Bottle Caps
It’s pretty simple to build a small container out of caps. It can be great for carrying small items like ammo or matches. First, cut off the cap off with the plastic still inside using a quality saw. Cut using outer ring as a guide. Do this with two separate bottles.
Next, file down the rough side so that it is smooth and uniform between the two caps. Also, use sandpaper on the ridges around cap that are designed to make it easier to grip.
Apply a two-part epoxy to one of the bottle caps and press them together. Clamp to get the best possible seal. Now, simply unscrew the cap that was not rubbed with epoxy and you have small functioning container.
14. Make a Bowl
Simply cut the bottom off the bottle. The higher up you cut, the bigger the bowl will be. These work great for cold food. However, you should avoid filling them with hot food like soup.
15. Make a Spoon
To help you eat of that new bowl, you can also create a makeshift spoon. Just use one of the rivets at the bottom of the bottle as the dip and cut out a decent sized handle.
By cutting glass bottles at an angle near the taper, you can create all kinds of useful tools. Then you just need to add a handle. To cut glass you can score it with a sharp tool and then heat it over a candle to crack it along the score.
You can also dunk cotton cordage in alcohol, wrap it around the bottle, and light it. It takes a few times, but eventually it will cut through. Sand the edges and you are finished.
16. Rain Collector
This technique is very simple but very effective. Simply cut the bottle in half vertically so that both sides can lie side by side. This will create an extremely wide surface to collect rainwater. Make sure the inside surface is clean.
17. Build A Wind Turbine
To make this you’ll need 27 2-liter bottles, a two cheap radiator fan motors. Line up and connect the bottles with the bottoms in removed in three rows of three to create a “blade.” Do this three times to make a turbine.
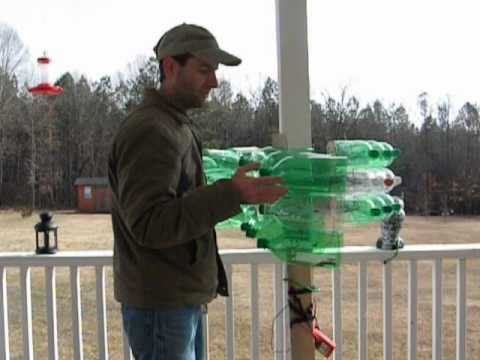
If you travel in the back of a car at 20 MPF, you’ll be able to get 0.5 volts. Certainly, this isn’t a ton. However, if you repeat the process it’ll be a nice boost of extra power in emergency situations.
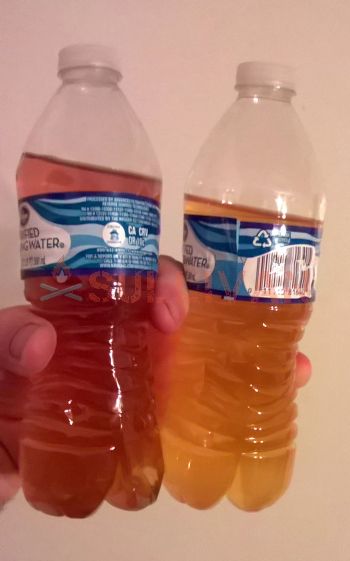
18. Water Filter
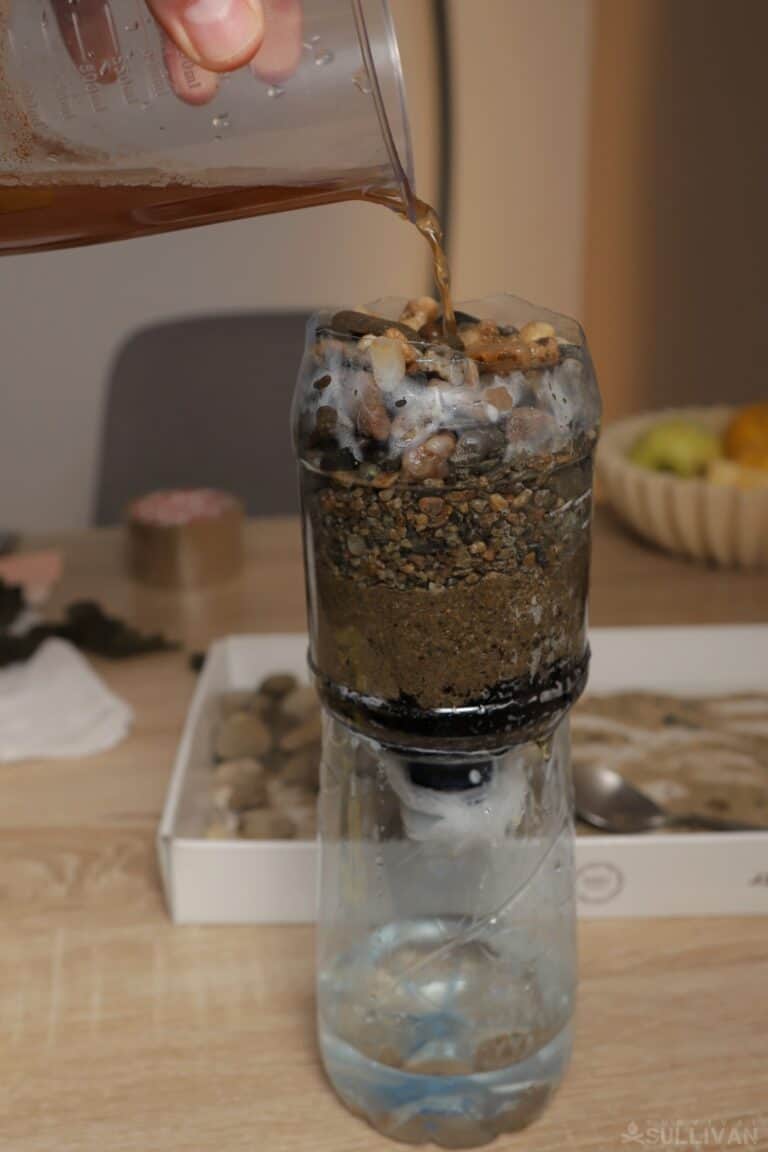
This one could literally be a lifesaver. All you’ll need to make it is some gravel, activated charcoal, and sand. There is a wait time of two weeks to make sure a biolayer forms, so get on it early.
19. Use as a Pillow
This isn’t the most comfortable sleeping option, but in the wild you take what you can get. Due to a plastic bottle’s bendability, it’s definitely more comfortable than sleeping on the ground. It’ll work whether full or empty and give your kids and family a little comfort in the wilderness.
20. Make Shoes
Like the pillow, only do this in extreme circumstances. It is possible to make some makeshift sandals with duct tape and two empty bottles. Anything is better than walking through the wilderness in barefoot.
You can flatten out a 2 Liter bottle and then punch holes to fish cordage through the plastic. Secure them to your toes, heels, and ankles for some quick foot protection.
#21. Urine Collection
You can use empty water bottles for collecting and saving your urine to use at a later date. Most people just pee and forget it, but your urine can be used for so much more:
Some of the uses for collecting urine include:
- Tanning leather – The urea in urine, you know, the stuff that makes it smell like ammonia? Well, that’s because it turns into ammonia. Ammonia is used by tanners to help soften the hide and it also aids in the removal of hair.
- Dying clothes – The ammonia in urine helps to set dyes in clothing. It also makes the colors more vibrant. Urine can be used instead of bleach to whiten clothes. Not exactly summer fresh, but you can always re-wash them to get the pee smell out. I’m glad I don’t wear white clothes.
- Composting – Your pee can be mixed in with all of the other composting materials and it helps to break it down. It also adds ammonia and nitrates to the compost which is excellent fertilizer.
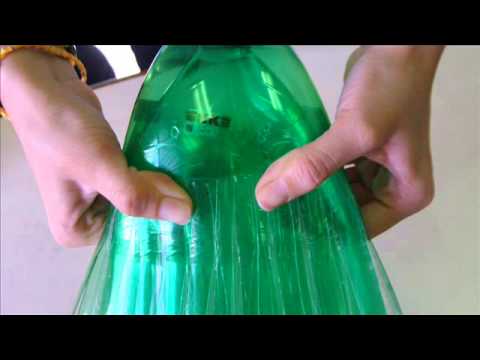
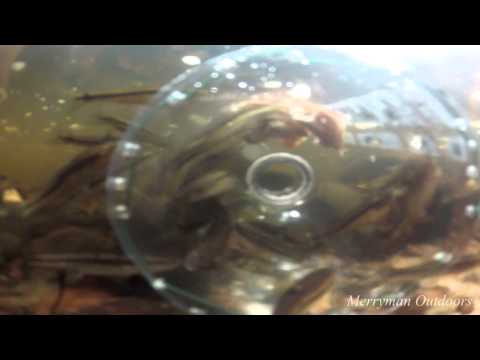
#22. To Build a Minnow Trap
You can use these 16 oz. water bottles to catch minnows to use for bait for fishing for bigger fish. Realistically, in a worst case scenario, you can just eat the minnows.
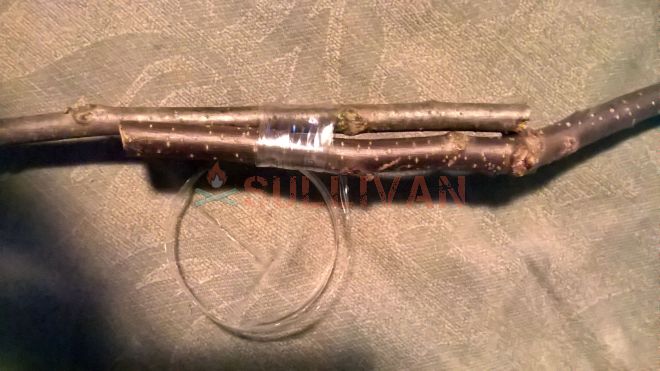
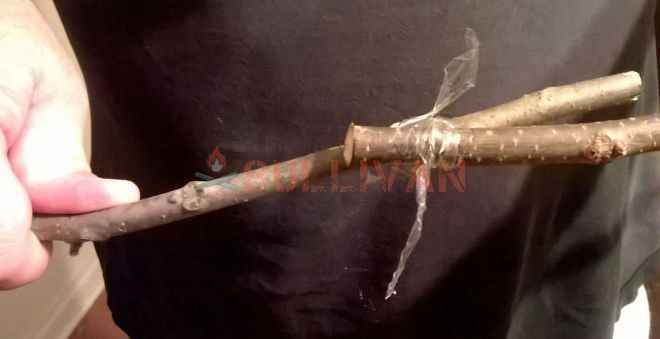
To make a minnow trap, simply cut the end of the bottle off about 1/4 of the bottle length, turn it around and stick it back in the bottle (be sure to remove the cap). Use the bait you just caught to fish or in bigger traps.
You can poke a couple holes through the sides and put a thin sliver of stick through the holes to hold the device together. Put a berry or some bit of something, a worm or a bug in the bottle to attract the minnows. They will swim in through the hole but not be able to get back out.
Here’s a video of the minnow trap:
#23. Canteen
When you are in survival situations water is very important. If you find a source for clean water you need somewhere to put it.
Empty water bottles are exactly perfect for holding water, imagine that. I would not store water long-term unless in bottle made for long-term storage.
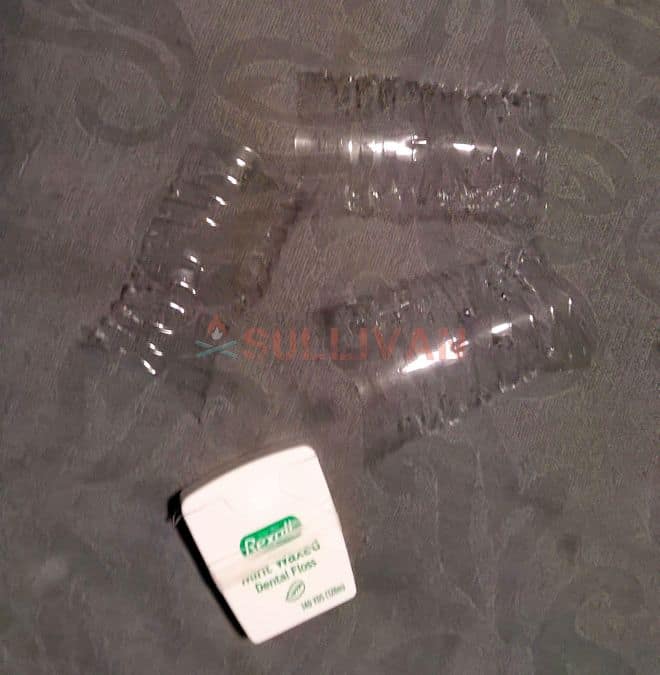
#24. To Make Cordage
Most plastic bottles can be cut into long thin strips of cordage. If you cut off the bottom of the bottle, you can start cutting around the circumference in an even strip. I suggest a thickness around ¼ inch. You can always weave three strands together if you need more strength out of your cordage.
The 2 liter bottles are thicker and firmer plastic, so I use this method for the smaller ones. While single serving 16 oz water bottles are made from thin plastic, they can still be used for making cordage.
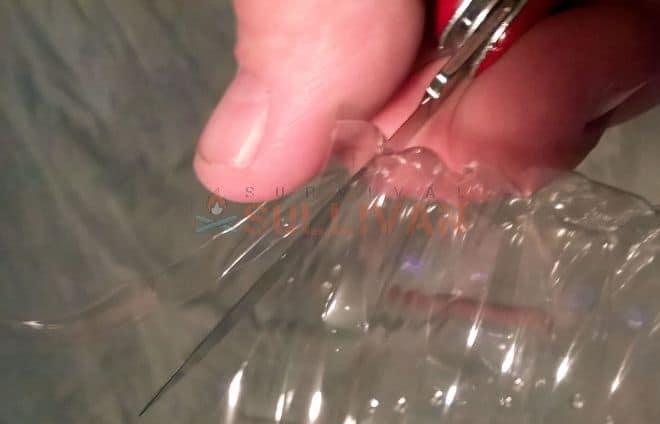
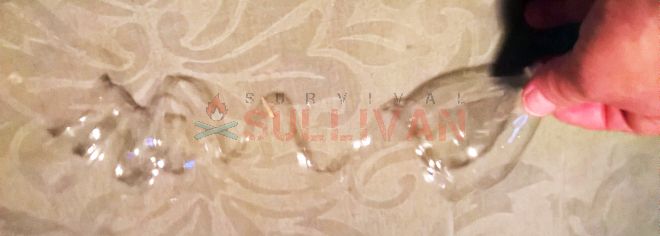
You just take your sharp knife and cut an even strip around the bottle in a spiral. If you take your time and cut carefully you can get one long strip.
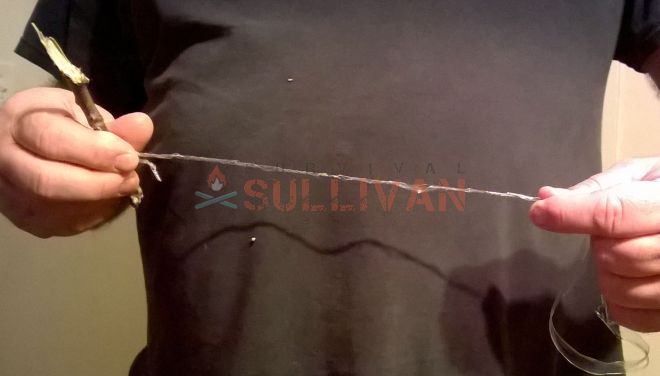

I did some testing to see how strong (or weak) it was, and it was actually stronger than I expected. Cut the strip at least 1/4” wide. You can use it as is and wrap whatever it is you are binding. I found however, that if you twist the strip it becomes stronger.
I bound a couple of sticks together to simulate making a lean to or similar structure. Then I suspended a 10 pound (4.5 kg) weight from the joint and it actually held up fairly well.
The bindings broke when I twisted the sticks 360 degrees, otherwise they held good enough to say that it made a viable lashing material.
#25. Terrarium
If you are in a short-term survival situation this use won’t matter for you. If you are homesteading, or after SHTF or TEOTWAWKI, you can get an early start on the growing season by starting your plants inside the water bottle. This is the “no-tape, no glue” version.
I use the smaller personal serving water bottles, as they are easily moved and portable. Plus with this size, if you have no tape or glue to fasten it if you cut it in half and you still need to retain that seal, it is like a small terrarium.
The benefits to this method, besides using less material, is by not cutting it. The surface area inside is not interrupted, so it retains heat and moisture for condensation. You cut it at the end to transplant the plant.
Simply fill the bottle through the opening, about 2 inches deep with soil. Drop a seed in the bottle in the center. Use a stick and push the seed gently, about 1/2″ deep into the soil.
Moisten the soil carefully, so you do not disturb the seed. Put the cap back on. Poke a hole, or three, in the cap with the tip of your knife, so the plant can breathe. Put the bottle in a window seal, it’s likely that you will have several of them.
The plant can grow to several inches tall inside the bottle and be ready to plant in the ground when the weather is warm enough outside. This gives you a jump on the growing season, because instead of a seed you are putting out plants. For plants like tomatoes this is especially useful.
Learn more about terrarium gardens here.
Note: The following are short-term survival uses for using the sun with a 16 oz. water bottle. These smaller serving sized bottles are a cheaper and flimsier plastic than a 2 liter. The difference in plastics, or even using plastic bottles with water, has a lot of heated debate surrounding it.
Many studies claim that the plastic used put chemicals in the water, and when in a high heat such as a microwave is used it accelerates the process and should not be used at all. The heat releases phthalates, especially in areas that are non-United States, as the regulations are not the same. There are concerns that over long periods, the plastic actually puts toxins in the water. Many groups say take your chances with tap water as bottled water is bad for you. Fox news reported that there are over 24,000 chemicals in bottled water.
After reading that the chemicals released into the water bottles, with or without heat, affect your hormones and are called “endocrine disruptors”, we switched to a filter on the water tap after, as we are trying to live cleaner and with less chemicals and did not suspect the “safe” water was doing this.
That being said, in a survival situation, especially when you will run across water bottles and you will as to pollution, nowhere is safe. Even on these TV shows where they are dropped off in highly unpopulated areas, plastics washed up for them to use.
In a survival situation, you will need to use what you find. So weighing water bottles and slight chemical levels from them will not be as life threatening as dehydration or not being able to heat food or water to kill bacteria and microbial contaminates which would be more dangerous that the miniscule levels of chemicals from the water bottles.
I would think about this in terms of long-term storage, and if you have the chance to choose glass or safer containers for liquids, choose other than these plastic water bottles.
The chemicals released are dioxins and the recently banned BPA, and to put it bluntly, bodies have a small burden in current times compared to our ancestors due to packaging like straws and microwave cooking containers from the 80’s and 90’s already. Baby products cannot be made with the same plastics as water bottles as to chemicals.
As the sun is less heat than a fire, we are listing some survival uses with the sun and water bottles to consider if you do not want to use a cooking fire.
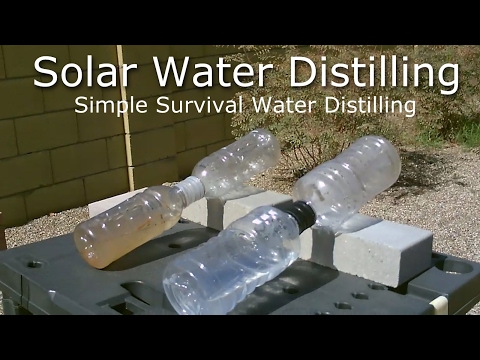
#26. Miniature Solar Still
You can use two water bottles to distill drinking water. If you have a piece of tubing to add to the mix it would make it even better but you don’t have to have tubing.
Here is a video that shows a simple two bottle solar still:
#27. Miniature Solar Water Heater
Water bottles filled with water will heat up fast in the sun. If you need hot water for various things throughout your day you can fill several water bottles and have hot water for cleaning and washing.
#28. Mini Solar Crock Pot
You can even cook with the water bottle by mixing the ingredients for soup in the bottle and leave it in the sun.
#29. Mini Solar Tea Kettle
You can make sun tea in a water bottle too. We used to make sun tea when I was a kid and I don’t know why, but it always seemed to taste better than tea made from boiling a pot on the stove. I haven’t made sun tea in a long time, not sure why really, but it sure was good.
If you are in a survival situation you can make tea from pine needles. They have an OK taste and are actually a good source for vitamin C when you are in the woods.
By using water bottles, you are making a readily available take along drink. You can also distribute the weight of several smaller bottles about your person, or in your BOB, much easier than if you had a gallon jug.
Dan’s note: careful, though, some pine needles are poisonous.
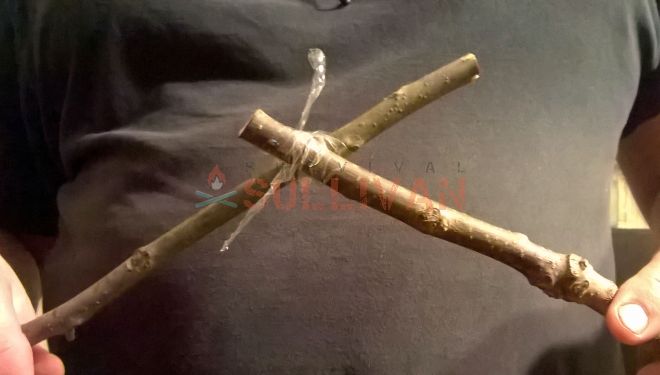
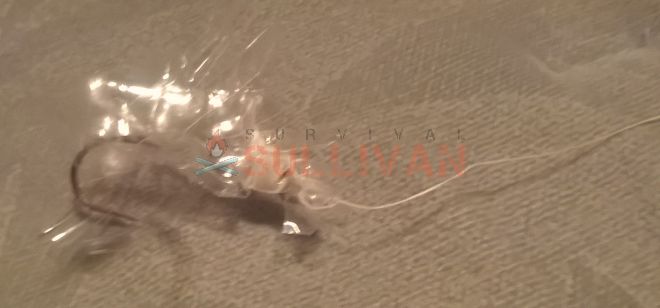
#30. Bottle Fishing Snare
Wrap 3 or 4 feet of fishing line around a water bottle. Tie the bottle to a limber tree branch or a whip stake in the ground (a whip stake is a 3-4 foot length of green wood stick), and hang a baited hook into the water.
When a fish takes the bait there will be no resistance so he will take it and go. When the line unwraps from the bottle it tightens then pulls the bottle under.
The reaction of the bottle going under water sets the hook. Then when the fish is hooked rather than yanking on your line tied to a tree branch (which can break the line), the bottle acts as a spring and resists the tension on the line so your line won’t break.
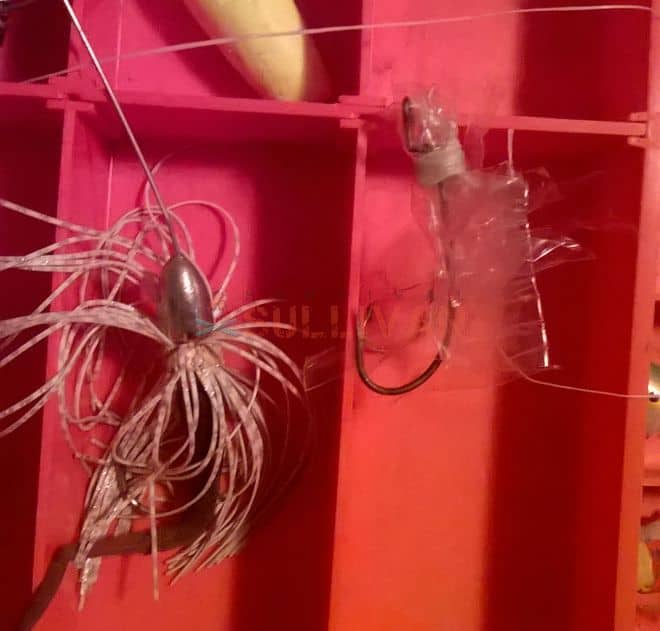
31. Fishing Lure
If you cut a small piece of the bottle and cut it into thin strips and fluff them out, then add a hook, you can make an artificial fly for fishing.
32. Arrow Fletching
If you make a survival bow and arrows, a water bottle can be cut up to make the fletching for the arrows. The same can be done for atlatl spears as well.

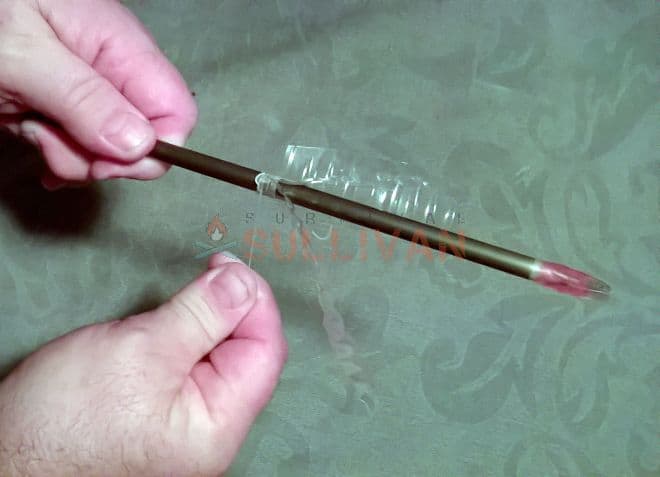
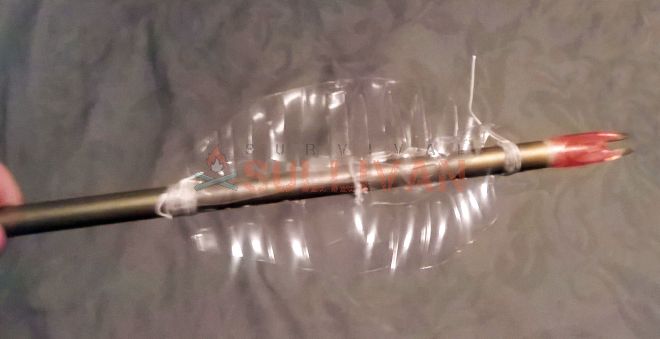
Note: If you do not have string you can fasten the fletching with pitch. Of course, having perfect arrows with nice machines fletching is great!
But here we are talking survival, and you do not need things perfect. If you are in a situation with no arrows or you will not be able to get them, do not think you can’t hunt.
Being a survivalist is utilizing the materials around you. Sadly, you probably can find discarded plastic bottles anywhere in the word. That includes remote shores and places as they washing up on shores. If you can find a straight stick, you can have arrows.
If things were ideal, you’d have the best equipment and everything you need stored and in perfect shape etc. Or some idealistic view of whittling and fashioning the perfect arrows with the best feathers tied on, and bow you fashioned by a fire, and then leaving your camp to go hunting and everything is in balance and Zen.
This is not for that. This is if you, for whatever reason, are somewhere with no bow or arrows, etc and are hungry. You may just be without your equipment and see food, or you are on the move with the clothes on your back and a few dwindling supplies. You may just without your bow and arrow and may miss your chance if you go get them.
You want the food, and in just a few minutes can fashion arrows and a bow (use dental floss). With just a few minutes invested to make them from improvised materials. They may not be perfect for 20 shots when retrieved, but they can surely be used for a few. You could just need one shot, and its perfect for that.
33. To Purify Water
This can be done using the rays of the sun or with a small fire. If you fill a clear plastic bottle with water and set it out in the sun for six hours, it will kill several types of bacteria and parasites. In fact, this method works as well as most water filters.
As long as you heat the water slowly, you can boil water in either a plastic or glass bottle. Leave the lid off for steam to escape and suspend it above the fire with cordage. You want the tips of the flames to barely lick the bottom of the bottle. Plastic will start to bow at the bottom, but it should not leak any water.
34. Dry Cache
When in a survival situation, certain materials must stay dry. This would include matches, lighters, and tinder for fire-starting, maps for navigation, cash, and important documents. Inside a capped glass or plastic bottle is the perfect spot to keep these supplies dry.
35. Early Warning System
In many survival situations evading capture is vital. At some point you have to get some sleep, but how do you sleep in the wilderness and stay alert?
Rig a trip line around the perimeter of your camp. Then attach glass or plastic bottles with small stones in the bottom.
Leave the top open so sound can escape. If a person or animal trips on your wire, the rattle from the bottles with wake you and give you a chance to run.
36. Bulletproof Your Body or Your Shelter
Believe it or not, a plastic bottle filled with dirt is actually better protection than bricks or cinder blocks when bullets are flying.
You can reinforce doors, windows, or walls with these bottles. You can also tape them together to create body armor in a jam.
37. Drip Irrigation
If you have larger plants or fruit trees that need irrigation, plastic bottles can help. Fill one with water and put the cap back on. Punch holes in the top to release the amount of water you like. Then hang over the base of the plant or shove the cap end directly into the soil.
38. Eye Protection
If you have a project that requires eye protection, plastic bottles can help. Just cut 2 inch circles out of the flat plastic and then punch holes to run cordage. Strap them over your eyes and you are good to go.
39. Spear Point, Knife Blade, or Arrowhead
Flint knapping takes lots of practice, but it can allow you to make all kinds of pointy and sharp tools. This is the process of taking a piece of glass and carefully chipping away at it with a piece of metal or rock.
Through this process you can shape the blade or point to be very sharp. Then you just need to attach it to a handle or shaft.
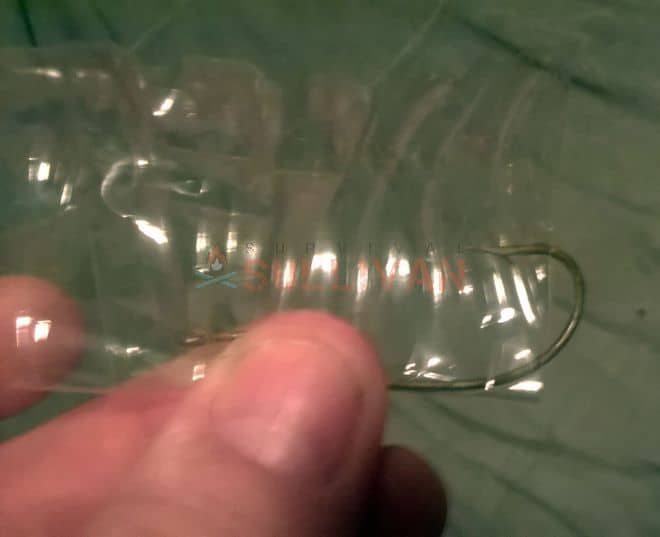
40. Fish Hook
If you are really good at flint knapping you can make a conventional fish hook. However, getting the curved shape is very difficult. All you really need is an elliptical shard that is long enough to catch in the fish’s mouth when it bites down.
For most fish a shard 1-2 inches long is about right. Then tie it to your line and add bait.
41. Oil Lamp
By filling any glass bottle with oil or another flammable liquid, you can create a lamp or torch. Cut strips of cloth or cordage and let them soak in the fluid. Then cork or cap the lid and punch a hole for the wick.
Shove it through the hole and down into the liquid. Now you can light the wick and have ambient light for hours.
42. Thermal Wall
You can actually use glass bottles as bricks when building a wall. You simply mortar or concrete around them just like bricks. You can also use mud and straw if needed.
However, if you use dark colored glass and fill the bottles with water on a South facing wall they will collect heat from the sun and then release it at night. This will also serve to help warm your home.
43. Char Cloth
This manufactured tinder is great to have in the bush to help get fires started. To make it in a glass bottle cut small strips of cotton cloth and put them in the bottle extending all the way down to the bottom.
Then gradually heat the bottle with fire keeping the top open so smoke can escape, but being sure not to allow the materials inside to actually flare up.
After 10 to 20 minutes you should have cloth that is charred black. With the impurities burned off, it is perfect to catch a spark.
44. Fire Striker
If you have a fire steel, glass can actually work well as a striker. Break off a piece large enough to grasp and wrap fabric around one side for a handle. The best pieces are the thick glass at the base of the bottle. Be careful when striking not to shatter the glass.
45. Knife Sharpener
If you remove the label from the glass, you can run the blade across the bottle at a 20 degree angle. Doing this on both sides strops the glass and gives you and edge somewhere between using a stone and using a leather strop.
46. Refrigeration
If you have extra room in your freezer, fill bottles 80% full with water and cap them. Then keep them in your freezer.
If your power goes out you can move them to the refrigerator side to help keep everything cool, or you can move them to a cooler. You can also stack them in front of a fan to make a homemade air conditioner.
Parting Thoughts
As you can see, there are tons of things you can do with plastic bottles. Throwing them out is a sin for preppers, and a real waste of resources. There are not many household items that have their amazing malleability and surprising durability.
When in a survival situation you will find many uses for ordinary items that you may never have thought of before. Need dictates use. For example, in your everyday life your bootlace ties your boots on, but in a survival situation you might use it to make a snare to catch a small animal for food.
As I always say, your brain is your most valuable asset, think about what you have at your disposal and how you can make the best and most use of it.

Eric Eichenberger is an avid outdoorsman, skilled marksman, and former certified range officer and instructor with nearly 40 years experience handling and repairing firearms.
A skilled craftsman with a strong love for working with his hands, Eric spent 20 years as a carpenter and custom woodworker in high end homes. As a gold and silversmith he has created hundreds of pieces of jewelry over the years using the lost wax casting method.
The grandson of humble country folk, he was raised with the “do it yourself” mentality and so is accustomed to coming up with unique solutions to problems utilizing materials at hand.
Hello,
Please disregard the star rating for this article. A “gentleman” with the IP 69.23.211.166 from Terre Haute, Indiana, has manipulated the results by voting 8 times and leaving one star with each vote.
Thank you.
I found several of these ideas very useful and can’t wait to try them out. Thank you for posting them. This is definately a 5 star article!
Wow, i don’t know it is useful like this. Especially I like the idea of building a wind turbine. coolz!
I can’t find it now but a couple of years ago I read an article where a guy built a party boat (barge) by using pressuretreated wood to cage 2200 two-litre pop bottles.
I’d just mention that storing poison in drink bottles can be deadly. A young relative of mine, a toddler, died when he drank kerosene from a lemonade bottle.
So sorry to hear that. But lesson learned that is why we label things.
Also why was it in reach of the child?
He didn’t really talk about it, but I would like to find out more about the pine needles which are poisonous, and which are not.
I myself am allergic to Black Walnut I can’t come I can’t I can’t eat the nuts and I can’t get to I can work with the wood if I wrap myself up otherwise it can kill me. A certain woods are poisonous if you burn them this I know but I don’t know which ones
Awesome! These are great ideas. Thank you so much for sharing. Hubby drinks sodas in 2 liter bottles. I’d give this 10 stars if possible.