Alcohol has been made, used, and consumed by people for thousands of years. For example, cereal grains were used to make beer in Ancient Mesopotamia and Ancient Egypt.
Later on, the Greeks and the Romans began producing wine and used it as a part of their social and religious traditions and rituals.
Today, the use of alcohol has largely been reduced to quenching thirst or religious practices for some people.
But it can also be used as an antiseptic, to sterilize equipment, for a morale booster, to make weapons, and more importantly, as a bartering item when it comes to a SHTF situation.
These are just a handful of reasons why alcohol will be in exceptionally high demand during and in the aftermath of a great disaster.
For this reason, making your own alcohol at home is a great skill to add to your existing list. Just like any other skill, home brewing requires you to practice extensively until you get it right, but as the old adage goes, practice makes perfect.
As long as you have the necessary resources and the knowledge, you will be able to make alcoholic beverages in a post-SHTF world.
Keep in mind you have to stockpile the tools and equipment to make alcohol as these will be hard to get post collapse.
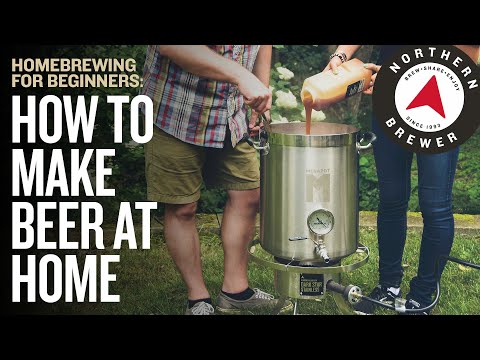
Making Beer
To brew beer, you’ll need hops, specialty grains, yeast, and malt extract. But the first thing you need to is to make sure that your work area and all of your materials are clean.
Any successful brewer will be sure to inform you that one of the secrets to a successful brewing is ensuring everything used is fully cleaned and sanitized.
Next, steep the grains by placing them into a grain or mesh bag, and then steeping it in a large, roughly three gallon pot of hot water for about thirty minutes.
After that, you can then remove it and allow the water to drip from the bag and into the pot.
At this point, you can then add the malt before bringing it all to a boil. After the mixture has boiled for a few minutes, feel free to add in the hops in intervals.
The reason we recommend that you add in the hops later in the boil is because adding it too soon can cause the beer to taste bitter.
Once the liquid mixture has been boiled, you’ll need to allow it to cool very quickly. Rather than just setting the pot out on the counter to cool, we suggest that you place the entire pot with the lid in a sink filled with cold water or ice.
Once the mixture has been reduced to around eighty degrees Fahrenheit, it is ready to be transferred over to a fermenter.
When the fermentation process has begun, you will want to keep exposure to the air to a bare minimum. This prevents any unpleasant flavors or smells developing from out of the mixture.
Use a strainer to scoop out the hops, since all of the good stuff has already been used out of them. Next, add water and then add in the yeast.
Sometimes, the yeast will need to be proofed first with warm water before being added to the mixture, but this is not always necessary.
Place a lid over the fermenter, and then place it in a darker location where it will be at a constant room temperature. Within a period of twenty four hours, you should notice that the air lock is bubbling.
As the week progresses, the rate of bubbling will begin to slow down substantially. Within two weeks, it should reduce dramatically or even stop. It is now ready to be bottled.
You can start the bottling process by transferring the beer, using a sanitized siphon, from the fomenter to your clean bottling bucket.
Open up the spigot and then place the bottle filler into a bottle. By pressing the filler to the bottom of the bucket, the beer will begin to flow.
With the right materials and enough practice, you can easily become a decent beer brewer in your own right.
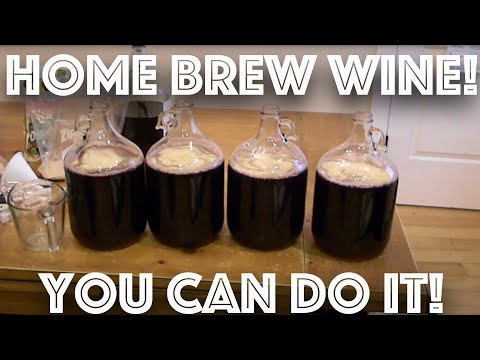
Making Wine
A prepper who is learning to brew should learn how to make beer first, but wine should be second.
In addition to the actual wine ingredients that you’ll need, you will also have to acquire a glass jar with a volume of at least two gallons, another glass container that’s have the size of your first, a thin plastic siphon, sanitized water bottles, and an airlock.
An advantage to making wine is that it can be made with nearly any kind of fruit, with the two most common choices being berries and grapes.
Just be sure to pick the ones that are in their prime and at their best flavor, and if possible, pick fruits that have not been touched by chemicals.
Rinse any fruit you collect very thoroughly. Many novice wine makers make the mistake of peeling it while in the rinsing stage, but this removes much of the flavor from the final product. If you want a stronger flavored wine avoid peeling the fruit while rinsing.
You can use your hands to crush the fruit, but a tool such as a potato masher works even better. The juices will be released as you squeeze them.
Continue adding juices until it is within two inches of the crock’s top. If you don’t have enough juice to come within two inches of the crock’s top, use clean water to make up the difference.
Next, add some honey. Honey is critical in making wine as it is what gives it its sweetened flavor. Add a minimum of 2 cups of honey. If you prefer a sweeter wine, you can add more honey. The more honey you add, the sweeter the wine will be.
Now, you can add the yeast. Simply pour it into the mix and then stir it using a spoon. Like the honey, adding yeast to your wine is a must.
Cover the crock with a lid and store it for the night. The cover should be sufficient to keep any bugs or pest out but also have a way to allow air to flow in and out.
There are crock lids that are designed specifically for this purpose, you can take a t-shirt and secure it over the opening with a rubber band. The crock will need to be stored at room temperature.
Dedicate a few minutes of your time over the next four days to stirring the mixture thoroughly.
Most wine makers recommend that you stir the mixture at least once every four to five hours during the day.
As the yeast begins to take action, the mixture will bubble, signaling that the fermentation process has begun.
The bubbling will slow down roughly three days after it started. At this point, you’ll need to siphon out the liquid to a carboy so it can be stored for the long term.
Once all of the mixture has been siphoned, attach the airlock to the opening of the carboy so that gas can be released while stopping any oxygen from entering and ruining the wine.
From this point, you can relax for at least a month and allow your wine to age. The more months you leave the wine alone, the better taste it will have.
But considering that you’re making wine during or immediately after a long term SHTF situation, one month will suffice.
Once you’re satisfied with the wine’s taste, you can then proceed to bottle it. Make sure that your siphon tube has been sanitized before bottling the wine in order to prevent any bacteria from getting into it.
After filling up the bottles, cork them immediately. You can then either allow them to sit and age further, or you can enjoy them immediately.
Update. We have a full article about making wine with more tips on how to make it taste awesome.
Making Whiskey
Disclaimer: Making whiskey at home even for personal use is currently illegal in the United States. Only do it if the law in your country allows it!
Whiskey is produced from fermented grain mash. There are many different combinations of grains, which explain why there are many different kinds of whiskey.
Most of the time, the grain mash is made out of wheat, rye, barley, and corn (as is the case with Bourbon whiskey).
There are five basic steps to making your own whiskey:
Make the Whiskey Mash
Mashing is simply using the steeping process from hot water to activate enzymes, which convert the starches in the grains into fermented sugars. The resulting solution is very rich in sugars and is referred to as wort.
The addition of yeast converts the wort into alcohol. You can choose any type of whiskey you want to make. We will assume for this article that you will be making a Bourbon recipe.
Fermentation Process
Once you have chosen your whiskey recipe, made the wort, and added the yeast, it will begin to ferment. This is the process where the sugars are converted into Co2 and ethanol.
This process can take anywhere from a couple of days to over a week. The temperature and the nutrients in the yeast are the two biggest factors that influence how long it will take.
You will know the fermentation process is complete when there are no longer any bubbles forming.
Distillation Process
The primary goal of the distillation process is to separate the wort from the ethanol. It’s going to be impossible to separate them completely.
But you should aim for a solution that is four-fifths ethanol and one-fifth water and mash flavors.
The whiskey is distilled in a pot still. Transfer the wort using a sanitary siphon. Heat the mixture slowly, be careful not to burn it. Plan for at least forty-five minutes for the wash to come to a boil.
Condensation Process
Start the condenser so that it reaches a temperature of one hundred and thirty degrees Fahrenheit. A consistent drip should begin to form at the end of the condenser.
Collect this mixture, the temperature reading should be around 180 degrees on the thermometer. Let the temperature rise to 200 degrees.
Distill out the fusel oil and add flavors to the final product. Turn it off and remove the mixture from the heat source.
Maturation and Bottling
Allow everything to cool. Whiskey will always taste better after it has aged. It always ages the best in either oak barrels or when oak chips are added to the mixture.
Once you have bottled your mixture it will no longer mature. After maturation, dilute and bottle the whiskey using a sanitized siphon. To truly enjoy whiskey, you will want to cut the mixture with water.
Conclusion
Brewing your own alcohol is not as hard as it may seem. No matter how complicated the process may sound, do not let yourself intimidated.
Mistakes are to be expected during your first several attempts and you will learn more about the process, each time you try it.
Many use alcohol brewing as an opportunity to bring family and friends together, to demonstrate the process of making homemade beer and wine, and pass on their skills to future generations.
So, have you ever made your own alcohol? Share your experiences in the comments section below so we can all learn from them.

Nick Oetken is a prepper, outdoor enthusiast but, most of all, he is our in-house firearms expert. Look out for his articles on guns to find out which ones you need for your survival.
just want to make rubbing ethanol for sterilizing , fuel etc.
Please do something on this as well.
Hi George,
I added this to the queue, though I don’t have a time-frame for when it’s ready. A sure way to be alerted when it’s published is to subscribe to the newsletter.
It would have been nice to know how to make RUBBING ALCOHOL as well lol