For a long time canning anything was intimidating to me. Even after becoming a pickling expert, canning meats seemed out of reach. Then I had a friend bring me some samples, and I was hooked. I could not believe that meat could last months or even years on the pantry shelf with just a little extra elbow grease.
Of course, bacon is the holy grail of meats in my opinion. I have canned bacon from the grocery store in the past, but I intend to go hog hunting for the first time this summer.
In our state there is no limit on how many wild hogs you can take, so preservation is going to be key. I plan to salt cure and smoke some of the meat, but a huge portion will be canned.
I have fond memories of spending summers on my grandfather’s hog farm as a child. We worked hard and were baked in the sun as heat reflected off of the red clay soil. We were fortunate that we always had bacon for breakfast and ham for Sunday supper.
I also remember my grandmother spending hours in the kitchen delicately preparing the jams, jellies, veggies, and meats in shiny mason jars.
There were dozens of jars lining the baseboards in her garage. When fixing meals she would have me run out to the garage to select the perfect jar for what she was fixing.
In this article I want to take the seemingly complex process of canning bacon using a pressure canner and simplify it. My goal is to give step-by-step instructions to allow anybody to be successful in learning this skill.
Self-reliance is a major priority in our family, and I hope we can help it be one in your family as well.
A Word of Caution
Some sources say that canning cured meat, in general, is not safe, because there is no science-backed process for canning them at home that has been tested and proven effective.
However, many folks have been doing this for a long time, and the fatalities of foodborne botulism typically happen due to not following the recipe to the letter.
Use your best judgment. Don’t do this if you’re new to canning, and get someone to help and watch you as you’re doing it for the first time. If you have additional safety tips, please leave them in the comments section below.
Can You Pressure Can Bacon at Home?
Yes, you can pressure can bacon at home and this is the only way you should even try. Bacon is a low-acid food like all other meats that are can-able, and if you know anything about canning you know that low-acid foods must be pressure canned for safety.
Can You Water Bath Can Bacon at Home?
No! Absolutely not! Water bath canning is not suitable for low-acid foods, only high-acid foods. This is a matter of food safety. Trying to can bacon or any other kind of low-acid food, including meats, using water bath canning is highly likely to result in spoilage and, most worryingly, contracting botulism which can kill you stone-cold dead.
Don’t even attempt to can bacon if you don’t have a pressure canner! You have been warned!
Is Canned Bacon Still Crispy?
No, sorry. Canned bacon doesn’t come out of the jar crispy. It’s soft, chewy and tasty, and it still has enough tooth to it where it’s not totally revolting. However, you can pop it on the griddle or into a frying pan and fry it up to bring back some of the delicious crispness that you’re probably used to at the breakfast table.
Pre-Cooking
This is optional, however pre-cooking the bacon will make it taste better at the end.
To do it, preheat the oven to 375 F and cook them in the oven in trays for at least 10 minutes. Be sure to place them on parchment paper inside the trays.
This will not fully cook them, but that’s on purpose.
Jars
The condition of your jars, lids, and rings is vitally important. If you cut corners in this aspect it could lead to food poisoning. Please take the time to ensure that the equipment you are using will not make you or your family sick.
- Inspect your jars, and make sure there are no chips or cracks. That means even a little defect in the jar could ruin the process, so look them over carefully.
- Rings must not have any dents or rust, but can be reused. That being said, they are so inexpensive that I would not hesitate to buy new ones.
- Lids cannot be reused in any condition. Buy new ones for each batch.
- Wash all of these in soapy, warm water. Wash off any excess soap. You can run them through the dishwasher if you like, but be sure to arrange them in a way that will avoid any dents or chips. The pressure canner will also sterilize the jars, but we at least want to make sure there is no dust, debris, flies or anything you wouldn’t want to put in your mouth.
Choosing the Right Kind of Bacon
Picking the right kind of bacon is going to make a big difference in terms of success, safety and also the finished product. Technically, any kind of strip bacon or rashers will work, but if you can find some that is very thin and minimally fatty the process will go a lot smoother.
And yes, I know that bacon is naturally quite fatty. But if you can get the leanest cuts around you’ll thank me later. If all you have is fatty pieces, that’s okay as long as they are thin, no thicker than 1/8 of an inch or so. Also, break out the paring knife and cut away any bits of solid fat while leaving the streaking and marbling.
Excess fat can interfere with the canning process and result in spoilage!
Prepping the Bacon
Prep your bacon for canning prior to cooking, not after, which we will get to in the next section. Trim off the fat as detailed above. Then, trim the ends off the bacon if required so they will fit properly in the jars: you’ll need to leave about 1 inch of head space in the jars with each piece of bacon folded in half lengthwise in the middle. Fold a piece of bacon in half to test, and eyeball it to see if it will have the appropriate headspace when you pack it in the jar.
If not, trim a little bit off one end until you reach the needed length. Discard the bits or fry them up in your pan and use them as bacon bits or in an omelet: do not put the bits in the jars with the bacon strips!

How to Can Bacon at Home with a Pressure Canner
Step 1: Boil Water.
Bring a large pot with water to a boil and set your jars, lids, and rings in the water. Keep them in the water until you are ready to fill them.
You want the temperature of all components to be as hot as possible when you fill and seal the jars. Because of this, you will likely want to use jar tongs to avoid burning your hands.
Step 2: Placing the Bacon
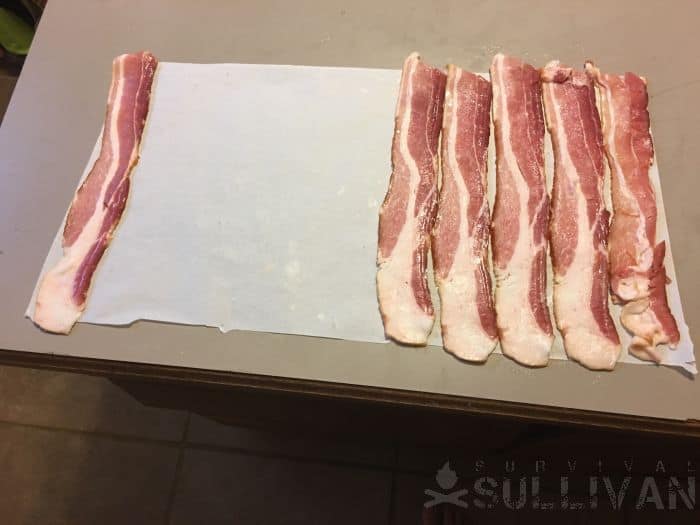
Lay out a sheet of parchment, butcher, or brown paper one foot wide by two feet long. You can buy rolls of inexpensive brown paper at the hardware store or you can purchase other types of paper at the grocery store:
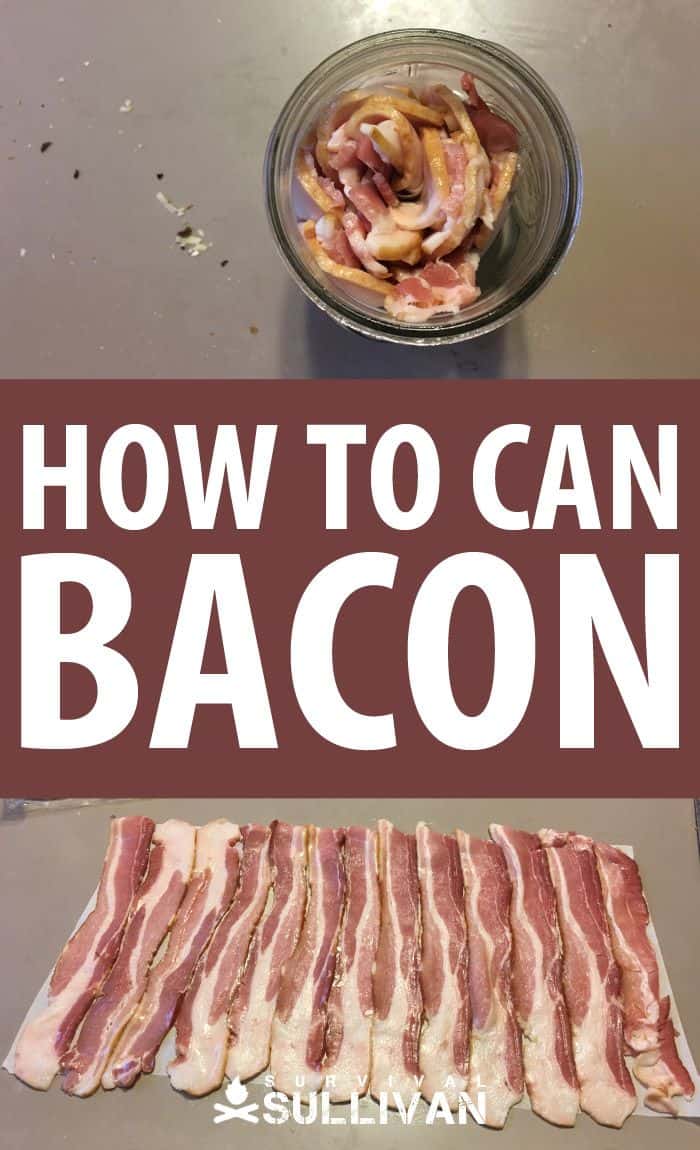
Step 3:
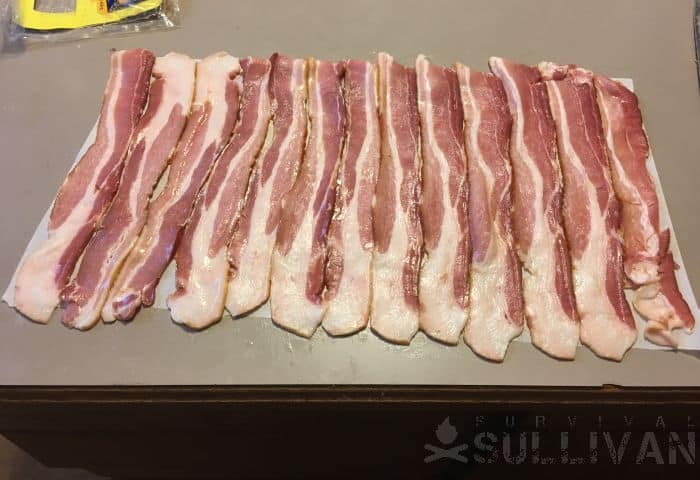
Stretch out strips of bacon side by side without any gaps or overlapping. You should be able to fit somewhere between six and eighteen strips depending on how thick the cut is:
Step 4:
Use scissors to trim off the excess paper on either side. Do not leave any excess paper on any of the four sides.
Place another piece of paper of the same size on top. If needed, trim it to the right shape and size to that it is a perfect match:
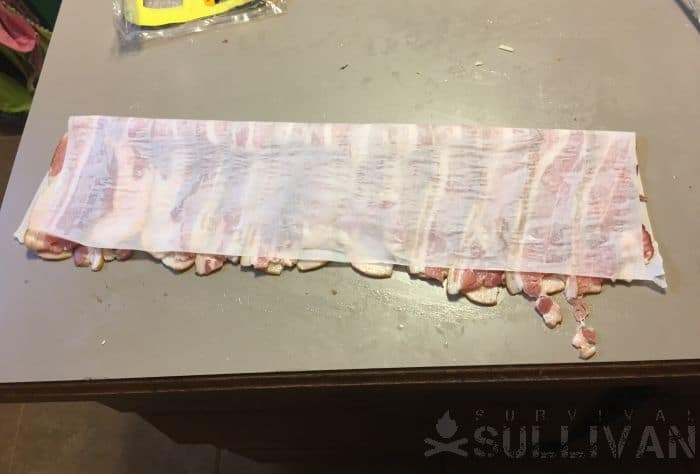
Step 5:
Place a rod or yardstick lengthwise on top to weigh down the top sheet. Place it in the center as we will be folding your bacon over at this point.
Fold the whole thing in half lengthwise. Now the width of your strip of paper and bacon should be about six inches wide.
Step 6:
Tightly roll the folded package up like a sleeping bag tucking as you go. If you do not roll this as tight as possible, it may not fit in the jar.
Step 7:
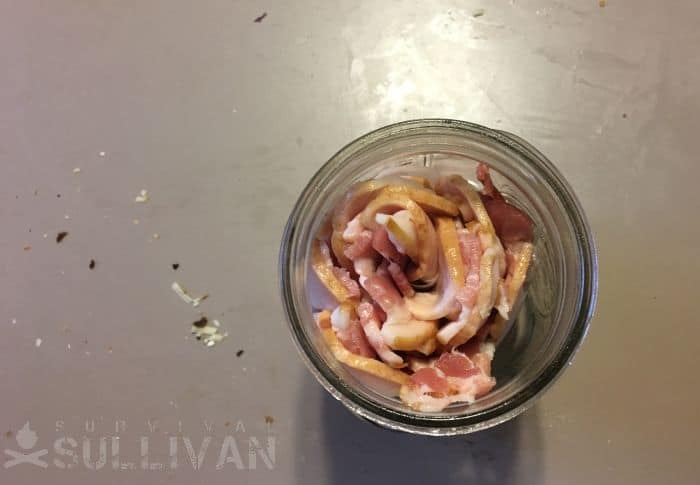
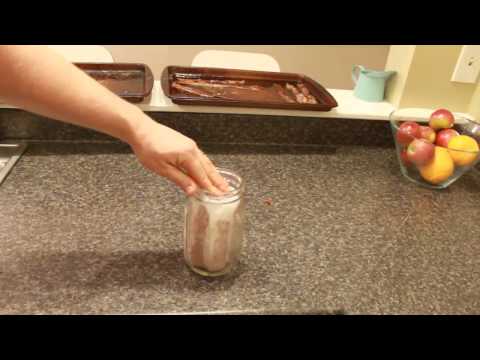
Shove the roll into a wide-mouth quart jar. You may have to twist the package as you push it inside. Remove only one strip of bacon if it will not fit, and try again.
Repeat for all of the bacon. One quart jar should hold about one lb. of bacon.
Step 8:
Take a paper towel, dip it in vinegar, and then quickly wipe off the rims of the jars after packing the bacon. Then take a clean paper towel and wipe them dry.
This is needed to remove fat and grease from the rims and threads of the jars which would otherwise interfere with the lids and prevent a good seal, causing failure and potentially damage when we put them in the canner.
Step 9: Capping The Jars
Remove lids and rings from the boiling water and twist them onto all the jars. You may have to shove them down a bit as some of the paper and bacon may be sticking out the top.
DO NOT ADD LIQUID. Bacon has enough fat that it needs nothing added to it.
Step 10:
Put a few inches of water in your pressure canner as the directions instruct.
Place your jars in the canner and let the steam move around them.
Step 11:
Secure the lid on the canner so steam can only be released through the vents.
Let the canner vent for 10 minutes allowing air to escape and pressure to build up. If it is not vented properly you will get a false reading.
Step 12:
If using a dial gauge, close the petcock. If using a weighted gauge, put the weight in place. Watch continually as the pressure climbs.
Once you’ve seen that the gauge is indicating adequate pressure, start your timer and set it according to the type of canner you have and also what elevation you live at.
For dial gauge canners: the gauge should read 11 lb if you are under 2,000 ft in elevation, 12 lb if you are above 2,000 ft and under 4,000 ft, or 13 lb if you are above 4,000 ft and beneath 6000 ft. Process for 1 hour and 40 minutes.
For weighted gauge canners: the gauge should indicate 10 lb if you are below 1,000 ft in elevation or 15 lb if you are above 1,000 ft in elevation. Process for 1 hour and 40 minutes.
Step 13: Keep an eye on it! You must manage your canner during this time. Adjust the heat as needed to keep the canner’s pressure level right at or slightly above the indicated pressure. Slightly high is okay, but if it dips too low you’ve got to start the process over again.
I cannot impress upon you enough how important it is that you keep the canner at the prescribed pressure! If, at any time, your gauge indicates that the pressure has fallen below the guidelines above, you must re-establish the needed level of pressure and then restart your timer for processing.
I’m dead serious: don’t add a couple of minutes and call it good, don’t be okay with it only being about 30 seconds or whatever. That way lies spoilage and potentially death from food poisoning! And sure that the canner stays at the right pressure for the entire process, no excuses and no exceptions!
Cooling, Storing, and Cooking
Disclosure: This post has links to 3rd party websites, so I may get a commission if you buy through those links. Survival Sullivan is a participant in the Amazon Services LLC Associates Program. As an Amazon Associate, I earn from qualifying purchases. See my full disclosure for more.
- Follow the instructions for the pressure canner as to how to cool and open the unit. Be careful not to burn yourself.
- You should expect some liquid in the bottom of the jars. When they cool it will solidify back into solid fat.
- Set out your jars to cool and monitor them for a proper seal. First, listen for a pinging sound as they cool. Never try to cool them faster in cold water or a refrigerator.
- Next, check to make sure the center of the lid is pulled down and that you cannot push it down further.
- Any jars that do not have a good seal can be resealed with a new lid or you can use the contents right away.
- If you are not using standard lids, follow the instructions on how to check for a good seal.
A Lid Failed. What Should You Do?
If the lid on one of your jars has failed, you don’t need to throw the bacon away but you do need to take action. If it’s been more than 24 hours, don’t even try to reprocess it. Just stick the bacon in the refrigerator and then prepare and eat it within 3 days.
However, if it hasn’t been more than 24 hours since you cooled and it checked the lids you can reprocess it by putting the roll of bacon in a freshly sterilized jar and using a brand new lid, reprocessing it once again exactly as detailed above.
Now, I’ll level with you, reprocessing bacon in this way is going to turn it pretty mushy but it will still be safe, edible and reasonably tasty. If you’re committed to not wasting food or losing any meat, it is safe when done this way.
Storage and Use
Label and date your jars and store them in a cool, dry place. Your food is now preserved for six to twelve months depending on storage conditions.
Use as needed by simply opening the jar, removing the paper, and frying as usual.
So let us take a minute to put this in perspective. When you have uncooked bacon at room temperature it is only good for a few hours. When you have bacon in a refrigerator, it is good for about a week. By using this method we preserve bacon for six months to a year.
Wrap-Up
Bacon is a wonderful survival food. It has fat and animal protein… the two items most difficult to acquire. My family of three could easily eat one pound of bacon per day if that was our only source of meat.
That means if I bagged enough hogs or spent some money at the grocery store, I could can meat to last six months in just a few days. I could do all this without using up any space in my freezer or refrigerator.
The more we rely on modern technology like freezers and refrigerators, the harder an SHTF situation will be. Along with a few other preservation methods, I find canning to be absolutely vital to our efforts in self-reliance. If you take the time to learn this skill, it will definitely serve you well in the future.

My name is Ryan Dotson and I am a survivalist, prepper, writer, and photographer. I grew up in the Ozark Mountains and in the foothills of the Pocono Mountains. My interest in survival started when I was in Boy Scouts and continued as my father, uncle, and grandfather taught me to hunt and fish. In the last few years I have started taking on survival challenges and have started writing about my experiences. I currently live in Mid-Missouri with my wife Lauren and three year old son Andrew.
BAD INFORMATION! Pint jars 75 minurtes and Quart jars 90 minutes. Trying to kill people?
Do you have a picture of the finished result? I’m a bit skeptical that there is enough liquid in the jar with only the fat from the bacon, and would be interested in seeing what a fully canned and cooled jar looks like. I would never try a recipe that won’t show a finished result. Also, am I correct in seeing that the paper is left in the jar when you can it? I’ve never, ever heard of a recipe recommending you put something other than the food you’re going to eat into the canning jar and then pressure canning, and I’ve been canning for over 35 years.
Jen,
Thanks for letting me know about these issues. I haven’t spoken with Ryan in a few years but I forwarded these issues to my canning expert.
Thanks,
Dan
The parchment paper used when canning bacon is made to be cooked with. It imparts no flavor and, if you don’t use it, your bacon with all stick together in an un separable mass. That is why commercially canned bacon is wrapped in it. I have done this for about 50 years as did my grandmother before me and it works great.
i canned 4 pounds of cheap store bacon, uncooked in parchment paper. pint jar 75 mn. Today I used air fryer cooked hamburger and the bacon at the end. Bacon looked partially cooked, but none came out as whole slice. Lots of pieces but good. My family prefers thick bacon. But needed the practice as I am a newbie. My son raises cattle n pigs. We harvest Venison also. just waiting for jars to be e on sale and have what I want. After cleaning the jars in the dishwasher I put press n seal over the jar top n know it is clean.
I’ve seen several YouTube videos of this same technique. Can’t wait to try it.
I watched one tutorial that said to use non waxed parchment paper. I wasn’t aware that it was waxed. Have you heard this before?
We canned bacon this way and had no problems. It was delicious.
Thank you so much for sharing!!
I’m canning 40 lbs today.
I have been some what uneasy about canning meat but family i know cans deer meat but when they remove it from the canner they said that they flip it so if forms a plug when it solidifies. Is that right to do?
I have been canning chicken ham, HB, pork and all kinds of vegetables for many years. This is standard timing for meats and fish. I have never done bacon but I think it would require the same time as other meat.
I’ve done this and the bacon ends up very crispy when it is reheated. However it has a taste from the parchment paper. Any suggestions on how to avoid this?
I have canned 100’s of pounds of meat, Venison, Beef, Pork, Chicken of every size and shape including hotdogs. I have never had a problem with any of it. Some have been in the jars for over 5 years and tastes just as good as the day it was canned. This bacon recipe works like a dream. Good thing, who would want to face the apocalypse without bacon?
I always add a little white vinegar to my water for heating jars and seals and in the pressure canner because we have very hard water.
50 years ago Dak and Plumrose made canned. Bacon like this. When the can was open, the bacon appeared raw and was wrapped in white paper. The can was filled up with lard. A bit salty, but delicious. It was somewhat rationed in Alaska, but we bought all we could. my mother rarely used regular bacon. Much better than the precooked bacon nowadays.
I found that my jars wanted to tip over. I put towels in between the jars to keep them upright. I did 7 quarts of bacon in 16 quart pressure canner. Is this normal?
absolutely.