In a previous article, we looked at how you can make a mini-crossbow for taking small game. The upside to the mini-crossbow is that it is small, light, easy to carry, and capable of taking small game.
The downside is that it is like a pistol, therefore less accurate than a full-sized crossbow. Another downside is that due to its small size, the bow is less powerful than a bow or a full-sized crossbow.
A full-sized crossbow can not only take small game, but medium-sized game as well. With the right tip on the bolt (crossbows fire bolts, not arrows) a crossbow of reasonable power would be capable of taking a small deer, or defending yourself against an attacker.
This isn’t some chintzy toy PVC crossbow, either; this thing has serious capability! Keep reading and I will tell you how to craft a shockingly capable DIY crossbow using minimal tools and materials.
Gathering the Materials
To build a homemade crossbow of this design you will need the following materials, tools, and components:
Tiller
The stock and crossbow body. A piece of wood about three feet long to make the stock. This can be a simple 2×6 pine board, or you could split a small log to shape into the stock if you have no access to other materials. Walnut works well for crossbows if you can source some.
Prod
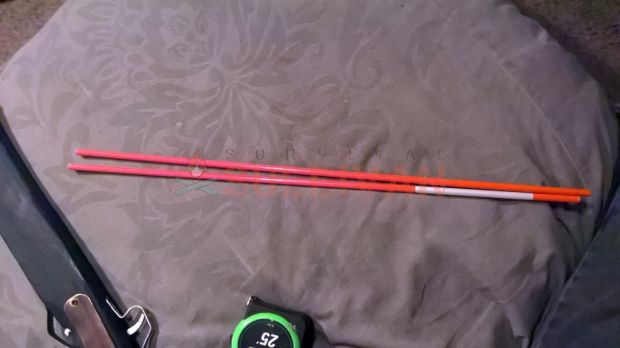
This is the “bow” part of a crossbow. I used fiberglass rods as these were readily available at Lowes for $2 each. But in a survival situation you may have to make the bow from wood.
Bow making is an art unto itself, the basis of which is that by using wood that contains both sapwood and heartwood along the bow stave you get a level of flexibility that you won’t get with just a branch or regular piece of wood.
Whatever you choose, it must be capable of withstanding immense tension without slowly weakening over time. This is another skill that should be mastered by a primitive weapons user and/or maker. Don’t be afraid to experiment.
Trigger
Metal for the trigger. This can be made from steel, aluminum, brass, or even copper if the piece is thick enough to maintain rigidity. Some old crossbows even had triggers made from wood.
Trigger Guard
This is a piece of metal, preferably thin and bendable but still sturdy, that will cover the trigger to protect it from accidental or negligent discharge from errant body parts or objects. Note that you’ll probably be able to use the same type of material for this that you’ll use for the lock and sear. See below.
Bowstring
I used paracord. Any good survivalist will have an abundance of paracord, however if you have to, you can make the bowstring from fiber cord that you twist yourself.
Survival weapon-making is best achieved by practicing the art of exploiting the materials that you have on hand. You can use your bootlace if you have to, or even a leather strip could work in a pinch.
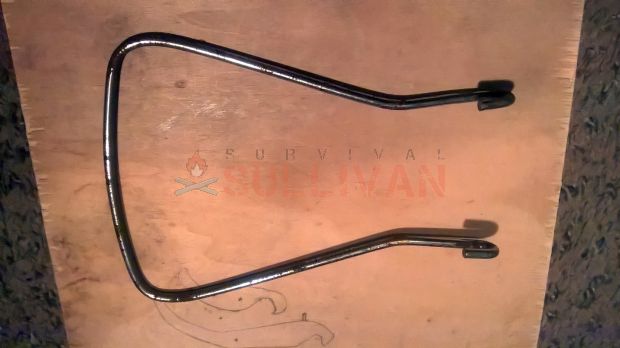
Stirrup
The stirrup is essentially just a bent piece of metal rod attached to the front of the stock, and will allow you to get mechanical advantage over the crossbow to retract the string and cock it.
Must be of sufficent strength and diameter to resist bending and collapsing. Even though this is a heavier draw design, nominally, it is quick, cheap, and simple and so that means no pulley and winch.
Screws
You will need a few to make a crossbow like I did in this article, however, there are methods that require no fasteners at all.
By making a hole through the stock and inserting the bow through the hole you eliminate the need for metal clamps and screws. The mini-crossbow was made by inserting the bow rod through the stock. You can even make the trigger and trigger pin entirely from wood if you need to, the trigger is just shaped slightly differently.
Spring
Not a must, but makes it easier to set the bowstring.
Lock and Sear
A piece of metal that acts as a rest for the bolt, and engages the trigger, holding the string in position for firing.
Tools
Drill: a drill will definitely make things easier when it’s time to install the trigger, mount the stirrup, bolt on the trigger guard, and various other steps during assembly. If you don’t have access to electricity or want to go old school, a hand drill will work. If that’s not available to you, a bow drill with a stone point can get it done in a pinch.
Chisel: a chisel or similar cutter is likewise very handy for this project, but not something you’ll probably have in your pack or survival kit.
It’s useful for roughing out the channel for the trigger guard and making a notch for the bolt to rest in along with shaping the stock generally. Lacking a chisel, it is possible to use a sturdy knife for this or repurpose a box cutter or window scraper blade for the same task.
Rasp: a rasp is handy for shaping the stock and it helping to finish all the other operations will be going through in the step-by-step. Not strictly necessary, but good to have if you can come up with one.
Sandpaper: for knocking down splinters, smoothing the channel for the bolt to reduce friction, and cleaning up your cuts sandpaper gets it done. A good quality of life tool to have for this build, but again not strictly necessary if you’re doing this quick and dirty in austere conditions.
Hacksaw: a hacksaw will be needed to cut steel rod and some kinds of sheet metal depending on the thickness. It’s possible to cut thinner types of metal with your knife by bending it repeatedly until it snaps or batoning, but it is much harder to do accurately and very hard on your knife if you’re using it.
Crosscut Saw: any kind of saw suitable for making cross cuts will help you rough out your blank for the stock or even lop off the branch or cut down the tree then it comes from. A toolbox or handyman saw is perfect for the purpose, or you can even use a emergency survival saw if you have to.
Pliers: a sturdy set of pliers will help you bend metal when you need to and it fold it into the required shapes in the case of sheet goods. You can use a good set of multi-tool pliers for this.
Gloves: You’ll be working with lots of sharp tools and strong cord under considerable tension. Protect your hands!
Making the Crossbow
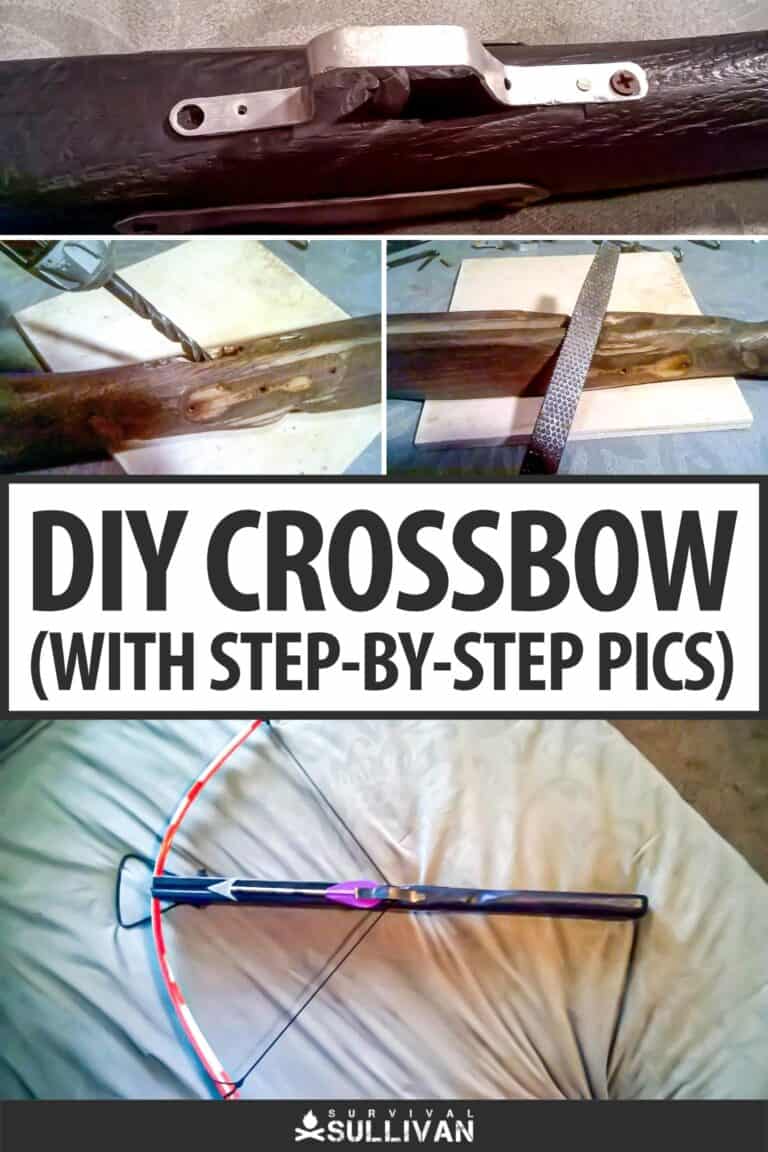
To make the stock you just cut out the shape of a stock that feels comfortable for you.
It doesn’t have to look exactly like this one, it can be far more complicated and fancy, like a thumbhole stock if that’s what you want to make, but I am following simplicity as much as possible.
Once you have the shape of the stock cut out, you have to cut the slot for the trigger.
You can do this with a drill as I show in the pictures, but if you don’t have a drill you can chisel the slot with your knife or even burn it through by strategically placing hot coals on the stock until it burns through.
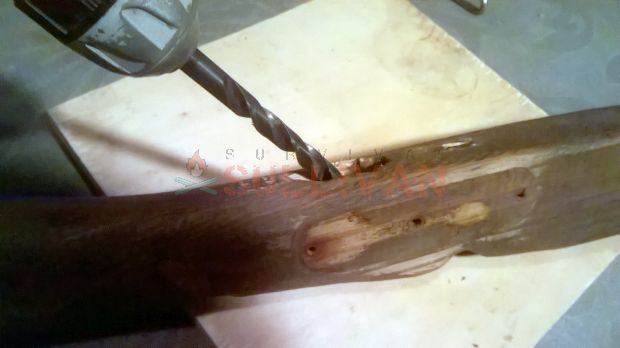
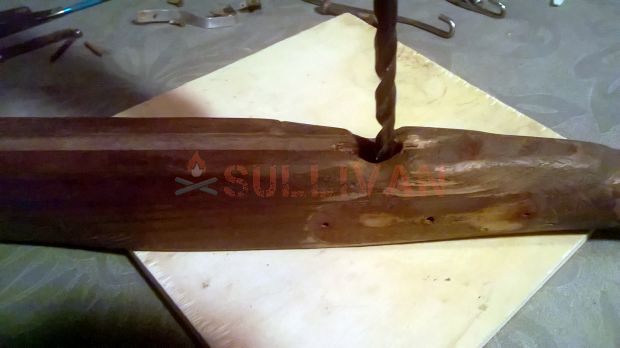
Once you have drilled the slot you can refine the stock contours with a wood rasp as shown in the pictures, but you can also do this with your knife or even a rock if you have to. Just do whatever it takes to get it done.
Everything here can be done with a knife or even a sharp rock; it will just take a lot more time than it takes using power tools.
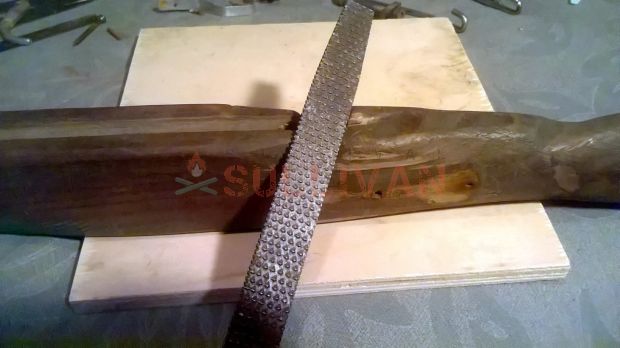
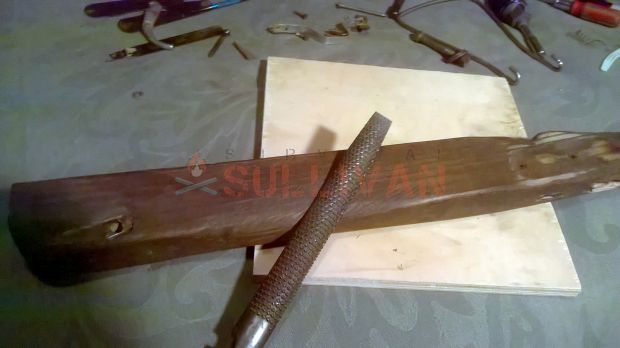
You can easily see that I wasn’t trying for perfection, as you can see rasp marks in my finished crossbow.
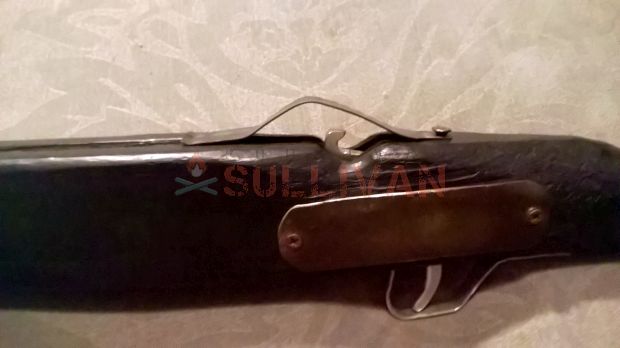
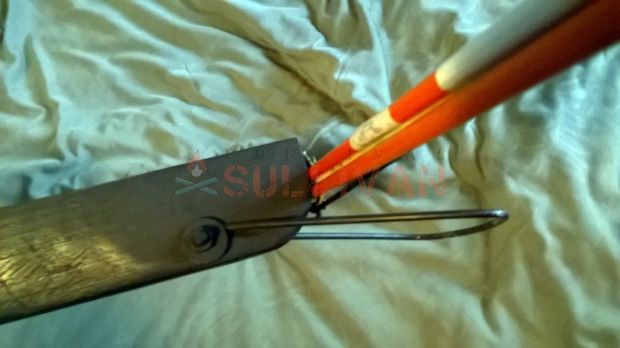
Once the stock has been made you can make the trigger. Just mark the pattern on paper first then hold it against the side of the stock to see if it is shaped right. You can make adjustments to your paper pattern as needed. Once you have the shape determined, then mark your chosen material and cut it out. I used aluminum for the trigger in this crossbow as it is strong and easier to work than steel.
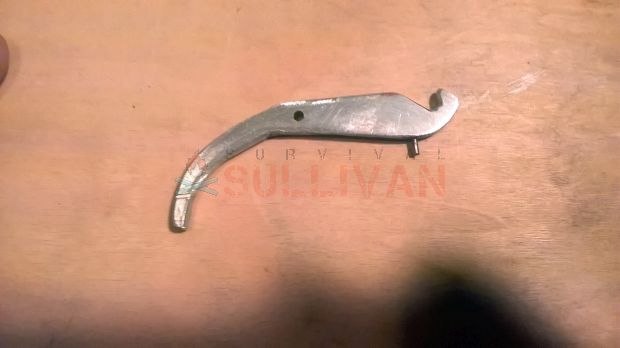
The small pin protruding from the bottom is to keep the spring in place. Once the trigger is cut and the trigger pin hole is drilled, you can set the trigger in the stock.


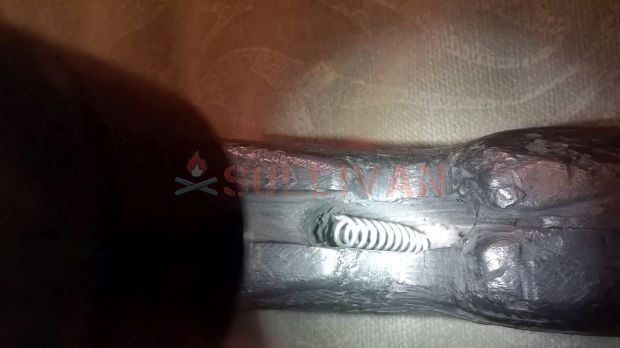
I used a spring under the front of the trigger to keep it in the up position. This makes it easier to set the bowstring. You can do without the spring if you can’t find anything suitable to use.
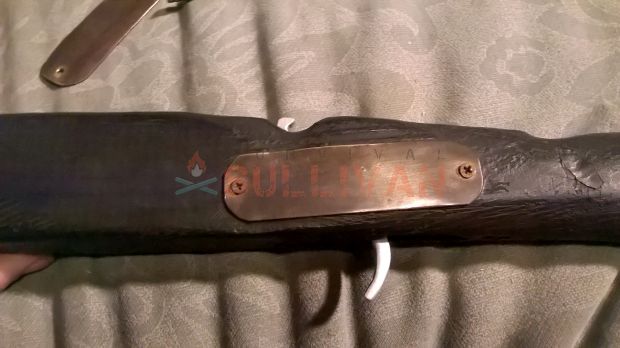
You can mount the side plates at this point. These are not a must have, but I just put them on there as re-enforcement plates and to help dress the stock up a little.
Next is the trigger guard, this is simple to make; you just need a semi-rigid strip of metal. I used aluminum for this as well because it is light, strong, and easy to work. Use a strip of paper to make a pattern before you cut the metal, once you have shaped the paper then you know how long to cut the strip and where to bend it.
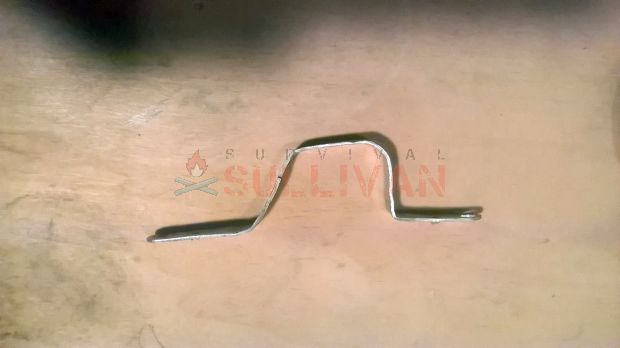
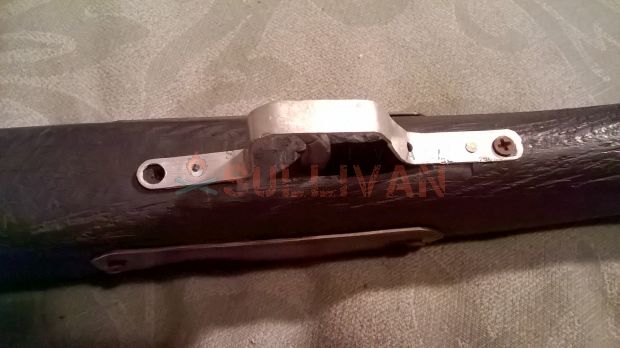
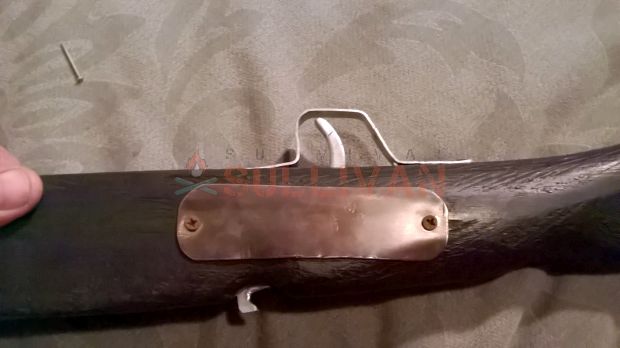
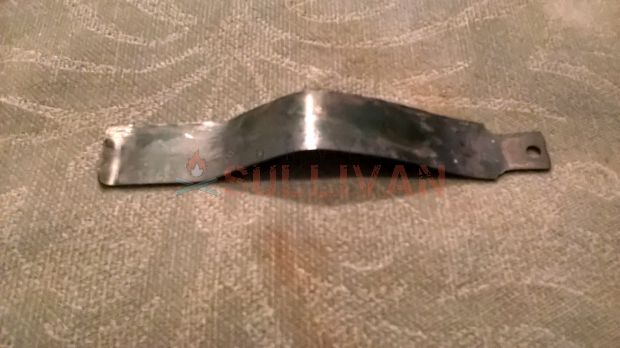
Next on the list is the piece on top to hold the bolt in place. This also acts as a safety as it prevents the trigger from being pushed down from the top. I used an old Saw-zall blade for this as it is tough material and it is naturally springy from being heated repeatedly under use.
Next, and last, is to mount the foot stirrup. This is important on a heavy draw crossbow because you wouldn’t be able to draw the bowstring without it. some crossbows have a lever that is used to draw the bowstring, but this one isn’t heavy enough to warrant that. A foot stirrup will do.
To make the stirrup you just need a fairly stiff piece of rod. Bend hooks on the end to attach with a bolt. If you don’t have a bolt you can mount the stirrup simply by drilling through the stock then pushing the ends through the hole and bending them over. It might not be pretty, but it will work. But I had a bolt so I did it this way.

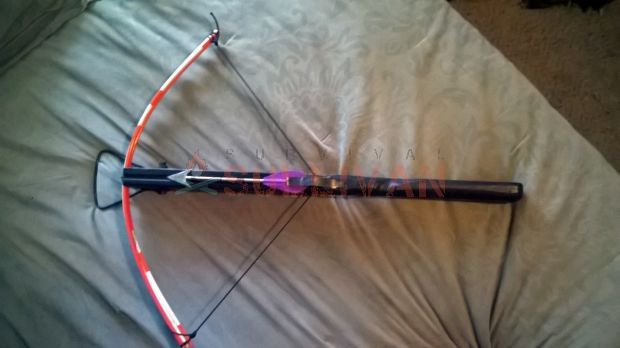
At this point the crossbow is completed except for the bow. As mentioned earlier, there are several options for making the bow; I took the easy way by using a couple of fiberglass rods that I got at Lowes.
Of course, you might not have this luxury in the woods, in a survival situation, but you just have to keep the mentality of using whatever you can find to get the job done.
Just How Good is this DIY Crossbow?
The crossbow that I made here was able to sink the bolt about 8” deep into the foam target block. This block is rated for a 70-pound draw-weight bow, meaning an arrow fired from a bow with 70 pounds of draw-weight will be stopped by the block.
For the bolt to sink 8” into the block tells me that if a human were hit with a bolt from this crossbow, and no bones were hit, the bolt would easily pass right through the body.
That makes this a lethal weapon, and also suitable for hunting medium game. The biggest problem is that you have to get pretty close up and personal with any type of bow. Most shots with a bow are taken at 25 yards or less.
Although not ideal for self-defense, the crossbow as used in history allowed a smaller, inexperienced person to loft pointed projectiles at distances towards targets they would normally need a skilled archer to achieve.
What Can You Use for a Quiver?
You can use lots of materials to make a functional quiver for your crossbow bolts, but one of the best and the quickest is simply a piece of PVC piping, wide enough to hold an assortment of bolts and it cut to a length where it won’t swallow them up, that has a piece of soft foam or leather with a few incisions in the bottom to protect the points.
A single piece of pipe and a cap is all you need for this, and it’s easy to make a sling for it using any common cordage or other material.
Another good option for a quiver is a sturdy belt pouch of appropriate size that has a piece of wood or styrofoam drilled or notched out to accept the points of the bolts.
Last Shot
So there you have it, a crossbow made from items that can probably be scrounged up around the house. You don’t have to make the exact same design as this one, but rather use this as a guide to show the principles and design methodology that should be employed.
By putting your mind to the problem you can find a solution, you CAN make a crossbow.
In a time of need when you need to take game to feed yourself or your family, you can spend a day making a crossbow completely from found items or even completely from wood if no other materials are available.
This crossbow is a great example of what you can do with just a few tools, some determination, and a day’s worth of effort.
Those are a little more complex than the one I made, but I tried to make one that could be done with only your knife if you had to. I think that it is reasonable to say that you could make this design with only a knife, as long as you are patient and persistent, it can be done.
Eric Eichenberger is an avid outdoorsman, skilled marksman, and former certified range officer and instructor with nearly 40 years experience handling and repairing firearms.
A skilled craftsman with a strong love for working with his hands, Eric spent 20 years as a carpenter and custom woodworker in high end homes. As a gold and silversmith he has created hundreds of pieces of jewelry over the years using the lost wax casting method.
The grandson of humble country folk, he was raised with the “do it yourself” mentality and so is accustomed to coming up with unique solutions to problems utilizing materials at hand.
Mr. Sullivan is there any way that I could get a pattern cutout for this crossbow. I WOULD BE WILLING TO PAY FOR THIS.
Sorry Andre, I don’t have anything of the sort, but maybe someone else can point you in the right direction..