Camouflaging is an art, it takes a lot of time and patience to be able to successfully blend in with your surrounding environment. Even though it may be a tedious art, camouflaging is well worth it, if you can do it successfully.
There are many reasons as to why you would want to camouflage yourself, or your weapon. One of the biggest reasons why, is when SHTF and you need to bug-out undetected. Snipers use camouflage to conceal themselves, and they’re very effective in doing so.
You don’t have to wait until SHTF to learn how to camouflage, you can also use it for everyday means such as hunting. Make sure you follow the rules in your state in regards to wearing “blaze orange” during rifle hunting season.
On average, it takes 2-3 months of preparation to be successful at utilizing camouflage. The sooner you start, the better off you’ll be.
Table of Contents
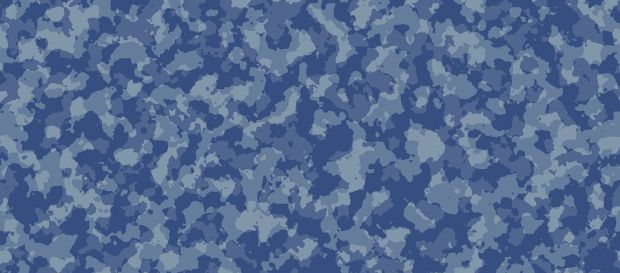
Typical Camo Palettes of North America
There are several different color options to pick from when it comes to decorating your clothing or equipment, as the outdoors offers a rainbow of hues.
The seasons, weather, and vegetation all have an impact on which colors you should select, so don’t choose the conventional Military BDU color scheme as your one-stop shop for painting everything.
Fortunately for you, I’ve assembled a quick-reference guide of various color palettes for various environments and seasons in North America. As always, these are a guide and should be proofed in the environment you are operating in during a specific season:
- Summer, Verdant: Light green (like go away green), sand, black.
- Tropics, Verdant, Lush: Emerald green, foliage green, dark green, light green, black.
- Winter, Verdant: Green, feldgrau (gray-green), tan, black.
- Snowy, trees and scrub: Dark Green, white, tan, black.
- Snow, open terrain: White, feldgrau, black.
- Red Desert: Terracotta, clay red, yellow ochre, tan, black.
- Gray Desert: Sand yellow, feldgrau, yellow ochre, black.
Here are a few examples of color combinations that would work in your region, but you may experiment with colors to match the setting in which you’ll be using them. When laying paint on your possessions, the area you’re in as well as its color scheme will determine your primary color.
Place the wood against an object of the same color scheme and pattern as the one you’re working on. Then take a step back to see how well it blends in.
If something is highly visible, experiment with a variety of designs until you’ve mastered how to utilize color schemes to your advantage depending on the region you’re in.
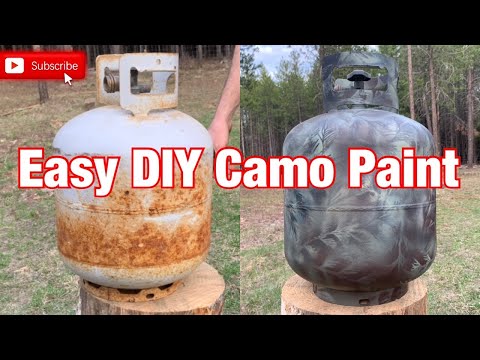
DIY Your Own Camo Paint
Having the correct tools for each task will only make the work simpler, but sometimes through chance or a lack of planning, we won’t have what we need to do the job properly.
When this happens, any good prepper must be ready to adapt. Fortunately, you can craft your own paint and other specific camo coatings simply, and even better for us you can do it with commonly scavenged materials.
You can further improve on this effect by crafting stencils, masks, filters and other supplies to create a really stunning (and effective) pattern if needed!
When it comes to field expedient painting, the United States military has already solved all of this for us.
Field Manual 20-3: Camouflage and Concealment provides a variety of options that may be combined and tailored to meet any design or pattern required in any setting. The guide is also quite helpful, providing precise recipes and preparation instructions.
One thing to note, though, is that many of the components listed in these lists are combustible, so be careful not to prepare or apply any of these paints near a source of ignition, such as a hot barrel or a burning cigarette.
When the paint is still wet, this is especially important! It would not do to go up in flames when you are only trying to keep yourself safe from detection.
And do try to keep the paint off your skin! This is not grease-paint makeup!
Dull Drab Coating
Combine soot and paraffin to make dull drab paint.
2 bars of soap should be combined with 8 gallons of water separately. Soot and paraffin mixture should be slowly added to soapy water. As needed, add soil for color.
Adding in varying amounts canned milk or powdered eggs can improve the adhesion of paint. To reduce shine and further matte finish, stir in fine gravel or sand.
Field Expedient Enamel
Add one gallon of oil in a slow and steady stream to 3 gallons of water. To alter the hue, add clay and dirt in different amounts.
Like other recipes, canned milk or powdered eggs will improve paint adhesion. Gritty sand or fine gravel may provide texture to reduce shine as above.
Field Expedient Gloss Paint
In large container or trough combine 2 gallons of water with 1 gallon of oil and 2 gallons of clay. Stir in appropriate earth or soil gradually for color alteration.
Thin the mixture as needed with gasoline or water. As always, make your paint stick better by adding powdered milk or eggs. Adding fine gravel or sand will similarly diffuse texture and reduce shine.
Paint these on through slots or tears in sheet cardboard, or old, cut up tarps or laundry bags with these colors and you may instantly enhance or change the color of your equipment’s current camouflage.
When it comes to tarps, it is feasible to field-improvise a surprisingly nice camo tarp to cover your position or your body utilizing these same paints, or any spray paint you have on hand.
Simply obtain a cloth tarp and then paint it completely with any of the paints listed above or another color. If the paint is thinned down, it will assist in preventing cracking.
So much better if you’re using a camo-colored tarp. Earth tones and natural colors are, as always, your best bet.
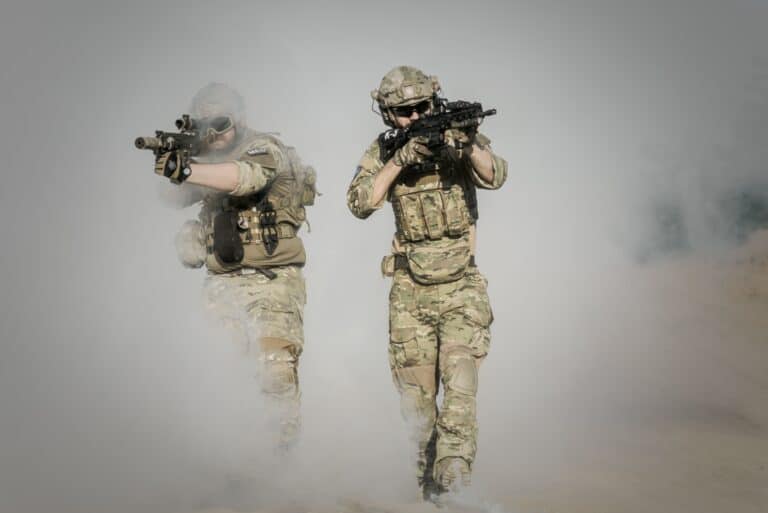
Camouflage Fundamentals
Blending into the environment is critical when it comes to remaining unseen. The ideal shot is the one you make, and can retreat to a safe distance, all while remaining concealed.
A ghillie suit can help you blend into your environment, and are very inexpensive to make. While you can buy pre-made suits, it’s not recommended.
The best suits are made by hand with the brush, foliage, grass, and leaves around the area that you’re in. The only exception to this rule is winter time, a pre-made white and grey or white and black ghillie suit will fit most winter wilderness situations.
While you don’t have to completely cover yourself from head to toe, even camouflaging your weapon can make a big difference in concealment. Camouflage is the art of exploiting the vision, it may seem hard, but we’ll explain how easy it can be. We’ll break down this segment into three levels of camouflage.
Level 1 – Camouflage Clothing and Face Paint
Camouflage clothing is very easy, and inexpensive to acquire. If you’re a devout prepper, odds are you probably already own camouflage clothing.
Face paint is very inexpensive, and you can get it in the hunting section of most retail stores (including Walmart). The importance of face paint is to be able to contour different parts of your face so that the natural light doesn’t reflect off it, giving away your position.
Grease-based face paint is recommended, because it’s water resistant. If you’re going to be out in the wilderness, you don’t want to be reapplying your face paint because of a little rain. You’ll want to use the colors that match the environment that you’re in.
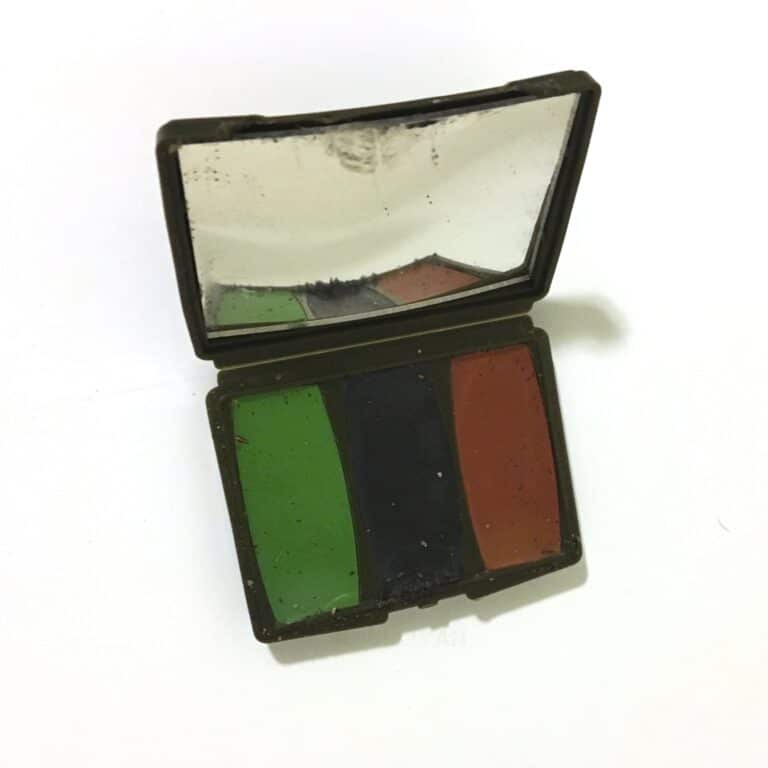
In the forest, you’ll want to use brown, black, and green. In a desert environment, you’ll use tan, brown, and light green. In a winter environment, you’ll use green, grey, and white. In an urban environment, you’ll use grey, black, and brown.
The areas of your face that cave-in, such as your eyes, under your nose, under your bottom lip, and temples, you’ll want to paint with the lightest color you’re using for your environment.
Make sure you paint a larger area around your eyes so they’re not recognizable at a distance as eyes. Also, make sure you properly blend the paint into your skin. By doing this, you obscure your natural facial pattern, so enemies won’t be able to recognize your facial shape at a distance.
The shinier areas of your face, such as your forehead, cheeks (from the bone to your nose), and either side of your chin, you’ll want to paint with the medium color you’re using.
Make sure you overlap the medium color with the lighter one, and blend them together. If you don’t, you’ll look like you have blocks on your face, rather than obscuring it.
Tip: when you overlap colors, use three fingers to blend them in a circular motion, not your palm.
The outer areas of your face, such as your chin, cheek bones, and outer forehead, you’ll want to paint with the darkest color. Blend the colors in with your fingers, and then paint an irregular pattern on your face to match the foliage around you.
For example, if it’s winter and you’re around a lot of leafless trees, paint black stripes on your face to match tree branches. Don’t try to be Rambo and just use three black stripes on your face, you’ll look like an idiot, and completely ruin the purpose of painting your face.
Make sure you also cover your ears, and neck. Remember the rules for what parts to paint what shade. Any object that sticks out, paint darker. Any object that caves-in, paint lighter (or medium). Using this method will give your face a flat appearance. Flat objects are much harder to detect at a distance, especially at night. The more skin around your face that’s covered, the better chance you’ll have at remaining undetected.
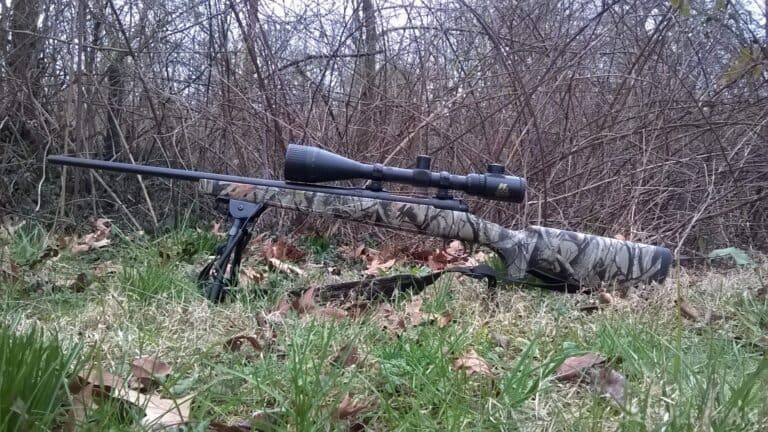
Level 2 – Camouflaging Your Rifle, Along with Level 1
Camouflaging your rifle is an important step when you wish to remain concealed from your enemies, or people in general. You’ll hear of people wrapping camouflage-patterned duct tape around their rifle, but I want you to think about that for a second.
You spent a lot of money on a well-rounded rifle, with a (more than likely) expensive piece of glass (scope) . Would you treat your rifle like that? It’s like taking someone who’s way out of your league to Burger King for a first date, instead of planning a romantic one for around the same price.
The only exception to this “tape rule”, is the winter. You can get away with any white tape of your choosing, so you can eliminate having to paint your rifle multiple times per year.
To start the camouflaging process, start with a light coat of spray paint. For naturally wooded areas, use a dark green. For naturally barren areas, use a dark tan or a brown. Make sure you use matte paint, not metallic, because anything shiny can give away your position.
Parachute cord will be your friend with this process, so make sure you have plenty. On a side note, you should always have at least 50 feet of parachute cord in your BOB, you never know when you’ll need it.
Once your weapon is painted, you can choose to paint your glass, but you don’t need to if it’s black. There are three easy stages of camouflaging your rifle, this is stage one.
For stage two, you’ll need parachute cord. Find the natural foliage that will be around your area of attack/defense. You’ll need to grab small, flexible branches, leaves, grass, basically anything that’s found around the area you will set up in.
Remember, you want to blend into your environment. Start by tying the small branches along the side of your rifle.
Make sure you’re not just tying them along flat with the rifle, you’ll want them to stick up a little (not straight up and down either). A good rule to follow – one small branch every three inches.
Once the branches are tied to your rifle, take the smaller foliage (leaves, grass, and other small items) that you gathered, and weave them between the branches. This will give your rifle a nature-like appearance, and help conceal you when your rifle sticks out.
Also, make sure you do this to an extent on your glass. Scopes stick out like a sore thumb to the trained eye, when they’re not properly camouflaged.
As far as the parachute cord is concerned, you’ll want to match the color of the cord to the color of your surroundings. For instance, in a wooded area, the cord should be green. For a barren area, it should be tan.
Lastly, in a winter environment, it should be white, grey, or black. For camouflaging your rifle in the winter, the same rules apply, without the smaller foliage.
Stage three is simple, camouflaging the light reflection on your scope. To do this, you can buy a “honeycomb” attachment, or make one yourself. If you chose to make one yourself, all you need is dyed burlap, and a rubber band. Take the dyed burlap, and cut it to size.
Remove some of the strands (so you can see easier), and attach it to the front-end of your glass with the rubber band. If you’ve completed all three steps to standard, your rifle should completely blend in with the environment you’ll be shooting from.
Level 3 – Ghillie Suits, Along with Levels 1 & 2
Ghillie suits come in two different variants, store-bought, and hand-made. I usually don’t recommend store-bought items for things like this, but most bought ghillie suits are decent, and save you a lot of time.
Bought ghillie suits allow you to skip the tedious process of making one yourself, and you can skip straight to the last step (step five) in the ghillie-making process.
Materials
- Burlap (big enough to wrap around your body 3 or 4 times)
- Netting with one inch spacing (a badminton net will do)
- Camouflage clothing (colored to fit your natural surroundings)
- Camouflage hat (if you’re using a helmet, it will work too)
- Fabric dyes (at least three natural colors for your environment)
- Hot glue gun, with hot glue
The Process
- Pull apart the burlap strand by strand, until all the burlap is in single strands.
- Dye the burlap in the colors you picked for your environment (for instructions on how to dye burlap, follow the instructions on the fabric dye) and allow time to air dry.
- Stitch the netting onto your clothing, and hat. Make sure you stitch all the clothing with thick stitching, ghillie suits are heavy and you don’t want your suit coming undone when it matters most. Transparent fishing line works well for this. For a helmet, attach the netting to the bolts used for your chin straps (for an extra hold, pull the netting under the helmet as well).
- Pull the burlap strands (four at a time) through the netting, so they’re in u-shape strands around the netting, and glue them to it. Make sure you disperse the colors so you don’t have dark brown in one area, and light green in the other (you’ll look ridiculous).
- Attach natural foliage found in your environment to the ghillie suit. Remember, a ghillie suit should be 30% artificial, and 70% natural.
Ghillie suits can be extremely warm in high temperatures, so make sure you have a water source. You can wear a hose-fed hydration source under your suit, to keep it concealed. If you can help it, try to plan your routes where the vegetation is nearly the same the entire way.
To be effective at concealment, you need to blend into your environment. You’ll stick out like a sore thumb if you try to cross a dry field, wearing a dark-green ghillie suit meant for densely wooded areas.
Proper use of a ghillie suit requires a lot of practice. I suggest that you hide from a friend (with your camouflaged rifle, obviously cleared of any rounds), and have them try to come and find you.
Avoid being “tree cancer”, this term is used by snipers to describe an individual using a tree to conceal themselves, but end up looking like a lump sticking out of the trunk of the tree.
A great place to set up your concealment position is in a thick bush, or a high grassy area. Rocky areas also work well, just make sure there’s enough vegetation around to justify your ghillie suit.
Make sure you conceal your sound as well. When moving through densely-wooded areas, small twigs, and other objects can break when you step on them. In a quiet area, this small sound can seem like a train moving through the woods.
A good trick to use when trying to remain silent, is walk very slowly, and plant your toes down first with each step. After your toes strike the ground, then slowly plant your heel down.
This allows you to manage the weight you strike the ground with initially, so if there is something that could generate a loud sound, you’ll generally feel it before you see it.
Mind the Little Things
Concerning your chances of detection by an enemy in a survival situation, the consequences dictate that no element is too small or beneath notice. The little things done right or wrong will make the difference in a close call.
Customizing your equipment and clothing with camouflage can be a time-consuming process, but it is only worth it if it makes the difference between life and death.
One area where preppers go wrong is in overlooking the little things that could betray their presence by happenstance or to a skilled observer.
This could be something like a colored watchband (or glossy watch face) peeking out from beneath a sleeve. It might be the obvious, charcoal black, slender shape of a scope that wasn’t painted perched atop a rifle. It might be the bright white color of the skin on someone’s neck!
Any of these elements constitute “little things” that could have big and grave consequences. Any of them can spoil an otherwise effective camouflage job.
Moreover, these little things can often be remedied with a quick application of paint or tape, or covered with a dark sock or bandana, or even slathered with mud.
It only takes a few seconds to do it right and could save your life. Also, don’t hesitate to paint your optics! Mask off those lenses and adjustments and go to town. No excuses!
Name Brand Camo vs. Improvised “Homebrew” Camo
Is homemade camo always a necessity? Do you really need to endure the painstaking process of customizing your gear with paint or homemade coatings?
The process can be messy, tiresome and finicky depending on the weather, especially with sprayed on coatings!
I must emphasize again that these skills are important to have for pretty much every prepper since situations change and you must remain adaptable. But the ultimate goal is making our stuff and ourselves that are visible highly less so.
If you want a solution now you can buy camo clothing or gear off the shelf in any pattern or color your heart desires.
However, in a SHTF situation where stores are emptied out and “civilian” clothing is the new target, this might not be the best solution. It would be much wiser to go with a less conspicuous color or pattern.
Take for example the common Woodsman brand of camo. It’s made to help you blend into your surroundings by using earth tones like green, brown and black.
These colors are natural and will work well in any environment that isn’t too bright or sandy. You can purchase this type of camo at most sporting goods stores or online.
Other, high-end military or hunting specific patterns are also available, and each promises a level of performance heretofore undreamed of. Kryptek, Pencott, ATACS, Mossy Oak, RealTree, the list goes on.
However, these patterns are also designed to work in highly specific environments and might not be as effective in other surroundings.
One of the best things about going with a “Name Brand Camo” is that you don’t have to worry about the pattern or color combination.
All you have to do is pick the one that suits your environment and go with it. You are done.
You can equip your body and your gear with pre-camo’d clothing or equipment and scratch it off the list. The downside to using Name Brand Camos is the price tag.
A good set of high-end camo clothing can run into the hundreds of dollars, which might not be feasible for some people. At any rate, it may well not be the best use of your funds.
And I want to let you in on a secret. These big ticket camo patterns rarely work as well in your environment as a purpose-made and tested homebrew camo.
However, they just don’t have the same impact as a handcrafted version, although they may still be useful if utilized correctly in conjunction with your own paint and some vegetation selections.
They might still be an important addition to your skill set, especially for certain pieces of equipment or complementing an existing load, if chosen carefully.
Also, pre-camo’d “soft goods” and hardware in any pattern must be chosen with care.
Many cheap examples are made or finished with a satin or plastic-like sheen that can reflect or glint when you can least afford it. Even getting these items for a bargain might not be worthwhile. As always, test, test and test again!
Remember: Nobody knows better than you do what you need, and knowledge is weightless, but you may use off-the-shelf camo gear to supplement your abilities and procedures when appropriate.
Urban Camouflage
Urban areas can be difficult when it comes to camouflaging. There’s little vegetation to blend in with, and lighting in most areas. In a post-collapse environment, the best way to camouflage yourself during the day, is to blend in with the people.
In doing this, you’ll draw less attention to yourself. Wear the clothing they wear, walk how they walk, and talk how they talk. People dress differently in different regions, so study your environment.
In a nighttime environment, however, camouflaging is very different. To camouflage yourself, use all black clothing, and nothing shiny that could give off a light reflection. Stick to the shadows, when you’re trying to conceal yourself from threats at night, that’s not the time to be afraid of the dark.
Complete darkness is your friend, learn to use your ears to detect what the eyes can’t see. Make sure you utilize a 5-minute familiarization time in complete darkness to allow your eyes to adjust.
If you must use any kind of light when you’re trying to conceal yourself, use a dim, red lens. Very dim red light is more difficult for the naked eye to detect at longer distances.
Use light sparingly, because every time you do, you risk being detected. If you allow your eyes enough time to adjust to the dark, you should have no trouble moving around in it.
When using face paint in an urban environment, use black and a darker shade of grey. The dark grey will be used in place of the “light” and “medium” colors as instructed in the face painting segment above.
Masking your scent is also very important at night, because if you’re not supposed to be somewhere, your scent will give you away at close distances before anything else will.
Bedding Down While Concealed
If your concealment experience needs to be an overnight trip, there are ways to help conceal you while you get some sleep. You’re no good to anyone (including yourself) if you’re not well-rested, so sleep is an important factor to keeping a focused mind.
Remaining concealed when you bed down in a rural environment is much easier than doing so in an urban one, so if you can, move to a wooded area before you need to get some shut-eye.
Disclosure: This post has links to 3rd party websites, so I may get a commission if you buy through those links. Survival Sullivan is a participant in the Amazon Services LLC Associates Program. As an Amazon Associate, I earn from qualifying purchases. See my full disclosure for more.
In a rural environment, make sure you have a shovel to dig a hole with. An army surplus “E-Tool” is a great tool to dig with, it’s lightweight, versatile, and compact. Dig a hole about 3 feet deep, and the length of your body. The reason you want it deep, is so you can pile vegetation on top of you while you sleep.
After you dig your hole, lay a tarp or some sort of waterproof material along the bottom of it. Then, lay down in your hole, and fold the waterproof material around you as if to make a cocoon. After you’ve done this, pull vegetation from the surrounding area on top of you, thus concealing your position.
In an urban environment, find the high ground. Most people are lazy, and won’t want to put in the work to get to the highest point they can find. If you know you’ll be in an urban environment overnight, plan your route accordingly so that your end-point will be where you bed down.
Once you’ve found your high ground, make yourself as inconspicuous as possible. The best area to bed down in an urban environment is a closet. If the only other option you have is a roof, make sure it’s not easily visible by a normal pedestrian.
Counter-Concealment
You can’t really think you’re the only person in the world who knows about camouflaging, right? You can count on many people knowing how to conceal themselves when SHTF, and some might even be enemies.
Therefore, it’s very important to practice counter-concealment. It’s not as hard as you may think, most people aren’t very efficient at camouflaging (probably because they didn’t read my article).
When looking for someone who may be camouflaged, look for the things that I had pointed out in the above segments that make you stick out such as “tree cancer”.
Another thing that’s a dead giveaway, is their scent. Most people don’t think about masking their scent, so if you’re a smoker, now’s a good time to quit. Smoking greatly reduces your smelling capabilities, so stopping now will greatly increase your sensitivity to scent.
Another technique you can use is paying attention to the wildlife around you. While you shouldn’t shoot at the first thing that moves in the woods, you should definitely take a mental note when animals act irregularly around you.
If birds suddenly fly out of a tree in flocks for no reason, there’s a good chance that they feel like there’s a threat in the area. Usually birds associate humans as threats, so this could be a good indicator that there’s someone in that vicinity.
Scent Concealment
Concealing your scent is very important when you fully dedicate yourself to camouflaging, especially when used for hunting. An animal’s nose is extremely sensitive, and can detect scents from a much further distance than humans can.
The basic rules for camouflaging your sent are to stay away from using deodorants, colognes, tobacco, or anything not natural to the human scent. These things can make masking your scent very difficult, because now you must mask the other scents too.
Dirt can mask your scent, but only for so long. It can be used when you have no other means to cover your scent, but there are other was that are more effective. Depending on state laws, a great option for deer hunting is “doe urine”.
Now before you get grossed out, doe urine is safe (however I wouldn’t personally drink it) and very effective at attracting a male deer to your location.
Deer are very instinctive, so when it’s mating season, any sign of a female will make a male go out of his way to find her and mate.
There are also scent-masking sprays on the market, make sure they aren’t infused with bug spray. The “DEET” in most bug sprays can give away an irregular scent, therefore giving away your position.
I recommend “Scent-A-Way” masking spray, it’s inexpensive, and sold at most retail stores. This spray gives off an earthly scent, making it a great way to conceal your natural body odor.
Wrap-Up
Camouflaging is a must-know technique for preppers. If whatever you’re planning to hunt (or recon) doesn’t know you’re there, it will make your endeavors much simpler.
Remember, never rush the camouflaging process unless you must, it could mean the difference between life and death.
One last tip – if you must remain concealed, never travel in a team with more than 3 people. The more people in your group, the more noticeable you’ll be.
I’m an active-duty infantryman with the U.S. Army, and I’ve served a combined-service of over 5 years. Throughout my career, I’ve learned various survival techniques, as well as self-defense techniques. I specialize in weapons, long-range reconnaissance, distance shooting, and long-term isolation survival. I’m a very conservative, very “to the point” kind of person.
Well done article on the types of camouflage that were addressed. There are several other types and ways to ‘camouflage’ a person and gear.
The first, and most important for me, is role camouflage. This is because under most circumstances it is not easy at best, and can be almost impossible to camouflage oneself effectively to not actually be seen. Role camouflage gets around this by ‘camouflaging yourself in plain sight’ so to speak.
If you are wearing camouflage shirt and pants, of any pattern and any color combination, you are going to stick out like a beacon flashing amongst a group of people wearing business suits in a downtown area. However, if you are dressed in a business suit, very similar in look to all the rest of those around you, you can certainly be seen by anyone that looks at you, but will you be seen as you, or just another person in a business suit.
A leopard can be very hard to see in the wild, as the spots help it blend in with the foliage. Great camouflage. Try to pick out and track one specific antelope in a herd of antelope on the move on the open plain. That antelope is pretty well hidden, as well, if you ask me.
Another type of role camouflage is not to look like the others you are grouped with, but to look like you belong in the area, when there are people of many different looks around. Or even not that many people. If you look like a person that can be expected by most people to be in a given location, they will not pay all that much attention to you specifically, but simply regulate your presence into the background of the area, just like the street light poles, fire hydrants, trash cans, sculpture, kiosks or whatever else is often seen in the area.
If you wear a tool belt, a reflective vest, have on work boots, hard hat, and safety glasses, carry a tool box, and look like you are headed to or from something that needed repairs or construction, you are part of the background of the place, not someone out of the ordinary a person would not expect to see there if dressed differently.
Another form of camouflage that does not hide you, but does help hide your identity, so you can again hide in plain sight, is to change your appearance. Not just your hair color and/or length, eye color, clothing style, but other physical attributes, and even more importantly, your stance when standing and sitting, and gait when walking. Mannerisms are just as important to carry off the deception.
Every person has signature elements to their personality, look, and general actions. Make a point to learn what yours are, and figure out ways to change them when you need to, in private, so you can do it in public without it being noticeable.
Another thing that really is not camouflage, but goes along with it, is the use of misdirection. If you can keep anyone from looking in your direction, they are not likely to see you, or take note of you. So use anything and everything you can that will have people looking any direction except the one toward you. Some of these can be active actions on your part, such as diversions like fireworks or even a tossed rock. Others can be the use of actions, sounds, lighting, and such that tend to draw peoples attention, whereupon you do what you need to do while they are distracted with those things.
Lots of other options, too.
Just my opinion.
Interesting article in as much as it became obvious that the author neither has any experience in this topic nor knows anything about it.
Interesting that you comment all day on dozens of websites, always ranting and complaining. I wonder if you have also practiced more than my writer, who’s been an infantryman for the past 5 years.
It’s a good thing you told us he has no idea what he’s talking about, from now we can rely on your vast experience as a keyboard warrior.
With the exception of urban camouflage, I’ve successfully used all of the techniques described in this article. Reaper’s guidance is fact-based and authentic.
Ben,
Thank you for your feedback! I strive to make all of my articles fact-based. If people trust their survival off of my articles, I owe it to them to give them the most clear and concise guidance that I can offer! Make sure you check out my other articles if you’d like to know more!
-Reaper
Jerry, thank you for your input as to different types of camouflage. I did touch on casual camouflage as it pertains to blending in with city people, or the environment you’re in. I’m not sure if you caught that. You seem like you’re decently familiar with these aspects, which is awesome! If you have any further questions, I’ll be happy to answer them for you!
Thank you, as well.
I did note the additional references. They are part of what prompted me to reply.
I would dearly love to hear (read) your thoughts on some of the ideas I presented.
I would also like your opinion, and whether you have done any reseach on night time camouflage, and dealing with IR, and Thermal Imaging devices.
And something else. I thought I had mentioned this in my earlier post, but perhaps not. You mentioned not using shiny fabrics, including shiny black fabrics for night time. Which I totally agree with. Subdued colors, dull colors, and flat/matte colors reflect less light, and that is the whole point, of course.
One thing I have found, is that there is black, and then there is black, if you know what I mean. The ‘black’ of night really is not black. The total lack of color. Other than in a mine or cave, where no light at all can penetrate, there is almost always some light, even if not really discernable to the human eye. But for me, since black fabric cannot actually be totally non reflective in the sense of there being no color at all, and the black of night still hase some light, that even matte black fabric does not look the same as the black of night. It can still be seen. Not well, but it can.
I discovered by accident, that a very deep puple, a purplish black or blackish purple, edging into even midnight blue colors, are actually harder to see at night than basic black, even matte black. If you have any information on this, I would certainly be interested in it.
Thank you again for the article.
Jerry
Jerry,
I have firsthand experience with thermal imaging and IR. Some things, however, I can’t share firsthand experience on, given the fact that I’m still active-duty. However, I can discuss public information. That’s what I usually base my articles on, public information. As far as your comments with black materials, you are correct! I try to keep things relatively simple for preppers to acquire so they can understand my articles easier.
As far as my thoughts on what you shared, most of the things you said have accuracy, however there are so many aspects of camouflaging that it would take forever to discuss it in entirety. I definitely enjoyed your input, and if you have any other comments you’d like to share with any of my articles that are posted as of now on SS (how to survive a street fight, how to shoot like a sniper) please let me know and I’ll answer them to the best of my ability! Stay safe, and stay alert.
-Reaper
I understand the security restrictions you are under. No problem there.
And thank you very much. I am a highly opinioned sort, and have no qualms about sharing them in appropriate venues. They are all simply my opinions, and anything I might post should always be double checked by anyone that might be thinking about acting on it. I always do my own due diligence research, and hope everyone does in relation to my opinions, too.
Some very good stuff here. Not that I am getting the e-mails I may drop in from time to time when a subject comes up that I have some thoughts about. Some of my articles/posts are quite long. Feel free to restrict them, or ask me to edit them if necessary to meet your site requirements.
Glad I found this place.
Just my opinion.
I’m a blacksmith/knifemaker/metalsmith. There’s lots of things about working metal that I know. However there’s probably more that I don’t know than I know even though I’ve been doing it since 1965.
I really enjoyed the article with all the information. It don’t matter how much one knows you can always pick up tips from others. I also enjoyed the comments of Mr. Young. More information. In my opinion I think Vocalpatriot just complained without adding any information at all to the conversation. Maybe you should ask him to write an article that would better inform us.
Reaper,
I would like to get your views on camouflaging vehicles sometime in a future article. I’ve done a lot of border area work, where vehicle concealment is critical to mission success. Your thoughts and experience on this topic would be a welcomed “continuing education” opportunity.
Ben, I will get in touch with some of my contacts in the near future regarding this topic. This way I can combine my knowledge with theirs to better advise you. I was away for a couple of months, but now I’m back. Can’t wait to feed you guys some more advice!
-Reaper
You must also address the was and techniques involved to stop the unwanted narural. …(what would the correct word be..squeamishness) to the fact that you must kill another sentient human being if you want to survive. You must learn to stop this natural feeling of caring for another human life, and I know there are certain people out there that will not have any issues with pulling a trigger or using a knife to end someone else’s life, but the majority of people will have a hard time doing this. any opinions about that? I think that the actual psychology of an individual is a very important survival issue.
Hello Mr Reaper, nice article, thank you for that,
I’d just like to add some additional points you may find interesting regarding avoiding night time/shiny black. I agree it’s good to avoid shiny black, many people may suggest dark charcoal grey on muted fabrics.
While this is ok, a little practice and it’s almost as easy to spot as pure black.
A better suggestion is orange and blue in pastel shades. Orange at dusk plays with the rods and cones in our eyes to distort how we perceive distance (think of the colour of a fox or orangutan)
A specific shade of blue used by the Britons when the Romans invaded made with woad and lard has an even more profound effect in low light, namely that the rods and cones do not register the colour at all
These colours also are less suspicious if you are witnessed en route to a target area (you’re more likely to be reported if you are all in black, but blue or orange jogging suit, much less suspicious or note worthy)
Hope you like the info