If you’re a prepper planning to have your own survival garden or food forest to sustain you following a SHTF event, then you will likely need a good way to store harvested food without refrigeration.
Even with solar or hydro powered refrigeration, you will have to use a smaller unit to avoid pulling excessive power from your battery storage.
One option for more storage is to build a root cellar yourself to extend the shelf life of your harvest so you can eat fresh food even through the winter months.
Table of Contents
What Exactly Is a Root Cellar?
A root cellar is a cool, dark storage area, typically at least partially underground. The purpose of a root cellar is to keep food cool and to avoid exposure to humidity to keep it from spoiling.
For most families and especially for preppers, who are planning to bug in or can build one at their bug out location, the root cellar can not only extend the shelf life of your food but also help keep it hidden from potential looters.
The Pillars of Building a Root Cellar
The three crucial things to consider when building a root cellar are:
- ventilation
- temperature
- and humidity
Make sure your root cellar is well ventilated.
Pears, tomatoes, and apples produce ethylene and should be stored close to ventilation and away from other vegetables, especially carrots and potatoes.
The more densely packed your root cellar is, the more ventilation you will need. Wrap vegetables with strong smells such as garlic, cabbages, and turnips in newspaper.
The temperature of a root cellar should stay above 32 and below 50 degrees Fahrenheit (that’s between 0 and 10 degrees Celsius). The average shelf life for vegetables stored in a root cellar varies from 1-6 months. Invest in a good thermometer, which displays temperature in your root cellar.
The level of humidity in a root cellar is the third critical piece of your root cellar design. The majority of root crop vegetables store best in high humidity, at about 90-95%.
A root cellar with a dirt or gravel floor will retain more moisture than one with a concrete floor. Use a hygrometer to monitor the humidity levels. You can increase the humidity in your root cellar by hanging damp burlap bags over certain crops or by placing pans of water on the floor of the cellar.
For root cellars where maintaining high humidity is an issue, pack your root vegetables in sand, damp sawdust or even moss to reduce evaporation.
Root Cellar Plans
1. Garbage Cans
Disclosure: This post has links to 3rd party websites, so I may get a commission if you buy through those links. Survival Sullivan is a participant in the Amazon Services LLC Associates Program. As an Amazon Associate, I earn from qualifying purchases. See my full disclosure for more.
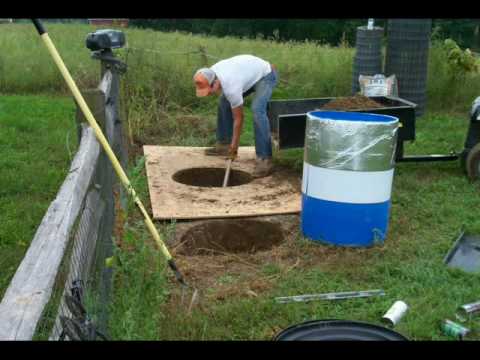
Take a plastic or galvanized steel garbage can and punch holes in the bottom of it so any water that gets inside can drain out. Pick a spot to bury the can.
Layer your vegetables into the can, use wire racks if you can so they aren’t touching one another, wrap them in newspaper, or bury them in layers of sand. Put the lid on tight and cover with a bale of straw or some other marker.
You’ll need to pay special attention to temperature monitoring and drainage:

2. Plastic Barrel Root Cellar
Besides the garbage can root cellar, you can also construct the root cellar from plastic barrels as you can see here:
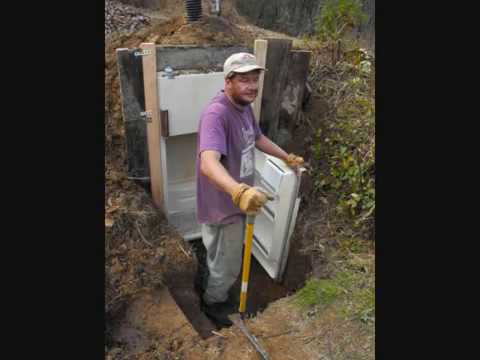
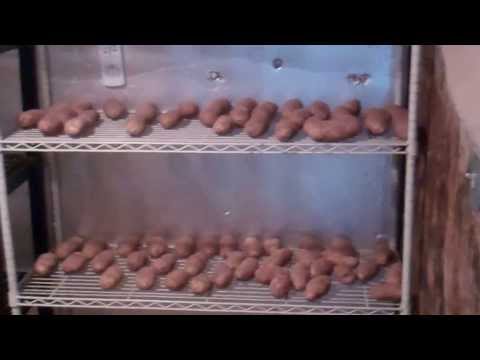
3. Old Refrigerators or Freezers
You can use an old broken freezer or refrigerator as a mini root cellar. Get an old one from a friend, relative, or even from an appliance store or the dump.
Make sure that the Freon gas inside has been safely removed so it doesn’t leak into the air or contaminate your food.
- Dig a hole to bury the freezer at least three to four feet deep so you are below the frost level. If you have one available or can afford to rent one, use a backhoe to make digging easier.
- Create a level layer of large rocks or ¾ inch gravel in the spot where the unit will sit to increase air flow.
- Remove all the mechanical parts from the unit and then punch holes into the backside. You want the holes to be flat against the ground when the unit is buried so the warm air from the ground comes into the unit to keep your produce from freezing.
- You will then punch holes on the top of the unit and the bottom and insert elbows and then straight pipes into each hole. This allows the air that comes in from the ground to be pulled out to the surface. The pipes need to be long enough that they will stick out of the ground once the fridge or freezer has been buried.
- Cover the top of each pipe with a vent to keep water and dirt from falling into the pipes.
- Use boards to create a box around the fridge so you can bury the fridge but won’t be knocking dirt inside every time you open it. Fill in the dirt around the box.
- Cut a piece of insulation to fit over the top of the unit for extra protection in the winter. If your climate experiences extremely low temperatures, invest in a light that turns on when temperatures drop. A simple halogen light will provide enough heat to keep things from freezing.
- If there is ANY chance, however slim, that children could get into the fridge to play hide and seek, make sure that you take this into account and add safety measures to prevent a tragedy.
Monitor your temperature regularly to ensure nothing freezes or becomes too warm. For an example of how to build a root cellar from an old refrigerator and create an upright root cellar into a hill, see this video:
4. Pallet Root Cellar
If you have wooden pallets available and they seem too good to cut up for firewood, then put them to use in constructing a root cellar. The article in the link was written by Ted Wright, survival expert, and author of Wright’s Complete Disaster Survival Manual.
See the instructions here.
5. Basement Cold Room
This video shows how to turn an existing old basement room into a great cold storage area, all you need to add is proper ventilation pipes, a thermometer, hygrometer, and to cover that window to keep the direct sunlight off your vegetables:
If you want to get even fancier, you can create a cold room in your basement like this one that even has its own thermostat and ceiling fan:
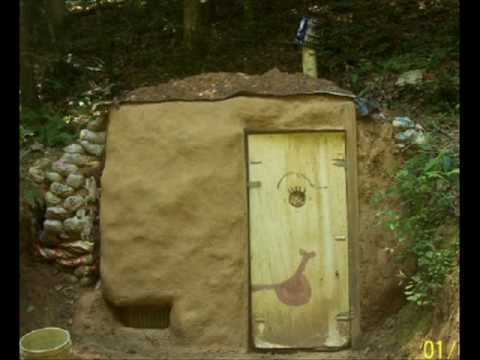
6. Cob and Earthbags Root Cellar
Cob is a type of natural building material that is typically made by mixing straw with clay and crushed rock or sand. You can build blocks using “earth bags” which are typically bags of natural woven material such as feed bags or rice bags. You then use the cob to cover the bags to create a smooth finish.
In the same way you would build a home from earth bags and cob, you can build a root cellar pretty inexpensively as demonstrated in this video:
7. Spring House
Our ancestors who were homesteaders knew that building their homes near running water such as creeks and streams was beneficial not only for drinking water and cleaning but also for keeping things cool by submerging them in water or storing them in shelves inside the naturally cooler structure.
A spring house can be a free-standing structure built over a natural spring, or next to a creek or stream. Ideally it is built into a hill so that at least some of the walls can be made of cool earth. If you cannot build into a hill, you can use brick, block, or stone for the walls.
See what you need to build a spring house:

Things that need very cool temperatures can be kept submerged in airtight containers in the water (milk, butter, etc.) and other items that just need cooler temperatures can be kept on shelves inside the structure.
Springhouses can become very damp, so monitoring humidity levels and balancing those will be important.
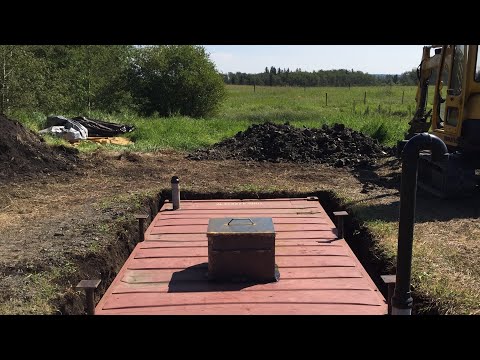
8. Using a New Concrete Septic Tank
You can use a new concrete septic tank to make a nice sized root cellar. It’s okay if the tank is chipped or cracked so try to get a deal on one that can’t be used for septic because of a defect.
You don’t need the fittings or filter so ask for those to be removed. More common sizes are 1,000- and 1,200-gallon tanks but one that is 1,500 or more will pay off by providing you more storage space as well as increased headroom for moving about.
Here to see how you can make a root cellar using a septic tank:
For a new 1,500 gallon tank that is undamaged, you can plan to spend around $1,000. If you can find one, buy a 2,500-gallon tank, which will have 6 feet of headroom inside and new will be about $1,800. But don’t buy new until you’ve asked about damaged tanks, discounts for these can be as much as 50%.
Make sure to seal the top hatch to prevent roof leaks. You will need to enlist the help of construction professionals to ensure that you deal with pressure, condensation, and other issues during installation to prevent issues later.
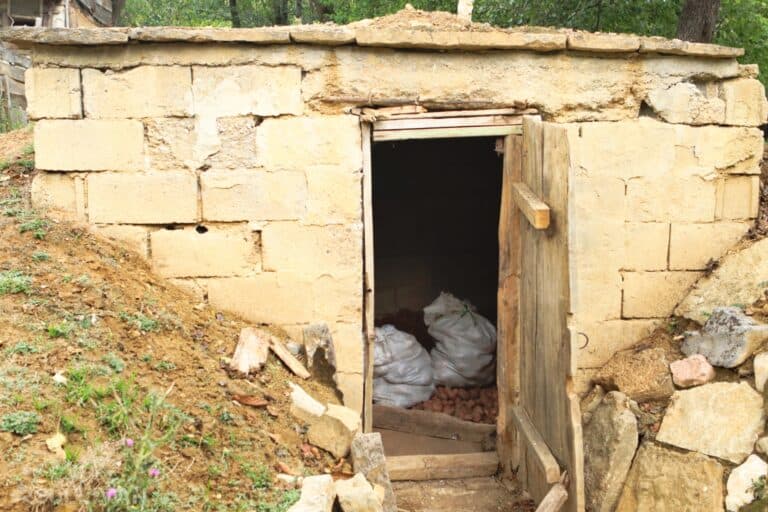
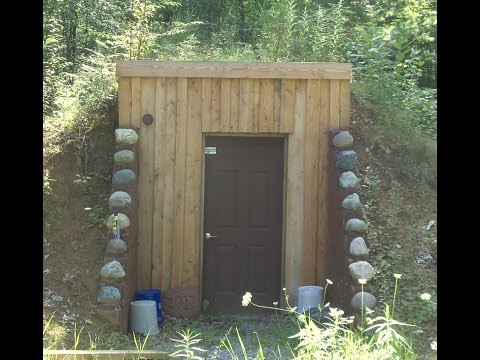
9. Excavated Inside a Hill
Many people who have a hill available on their property in a good location, will use that hill to build their root cellar. Doing this means that you get the benefit of having the earth all around your root cellar, but you are at less risk for flooding since you are higher above the water table.
Using a hill for part of your root cellar also means a little less digging than if you dug the hole down into the ground.
For a demonstration of the work involved in building a root cellar into a hill, see this video:
A variation on this is the root clamp.
Making these clamps at home is easy and doesn’t require many materials or a lot of time. They’re simply holes in the ground! Here are plans.
10. Large Scale Root Cellar
Preppers have different ideas of how to deal with those people who haven’t adequately prepared for a SHTF scenario. For those who believe in helping their friends, loved ones and neighbors who haven’t prepared, a larger-scale root cellar could help achieve that.
With the technology that is available today, you can build a large modern root cellar that uses the earth home design principles and minimal electricity.
Since your modern root cellar would use very little electricity, it would even be possible to power it using solar power. If you’d like to build a more modern root cellar on a grander scale, look at what these folks are building:

11. Improvised Garage Root Cellar
If your garage is insulated and you live in a colder climate, you can use old coolers or even heavy cardboard boxes to store your produce through the winter. Before storing any produce, make sure that any fruit or vegetables that have blemishes or soft spots have been removed.
If you are using boxes, elevate them as high as you can on racks to make it harder for rodents to get into. If you use coolers, leave the drainage spigot open or shut the lid but don’t seal it so that there is enough ventilation.
Check often for any signs of rotting and to ensure temperature is staying consistent, especially when weather is extremely hot or extremely cold outside.
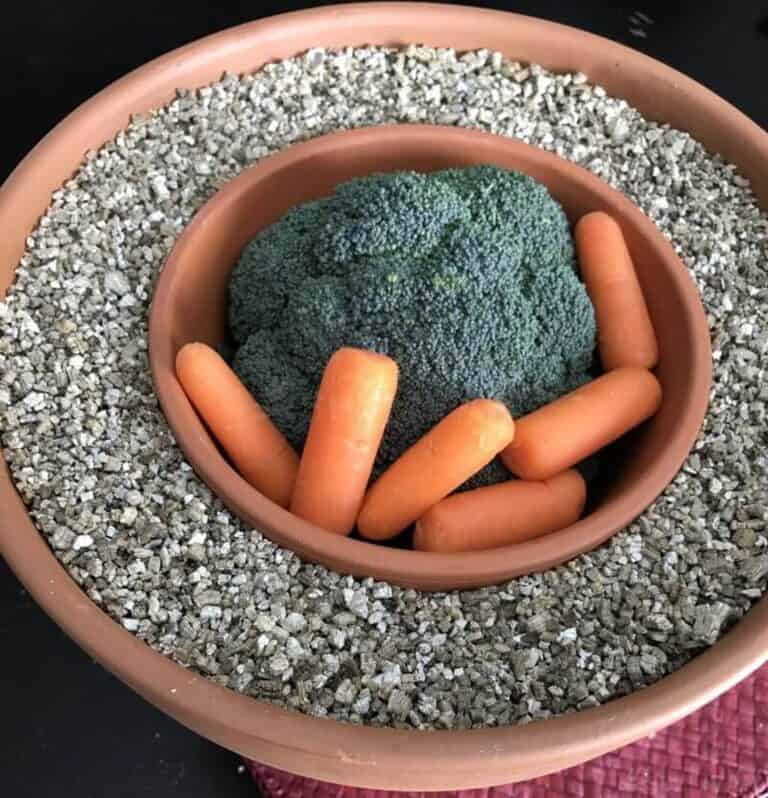
The Zeer Pot
This is actually at the opposite end of the large-scale cellar we mentioned. A Zeer pot, also known as a pot-in-pot refrigerator, or a zeer pot fridge is a simple system consisting of two terracotta pots filled in-between with sand.
The amount of produce you can store is very limited and the temperature isn’t that low compared to a traditional root cellar, nevertheless it does work.
What’s your favorite root cellar design idea? Did we miss one that you like? Let us know in the comments below.
13. Sandbags Root Cellar
An ingenious way to store perishable food items is to build and use a sandbags root cellar
A properly constructed sandbags root cellar can prevent vegetables from freezing and extend their shelf-life for months at a time — much longer than if stored in other methods such as greenhouses or refrigerators.
The key components needed to successfully create your own root cellar include waterproofing container bags (heavier material works best), insulation material to help retain temperature, and well draining soil mix to create the best environment for freshness retention.
Here’s a simple DIY to follow.
14. Recycled Tire Multi-Functional Root Cellar
Making a recycled tire root cellar is an ideal solution for those looking to store root vegetables and maintain an eco-friendly lifestyle. Due to the complex design, it might seem like a daunting project, but with the right materials and tools, it can easily be completed in a weekend.
Here are instructions to follow.
15. Green Roof Root Cellar
Building a green roof root cellar takes much less effort than most realize. Once the roof structure is ready, create an insulated chamber and fill with soil and any vegetation desired.
For insulation, use one or two layers of dead leaves and straw for efficient energy usage in cooling the storehouse temperatures during summer.
Green roofs encourage drainage and help keep the stored moisture levels steady in order to extend shelf life of produce stored inside.
Plus, they’re more aesthetically pleasing!
Here is a design to try.
16. Hay or Straw Bale Root Cellar
This easy-to-make root cellar uses bales made from hay or straw that have been gathered and stacked in a U or horseshoe shape and are then covered with tarps, plastic sheeting or old blankets for insulation.
The advantage of this type of root cellar is that it helps to keep out frost, rodents, and excess moisture while still providing excellent protection against temperature changes, allowing you to preserve your produce all year long.
Additionally, it takes minimal maintenance in order to keep the contents protected, as you simply need to check on it every now and again.
Here are some plans.
17. Barrel Root Cellar Design
A barrel root cellar is an excellent choice for those looking to preserve their fruits, vegetables and other perishables for long-term storage.
Barrel cellars provide efficient temperature control, which is necessary for many types of food items. They can also be built relatively inexpensively when compared with some other food storage options.
Here’s an easy plan to follow.
18. Organic Garden Blanket Root Cellar
Making an organic garden blanket root cellar is a surprisingly simple way to extend the growing season and take advantage of the earth’s natural warmth.
Not only does this method provide insulation against frost, but it also allows you to dig in the soil and harvest cold-tolerant vegetables well past when everyone else has turned to grocery stores for their produce. When done correctly, it can prevent mold and mildew.
To get started, all you need is some kind of fluffy organic material – be it leaves, clean straw, sawdust or even banked up snow – which can then be tucked into recycled trash bags in order to make handling easier.
Here’s how to do it.
19. Root Cellar From a Shipping Container
Building a root cellar from a shipping container is an excellent choice for those who want to take advantage of the extended storage capability it offers, without having to invest in the construction of a traditional stone cellar.
Shipping containers come pre-built with walls and roofs that are designed to help keep out moisture and pests.
Their structure makes them easy and convenient to install in a variety of locations – from your backyard to the side of your house – as they can be loaded onto trucks or trailers and moved into place with minimal effort.
In terms of why someone should consider building a root cellar from a shipping container rather than another material, it’s all about efficiency: by reusing an already available material, you can avoid creating additional waste, while also taking advantage of its built-in features.
This is also a multipurpose root cellar – not only can it help prevent food spoilage, but if designed correctly, it can also be used as a storm shelter.
Furthermore, because they are made to withstand inclement weather, you can rest assured your stored fruits and vegetables will remain fresh far longer than they would had they been kept in another type of container.
Here are some plans:
20. Old Vehicle Root Cellar
A great way to make a root cellar out of an old vehicle is to use a boat or school bus. Boats have the added benefit of being able to be accessed from multiple angles which makes them ideal for storing vegetables and fruits that require different levels of humidity.
School buses, on the other hand, are large enough to store bulk food items such as potatoes and other crops like beets, onion crops, pumpkins, or turnips.
Not only do these two kinds of vehicles provide excellent storage solutions, but they also offer a unique touch to any home as well as create a unique atmosphere around them.
Here are some ideas.
Planning Considerations
- The entrance should be wide enough for you to walk into. If you will need to use a wheelbarrow, cart, or wagon, make sure its width makes getting in and out easy.
- Think about the weather in your area and whether ice, snow, flooding or high winds might keep you from getting into the entrance.
- Consider proximity of the root cellar to your house, especially your kitchen. If going to the root cellar is a long trek, you may be less likely to use it regularly.
- The size of your root cellar is something to consider. It needs to be large enough to store what you need to store but not more than you need. If your root cellar will double as a storm bunker, you may need additional space. Plan for adequate ceiling height, and have separate in your cellar if needed.
- The type of materials you use factor into what the conditions will be like inside. A hard dirt floor or gravel floor will retain moisture better than a cement floor. Plan for adequate drainage, especially if you live in a wet climate.
- Consider the shelves and storage containers you will use in your root cellar. You may need different containers or shelves, depending on the type of produce. Whenever possible, use containers with holes or open shelves to facilitate ventilation. As we mention below, ventilation is one the main pillars or root cellar storage.
- Bring adequate lighting sources. Root cellars should stay dark most of the time, but if you have a window that can be kept covered and uncovered when you are working in the cellar, that works.
- You need to think about waterproofing your cellar. Think about the rainfall in your area, whether or not there have been floods, and more.
Building a Root Cellar Is Definitely Doable
When all is said and done, your root cellar can be as elaborate or as simple as it needs to be to meet your needs. Think carefully about how you will regulate temperature, humidity, and ventilation during the design phase of your root cellar construction.
Above all make sure that you follow safety guidelines and the local building regulations for your area to ensure that your root cellar is safe and will withstand the test of time and weather any storms that may come.

Born and raised in NE Ohio, with early memories that include grandpa teaching her to bait a hook and watching her mom, aunts, and grandmothers garden, sew, and can food, Megan is a true farm girl at heart.
For Megan, the 2003 blackout, the events of 911, and the increasing frequency of natural disasters like Hurricane Katrina, spurred a desire to be more prepared. Soon to be living off-grid, this mother of four and grandmother of ten is learning everything she can about preparedness, survival, and homesteading.