Want to make your own pottery for family use and perhaps make a small income from selling your ceramic wares? If the cost of buying a potter’s wheel is putting you off then take heart – making your own is not that difficult.
There are as many designs as there are people building their own wheels but they all have a few principles in common once you have decided on the type of wheel you would like.
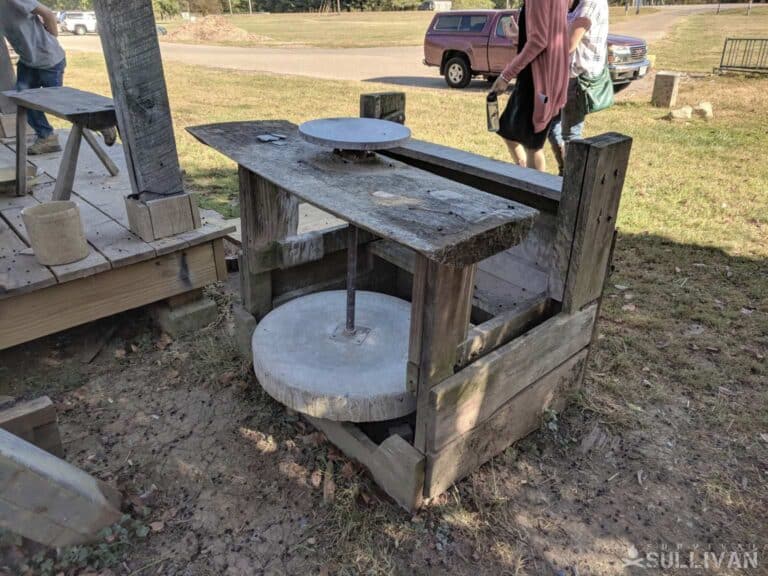
Table of Contents
The Three Types of Wheels
- The kick wheel where the heavily weighted fly-wheel is alternately kicked into motion and slowed by the potter’s foot.
- The treadle wheel using the momentum of the potter’s foot swinging back and forth on the pedal keeps the wheel in motion.
- The electric wheel where a motor turns the wheel at the flick of a switch.
Which is the best wheel for me?
Many traditional potters prefer the kick or treadle wheel over the electric wheel, as it seems more tuned to the natural rhythm of the potter.
This means you automatically slow down the rhythm of your foot rather than having to reach for a switch either with the hand or foot.
The electric wheel moves off from the start at quite a speed so one has to be pretty fast on getting the clay under control and it can stop quite abruptly sometimes resulting in a delicate pot wobbling and losing shape.
The bonus with the kick or treadle pottery wheel is that you don’t need electricity, and in an off-grid situation, this is perfect.
There are many designs – it depends on whether you want to use an old car tire, a bicycle wheel, wood or even recycle some household plastic items for the wheel.
Buying Versus Building
This is one of those no-contest comparisons – building your own may take some blood, sweat, and tears but you’ll be smiling as your wallet will only be lighter by around $50 – if that. The costs depend on how ingenious you are and what you can find lying around or can scrounge!
If you want to compare building with buying then the Shimpo RK Whisper Pottery Wheel, for instance, will cost around $1,000.
It is quiet, and those who own them are impressed by the quality – but in a survival situation do you really want to spend that much?
Making pots could be a passing fancy for members of the family and you certainly don’t want to outlay a lot on a wheel that may not be used. If you want to buy a kit rather than build your own then a decent wheel kit will set you back around $250.
Everything is supplied and all you need is a hammer, drill, glue, nails, and some bricks – for weighing the wheel. But do you even want to spend $250 when you can build one for almost no cost at all?
Difference Between a Kick and Treadle Potter’s Wheel
The kick and treadle wheel both leave both hands free to control the flow of the clay on the wheel and use the feet to get the wheel to the correct speed.
A treadle wheel never goes particularly fast and one tends to use softer clay on a slower wheel. The 1920s Leach wheel is the best-known treadle wheel taking its name from the Leach Pottery in Cornwall.
What made this design innovative were the three legs preventing it from rocking on an uneven surface; the fact that the treadle had an adjustable chain so it could be set to the length of the potter’s leg for comfortable working conditions and the fly-wheel with lead inserts.
This is so they can be adjusted according to the amount of weight on the wheel – the heavier the item you are making the more lead weights were inserted.
Many potters complain that for large and heavy pieces their wheel lacks sufficient torque to handle the weight of the clay, so the lead weights address that problem.
You can check out the plans for a Leach wheel here and see one made from these plans:
With a treadle wheel, all parts of the throwing process are conducted at a fairly constant speed and the potter has to adjust to this rhythmic movement regulated by the swing of the foot back and forth.
It doesn’t require as much movement in the leg as required to keep a kick wheel revolving.
Consider the Details
Basic Construction
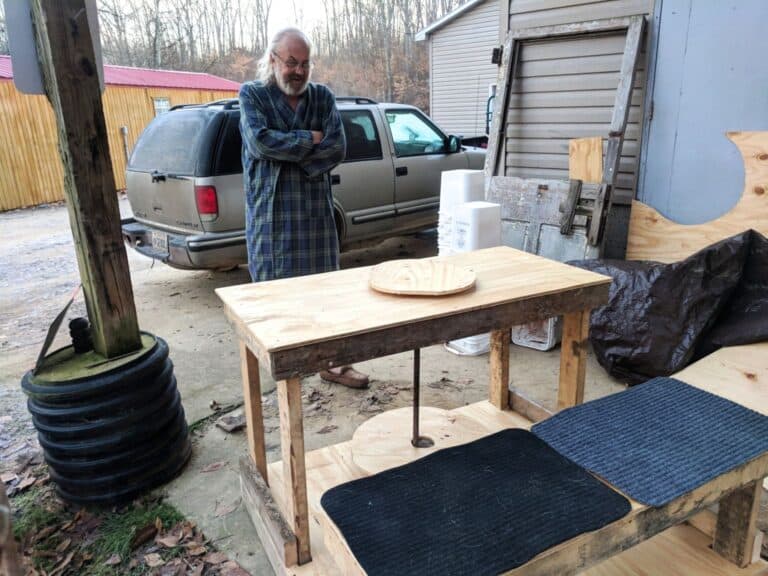
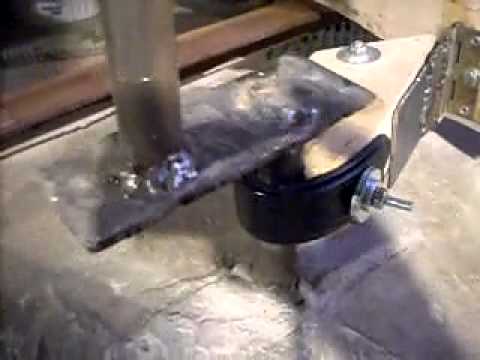
To make a kick wheel you need an upper turntable connected by a bearing to a shaft that fits into another bearing on the lower wheel or flywheel – the movement of the upper wheel is controlled by the speed at which the lower wheel moves.
The lower wheel can be made from a cast cement disk, a heavy circle of wood, or even a truck tire mounted on a wooden crosspiece attached to the bearing. The wheels need to be bolted to a frame to ensure they are stable, level, and won’t topple over.
Seating
Some wheels have a seat built onto the stand. If different members of the family are going to be using the wheel then don’t build in a seat – just place a chair or stool that is the right height near it.
The other alternative is to make the seat adjustable like the seats on exercise bikes – lining up holes where one tube of steel fits inside another and securing it with a metal pin.
Some people prefer to sit higher than the turntable but this can place strain on the back with the constant bending forward and enables the potter to see only the top of the pot instead of being able to view the shape from the side.
Some prefer to sit on the ground like the Indian potters with little distance between the flywheel and turntable.
Hand Rest
It is always good to have a place to rest your arm or elbow as you control the shaping of the pot. It gives some leverage. Whether you have a handrest or not also depends on the individual potter.
Some find it very useful, others don’t seem to mind. So, next to the turntable but placed in a way so it does not interfere with the rotation you can have a level piece of wood, metal, or hard plastic attached to serve as the “arm steadier.”
Splash Pan
The purpose of this is twofold… Firstly, it keeps the studio/work area cleaner as you don’t have clay water spraying all over the place and secondly the clay water and extra bits of clay are contained and can be put into a bucket to be reworked to the right consistency and reused.
Splash pans are a personal preference, some potters don’t like them at all as they feel they limit full access to the wheel when throwing or trimming, but this will depend on their method of throwing pots.
Many of the videos show a very small splash pan around the wheel. Some potters like fairly large pan, and around 4 inches deep to avoid messiness.
Water Use
Certain potters work fairly “dry” using slurry for lubricant and others use more water with the sponge to achieve certain finishes on the clay – it all depends on what you are making.
With a kick wheel or treadle potter’s wheel water isn’t going to be a big issue but with a wheel using an electric motor, one needs to ensure the motor is correctly housed so water cannot leak or splash onto it.
Extra water can be led off through a tube connected to an outlet in the splash basin around the actual wheel.
Ensure that the couplings don’t allow water to drip onto the base wheel or anywhere near the motor if there is one.
Usually, one simply places a removable bucket below the hose and empties the bucket of clay water when necessary.
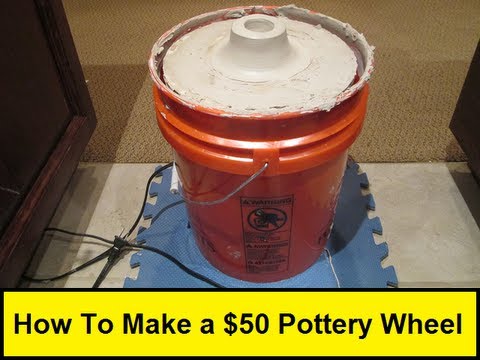
DIY Pottery Wheel Designs
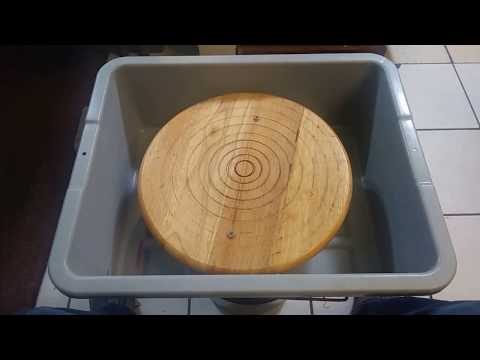
Pottery Wheel #1: Car Wheel Pottery Wheel
Before getting involved in material purchases perhaps build the simplest type of wheel and see if the family shows interest and an aptitude for some serious pottery making.
This is a wheel that requires hand spinning and doesn’t fall into the kick or treadle categories:

And here’s the same wheel in use:

It also has no splash barrier so you are likely to get some clay water spraying across the work area – this is fine if it is outdoors.
One also has to consider safety – should your hands slip off the wheel and a finger get caught in the wheel rim this could result in a nasty injury – unlikely but possible.
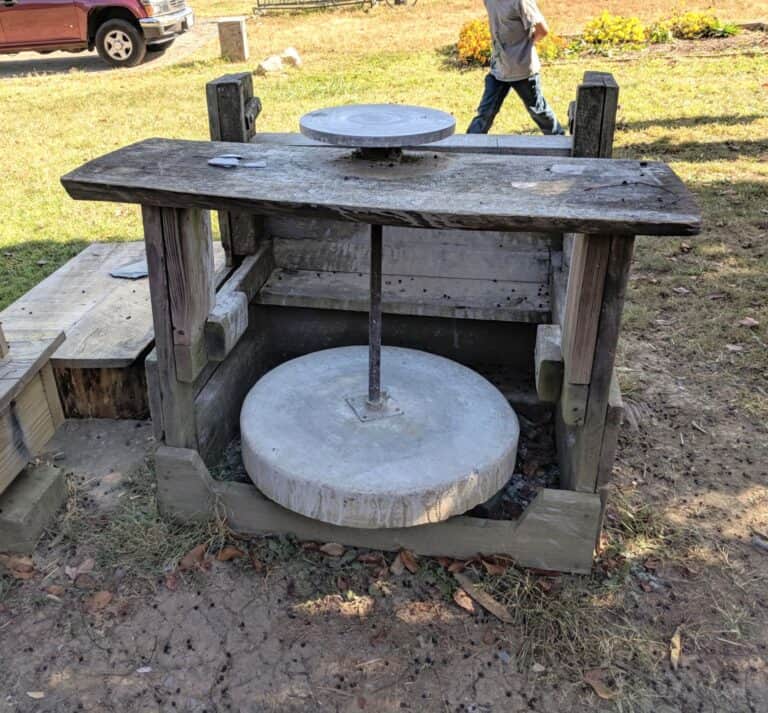
Pottery Wheel #2: Kick Wheel
The kick wheel, favored in countries like India, Korea, Japan, and other Asian countries relies on the weight of the wheel at the bottom to keep the turntable at the top with the clay on it in motion.
The harder you kick the faster it goes and when you want to slow it down you drag your foot over the base wheel to decelerate.
If you don’t believe a kick wheel can be fast, then take a look at this video where a record-breaking 159 pots were made in one hour – that’s around 23 seconds per pot:
Pottery Wheel #3: Using a Ceiling Fan Motor
This is how to make a pottery wheel using a ceiling fan motor and a couple of plastic buckets:
If you are into recycling and want to use up what you might otherwise discard then this design uses plastic items from around the house.
Pottery Wheel #4: Wooden Potter’s Wheel
When constructing your own wheel always look at the product’s life. Plastic can get brittle and break with time. If you re going to invest the energy perhaps rather go for this solidly constructed country-style pottery wheel using wood.
Pottery Wheel #5: Bicycle Wheel and Wood
This is a fairly easy one to do and, if you’re just learning to throw pottery, is also budget-friendly. All you need is a bicycle wheel and some plywood. Cut the axle off on one side of the wheel, add some wooden discs, sand it all down, and voila! You have your wheel. For the base, you’ll drill a small hole into a log or whatever base material you have on hand and simply insert the wheel into the hole.
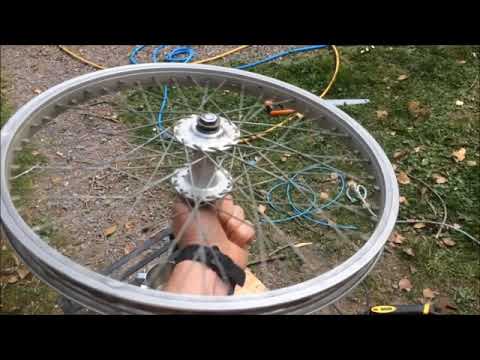
As far as holding the wheel together, our friend in the video uses zip-ties but you could use strong glue or whatever you have available.
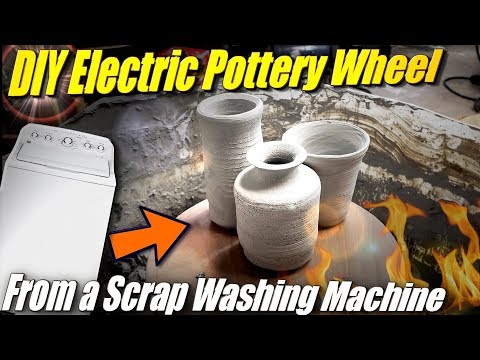
Pottery Wheel #6: Electric Wheel from an Old Washing Machine
This one is going to need a bit of patience but it’s definitely going to be a worthwhile project in the end.
Essentially, all you’re doing is breaking down an old washing machine, removing the outer shell, pipes, tubes, etc., and attaching a new motor and wheel platform. This particular wheel uses a DC motor (you can use an AC motor as well if you like) and chain to rotate the pulley.
Check out the video below to see how it’s done:
Pottery Wheel #7: PC Power Supply
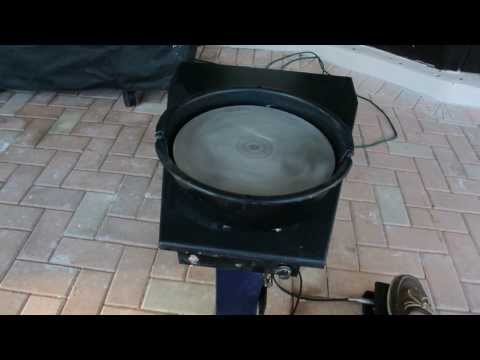
This one is just a chain-driven PC power supply with a foot pedal for power and an oil pan for a splash guard. It’s not too fancy but it’ll get the job done.
Pottery Wheel #8: Wheel with a Drill Motor
This one’s got a couple of smaller bits and pieces to watch out for. The discs that make up the wheel are held together with washers – with ball bearings to help it move. The wheel is powered by a small drill which is attached to the uprights underneath the main tabletop. Check out the video below:

This wheel’s small size makes portability a dream as you can pack it up easily and put it out of the way. As an added bonus, you can get pretty much everything you need from your local hardware store.
Pottery Wheel #9: The Lazy Susan Wheel
I think we all know or have at least heard of the lazy Susan – a spinning wheel for passing around salt, pepper, and sauces at the dinner table. Well, that’s the baseplate for this pottery wheel design. Check it out below:
Pottery Wheel #10: Wooden Asian Pottery Wheel
Asian pottery wheels have a variety of different names depending on where they’re from. This tutorial has been divided into two parts with part 01 focusing on the wheel portion and part 02 focusing on the base of the wheel.
Final Words
The most important aspect of designing a potter’s wheel is to make sure the turntable rotates smoothly and that it and the flywheel are perfectly level. The distance between the flywheel and the turntable can be easily adjusted.
Rather start out with a longer metal pole and cut it down as you discover which position suits the person who will be using it most.
Once the wheel is made the person using it needs to become adept at centering the clay and pulling up some fine pots.
As a person becomes more used to the small tweaks can be introduced like hooks to hang tools at the edge of the wheel frame, a small footplate for easier access to the seating, the adjustment in height of the turntable in relation to the flywheel and so on.
And when it is all done you can sit back and watch the potter at work producing dinnerware for the whole family. There’s nothing like the thrill of saying “I made it myself.”

Traveler, photographer, writer. I’m eternally curious, in love with the natural world. How people can survive in harmony with nature has fueled my food safety and survival gardening practices.
At the age of 12, I found a newspaper advertisement for a 155-acre farm at a really good price and showed my parents one Sunday morning. They bought it and I happily started planting vegetables, peanuts, maize and keeping bees with the help of the local labor.
Once I married wherever we moved it was all about planting food, keeping chickens and ducks, permaculture and creating micro-climates. I learned how to build wooden cabins and outdoor furniture from pallets, and baked and cooked home-grown produce, developing recipes as I went along.
this was “how to” build one as much as it was an “about” building one..
Agreed, we could use a step by step guide with photos, maybe even a video
I’ve often thought about getting in to pottery making and have in the past played around with it when a friend had a kiln, this would bring the cost of the wheel down considerably now when you figure out how to make a kiln cheap post it, that’s where the real expenses is, I’ve read up on using a fire to fire clay pots but it seems the process is hard to do and the outcome iffy
I built a gas kiln with a trash can, some 2600° insulation (kaowool) a couple fire bricks and one of those flame thrower kind of torches called a “weed burner” and it kicks butt.
Trash can $14, insulation $60, fire bricks $6, weed burner torch $18. Total $98 bucks. I didnt include propane costs because I robbed it from my BBQ pit. I can do about 5 or 6 firings on a 15# cylinder.
I am in the process of building a potter’s wheel and I need to know the height of the turning surface to the floor. I don’t know if there is a standard or it’s specific to the potter. From what I have seen, it’s about sitting mid crotch height, lower than the knees.
This post gives lots of general info but no details. Any you can provide would be helpful.
My wheel is about 30″
A basic comment about another type of pottery wheel drive. I am planning to have a multi-power-source jackshaft drive system when I can. One of the items I plan to have is a jackshaft driven pottery wheel. Probably one that can be kick driven, with an attachment to add the jackshaft drive.
The entire system will include sewing machines, clothes washing machines, and many types of wood working and metal working tools.
Inputs will be a vertical wind turbine, a stationary low pressure steam engine, Stirling engine with various heat sources, multi-fuel internal combustion engine, and if I find the right place, a water turbine or wheel.
Just my opinion.