One of the biggest concerns many preppers have is the threat of an EMP or electromagnetic pulse, which would bring the electrical grid crashing down around us, leaving us in the dark and the dark ages. If you have ever read William Forstchen’s book One Second After, you’ll know why.
An EMP is essentially a short, but very powerful burst of electromagnetic energy that will overload the power grid and any electronic device within its range, rendering them completely useless.
An EMP can occur due to natural or manmade causes, either due to a massive solar storm or the detonation of a nuclear device in upper atmosphere a few miles above the earth’s surface.
If an EMP happened on a mass scale, you can bet that millions of people would die and those who survived would be thrown back to a life kind of like that of 200 years ago, but without the support, knowledge, and skills in place to help them survive.
William Forstchen is a historian whose book One Second After was mentioned on the floor of the U.S. Congress as a book that every American should read because of the potential reality of the scenario.
The Wall Street Journal has reported on the possibility of an EMP attack on the U.S. and its allies. While there are many things you can do to prepare for an EMP, what we will discuss here is how to protect your most important electronic devices with the use of a Faraday cage.
What Is a Faraday Cage?
It’s a container or box that is made of conductive material. It was first designed and built by scientist Michael Faraday in 1836 and its purpose is to protect whatever is inside the cage from electric fields.
When an electric field, such as an EMP, hits the cage, the free electrons in the conductive outer layer of the cage will realign themselves to block out the electric field trying to penetrate the cage.
Since any electrical and computerized equipment would be rendered useless during an EMP, putting them inside a Faraday cage would protect them.
Now, we should clear something up. If you put a computer or tablet in a Faraday cage and an EMP occurred, they would function afterward.
However, that doesn’t mean you’ll be surfing the internet with them. Nor will you be able to plug them into the electrical outlet to charge them because everything else will have been fried by the EMP.
There will be no internet or cell phone service. There will be no electricity. For this reason, have a solar charger on hand, which will take care of the charging aspect of the problem.
Why Bother with Such a Cage?
If you can’t use many devices because they can’t fully function without an electrical grid or internet or cell phone service, then why bother protecting them? There are two primary reasons for this. First, is the all-important ability to communicate. In fact, communication is one of the most important things you will need after an EMP.
In a crisis, being able to gather and relay information can make the difference between life and death. You can put a ham radio, walkie-talkies, and other types of radios in your simple Faraday cage to protect them and have a form of communication after an EMP. A ham or two-way radio doesn’t depend on any service that won’t function after an EMP.
The second reason to protect certain devices from an EMP is that even if you can’t use the internet or phone service after an EMP, you can still store an enormous amount of data and information on a computer, tablet, or thumb drive, information you will need for EMP survival.
With that in mind, let’s take a look at the materials you will need to build your Faraday cage…
What Can Go into a Faraday Cage?
Simply stated, you can put anything inside of Faraday cage that will fit in it. Okay, a slightly less glib answer is that you can put any device, component, or some other piece of technology that would be vulnerable to an EMP inside a Faraday cage to protect it against the effects of an EMP.
Ideally, this will completely neutralize the event, but at worst it might offer the device inside a degree of protection that can lessen the damage.
The following items are great candidates for placing inside a Faraday cage:
- Cell phone or smartphone
- Handheld radio
- Ham radio set
- GPS receiver
- Flash drive, external hard drive, or other digital storage devices.
- Flashlights, optics, and other modern devices that have circuit boards.
- Digital cameras
- Specialized electronic sensors and detectors.
But mind you, that’s just thinking small. A Faraday cage can be as large or as small as required to protect any given device, component, or machine. Larger Faraday cages are entirely suitable for protecting the following, even if they are semi-permanent structures themselves:
- Automobiles
- Generators
- Desktop computer towers
- Any other computerized control system
Remember that a Faraday cage is really a principal in action, not so much a discrete piece of gear. So long as you have the right components, you can make your own Faraday cage as large as you need it. But then again, you might not eat anything more than a commercially available bag or box to protect your most valuable electronic preps.
Items Needed to Build a Faraday Cage
Believe it or not, it is entirely possible to build your very own DIY Faraday cage out of commonly available materials. You might be even more surprised to learn they can work just as well, potentially even better, compared to some high-priced products available on the market for the same purpose.
All you need to build an effective Faraday cage is a metal sheet or fine metal mesh, or any other highly conductive material.
In an ideal world, this will be copper or silver, but aluminum foil works quite well. Aluminum foil is also available everywhere, is cost-effective, and is reasonably durable so long as you aren’t packing it around all over the place.
In a perfect world, you’ll be able to craft your container using this conductive material and then line it or wrap it around a non-conductive material that will keep your sensitive items inside from contacting the outer skin or walls of your Faraday cage.
Some people use thick plastic, but Styrofoam containers can also work as can plastic paint buckets and other materials. Some folks skip the DIY element entirely and just choose a galvanized metal trash can in place and an insulated container inside that. Don’t forget the lid!
But with that in hand, all you need to do is create the outer surface of your Faraday cage by tightly sealing, wrapping, soldering, or joining your chosen material together with conductive tape.
You cannot leave any gaps that might allow electromagnetic radiation to enter the enclosure, and potentially fry or damage your stuff. If you are using aluminum foil, consider applying several layers of foil to help protect against tears and also to increase overall durability.
Also remember that if you’re using a mesh material, which is okay, get a type that’s as tightly woven as possible. Something like chicken wire is not going to work!
As long as you have a conductive outer surface that is tightly sealed and fully encloses the items inside, they being placed in or between an insulating layer or another non-conductive container, your materials should work just fine against all but the most powerful EMPs!
Before we get into the list of supplies you will need, know that even though many people say you can use Mylar bags and microwave ovens, these are not actually sufficiently effective…
It turns out good old aluminum foil is the best choice, particularly if you need your cage to be easily portable. The list of items you need is short and these are not difficult items to gather.
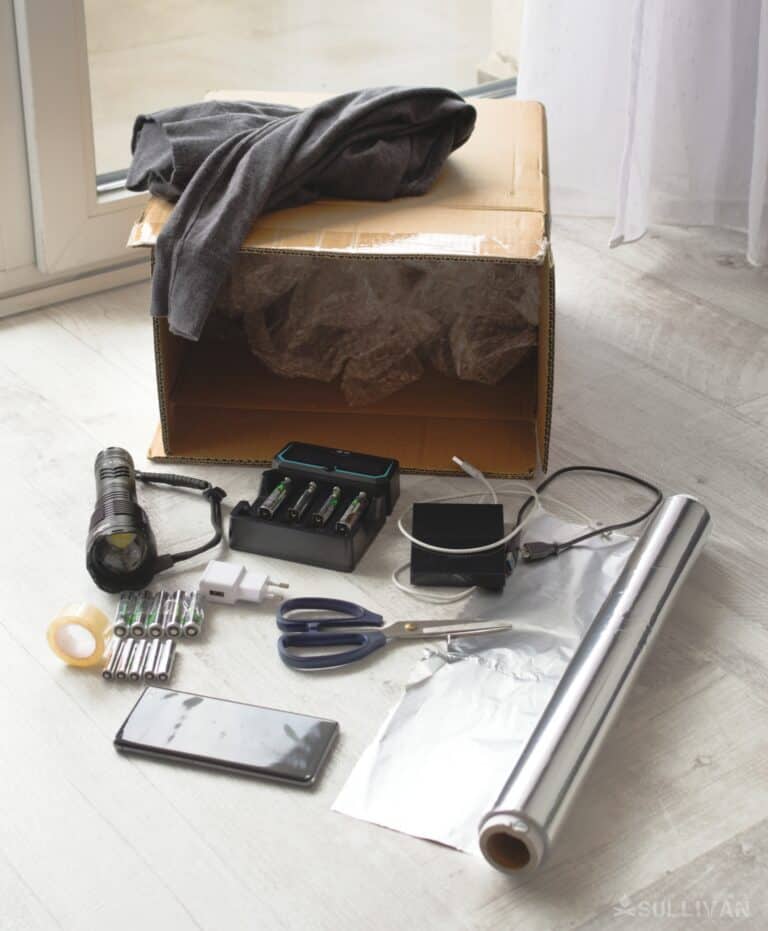
You will need the following:
- Lots of heavy-duty aluminum foil (make sure you get the thick stuff!), or, even better, heavy-duty copper foil. Copper should be able to stop a stronger EMP.
- Plastic wrap, bags, or sheeting
- Pieces of cloth large enough to wrap around the items
- Cardboard boxes of various sizes
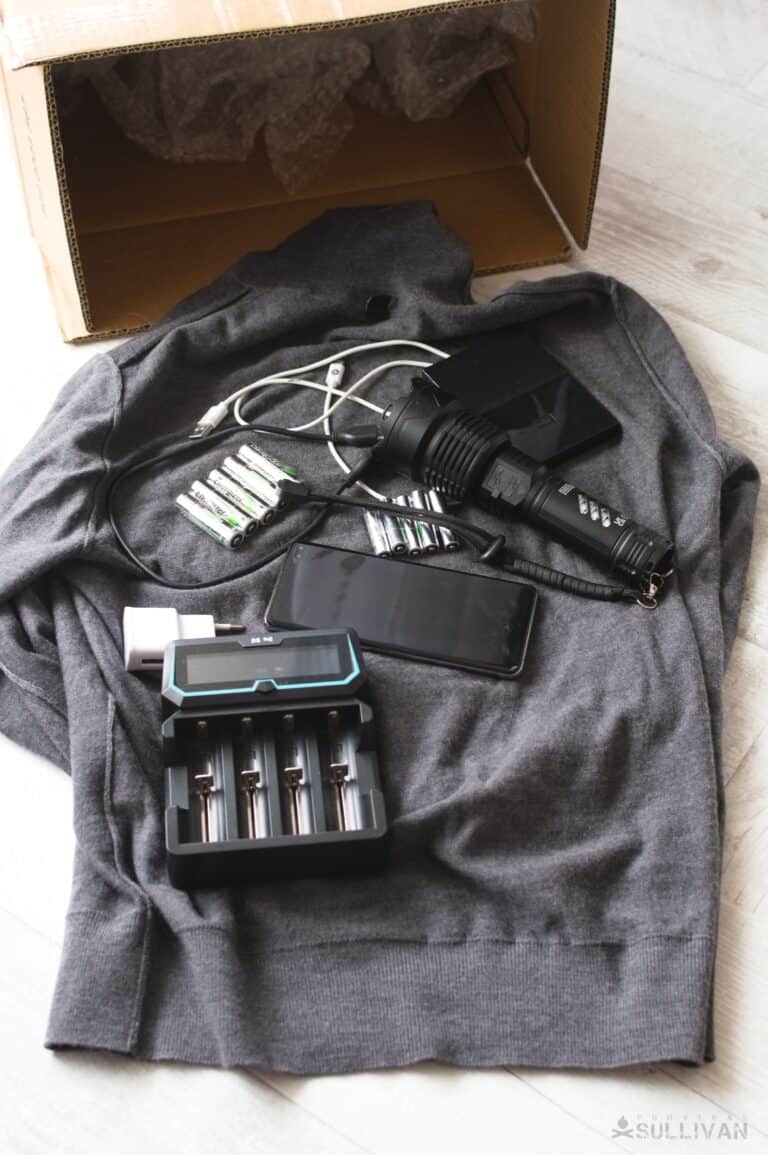
- Essential electrical items you won’t need or want in the near future but might need after the EMP strikes (your old cell phone, flashlights, walkie-talkie, radio, etc)
Building the Cage
Now let’s talk about what you will do with these items. Again, building a Faraday cage is very easy and you can even make a Faraday cage for your car. But be sure you do it right and with care or your efforts will be for naught. Follow these steps to protect your electronics:
Step 1: Wrap all the items in cloth. You can actually put multiple items inside one cloth bag to save you time and material. Be sure that all the items are fully enclosed within the cloth:
Step 2. Wrap the items in plastic wrap, bags, or plastic sheeting. By adding this layer of plastic, you can help secure the electronic devices in the cloth, holding them in place and preventing any protruding or pointy parts from sticking out. Use some bubble wrap too to make the entire Faraday shield shockproof:

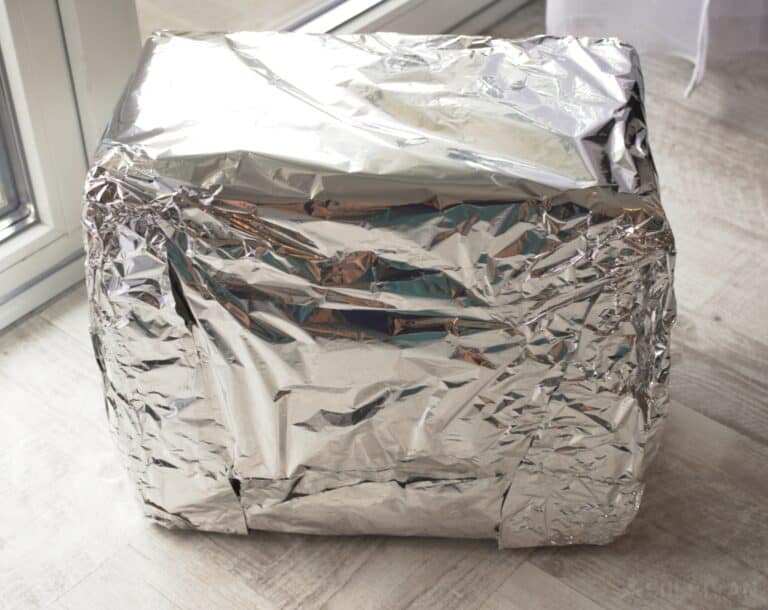
Step 3: Now you will wrap the box with your heavy-duty aluminum foil. Wrap them around 2-3 times at least, for a thicker conductive layer:

Ammo can Faraday Cage Variation
Another way of doing the Faraday cage is to put everything inside an ammo can, and wrap that in aluminum foil for an even thicker conductive layer:
This is what the ammo can Faraday cage looks like after it’s been further sealed with aluminum foil near the lid for extra safety:

The first type of cage is great for bug-out bags, while the second one is better for your home or bug out location as it’s heavier. So why not make but, just for the heck of it? You’ll be able to fit more stuff into them, and save some money unless you want to o the “easy” route:
Pre-made Faraday Bags
As an alternative, you can use a Faraday bag available online. If you’re putting the devices into a galvanized trash can, then you need to either place them inside a cardboard box or line the galvanized trash can with cardboard.
Whichever method you choose, the devices you are protecting must not come into contact with the exterior protective layer, i.e. the sides or bottom of the trash can or the outer layers of aluminum foil.
It is also possible to use a fine metal (such as aluminum) mesh and wooden posts to construct a cage. The same rules apply. Line the cage with cardboard or place your devices in a cardboard box before placing them inside the cage.
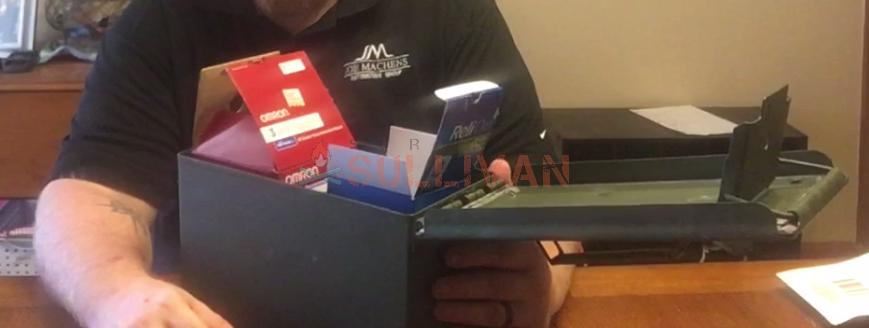
Other items that can be used in place of galvanized trash can include a safe, a metal ammunition box, or any other metal container of any shape or size. Check out this video, which shows how to make a Faraday cage using a metal box.

Grounding a Faraday Cage
There are varying opinions on whether or not a Faraday cage needs to be grounded. Some believe that the cage won’t work if it is not grounded first. Most folks are not in favor of grounding and only see it as optional
The Faraday cage does not need grounding to keep the electric field inside the container stable and protect whatever is inside it, provided there are no conductors (i.e. wires) entering the outer shield of the cage.
How to Test Your Faraday Cage
So how do you know if your Faraday cage actually works? You can test it using a radio. The range of frequencies from AM to FM will be adequate to test your cage.
Turn the volume of the radio up high and turn it to a strong FM frequency. Then place the radio inside your Faraday cage and see if you can hear it. If you can’t, that’s great, but it doesn’t necessarily mean your cage is working properly because it is relatively easy to block out FM frequencies.
With this in mind, AM frequencies are harder to block out, so take out your radio and tune it to a strong AM frequency. Then put it back into the cage and see if you can hear it. If you can, your Faraday cage isn’t working, and if you can’t hear it, then you have done a good job building your cage.
Additional Tips
Here are a few additional tips you need to know when building a Faraday cage and protecting your electronic devices:
- Be sure the edges of the cardboard lining a Faraday cage are overlapping and ensure that the closure of the metal container that forms the conductive outer layer is also overlapping and has no gaps. If there are any gaps, you need to cover these with aluminum foil or conductive tape.
- Take the batteries out of all devices if you can. This will prevent the devices from being ruined by battery acid leaking into them.
- Make two Faraday cages: a smaller, more portable one with some essential and basic electronics, such as your radio and walkie-talkies, and make another larger one for other electronic items you will require later on.
- You can turn an entire room into a Faraday cage by covering the walls, floor, and ceiling with a fine wire mesh or a number of layers of aluminum foil and covering that with a non-conductive material, such as plywood. You would need a lot of aluminum foil to do this, so a Faraday room is probably not worth the effort for most people when you can make several smaller Faraday cages and keep your devices there.
- A Faraday cage can have holes, but the size of the holes has to be smaller than the wavelength of electromagnetic energy you are trying to keep out. The best and safest Faraday cages are the ones that are made with solid metal, rather than a mesh. So, for our purposes: no holes at all.

An urban prepper and rural wannabe, Karen has been working as a freelance writer for a decade and prepping for about half that time. She has gathered a wealth of knowledge on preparing for SHTF, but there is always more to learn and she has a passion for gathering and sharing that knowledge with other like-minded folk. Karen lives in London, Canada with her two children and plethora of cats.
the only other problem I see with the ammo cans is the rubber gasket in the lid. Makes it airtight, but iis a gap for current. I think sealing the lid with metal tape should be fine.
Since rubber is a very poor conductor of electric current, I would think that it would act as an insulator between the lid and the body of the can, and not an opening. Unless you were to put a conductor through the rubber seal to the interior of the can it would not be susceptible to ESD, or EMP either one. Electromagnetic Pulse and Electrostatic Discharge behave similarly to each other, the main difference is the source of the burst of electrons. My ESD kit for working on computers has a non conductive mat, and the wrist strap is connected to it and a ground, drawing the current out of the area to a ground. That mat, however is not rubber, it is rubber with conductive material added to it such as ferrite powder, or in some cases a mesh layer of metal sandwiched between to rubber layers. The snap on the mat penetrates all layers of the mat and that is what connects the mat’s surface and anything placed on it to the wrist strap and then the ground connection.
In the case of an ammo can with a rubber gasket, there is no conductive material in the gasket, therefore no opening for current to pass through to the interior, and the latching mechanism and hinges provide for uninterrupted metal to metal contact on the outside of the can, which is what you want in a faraday cage.
The gasket is actually worse than that. A straight seam acts like an antenna, concentrating the EMP for entry into the (false) Faraday cage.
Why can’t a 55 gallon steel drum be used with the locking steel rim? It can be lined inside with any non conductive material.
Hi Karen,
I have a underground root cellar with 8 inch thick cement walls, floor and ceiling and an opening covered by plywood for stairs at the top right hand corner.
Could you please advise me the best way to turn this into a Faraday Cage as I know i need to do it given the existing threats and weirdos running the planet currently.
Best,
David
My thoughts on Faraday cages, based on the explanation and design in the article:
1) About the largest ‘hole’ that should be in a Faraday cage is the equivalent to the size of the openings in 20opi (openings per inch) of copper mesh.
20 OPI copper mesh specifications from an internet website (link available on request)
Specifications
Specs U.S. Metric
Mesh Size 20 per in 20 per 2.54 cm
Wire Diameter 0.016 in 0.4064 mm
Opening 0.034 in 0.8636 mm
Opening Microns 864 864
Opening % 46% 46%
Weight / sq. ft 0.3900 lb 0.1771 kg
2) Linear openings, such as slots, slits, cracks, etc., create ‘slot antennas’. Even one with a height (or width, depending on orientation) that is 0.034in or less, but is more than 0.034in the other dimension, is a slot antenna. The actual dimensions will determine which frequencies can get through, but there will be some, in addition to what 20 OPI mesh does anyway. Which are not of concern in an EMP protective device. Frequencies below what can get through a 0.034in opening are the ones that are likely to damage electronics.
3) Rubber, any rubber or similar compound to include polymers of all sorts, wood, glass, ceramics, and other electrically insulating materials do just that. Insulate something that can carry an electrical current from something else that can carry an electrical current. What they cannot do to any great effect, is prevent an electromagnetic force from passing through the area which they occupy, unless they have been produced with conductive material in addition to the base material, which creates a continuous electrically conductive barrier connecting the other conductive pieces they are in contact with, creating a full Faraday cage with no non-conductive gaps larger than 0.034in.
4) Metallic tapes used to seal Faraday cage seams obviously have an adhesive on one side. (Other wise it would just be a strip of metal.) While a very thin layer, the space the adhesive takes up between the two pieces of metal the tape is joining can be enough to create a slot antenna, which can allow an EMP entry to the container. There are, however, metallic tapes that have a conductive adhesive that will create the conductive bond without gaps between two adjoining conductive parts that have a gap of some kind. Such as all metal trash cans. (Which often have gaps that cannot be seen even if the lid fits tightly. Put water in one, hold the lid on tight, and invert the trash can, with help, of course. You will see water drip here and there. Possibly not much. Possibly a great deal. Either way, If water can exit that easily, EMP can enter that easily.
5) When using heavy duty aluminum foil, restaurant duty or Grill Foil (made to line charcoal grills for easy clean up and is very heavy), always make a seam where two pieces join. At least a three-fold seam, smoothed down very tightly. Otherwise the pieces will slip apart, or a gap can form between them. Do this on a large flat surface, as trying to do it with foil going in all directions is near impossible. When lining a box, pre-fold the corners of the foil to prevent bunching and major wrinkles. Make sure the lip or other connection point of two parts of the container is as flat and even as possible. And no matter how even it is, you will still need a gasket that is flexible, if access to the box might ever be wanted, and the box closed back up. Since this is more DIY with foil, regular EMP/RFI/EMI gaskets are not likely to be available or affordable. Therefore making the gaskets is probably the route that must be taken. Sometimes folding several layers of foil into a thick strip can work. But it does not go around corners very well unless interlacing corner joints are made. And take it from me, this is difficult, time consuming, and if any mistakes are made, ineffective. Rolling up foil into a long roll can be difficult to do by one person, but if there are several, and there is a long flat area available to lay the foil out so the full length can be rolled up at once using several people, then it can be used. But it cannot be too tightly rolled, so as to create a solid rod. It must be both flexible and ‘squishy’, with the ability to bounce back some to the original thickness. This is also difficult. The easiest gasket method I have found using aluminum foil it to get a coil of large round insulating foam, the type used to fill gaps around windows and such, and wrap it in several thicknesses of foil. If careful, this can be added to the top of the container, scrunched into the corners in the lid. Where the two ends of the gasket meet, either the foam has been precut and when wrapped, has too opposing slopes so they can overlap to create a joint the same thickness as the rest of the gasket. This has worked very well for me.
6) I prefer to use a layer of small-bubble bubble wrap as a lining on the inside of the outer cardboard box, and then place another plain cardboard box inside it. A piece of cardboard that will slip fit inside this inner box, with a folded tape handle on it will cover the contents. A layer of the bubble wrap is placed on the inside of the lid, and a piece of cardboard fastened to it. The items are placed in the inner cardboard box, the slip-in lid put inside the inner box over the items, and the lid of the Faraday box is gently placed on the box, making sure the gasket stays in place. Some type of weight is put on top, to be sure the gasket flexes enough to seal any gaps between it and the box and it and the lid. This type of box will allow one to open it up every six months or so to swap out or recharge batteries, and then be reclosed with contents again protected. The seal should be replace every few opening/closing cycles, even if not showing signs of deterioration.
7) These small types of Faraday cages should be kept well away from anything that could allow an EMP induced electrical current from jumping from a current carrying item to the Faraday box. This includes placing close to the ground without a good electrical insulating layer, near outlets or switches in a wall, along walls or floors that have wire or metal pipe, metal duct, or any other metal object of a lineal nature in or behind them. The EMP will create a current flow in these items, which can jump from the item, to the Faraday cage, and then on to either ground or back to the conductor a bit further away. This does not introduce an EMP into the box, but what it can do is the electrical arc can go through the box and through the electronics, doing damage just like any other electrical spark.
Just my opinion.
Jerry D Young
Really great info, Thanks!!
Well done Jerry, thank you for the additional info and KUDOS on your post!
can foil bubble wrap be used and will a car in the grauge be afected ,will a emp disable a parked car?
Remove the seal from a pressure cooker. Place the layer wrapped items inside. Then lock the lid.
great idea
Will an EMP adversely affect batteries stored outside the Faraday cage??
Wanting to build a faraday cage for emp protection for a large gas portable generator. Wooden Frame no nails just glue. Insulation board with foil as liner inside wood box, seams sealed with aluminum tape. Outside wood frame aluminum screen mesh attached with aluminum staples. This is a large 4ftx 4ftx 4ft box with door to close. How to ground and what to use on floor. Will this work yes or no
So I am debating Purchasing a 11000w Generator but the whole EMP thing is Making me rethink it. But I have watched several videos on building a “Faraday box” none the size I need to house a large outdoor generator. Here is my thought..Could I build a Large plywood Box covered in aluminum screen material? Would my generator Be protected from being damaged?
how deep in the earth is necessary to create a barrier? 2 feet, 3 feet, or 6 feet?
You can’t use the computer while it is in a Faraday cage, so it’s likely to be out and unprotected when the EMP event happens.