Practicing survival skills is the same as practicing any skill. The outcome can be influenced dramatically when you practice. When you need certain skills to eat or stay alive in a survival situation, knowledge of the correct way and some practice beforehand can give you higher odds of being more successful.

Thoughtful practice with skills as a concept can be applied to many primitively based skills, such as how to build a basic snare for survival.
A snare is primitive and can be modified to kill a variety of animals, furbearing, flying, or swimming. A survival snare can also be used for an intruder trap or as a perimeter early alarm system.
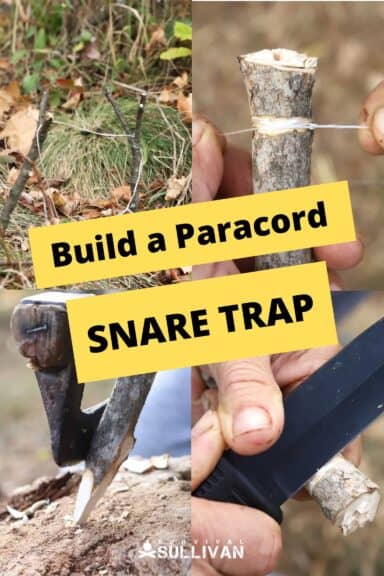
Today we will start on our journey of exploring the humble snare and its many applications by first learning how to build a basic snare trap using Paracord.
The Snare Is Historically Significant
The use of snares, by some, is regarded as the oldest profession and predates recorded history. A snare was first seen in European painting in Paleolithic artwork, before even bows and arrows.
Meat is a critical component of every primitive tribe, culture, and people. If you remove the luxuries of modern-day processing, farming, supplements, and stores, it would be extremely hard to get enough calories by eating wild edibles. That’s why animals of any size spend almost all their time eating!
In primitive times, this is precisely why snares were crucial for survival as to their time and energy conservation.
With snares, you can set up traps in many places at once to gain the maximum in effort over time. In a survival setting, catching wild game is your best bet for success as it works on any continent, in any weather, day or night, any time of the year.
The Makeup of the Snare
Literally, there are as many designs as you can think of. There are three basic components of a snare.
- The noose- a loop made of cordage of some type
- The anchor- usually a wooden peg of some sort
- The leader line- made of some type of cordage
Today we will use paracord, as it has many applications in survival and can be utilized in several ways. If you don’t have any, you can use many different things such as a snare wire as long as they are cordage. In primitive times, they didn’t have wire, rope, or paracord and used leather or plant fibers.
Some plants that provide fibers to use for cords are:
- Cattails
- Stinging nettles
- Inner bark trees like cedar or elm
- Palm
Many snares employ a trigger system, but today we will be using a simple noose and anchor type. It is an incredibly effective setup. It can be used in many situations and is a very popular method to snare small game.
In many states, snares can be illegal. These primitive methods are being shown to be employed in survival situations.
Paracord Snare Steps
Material list:
- Thick wooden peg or stick
- Two Y-shaped twigs
- Paracord
- Sharp ax or mallet
- Sharp knife
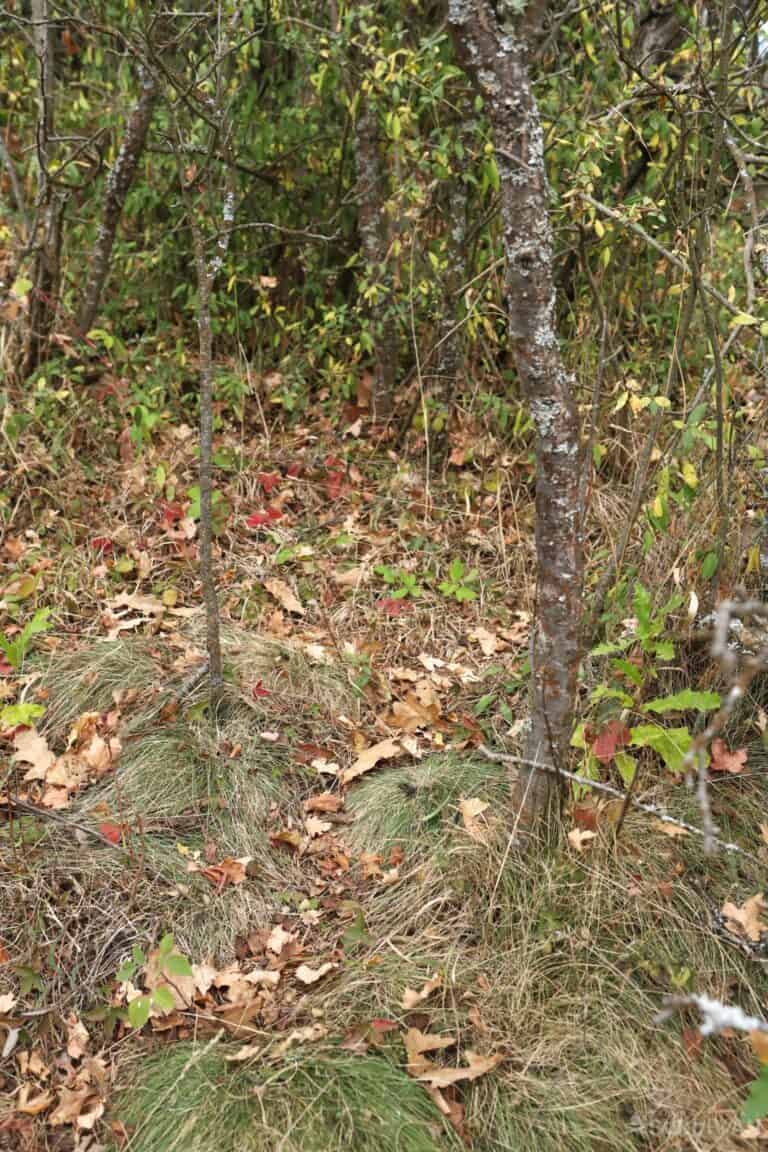
Step 1: choosing a location
You need to consider your prey. Do you see holes or well-worn paths? Have you seen droppings? Nesting spots anywhere, or young animals spotted? The absence of predators.
If you’re looking to catch squirrels, for instance, you may want to find a path that goes up a tree – so the type of game you’re after also matters.
Here is where we decided to place our snare, as it has a nicely worn path and no big predators in the vicinity that we have seen. Look at the natural trails and spots in these ideal pictures:
Step 2: Build your anchor
We need a piece of wood or stick that we can use as an anchor for our snare. Look for a piece strong enough so that when the snare has caught something, it isn’t pulled up or lets the animal get away by breaking.
Select a limber stick with some bounce, so it won’t break as to its spring. Greenwood, living wood that is, is nice for this. The smell may bring some animals for its nice tender insides too!
Also try to find a bigger stake in case the soil is moist. This way you’ll hammer it down deeper into the soil so it doesn’t come out as the catch struggles to release itself.
Step 3: Sharpen the stake
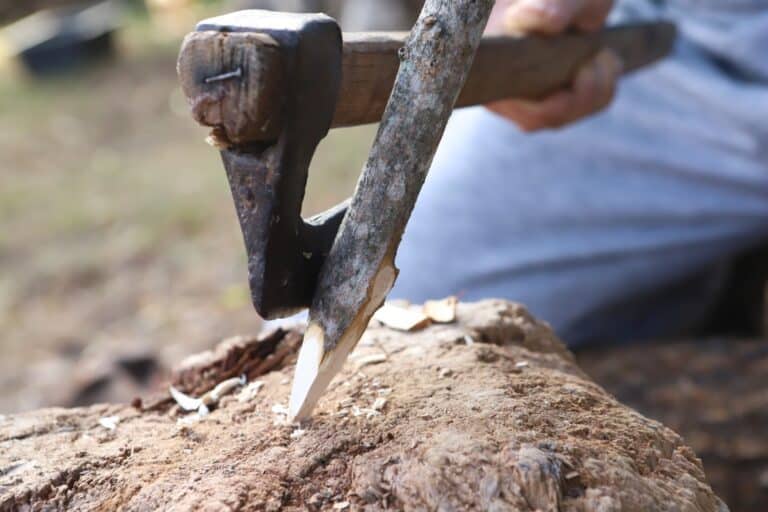
You will want the anchor to go into the ground easily and deeply, so carve a point on the end with a knife or small axe. The point will help it slide into the ground.
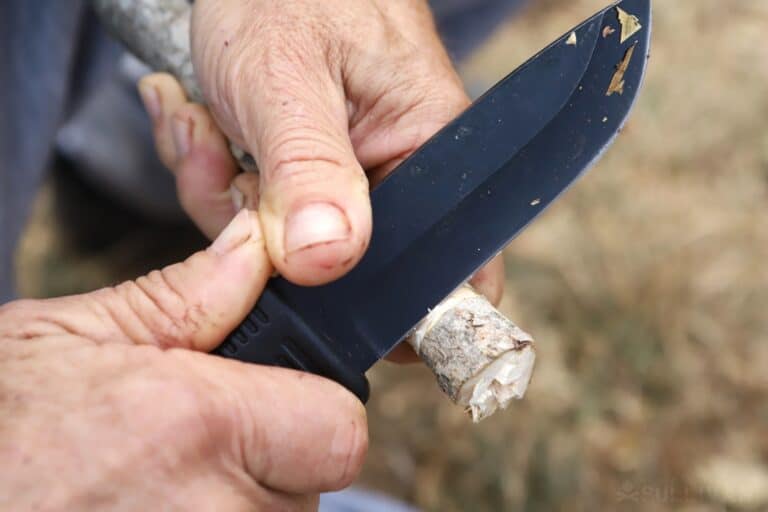
Step 4: Notch your anchor
Use a blade to create a notch to keep your cord from slipping off.
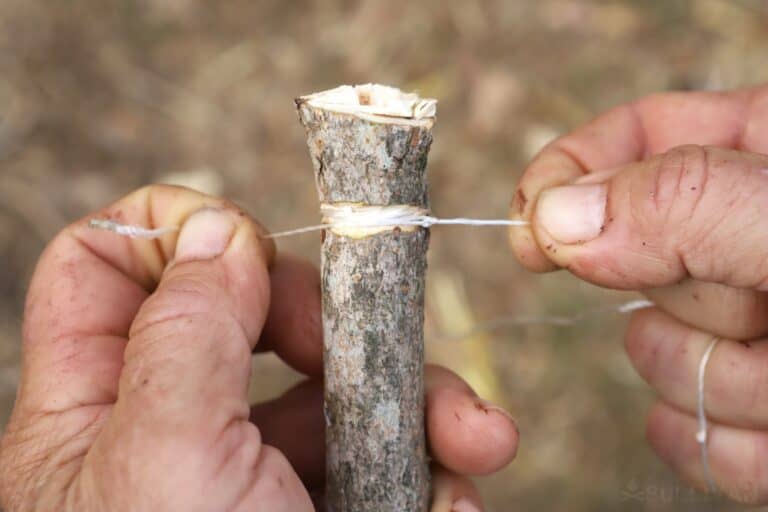
Step 5. The the cord around the notch
Next, tie your cord around the notch to place it tightly:
Step 6: Get your paracord measured out
For the type of snare, about 18-24” should do it. That’s about 3 hand lengths of cord for a man.
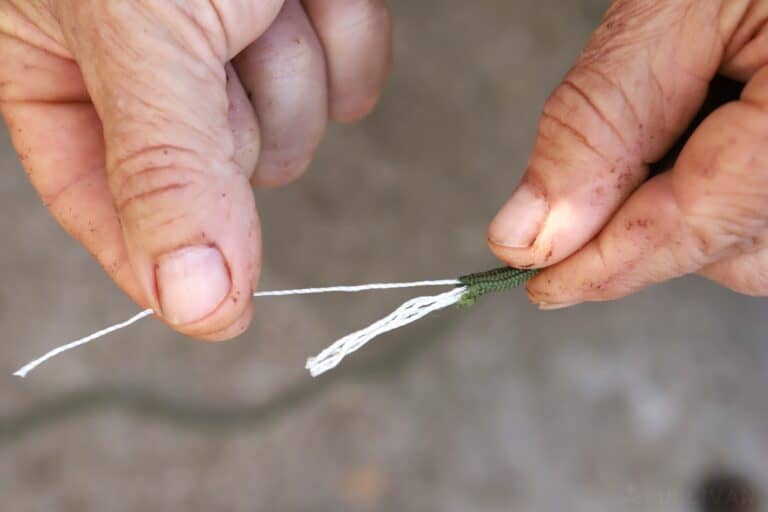
Step 7: Separate your Paracord
We will only be utilizing one strand of the paracord inside pieces. Most paracord has 7 strands, so pull them out and separate them, putting the rest up for later use. You can use them for multiple sets of snares for the most success.
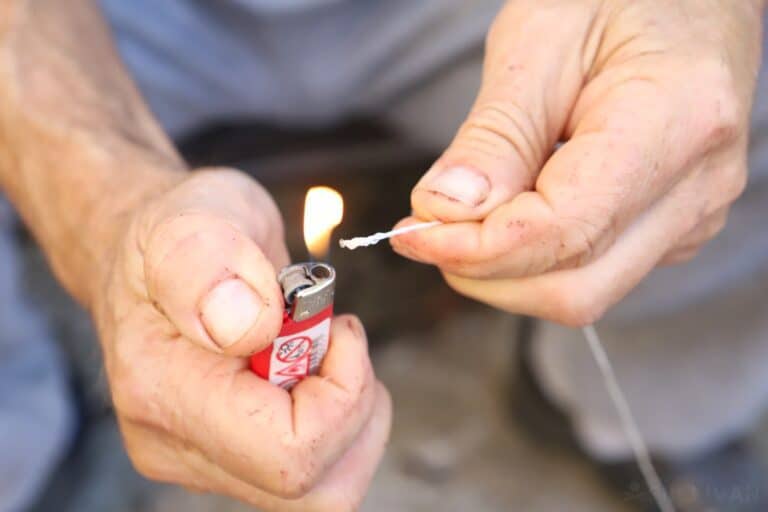
Step 8: Burn your ends on your paracord to seal it with a lighter or match.
Burn the extra so it will not unravel, and store it safely. So many uses for this magic stuff!! The tensile strength makes it the survival duct tape!!
Step 9: Make the loop
We’ll need the lopp wheere the animal will get stuck into to be about as big as your fist, maybe bigger if you’re hunting harger game such as rabbit.
This is really easy… you just need to make an overhand knot, on of the most trivial knots there is like so. Be sure to do this at one of the ends of the Paracord inner strand you’ve chosen for your snare.
Step 10. Insert the other end through loop
Now, to form the actual loop, simply run the other end through the knot you just made.
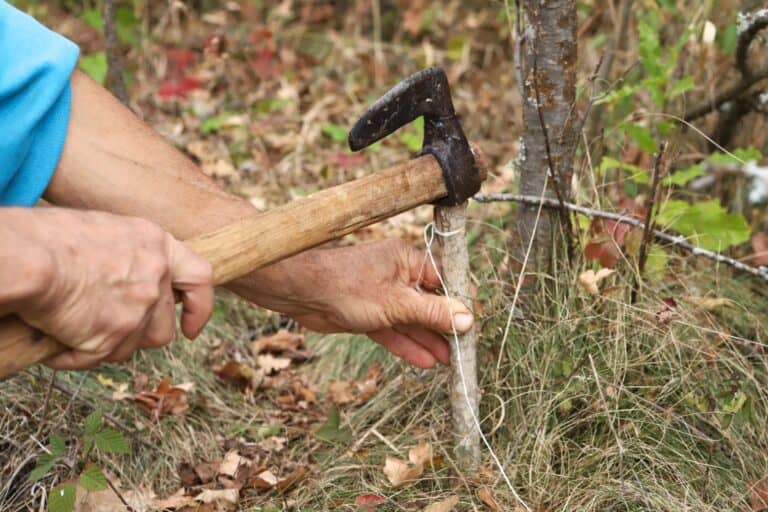
Step 11: Place your anchor in the ground to set it
Measure the height you will want to use, and plant your pointed stake anchor into the ground away from the direction the animal will travel for leverage.
You want the height to be about where the head and body will go through, off the ground. We will use surrounding brush supports to keep it off the ground.
Use a mallet or a hammer to drive your anchor into the ground. This will set your trap, making it ready to place your noose:
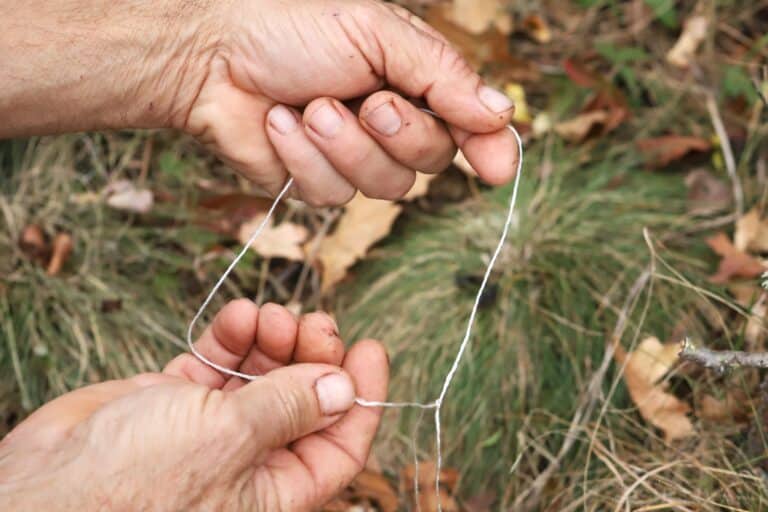
Step 12: Set the noose of the snare
Use the paracord to make a loop, and you will want to open the paracord about the size and width of a fist, maybe bigger depending on what you’re hunting. This is about fox height and placed where the neck will go through first, on a trail, as he ducks under the natural brush.
Step 13: Support your noose
Find two small forked sticks, or use surrounding vegetation to keep your noose in place at the animal’s head level.
That’s it, you’re done! Step back and look at the most successful primitive trap in history, updated with modern paracord! This is the small game one:
Tips For a Successful Snare
- The more snares you set, the more you stand to have success at trapping some meat.
- Snares are lightweight and inexpensive. Put them in your BOB (bug-out bag) and in any survival resource kits you have.
- Depending on what you are hunting, remains from other catches and snares make good bait.
- You’ll want to check your snares several times a day, and at least every 24 hours. This is especially true in warm weather and springtime. You do not want something to eat your catch, or it to spoil.
- Meat is not the only survival benefit from DYI snares, you can utilize the fur and its rawhide for cordage, lashings, and clothing. Bones can be fashioned into spear points, hooks, or many tools.
- Paracord is multifunctional, so when you remove the snare, reuse it.
- Do not leave any trace, if you can avoid it, of being there. Most animals are creatures of habit, and can be spooked when their regular habits and surroundings are suddenly changed.
- If you have the luxury, walk the paths to accustom the area and its inhabitants to your being there and your smell. They will smell you. Desensitize them and you will be more fruitful in your hunts.
Wrapping It Up
In any survival situation, energy conservation and time need to be used as effectively as possible. Teaching yourself basic skills to cover your family’s needs can make you very successful in an extended survival scenario where food will be a critical factor for that survival.
Being as well-rounded as possible in as many survival skills as you can, can only be a good thing. It’s better to not have to use it at all, but it can be lifesaving to have the knowledge when you need it and have to rely on your skills to make it in an emergency or survival situation.
Be sure to pin this on your favorite Pinterest bord for later!

Growing up in the Bluegrass State, it was a point of familial pride to be able to shoot, trap, identify plants and track animals. Summer camps helped us be well versed in camping, weapons, and survival skills from a young age. We were surrounded by such a lush environment, and we used the resources we had.
I met my soulmate in my happiest place to be- a seemingly enchanted winding trail next to a beautiful wooded glen- where I spent as much time exploring as I could during daylight hours with my trusty four-legged friends.
The bucket list includes living the days painting and writing on a fully self-sufficient homestead, off-grid with our animals and family and plenty of land for the significant other (who I think is a true artist at weapons and living that way) to shoot to his heart’s content. Naturally organic living for us and the animals is a goal.
just a question. how practical is paracord for this application? maybe it’s fine, i’ve never tried it… but my first thought is that it would easily be gnawed through by squirrels, rabbits and the like. just curious if you’ve had success with it. nice easy to follow directions. photos were a great teaching tool!
I just saw this, sorry about the delay.
Actually paracord worked pretty well, the one drawback was there were less live animals. I guess wire supports the loop better? But as paracord was more slippery, and I only used it above ground at head height, it seemed to do the job. Maybe if it was loose and laying on the ground, they may chew through it? I know when I tried to pull it up by hand, I yanked and it didnt come out and left blood blisters where it bit into my skin as I kept pulling. It has been successful with squirrel and rabbit here.
Thanks for the comment!