Nature has all the resources that we need in order to survive, but the trick is knowing how to use them, otherwise you’ll be at the mercy of the elements.
Whether you’re hiking, camping, or bugging out, you need to practice these skills beforehand. Do NOT count on your learning them on the spot, when you’re lost in the wild, soaking wet, dehydrated or even injured.
When the time comes to survive, you should be a master at most of these bushcraft skills, which is why I grouped by order of importance, but also labeled them so you know which ones are harder and require more time and practice.
But before we get to the list of skills, let’s set one thing straight…
Table of Contents
What Exactly Is Bushcraft?
Bushcraft is a group of interrelated skills that can help you survive and thrive in the wild with nothing more than a backpack and nature’s resources.
Bushcraft decreases your dependence on store-bought supplies and, in theory, you could survive with nothing but a knife. So even if they run out, there is no need to panic because you are confident in your ability to use the natural resources at your disposal.
Although bushcraft focuses more on wilderness survival, it also teaches us to make the most with what we have even in urban survival situations.
Essential Wilderness Survival Skills
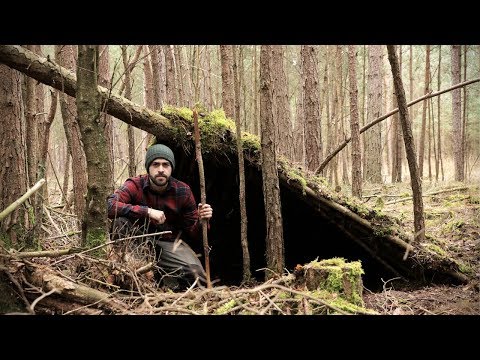
Making Shelter
Yes, making shelter is without a doubt the most important bushcraft skill. More important than making fire, more important than finding food, even more important than finding water.
Why? because the survival rule of threes teaches us that, while you can survive for up to 3 days without water, you can only survive 3 hours without shelter.
How is that possible? One word: hypothermia.
Hypothermia is a real killer, so building a shelter keeps you dry, protects you from the cold and shields you from animals lurking nearby.
If stranded without a tent, make use of branches, leaves, moss, and other materials you see lying around to build your shelter. You can even use items in your bug out bag, such as paracord, your tarp or a poncho.
Probably the easiest type of outdoor shelter you can build is the lean-to shelter. You can use commonly found natural materials to build it (like in the video below), or you can use a tarp.
Additionally, making use of natural shelter such as rock overhangs or a tree that has been overturned with its roots exposed will give you the shelter you need without expending the energy in building something from scratch.
These are great shelters if the weather turns sour suddenly.
Of course, there are others you should be aware of, such as:
- debris huts
- A-Frame shelters
- snow shelters
- … and many more types.
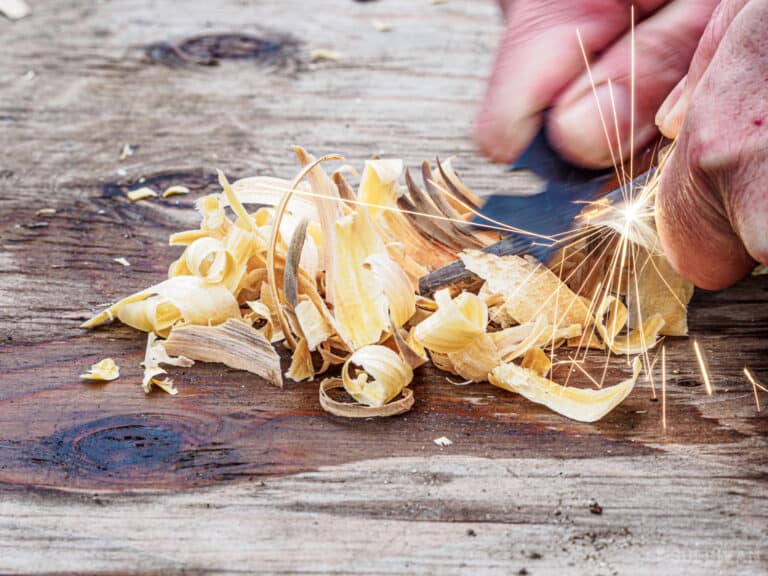
Starting a Fire
Fire craft is the ability to make, control, and use fire for survival. Without matches and lighter at your disposal, and especially in wet conditions, you should know how to start a fire with the resources around you.
For practiced bushcrafters, a rock, branches, and birch bark can be enough. You also need to know how to transport fire, such as carrying a burning coal in dry sage grass to keep the fire going.
Having knowledge of effective fire starters such as fatwood and birch bark is important for crafting a fire.
Additionally you can create a feather stick by running your knife down a length of wood and creating thin curls that will ignite easily when touched with a flame. If you carry lighters on you then this process becomes much easier.
It is always a good idea to have a way to start a fire that doesn’t require any additional components to work.
A great idea would be a ferrocerium rod or “ferro rod” ; these work much like flint and steel in that you scrape the length of the rod with something hard and it creates hot sparks to ignite your tinder.
The bow drill method showcased below is hard, but not impossible. I would NOT rely on it in a survival situation as even experienced survivors can screw up, not to mention it will rob you of precious energy trying to make it work.
Knowing how to start a fire is just the start. You should also know how to gather wood, how to keep the fire going, where to position it in relation to your shelter and, of course, to put it out when you leave the perimeter.
As a rule of thumb, you should never leave a fire unattended, even if you’re in a survival situation.
Errant sparks light dry tinder, a smoky root fire could start underneath your fire, all of these are considerations that make it a safe bet to just stay near your fire.
Speaking of survival situations, one type of fire you can make that’s less visible to others is to dig a Dakota fire pit (which basically consists of two interconnected holes in the ground), and build the fire below ground level.
Dakota fire holes are incredible for stealthy situations and even to conserve firewood since your fire is surrounded by heat preserving ground to keep it hotter longer.
The flames are also less visible. Here’s how to build one.
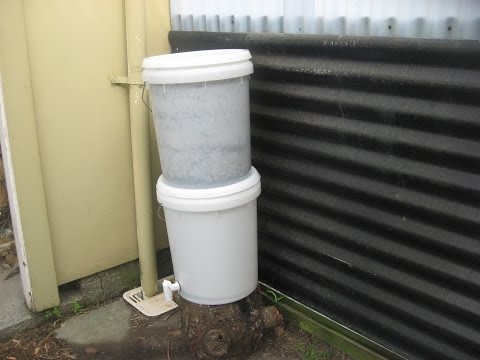
Water Collection and Purification
If you paid attention to the previous sections, you should know you can only live for about 3 days without water.
Keep in mind that, depending on your age and physical condition, your body will feel and be dehydrated before that, affecting your ability to do physical work, defend yourself, or even think.
Once you start down the slippery slope of becoming dehydrated it is hard to clamber your way back out of it. Best to be prepared beforehand.
Now, you probably have a bottle of water in your bug out bag, but that won’t last for very long. Water is heavy so it’s not feasible to put more because you’ll have to carry all of it on your back.
This is why having a skillset to know how to find sources of clean water in the wilderness is a key asset.
So when your water bottle runs out, it’s important to know how to find more.
When you do, I suggest you make your camp close to your water source, but take precautions for flooding and animals and other people passing through.
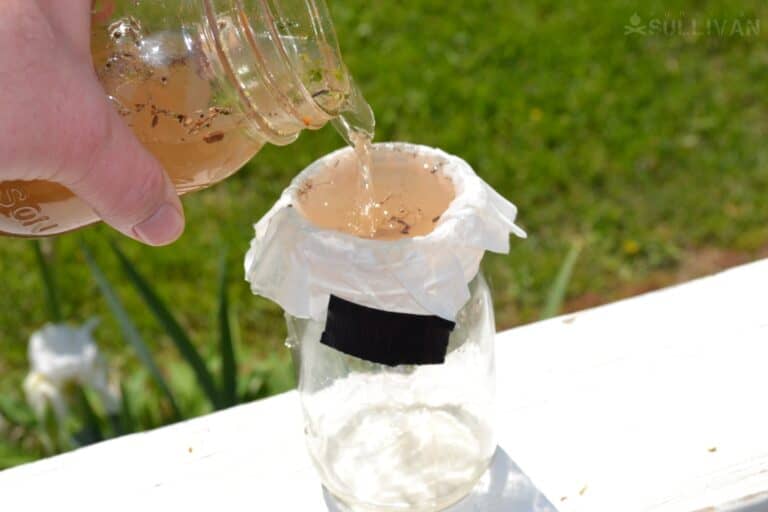
Filter your water to remove debris and other contaminants, then boil it to kill bacteria and pathogens. Boil water to kill off any nasty parasites and viruses.
Filtering your water without proper gear can be as simple as running it through some clean piece of clothing or even a bandana into a pot. The idea is to get as much particulate matter out of the water as you can.
To get rid of any pathogens and harmful bacteria, you can make your own water filter using sand and charcoal. Here’s how:
If it’s winter, know that you can drink water from melted snow, so long as you warm it up first.
Don’t leave it up to your stomach to do the heating, you’ll get headaches and expend precious calories doing so.
Use a bandana to pre filter debris, and let it melt into a container. If you have a fire going even better, you’ll have drinkable water in no time at all.
Keep in mind that it does take quite a bit of snow to get a sizable amount of drinkable water. It’s best to start with a little water as it’ll help melt the snow quickly.
If you do eat snow raw it will lower your body temperature and can cause conditions such as hypothermia.
Foraging
I put foraging in the essentials list category because it’s the easiest way to procure food.
Foraging is the easiest in the greener months (spring/summer in particular) but can be done in the colder months if you know where to look.
Whether you live in the Americas, Europe, or in many other parts of the world, you should be able to find a variety of fruits, nuts, seeds and other wild edibles you can eat without cooking for extra calories.
Knowing how to identify edible wild plants and how to cook them can come in handy when there’s shortage of game, if you can’t build a fire to cook them on, or if you don’t know any other means of finding food.
Here is a general list of what you can forage throughout the year in North America:
- Spring – Leafy greens, wild garlic, fiddleheads, wild onion, asparagus, cattail shoots, dandelions, stinging nettle
- Summer – Blueberries, strawberries, mulberries, raspberries, cattail spikes, goosefoot
- Fall – Crabapples, walnuts, chickweed, mint, wild grapes
- Winter – Chestnuts, cattail roots, cranberries, hophornbeam seeds, beech nuts
It also helps learning to identify and use wild plants for medicinal purposes.
It is important to understand that lots of wild edibles have look-alikes that are potentially toxic to you, knowing key characteristics of the plant you’re looking for will save you from a literal headache.
Preserving your foraged foods for times when there are slim pickings is another great skill to have. All the berries and things like garlic can be dried out using nothing but the power of the sun.
Once all the moisture is gone from the edibles bacteria won’t be able to grow on it effectively, giving you a lot more time out of your food finds.
By the way, if you’re thinking about eating mushrooms from the wild, forget about it. It’s very risky, even when they look exactly like the ones in the books.
How to Use Knives and Axes
In bushcraft, many chores require the use of bladed instruments.
Knowing how to use them correctly is important for security but also to be able to carry out many skills such as hunting, fishing, and building shelters.
It’s crucial to know what your blade is capable of to prevent breakage and possible injury.
There are many types of blades on the market and each is geared towards excelling at different tasks. For example:
Axes – These are generally used for processing firewood or logs for a primitive shelter. With a little finesse you can even use a small hatchet to shave off bark from a tree or make feather sticks.
Hatchets fall into this category as well, since they are smaller versions of an axe. Using a hatchet for light duty wood processing is the best way to get the most out of this tool.
Knives – Used for general tasks, cooking, and protection. This will become your best friend in the backcountry.
Not all knives are considered equal so be sure to pay attention to things such as metal composition, whether or not it has a full tang, and how sharp you can make it.
Machetes – Machetes are giant sword-like knives that excel at bushwhacking and trail maintenance. While they don’t have the versatility of a knife you can use them in a variety of the same tasks.
Kukri – Thought of as a jack of all trades, the kukri can perform the tasks of a machete, axe, and knife.
The downside is that while it can perform these tasks, it doesn’t excel at them like their respective counterparts. It’s best to have the right tool for the job, but in a pinch a Kukri can do all three pretty well.
You should also learn how to sharpen, store, repair, and protect your knives, axes and hatches to prolong their lives, especially when you’re out in the bush with no way of getting new ones.
Treating Wounds
When there’s no doctor in sight, you’ll have to deal with any injury that may come your way, whether it’s a cut, an open wound or a broken bone.
There are several medicinal remedies out in the wilderness such as common plantain, rose hips and sphagnum moss that help with wounds.
Having a guide of medicinal plants is a great asset when it comes to treating injuries. Remember, indigenous tribes have been using these plants for centuries in healing.
Since I’m not a doctor, I can’t give you medical advice, but I strongly encourage you to take a first aid course, and don’t be shy about asking what to do in case of accidents in the wild, particularly how to clean and seal a wound and how to make a splint.
Be sure to have a first aid booklet in your survival bag, along with a comprehensive first aid kit.
Important Skills
Land Navigation
Even the most experienced outdoorsmen can get lost. Land navigation is obviously important so you can go back if you’re lost, or if you’ve taken the wrong path.
The first step is learning how to use a map and a compass. You should also learn to do it without one, by reading the sun or stars, following the flow of water, etc.
If you don’t have these items there are some tried and true methods of which you can try and get your bearings with. They aren’t difficult to do and only require some careful thinking and common sense.
Using your watch – If you have an analog watch you can use it in conjunction with the sun to find out what direction is true north.
Simply point the hour hand at the sun, locate 12 o’clock on your watch and cast your eyes in between the hour hand and noon. Directly in the middle of the two should be true north.
Follow a river – All rivers will end up dumping into a larger body of water. Populous places such as cities generally try to build up around bodies of water. If you follow a rivers path long enough you might end up at the edge of civilization before you know it.
There are many other ways to tell which way is north and it is one of the most important skills you can learn for survival.
Reading the land involves understanding how terrain works. This is important for setting up something like a basecamp. Higher lands are great for keeping in sight however, since you are out in the open you can be prone to stormy weather and high winds.
Build in a low-lying area and you are protected from the elements but it is very difficult to be seen in the case of a rescue.
How to Fish
Just like hunting, fishing involves the use of tools, only it’s easier, particularly for women and children. Not to mention it is a leisurely activity that has been shown to reduce stress.
Instead of relying on the traditional rods, reels, and hooks, true bushcrafters practice many alternative methods for catching fish, mainly by improvising fish hooks and setting up traps.
There are pros and cons to all of the fishing methods but a combination of multiple ways will increase your chances of getting a good catch.
As a prepper, you don’t need to make your own fish hooks. A small fishing kit or two in your bug out bag should suffice, although learning to catch fish with your bare hands might prove useful.
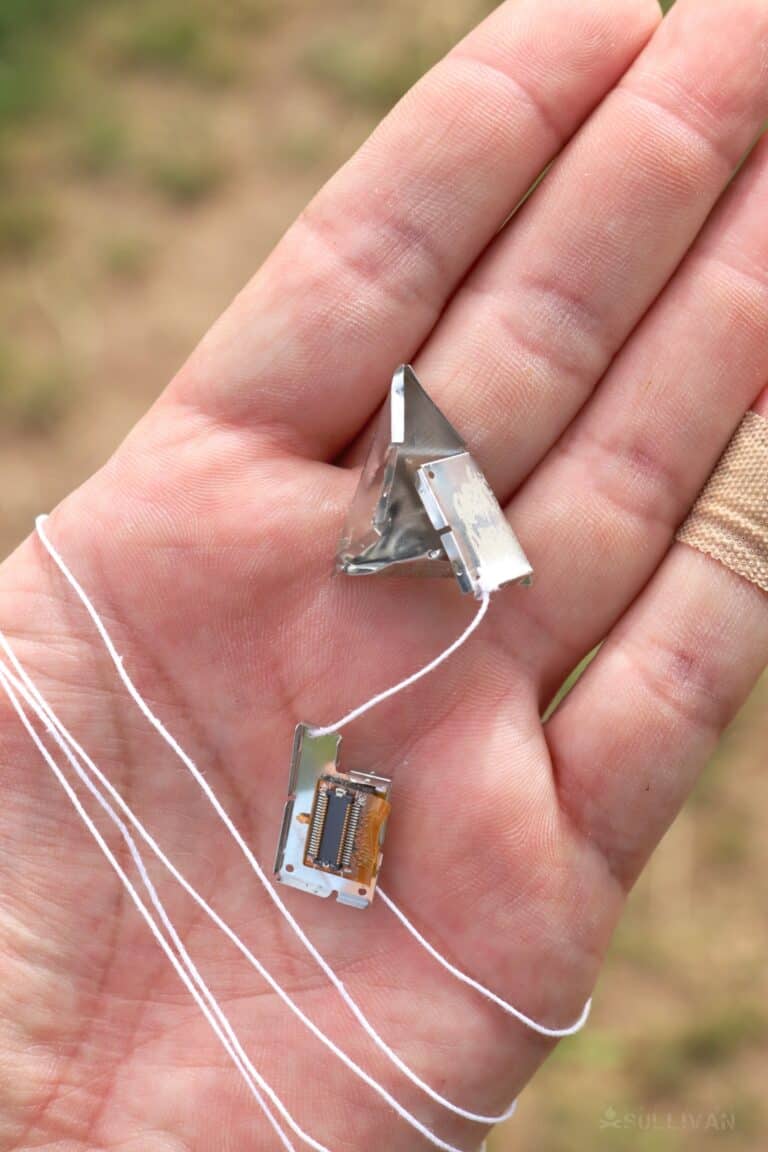
If you do need to make your own fish hooks, however, it is quite doable with minimum resources. You can use pine wood to make diver lures that are great for adding bait for a trolling line.
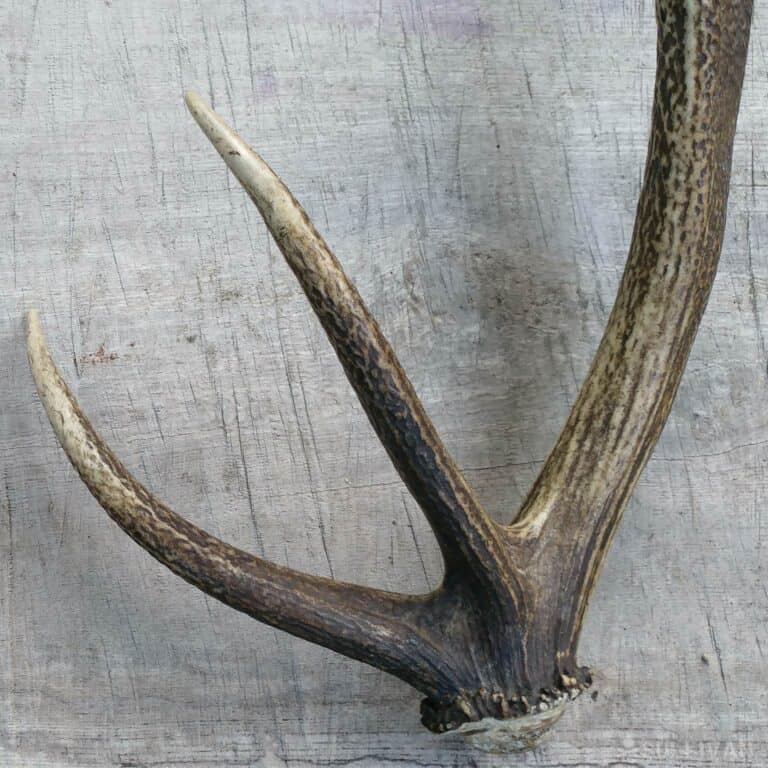
Traditionally, bone and antler were used to make primitive fish hooks.
Essentially, you would whittle the piece of bone or antler into little 1-2 inch hooks that are pointed at each end. The fishing line is tied around the middle of the hook and that is cast into the water.
When the hook enters the fish’s mouth you can pull on the string and the hook will lodge itself into the mouth.
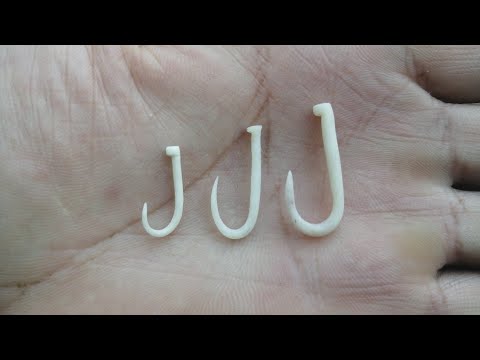
If our carving skills are up to snuff then you can definitely make your own J hooks using bone. These are more like the hooks you see today and are also good for catch and release fishing.
While this may seem a bit inhumane for the fish as it can do some damage on the inside, in a survival situation you will most likely be eating anything you catch so this doesn’t really matter as long as you dispatch the fish quickly and as painlessly as possible.
The Art of Camouflage
Camouflage is used for hiding supplies, escaping detection, or hunting and stalking your prey. Knowing how to properly use camouflage can keep your supplies hidden from looters or help you to catch food to feed your family.
Something as simple as camo netting from an army surplus store is enough to turn your sleeping shelter into another mossy rock in the forest.
It’s so effective because it breaks up the line of sight for anyone trying to spy you out. If you can find one that matches the general tone of the season you’re in, even better.
Camo can be beneficial for hunting in the wilderness. For example, a deer lacks the cones to see anything in the red-green spectrum so all the colors in the spectrum range appear the same.
This means anything associated with red and green (orange, brown, etc.) will work just fine.
Learning to blend into your surroundings is a critical tool for your survival both in the woods and in urban environments during post-SHTF.
Maintaining Your Tools
If you’re going to do this for the long term, you should keep your tools in tip top shape.
Otherwise, you’ll not only have to buy new ones more often, they’ll be unreliable when you’ll attempt to use them, and even risk injuring yourself (a dull knife IS more dangerous than a sharp knife).
There are many ways you can sharpen your knife blade, and not all of them need to be purchased. The most common way is to get a sharpening stone that consists of multiple grits which help work the metal down into a razor sharp apex.
Usually you start with a coarser grit to shape the angle of the blade and then finish off with a smoother one to get rid of burrs and small imperfections.
Unfortunately, not everyone has these in their survival kit and you can’t necessarily buy them while in a survival situation. Here are a couple of ways you can sharpen your knife without a sharpening stone from the store.
Find Your Own Sharpening Stone
Yes, you can use regular rocks to sharpen your knife. You need to find one that closely resembles the grit you can get in commercial stones.
River rocks are great for getting out minor imperfections where something harder can be used to hone the blade. Ensure you have lots of water nearby since sharpening always works better with water or oil.
Strop Your Blade
While stropping your knife usually comes after sharpening you can still use it to restore a little bit of the edge. If you’ve ever sharpened your knife then you may have noticed little micro scratches and teeth along the blade.
Using leather or suede is your best bet when stropping as they are strong enough to take out minor imperfections but not so strong as to wreck the blade.
These techniques can be applied to multiple blade types, including axes and machetes.
Trapping
Learning how to make snares and traps is useful for both hunting and fishing. There are different types of traps that you can make and set, depending on the animal you are targeting.
If you’re going to survive in the wilderness, you need to secure food quickly, and by wasting as little energy as possible.
Trapping is an effective way to get a food supply since it works passively once it’s set up properly.
If you’re interested in trapping there are a few things you should be aware of. These Include:
- Trapping is different depending on the animal you want to get. Watch for patterns and be observant of the area around you
- Always look for game trails and rabbit runs for effective setups
- Set your traps near water sources and gathering grounds
- Don’t get discouraged. You won’t get something every time unless you are lucky
- If you are hunting herbivores (rabbit in particular) look for the nibbled ends on branches and twigs. If they are angled that’s a rabbit, if they are flat then it was probably a deer.
There are dozens of different traps you can make, such as:
- Hangman’s nose loop
- double snare spring trap
- paiute deadfall trap
- bird snares
- … and more.
One of the easiest and most popular traps you can make is the snare trap. Take a look here:
How to Hunt
I put hunting after foraging, fishing and trapping simply because it’s harder, it takes more practice, and it can potentially attract unwanted attention in the bush.
In fact, whether you’re looking to hunt small game or big game, hunting is a collection of skills into one. You need to learn:
- how to track an animal
- how to use a bow or a firearm
- the importance of baits and scents
- reading animal tracks
- tying knots
- as well as cleaning and cooking your catch.
Keep in mind that how you hunt will change, depending on the game that you’re looking for. It’s important to learn how each species interacts with their environment.You wouldn’t hunt a deer with a sling or use a powerful rifle against a rabbit.
A final note on hunting. You are hunting an animal that is living and experiences emotions. Be sure to make your kill clean so that they do not suffer.
Traditionally, tobacco was offered to the animal and forest as thanks for providing. Whatever little way you decide to do it, ensure that you thank and respect the natural world.
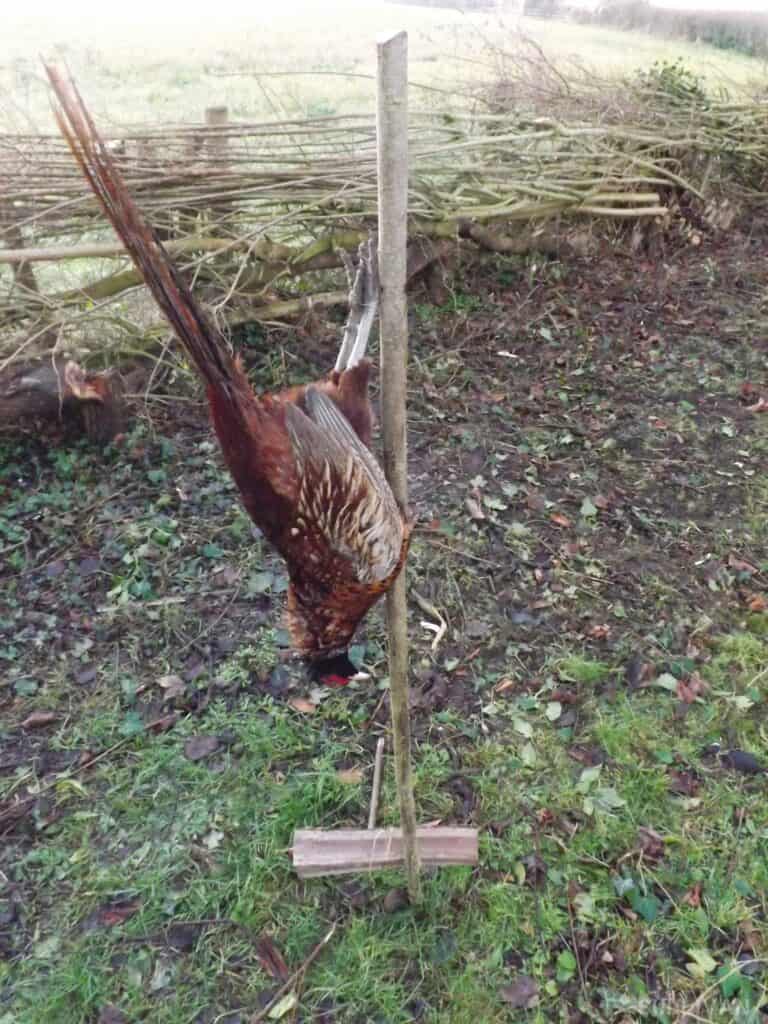
Cleaning Game
Cleaning your catch is one one of the more involved skills you can learn in the bush.
Properly caring for the fur and meat ensures that you don’t waste anything through spoiling or other means. It also shows a certain level of respect for the animal that gave its life to sustain you.
Once you catch your prey, the next thing you need to do is to clean it. In cleaning your chase, hang its head up to prevent the gut from breaking.
Cut it from the sternum to the groin. Remove the entrails and clean from top to bottom. For fish, it should be scaled from the tail to the head except for catfish which are scaled from the head down.
Depending on what you’re hunting, you should research dedicated articles for the steps:
Tracking People and Animals
Humans who are not skilled in stealth movement will always leave a trail. If you know how to track signs you will find a missing person quicker.
There’s so many things you can learn just by looking at tracks. You can figure out whether it’s a man or a woman, how long ago they were there, how many people in the group and so on.
Much like humans, animals are also creatures of habit and follow the same paths in obtaining their food and water source. Finding them means you can set traps in strategic places, increasing your chances of catching them obviously.
Keep in mind you should also look at torn branches, overturn rocks and other things besides the tracks to give you more clues.
If you’re hunting out in the wintertime, it makes it a little easier since the tracks show up more in the snow. It is also handy to date the tracks since if you have fresh powder on the ground, any new tracks will be easy to discern.
Check out this handy guide to animal tracks (you may want to print it out, too).
How to Identify Snakes
Anyone who spends time in the woods will likely come across a snake or two. Knowing the difference between venomous and non-venomous snakes is essential.
As a general rule, diamond-shaped heads are typically venomous, while round headed snakes are not. You can also remember “Red and yellow kill a fellow but red and black is your friend, Jack”.
To be on the safe side, you should try to avoid all snakes so you can worry about more important things.
Over and above snakes there are a variety of spiders and other insects that can also give you a bad time. Just be respectful and don’t agitate the creature and they won’t bother you. Animals are quite adept at reading situations and they will react accordingly.
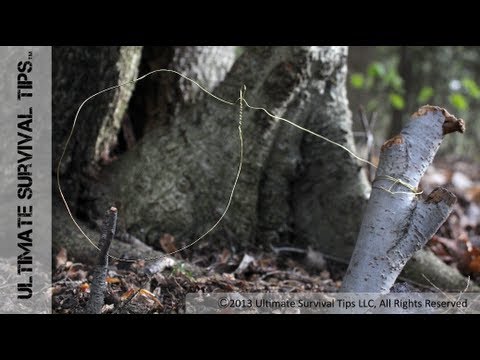
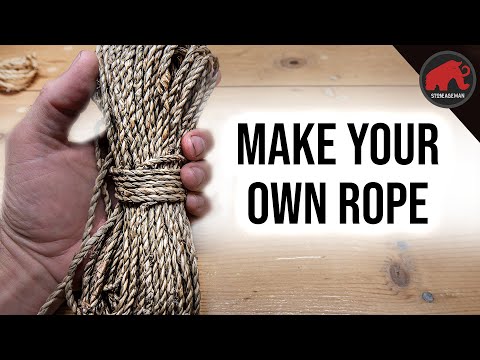
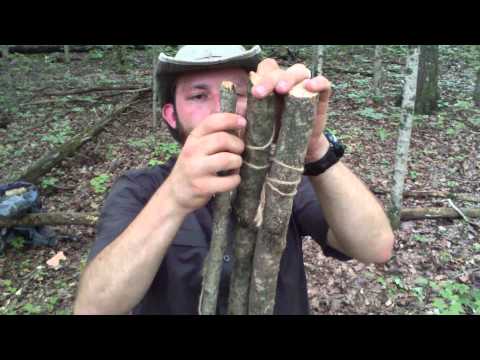
Using Rope and Tying Knots
One of the first things they teach in camping is making rope and tying knots. It is essential for building shelters, making traps, and securing knots for climbing.
You can make a rope from fibrous leaves around you in the woods if you take time to learn it. By adding rope-craft to your list of bushcraft skills, you can increase the strength of the materials you build which can be a lifesaver in an emergency.
Common ways to make cordage would be to use the inner barks of certain trees such as willow. You’ll want to look for the young trees with thin, flexible inner bark layer. You can strip it by hand in the late spring and summer.
Spruce tree roots are also excellent candidates for cordage. The roots can be stripped of their bark and used for cordage right after that. You can process it down a little more and over time it will become finer. The resulting cordage is as strong as a steel line.
I would suggest wearing gloves for this next one but stinging nettle makes for excellent rope making. Just gather the plants and flatten them out. Remove the pith and you’ll have access to a couple of sturdy strands.
Crossing a Body of Water
Getting across bodies of water requires knowledge in water safety, or more advanced skills in raft building, or canoeing. Learn the basics about how to cross a stream or river without a bridge in this article.
Knowing how to be safe around water can mean life or death in a wilderness situation. Knowing how to swim is actually an often overlooked survival skill; people have been doing it “since forever”.
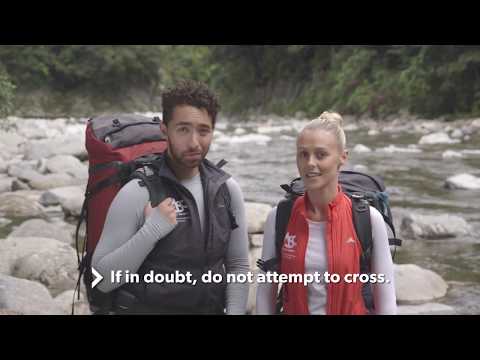
Here are some tips to help you decide whether or not to cross a body of water:
- Be mindful of the sky and weather. It can change quickly and cause turbulence on the water
- Watch out for rocks and logs just under the surface. One wrong hit and you could fall in.
- Rapids can be deadly to the untrained. If there is a way around the rapids it’s best to go that route.
If you do fall in for some reason and are unable to swim, your boat should be near you. Quickly grab onto the side of your craft and wait to gather your breath.
Once your heart rate calms down you will be able to think more clearly about the next steps. Use the craft to help propel you to shore using your legs.
Falling into cold water is never a fun experience.
The important thing to remember is that you will feel the initial shock for up to 1 minute afterwards. After that, you have 10 minutes to sort out your situation and get back to shore.
In total you have 1 hour generally until hypothermia sets in after you call into cold water.
Useful Bushcraft Skills
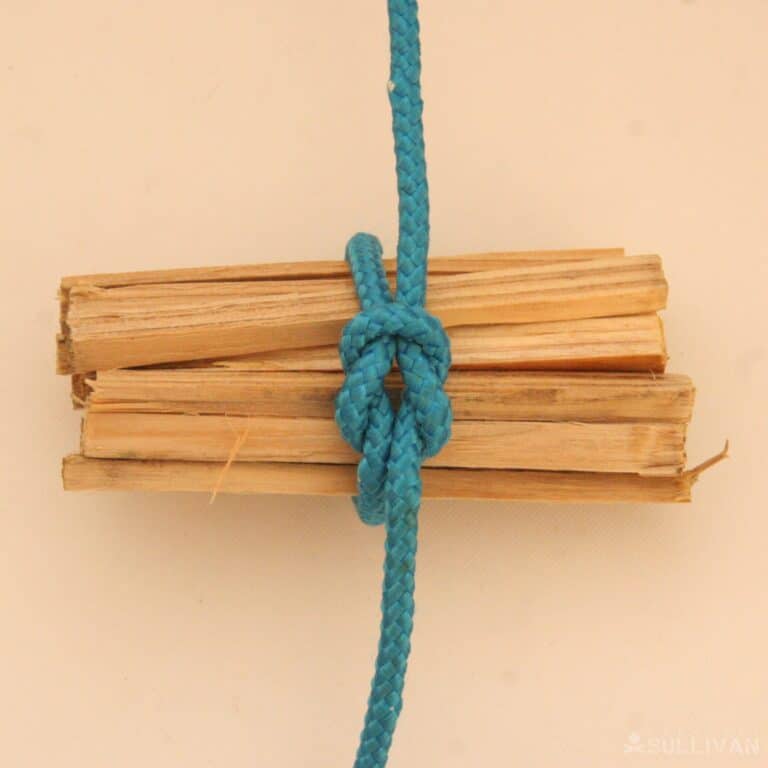
Building a Cooking Tripod
After cleaning your game, the next thing to do is to cook them. You will need to build yourself a tripod to make outdoor cooking easier.
All you need is three pieces of wood (of roughly the same length, preferably green saplings), cordage, and a cutting tool.
Align the three saplings so that they cross over at the top and tie your cordage around each individual sapling followed by a couple of knots to secure it. Hang some cordage from the center and you can suspend a pot over a fire.
Repelling Insects
When going through the forest, you will no doubt encounter those pesky mosquitoes and bugs along the way. A mosquito bite alone can put you at risk for diseases such as malaria, dengue fever, and yellow fever just to name a few.
Prevent this from happening by applying insect repellent to those vulnerable areas and by researching some alternate methods for pest control.
Repelling bugs is as easy as starting a smoky fire in your camp. Since the smoke from a fire is so acrid it deters them by burning their senses. Since they cannot navigate through the smoke they will often leave.
A smoky fire is easily obtained by using wet wood not throwing something like leaves or dry pine needles onto it. Anything that doesn’t produce complete combustion will work perfectly.
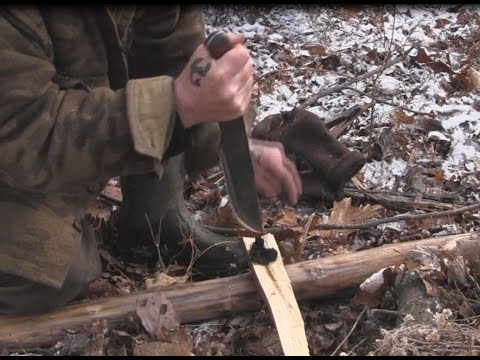
Batoning Wood
Batoning is a wood splitting technique where a knife is wedged in a piece of wood and struck repeatedly with a baton-like object, usually another piece of wood like so:
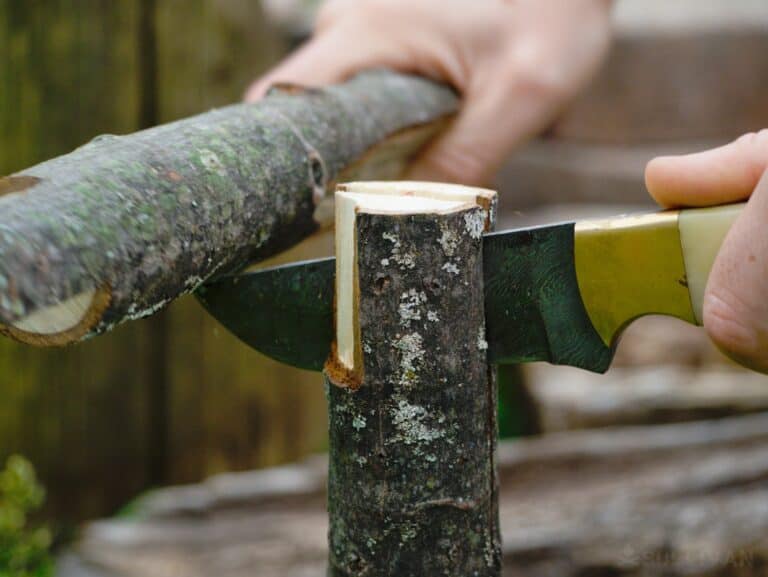
You will need a sturdy bushcraft knife for this, though I would suggest a hatchet to spare your knife’s blade. For larger pieces try to use a thicker blade as it will generally go through knots in the wood easily.
Wood Carving
Wood carving serves a variety of purposes, such as making primitive wooden tools and weapons:
- wooden spoons and forks
- mortar and pestle
- traps
- snares
- clubs
- atl-atls
- tomahawks
- wooden spears
- bows, arrows
- a bow drill set for starting fires

Wood carving isn’t something to be very concerned about unless you’re looking to live off the land with no temporary home, or if you’re thinking about surviving a long-term disaster in the bush.
Navigating using a Raft or a Canoe
Of course, you shouldn’t attempt this without supervision and you should definitely not do it if you don’t know how to swim.
Still, using a raft or a canoe can mean you leave behind wild animals or even other people who may want to harm you.
If you have to improvise and make your own raft, there are a variety of ways you can do so. You can make a raft out of small saplings and a tarp which makes an effective beehive for floating down rivers.
Plastic totes or bear barrels make for excellent raft making materials. They are usually hollow inside and if you can keep the opening about water then it’ll have no issues supporting your weight in the water.
Flintknapping
Flintknapping, a.k.a. making flint tools out of rocks. You can make hammers, axes, and so much more, let us show you how.
Flintknapping is rewarding as it is dangerous. Commonly used to make arrowheads and other tools, flint rock is easily molded into different shapes using something like an antler or horn.
The idea is to apply pressure in a precise area using the bone and “flake” off parts of the rock. The result is a sharp edge that can be used to hunt, tan hides, and other tasks.
The danger comes from the fact that you will more than likely bleed from flint knapping. The sharp rocks and pressure has even made veteran flintknappers curse as it slices their hand open.
This is exponentially worsened if you use something like obsidian as it is so sharp it can cause cuts at the cellular level. The key is to pay attention to what you’re doing and take your time.
Frequently Answered Questions
Q: How long does it take to learn these skills?
A: As with anything else worth learning, it could take years to become an experienced bushcrafter. This is because you’d have to get good at many of these skills, and this takes time. On the other hand, learning the most basic bushcraft skills could take weeks, if not days. Persistence is key.
If you’re starting out, the first skills you should focus on are the ones that are most important in a survival situation: shelter, water, and food.
Q: What are some common bushcraft tools?
The staple when it comes to practicing bushcraft is the knife. You should take your time picking yours, because you want something very reliable.
Other common bushcraft tools include:
- machetes
- hand-crank saws
- regular saws
- tomahawks
- carving tools
- a portable stove (not very primitive, I know, but you will need it)
- and, of course, a backpack.
Ready to Get Started?
These are just some of the bushcraft skills that can save your life or the life of your family, especially in scenarios that involve spending weeks or even months outdoors.
With some practice, your confidence and skill level increases. It’s best to learn these skills collectively instead of focusing on just one. The work to master these skills will put you well on your way to surviving an indefinite amount of time in the wild.
Disclosure: This post has links to 3rd party websites, so I may get a commission if you buy through those links. Survival Sullivan is a participant in the Amazon Services LLC Associates Program. As an Amazon Associate, I earn from qualifying purchases. See my full disclosure for more.
Here are a few further resources to get you started:
- our collection of bushcraft articles
- Dave Canterbury’s Bushcraft 101: A Field Guide to the Art of Wilderness Survival – a staple book on bushcraft
- Mors Kochanski’s Bushcraft: Outdoor Skills and Wilderness Survival
- … and if you’re feeling up to it, Dave has a follow-up on his book for more advanced bushcrafters and survivalists
Do you have more skills to add to this list? Let us know what we missed or feel free to post a comment below. I’ll be happy to hear from you.

My dad was military. My grandfather was a cop. They served their country well. But I don’t like taking orders. I’m taking matters into my own hands so I’m not just preparing, I’m going to a friggin’ war to provide you the best of the best survival and preparedness content out there.
Moss does not always grow on the north side of trees that is a complete myth it will grow on the side of trees that get the least sun otherwise great guide