While the ideal weapon may be more along the lines of a pistol, rifle, machine gun, or even a grenade launcher, the best weapon is the one that you have access to. In the event of an emergency if you find yourself unarmed, access to ANY weapon is better than no weapon at all.
A small knife can be very useful for many things, but it doesn’t really make a very good weapon, especially if you were to find yourself in a melee. If you don’t have access to a firearm, any weapon that extends your reach to keep adversaries at a distance is better than using your fists or a small knife.
Weapons to extend your reach
This weapon can be as simple as a stick. A bo staff is especially useful for keeping potential attackers at a safe distance. Being between six and eight feet, a bo staff can be quite a formidable weapon. A bo staff can double as a walking stick and can be useful for many other things as well.
But, if you are like me, you prefer that if a weapon doesn’t go bang, it at least has a sharp edge or a point on it. In past Improvised Arms and Ammunition articles we have talked about making knives and machetes, and improvising axes and spear heads from shovels. Today we will discuss alternative methods for making a spear, hatchet or axe.

Spear from a garden trowel
If you are trying to improvise weapons, having access to non-weapon items that can be modified is very important. Almost any store you can think of will have a garden hand trowel, although these are usually seasonal items that are only on the shelves in warm weather.
You may already have one or two of these in your shed. Some of them have a socket that fits over the handle, some of them (like the one pictured) have a rod that goes into the handle.
Whichever one you have, that will be how you will attach it to a pole. Notice how it already has a spear head shape? Just flatten it, sharpen it, and mount it to a pole and you have a spear.
This video shows something very similar to what I am talking about.
To make the spear
STEP 1: Find a pole. A pole can be source in the nearest woods; usually a sapling will be fairly straight and of the length that is suitable. Find a straight, hardwood sapling and cut it off just above the lowest leaf shoot so it will keep growing if you can. If not then I suppose it will have to be a sacrificial sapling.
STEP 2: Strip and de-bark the pole. If you don’t have a knife, the garden trowel itself can be sharpened (you’re going to have to sharpen it anyway) and used to cut and shape the pole. Once you have a pole six or eight feet long with the bark stripped off of it you can the affix the trowel to the pole to create the spear.
STEP 3: Attach the head. If you have the socket type trowel then just shape the end of the pole to fit into the socket then fix it firmly with a screw, nail, or some form of pin and lashing. If you have the type shown in the picture you just need to drill a hole into the end of the pole. If you don’t have a drill then you will have to find another way to make the hole.

You can heat the rod on the trowel and burn it into the pole if you have no other means. Once it is in lash the end of the pole to keep it from splitting. You just have to do whatever it takes to make it happen. Now you have a spear with a fairly formidable head on it. The trowel pictured is six inches long and a little over two inches wide. That will definitely make a lethal wound in man or beast once you have it sharpened.
Making a hatchet
A hatchet is pretty much a smaller, lighter version of an axe. Therefore it can be made from lighter materials. Making anything from steel requires tools to cut, grind, and hammer it into the form you desire. Forging steel requires some considerable practice to learn to do it right.
If you have a location where you can build fires and make a lot of noise beating on steel then forging is the best way to make a hatchet or axe head. I suggest that everyone learn at least some basic blacksmithing in order to make knives and tools.
Unfortunately, I will not be forging a hatchet or axe head for this article as I have made a knife, machete, and slider shotgun for other articles before. Although I will try to give explicit directions for you to be able to do so as well as show a few good videos.
Non-forged hatchet
A hatchet can be made without forging the head by using lighter materials. This type of hatchet is better served as a weapon for striking flesh rather than a camp hatchet for cutting firewood. To make this simple hatchet you need a strong, dry stick of hardwood about 14-16 inches long (hickory is most commonly used around here for tool handles).
The blade can be made from a varied assortment of items; you could even make a tomahawk style hatchet from the garden trowel. To make a tomahawk from a trowel you just need to follow these steps.
STEP 1: Remove the trowel blade from the handle.
STEP 2: Heat the trowel blade and hammer it flat.
STEP 3: Grind the wide end of the trowel blade square or rounded, whichever you prefer. I prefer rounded as it exerts more force onto the target. Sharpen both ends of the head.
STEP 4: Slot or split the handle at the narrower end to accept the tomahawk head. Cut the slot a few inches from the end of the handle, cut it as long as the center of the trowel blade and just wide enough for the thickness of the blade to fit. If you choose to split the handle, split it carefully so that it is straight otherwise the head will be crooked.
If you use a one inch thick handle you will have 2-2.5 inches of blade on each side of the handle. That is plenty to split a head or make serious gashes in someone. If you wish to have better wounding capabilities then make one end or the other stick out more. If you want a bigger blade you will have to make one form an alternative source.
STEP 5: To affix the blade into place you can lash it with wet leather lace. When the leather dries it will cinch up tighter. You can also use cordage or you can drill a couple of holes through the handle and head and screw or pin the head in place. If you split the stick then you will have to lash the end whether you lash or pin the head.
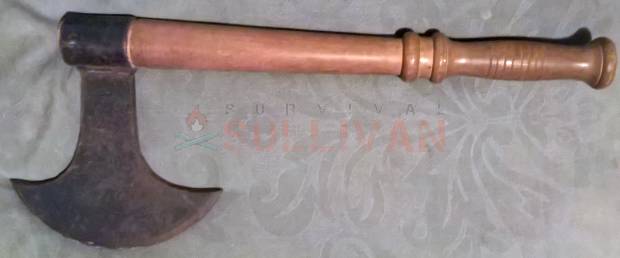
If you use an alternative source for the tomahawk head just cut it to a shape that you like. I would opt for a 2 or 3 inch wide blade, 3-4 inches long with a sharpened spiked tail 4-6 inches long. Once you have made the head and sharpened it just follow steps 2-5 above. Here is a picture of a clunky homemade axe I have:
Forged hatchet
If you want to forge a hatchet there are a couple of ways to do it. One way is to start from scratch and make the head then attach it to a handle. Another way is to modify an existing tool, like a hammer.
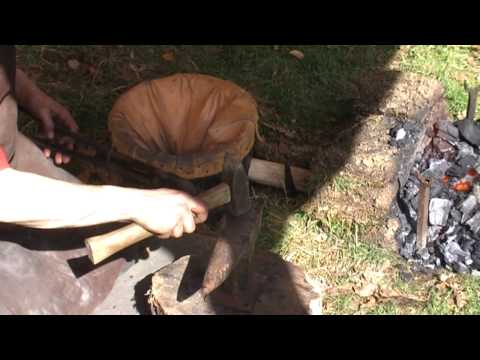
This video shows what your setup may look like to forge with the bare necessities. Note the primitive bellows.
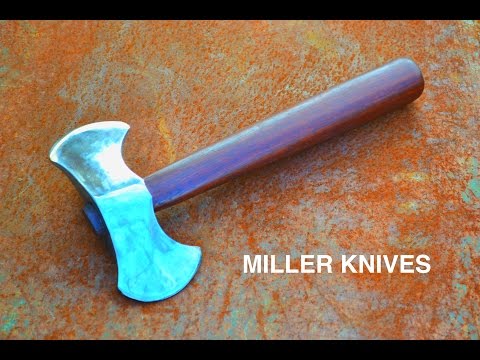
Forge a hatchet/tomahawk from a hammer
To forge steel you need a hot fire. Just a regular fire itself won’t get the steel hot enough, you will need a bellows to add air to it in order to get the steel to forging temperatures. Making a bellows and building a fire for forging could almost be an article unto itself, but I will leave it up to you how to get air to the fire.
I will give a couple of suggestions to get you thinking:
- You can use a blower, even a just a handheld hair dryer on the air only setting will work.
- The 12V blower from a car heater (these actually work quite well).
- You can make a pump bellows from a couple of pieces of plywood and some leather.
- You can use an air compressor with a pipe with a valve on it.
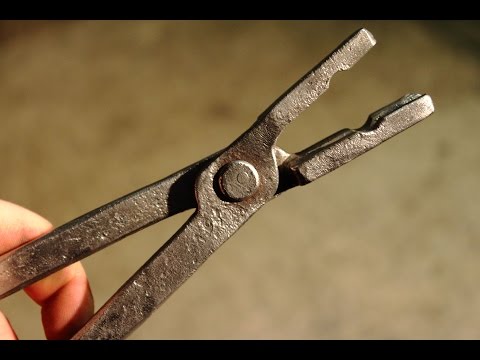
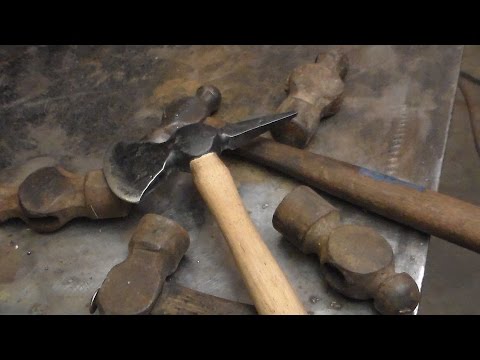
Ironically, you need two hammers to make a hatchet out of a hammer because you need one to reshape and one to beat on it with to reshape it. You also need a pair of tongs or some big pliers. Long tongs are better because they keep your hands away from the heat. You also need an anvil or some other solid, steel surface to beat on, a piece or railroad track makes a good anvil.
If you have no tongs, making a set might be a good way to practice your skills before you try to tackle the hatchet. This video shows you how.
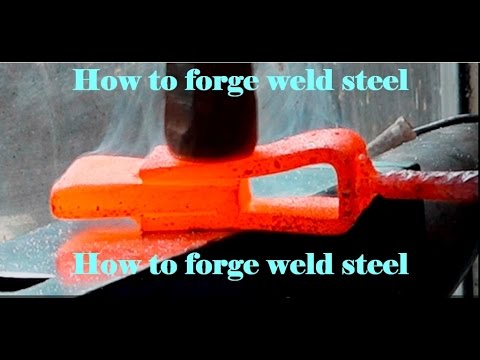
You also need to have some borax flux, and some oil. You can actually use regular laundry borax like 20 mule team brand or whatever you have in your area. You need flux to forge weld steel, which you will be doing to the hammer claws.
You can use vegetable oil or motor oil; it can even be used oil. You need to quench in the oil to temper the steel. DO NOT USE WATER. Water will cause the steel to cool too rapidly and it will become brittle and can break.
If it’s TEOTWAWKI/SHTF, just build a fire next to the tracks if you have to, railroad cross ties burn really hot actually as they are treated with creosote, which is like kind of like coal tar. But once you get all of those problems figured out follow these steps.
STEP 1: Remove the head from the handle if it’s a wooden handled hammer, I prefer a steel handled hammer like an Estwing myself. Save the wedges if you used a wooden handled hammer, you will need them to put it back on.
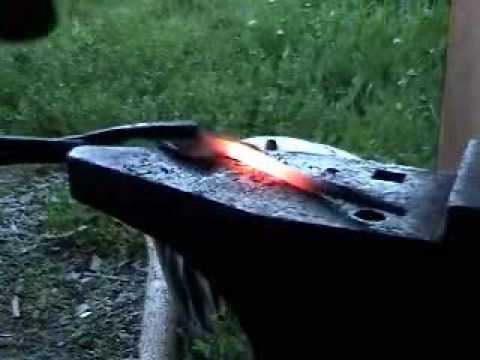
STEP 2: Heat the HEAD of the hammer until it glows cherry red, try not to get the socket as hot if possible. If you are using a steel handle hammer then still try to only get the head cherry red. But once it is cherry red you then remove it from the fire and beat it with your other hammer a few good blows being sure to watch the color.
DO NOT LET IT DARKEN WHILE HAMMERING IT. If it starts to darken you kept it out too long and this can cause cracks in the steel. Make sure it stays that cherry red when you are hammering it. Keep it hot, keep hammering it, and shape it into a hatchet blade. I can’t really tell you with words any better than that, you will just have to do it. You will get a feel for how the steel moves once you start beating on it.
STEP 3: Once you have shaped the head move on to the claws. This is where you need the borax flux. Again, heat only the claws if you can. Once the claws are glowing cherry red, liberally apply flux between them and then start hammering them together. You can try to get fancy if you want, if you have a vise, and put the claw tips in the vice and twist them together for a “rams horn” look, but that’s a more advanced technique.
This video may help you forge weld the claws together.
This video shows a guy making a spiked hatchet from a hammer.
STEP 4: After you have the head and spike shaped grind the edge on them while the steel is soft, it is easier. Put the bevel on the blade that you want and get it sharp, but you will have to re-sharpen it after the quench.
STEP 5: Once you have the hatchet blade and spike shaped and sharpened, you need to temper them by heating them and then quenching them in the oil. Put the HEAD back in the fire and get it glowing cherry red again, then immediately put it in the oil, and leave it. I know you see them on television pulling the steel out and causing a big fireball, but don’t do that. Just quench it and leave it cool.
After you have quenched the head, put the spike back in the fire and get it glowing cherry red, then quench it. To test your quench (if you have a metal file) try the file on the steel, it should just slide without cutting into the metal. This is a good temper.
You will have to clean the blade and refine the edge after you temper, especially if you quenched in used motor oil. If you quenched in used motor oil the blade will turn black, but this can be sanded off or left, depends on how much work you want to do and how you want to blade to look.
STEP 6: If you started with a wooden handled hammer you just have to mount the new hatchet head onto either the same handle it came from or make a new handle. You can then wrap the grip on the handle with leather or paracord. If you used a full steel hammer you are probably ready to go, but you can wrap the handle on that as well. It’s up to you and your tastes.
Forging an axe
You can forge an axe the same way that you forge a hatchet, everything is just bigger. You can even still use a hammer head to forge a double bit axe head; you just have to use a sledge hammer head. If you use a 3 pound hammer your finished axe head will come in right at or slightly under that weight.
By using a sledge hammer you have two equal sides to work on and can just work both sides at the same time and try to make them match. Just remember when it’s time to temper the blades you will be better off if you only heat the front 3/4 of the blade to cherry red and quench, that way the socket remains softer so it won’t break.
This video shows a guy making a double bit axe from a small sledge hammer.
Last swing
Even if you have never tried anything like this before I would say that most people can do it. Sure, there will be some that just cannot make things with their hands, sadly this is so. But for the most part people will be able to make at least a rudimentary weapon following these directions and then learning more as they go.
Having a hatchet, axe, or spear can be very beneficial to you in bad times, but why wait? Try to make something now. If you have a spare afternoon here and there why not put your time to use learning a new and valuable skill? Like the one guy said, go to a yard sale or swap meet, or flea market and buy some old hammers or wrenches etc.
You might even luck out and find an old anvil cheap. Then all you need is fire and you are on your way to making a tool or weapon that could be invaluable. Like any of the other articles, I don’t claim for them to be all knowing, but what I will say is that they are intended to get your mind working, to get you thinking about what you can do, if you just try.
You never know, you might surprise yourself.
Eric Eichenberger is an avid outdoorsman, skilled marksman, and former certified range officer and instructor with nearly 40 years experience handling and repairing firearms.
A skilled craftsman with a strong love for working with his hands, Eric spent 20 years as a carpenter and custom woodworker in high end homes. As a gold and silversmith he has created hundreds of pieces of jewelry over the years using the lost wax casting method.
The grandson of humble country folk, he was raised with the “do it yourself” mentality and so is accustomed to coming up with unique solutions to problems utilizing materials at hand.